API Integration
Overview
In the API Integration module of Integration Center, you can manage the authentication configuration of third-party APIs and the request configuration of APIs, and you can call the configured APIs to get data or push data in any of the authorized applications.
In addition to custom configuration of interfaces, there are more than 100 common API templates pre-built in the API library, and organization administrators can also add custom connections to the API library in the organization.
Entrance
On the homepage of Mingdao, click the "Integration" button on the left navigation bar to go to the Integration Center.
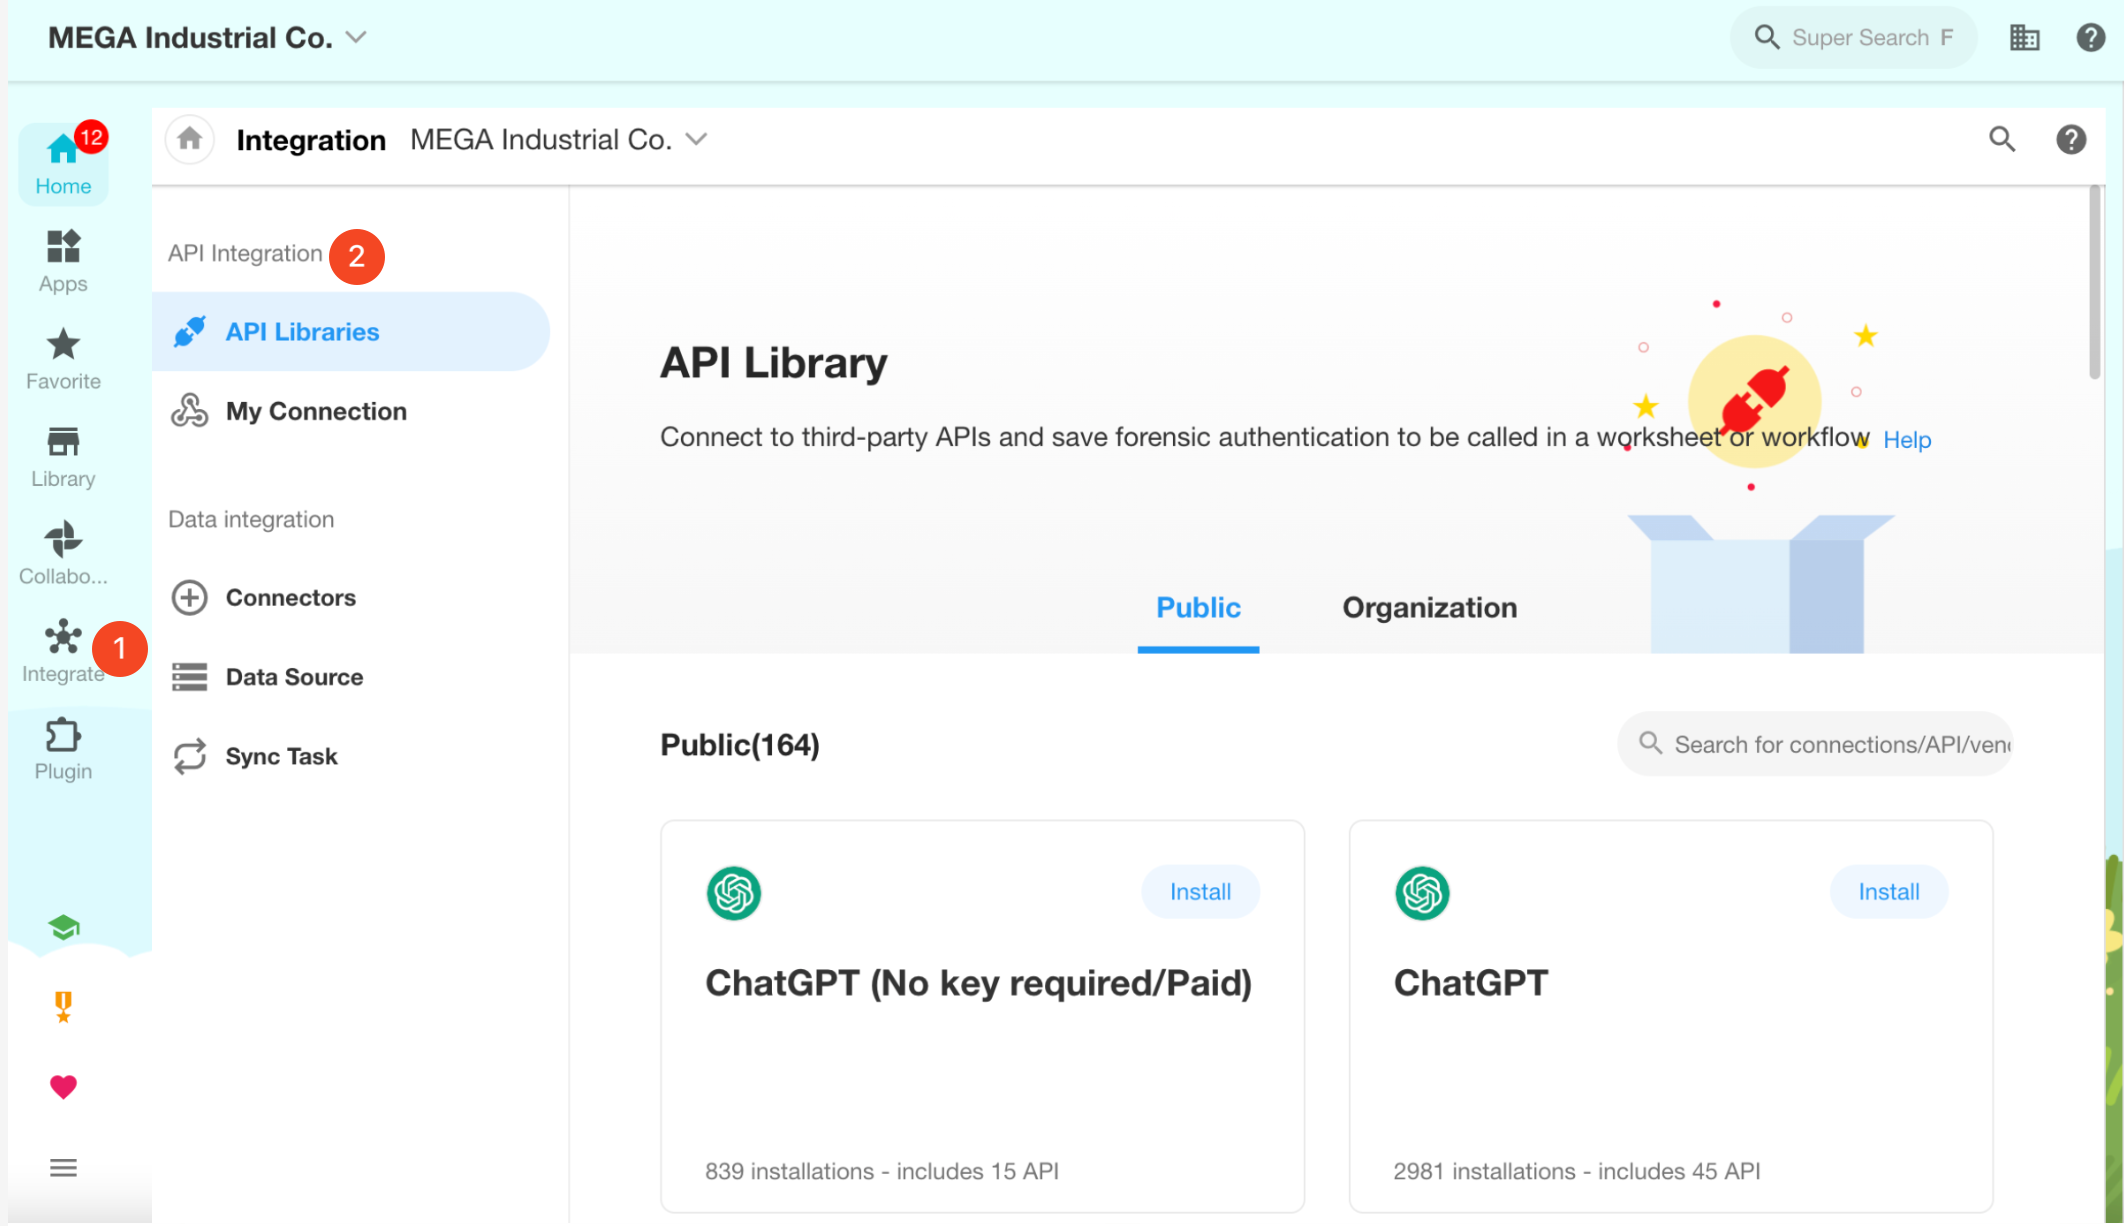
Two Modules of API Integration:
-
My Connection
Here users can create connections to third-party APIs and save authentication, configure request information for interfaces and authorize them to applications.
-
API Library
-
Public: The API connection templates preset can be installed and used directly, but the connection configuration cannot be changed, only the parameters can be filled.
-
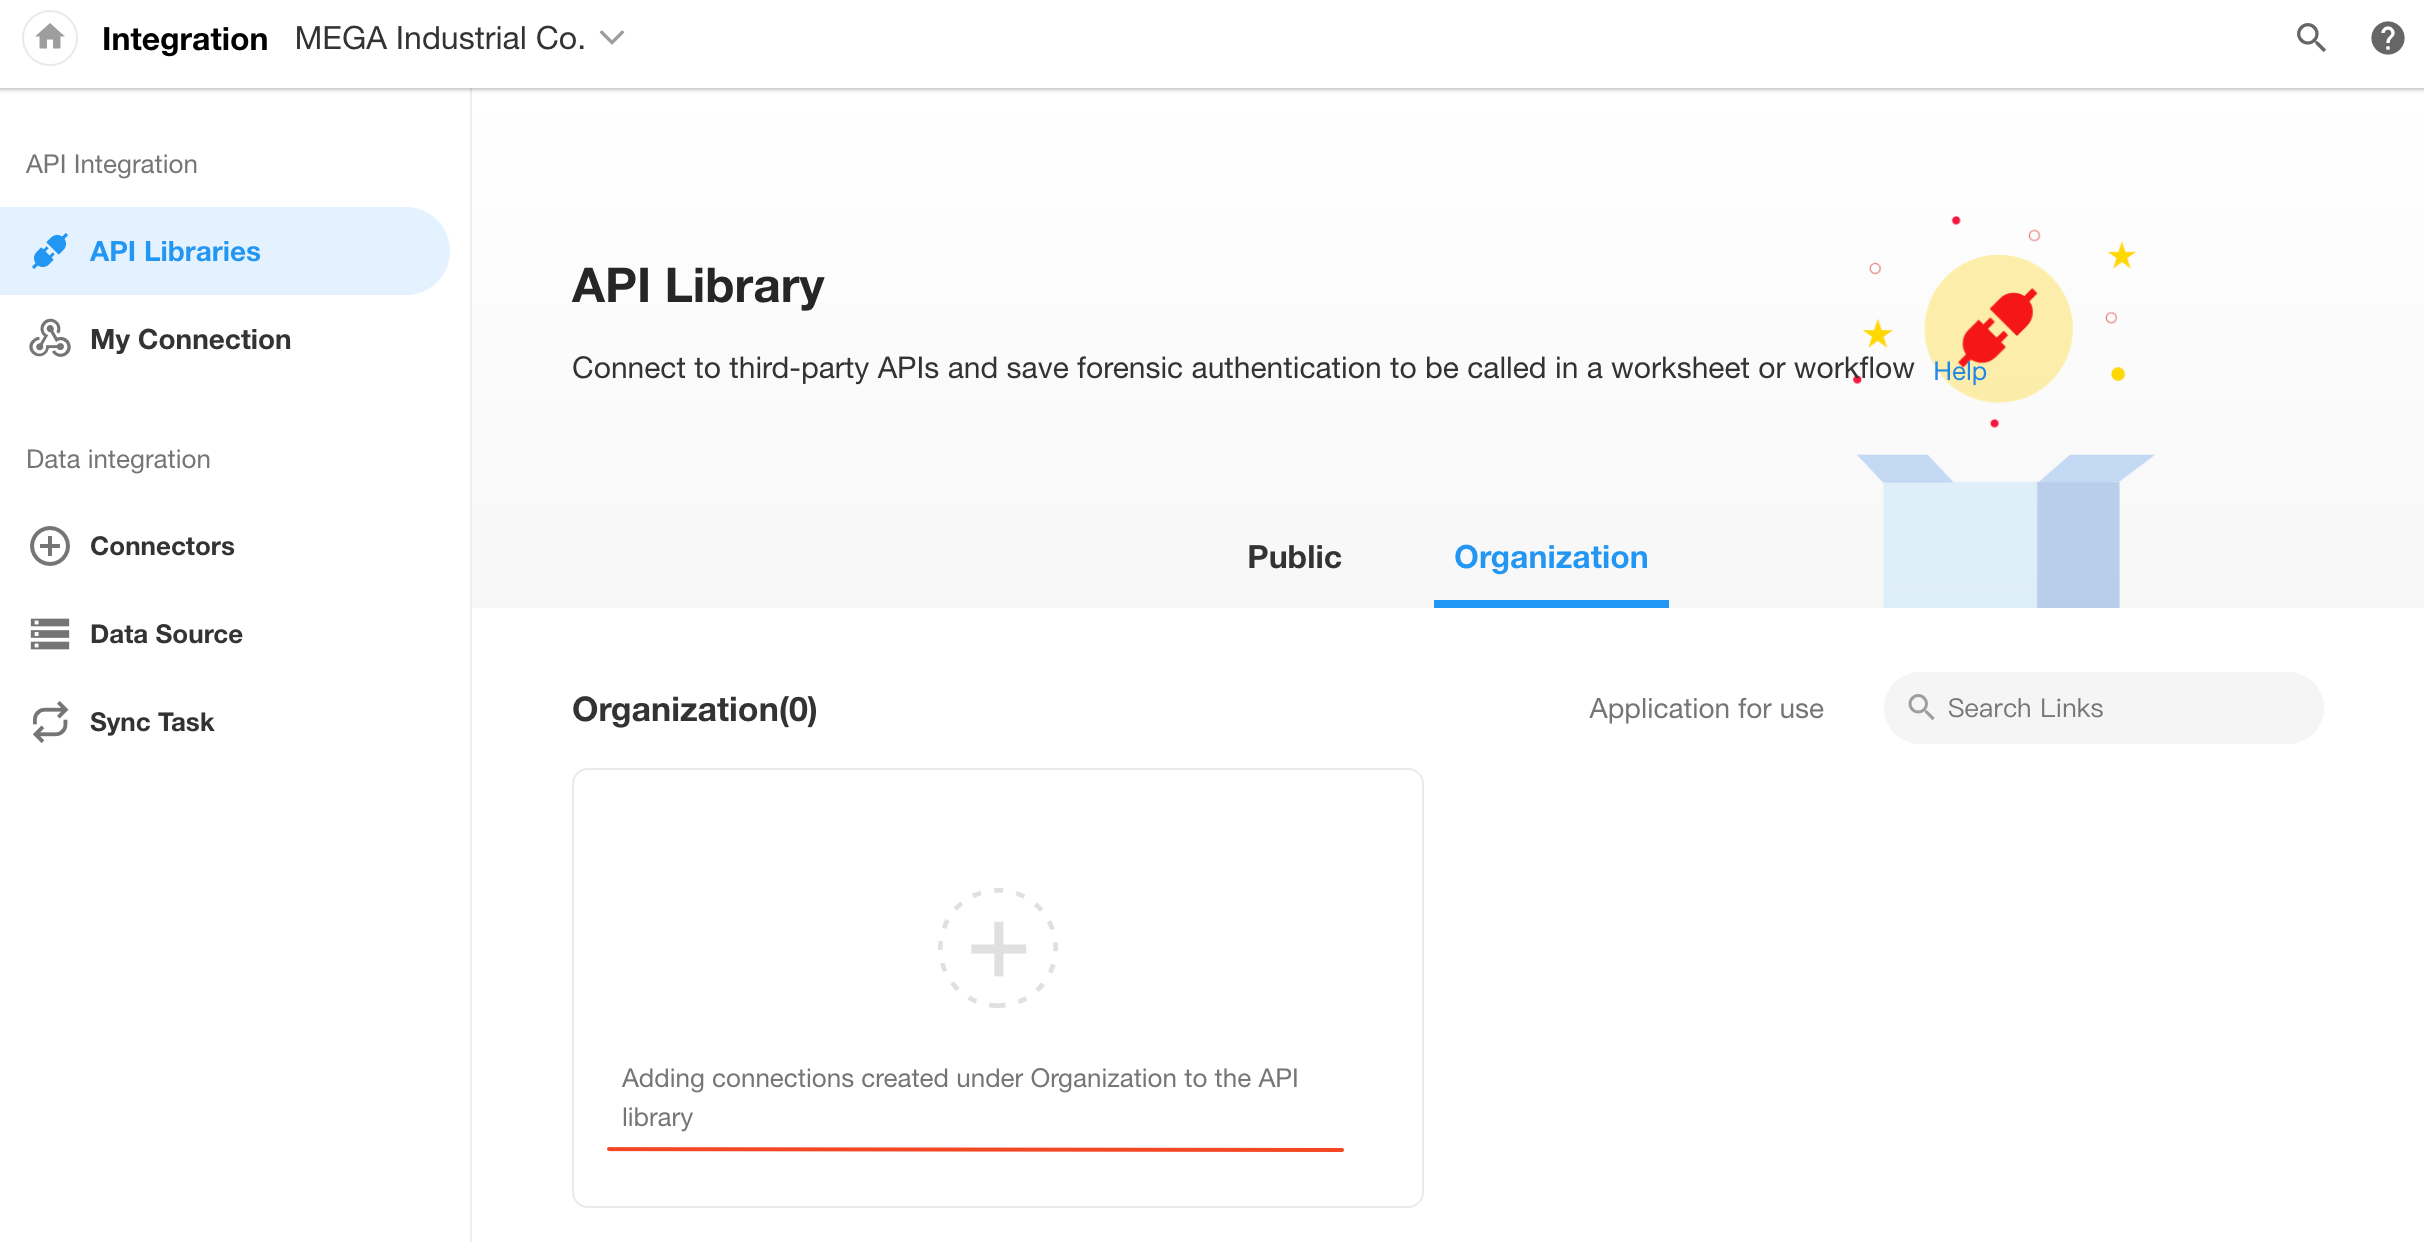
Organization: Organization Admins can add API connections created in their organization to here, and other members can apply to use them.
-
Configuration Overview
Step 1: Configure the authentication of third-party APIs
A service provider may have multiple interfaces to provide different services, but the authentication information obtained is basically common, for example, to obtain a token, it only needs to be obtained once, and multiple interfaces can be called in the validity period, so the authentication will be available for the relevant interfaces after configuration in the Integration Center.
Some service providers do not need to obtain authentication information for their APIs, so you can skip this step and configure step 2 below.
Step 2: Configure the API request information
Using different data services requires calling different interfaces, each of which needs to be configured with relevant input parameters and interface addresses. For the data obtained, you need to configure the output format of the data for use in worksheets or workflows.
Step 3: Grant authorization to applications
Only authorized applications can use the integrated API.
Step 4: Use the integrated API
Configured connection authentication or API can be used directly in the following 3 scenarios:
- The API query field in the worksheet
- The [Call Integrated API] node in the workflow
- The [API Connection and Authentication] node in the workflow
Installation of Pre-built API
In the API library, there are 30 kinds of common API services built-in, you can install as needed, after installation, what you need to do is to fill in and configure the necessary parameter values.
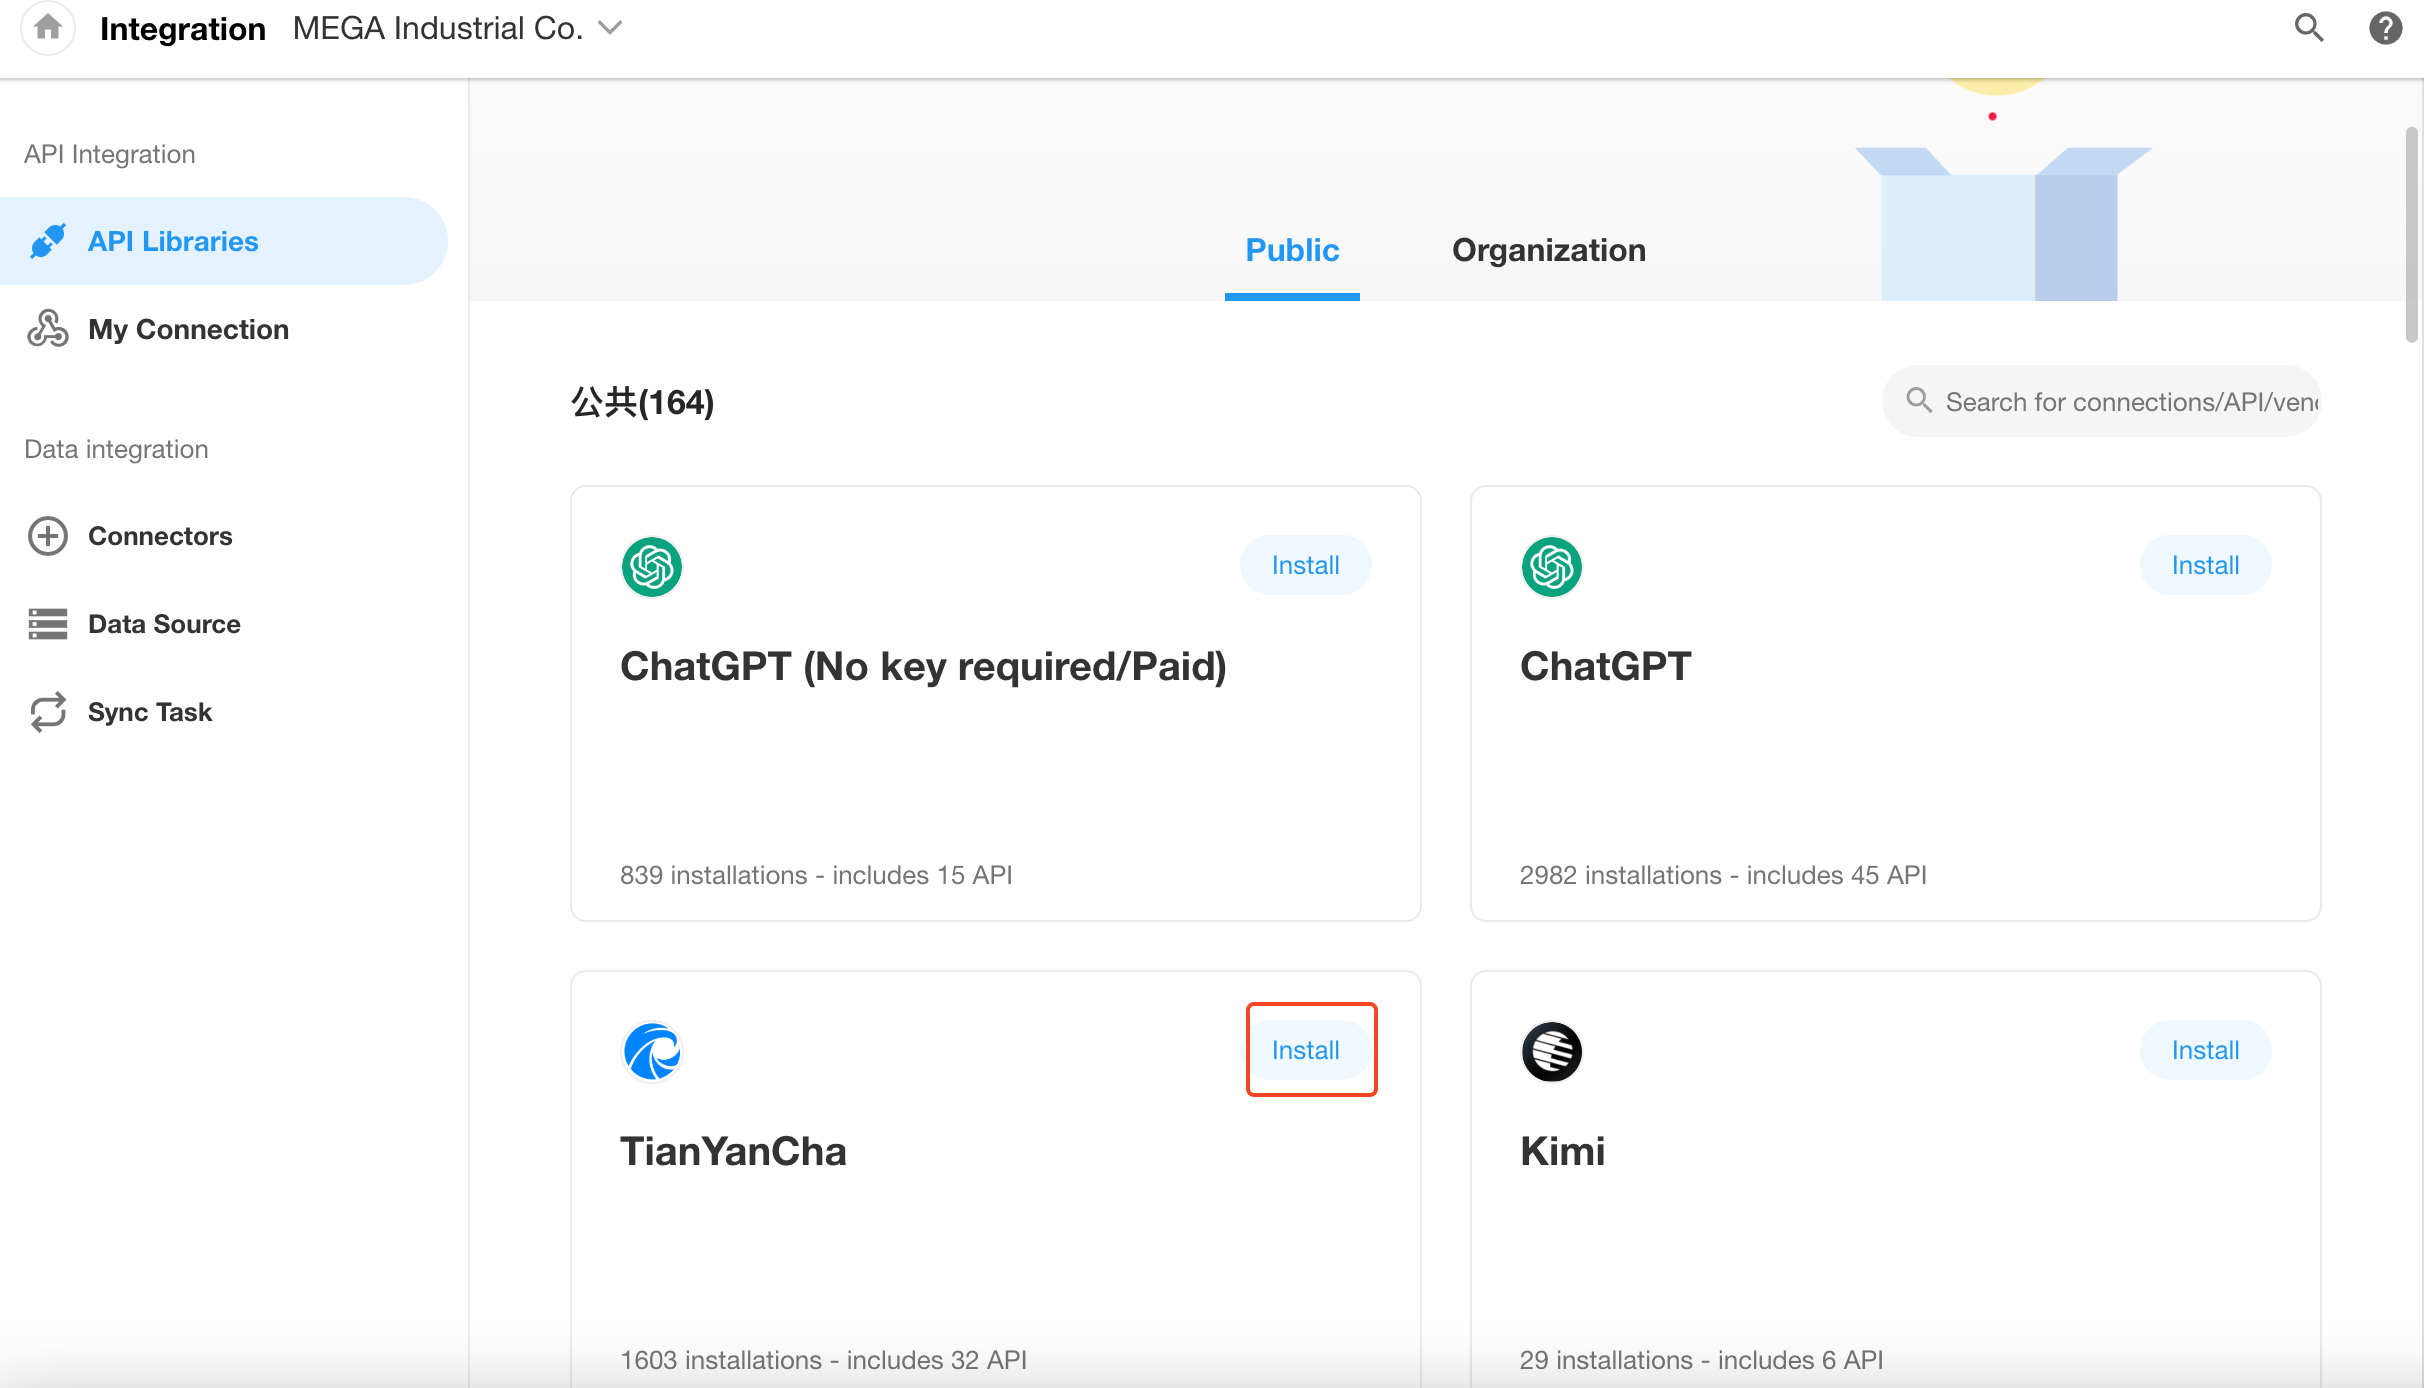
The following is an example of the installation and use of [TianYanCha].
1. Install the target API
Go to the Integration Center, click [TianYanCha], you will see the details of the interface service, and then click Install.
2. Configure connection
Go to the website of [TianYanCha] to sign up for the service, apply for the interface and get the token, then fill in here and save it. How to get the token

3. Enable the required API
There may be several interface services in a connection of a service provider, so enable the required interfaces.
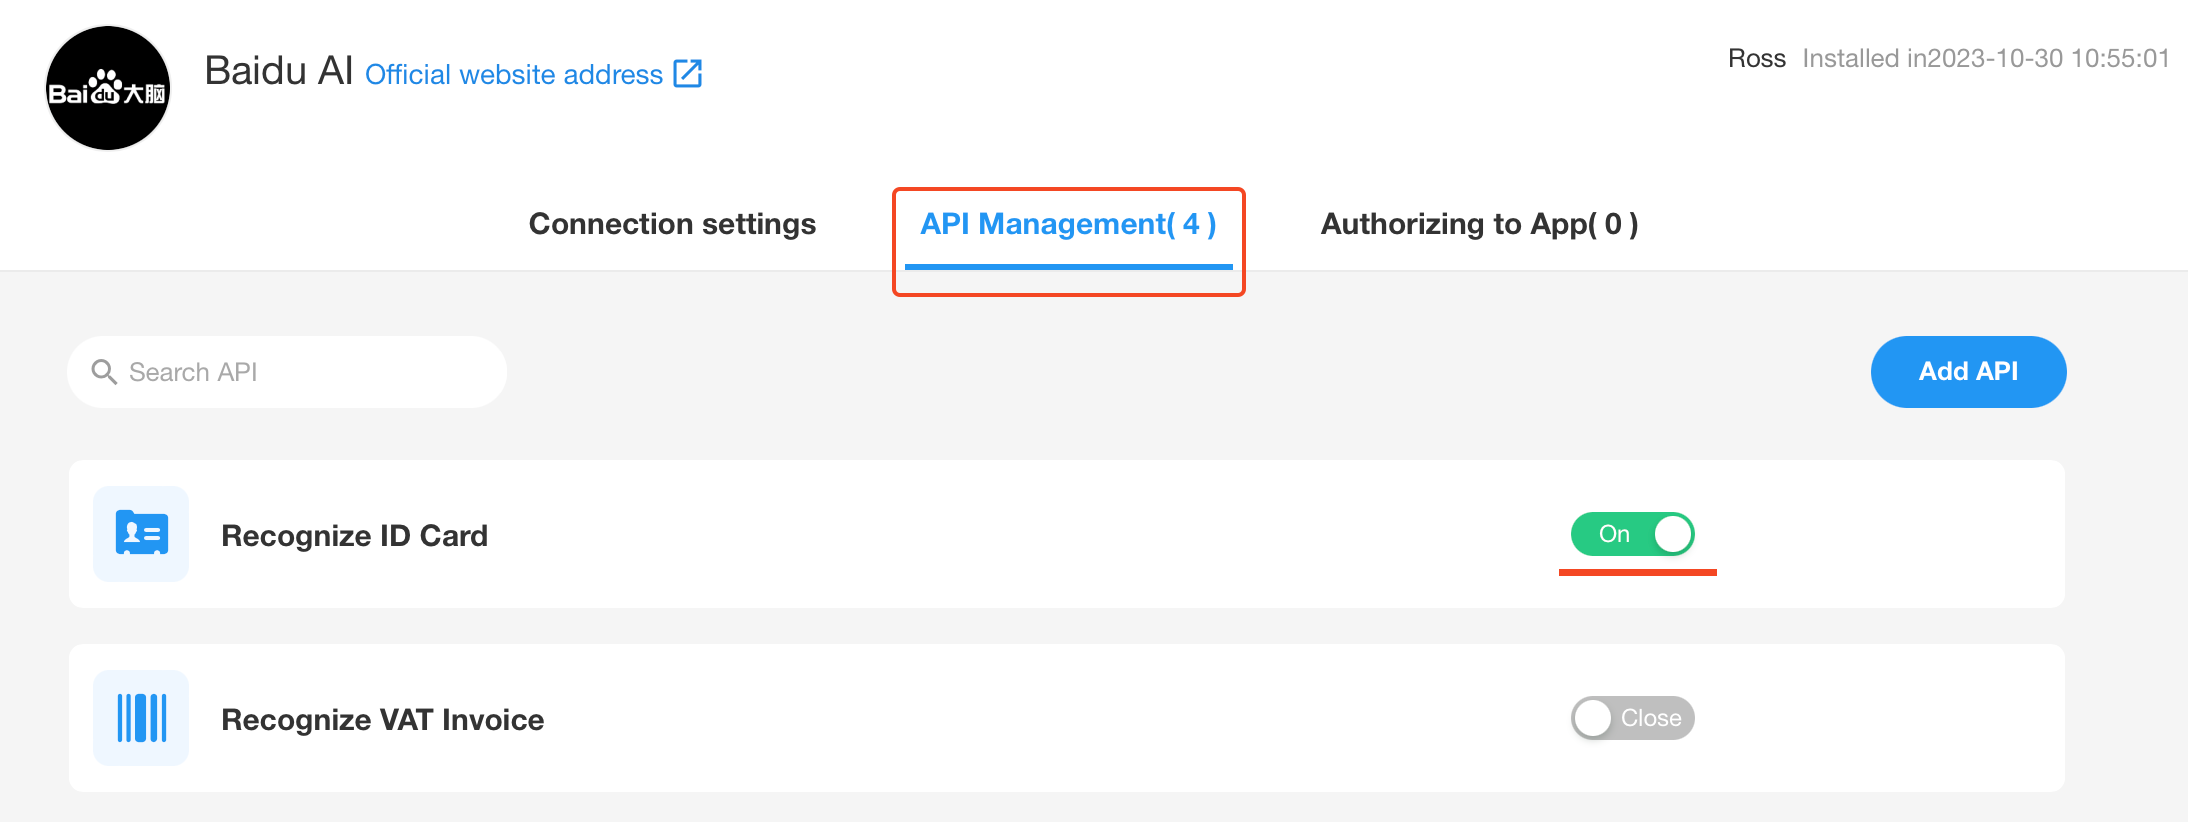
4. Grant authorization to the application
Only authorized applications can use the connection service and API.

5. API query in worksheet
Go to the application and add API query field.
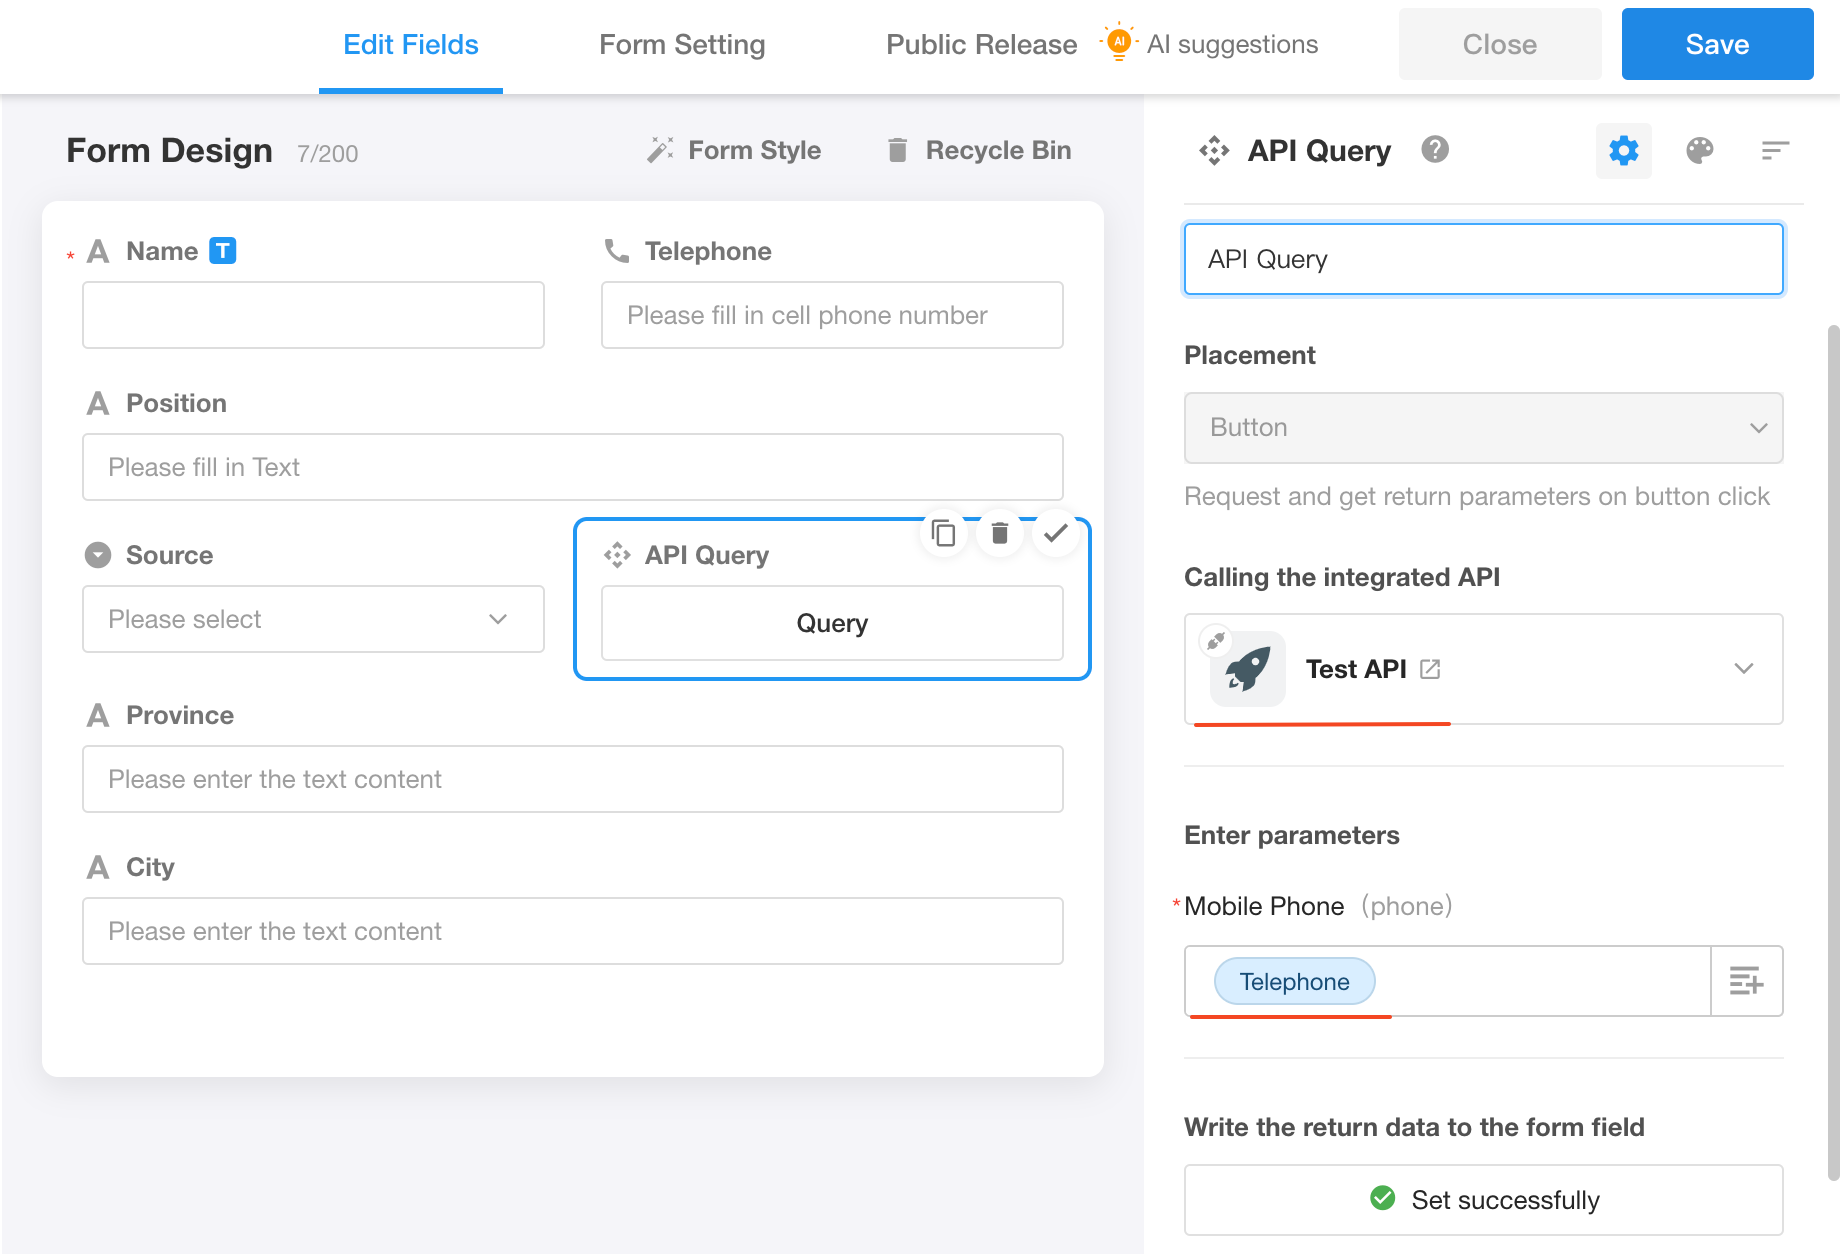
Step 1: Connection and Authentication
The following describes in detail how to configure a custom connection.
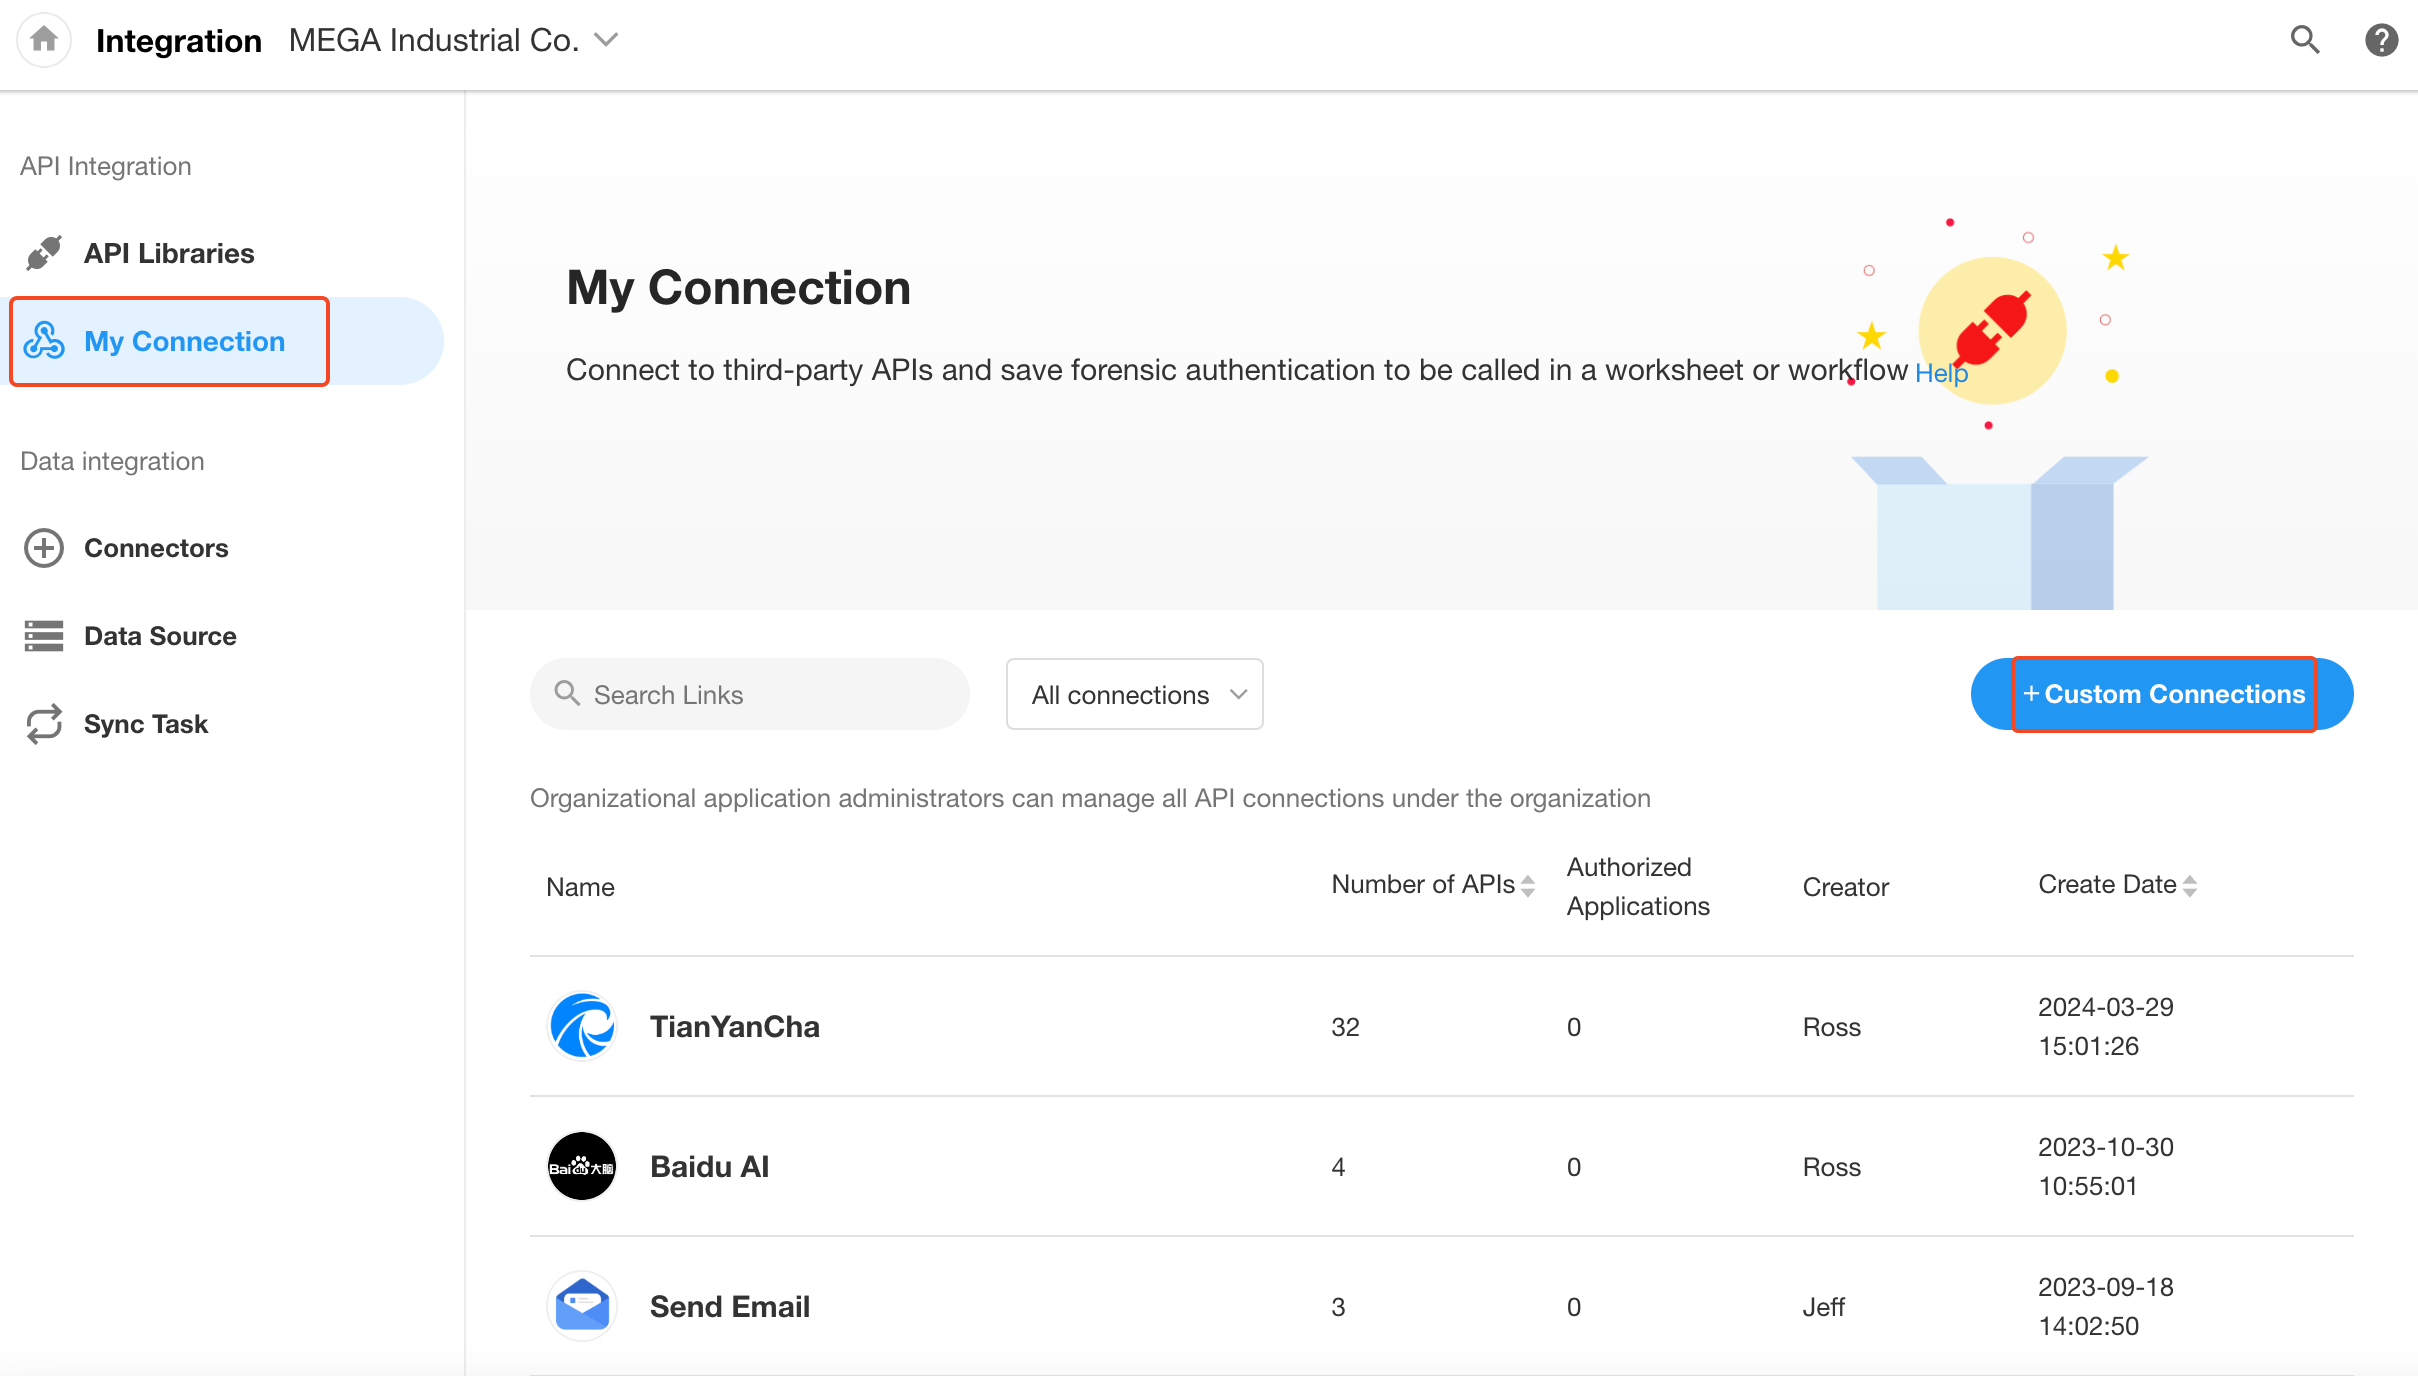
Add a custom connection
Go to the Integration Center, click [My Connection] > [+Custom Connections].
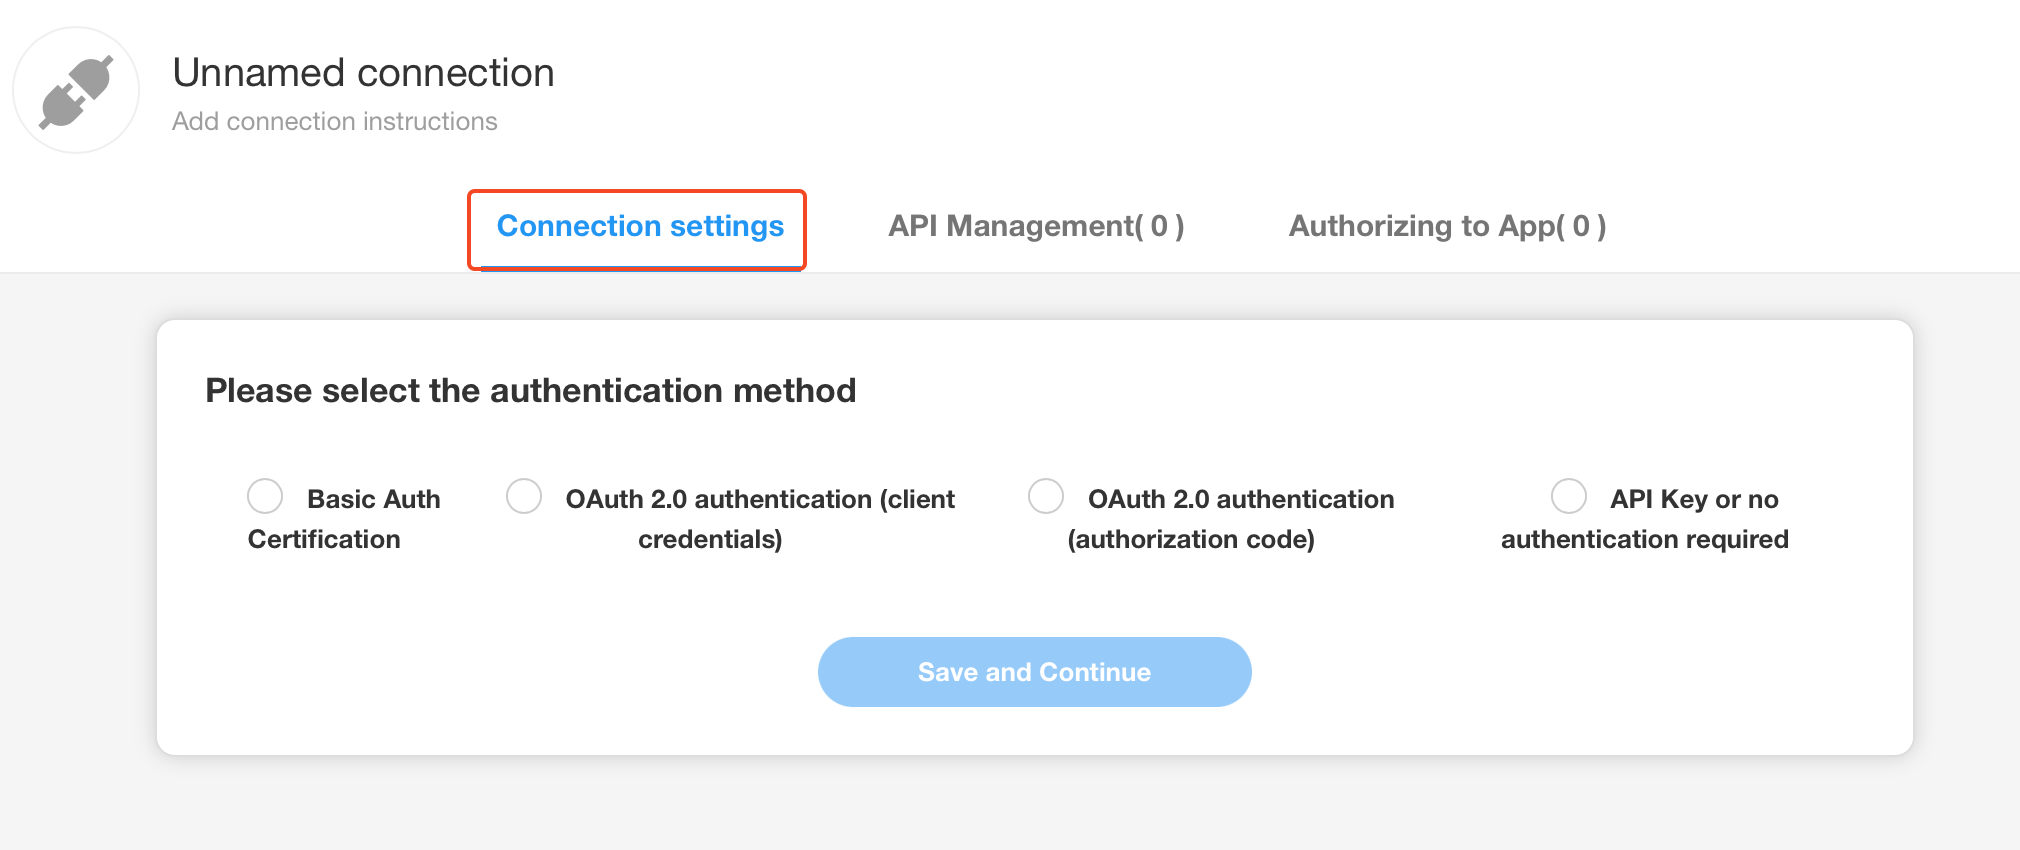
Select an authentication method
Select an authentication method according to the authentication requirements of the desired API service. If it is not required or the API Key authentication is required in the request URL, select [API Key or no authentication required], click Save and Continue.
Connection parameters
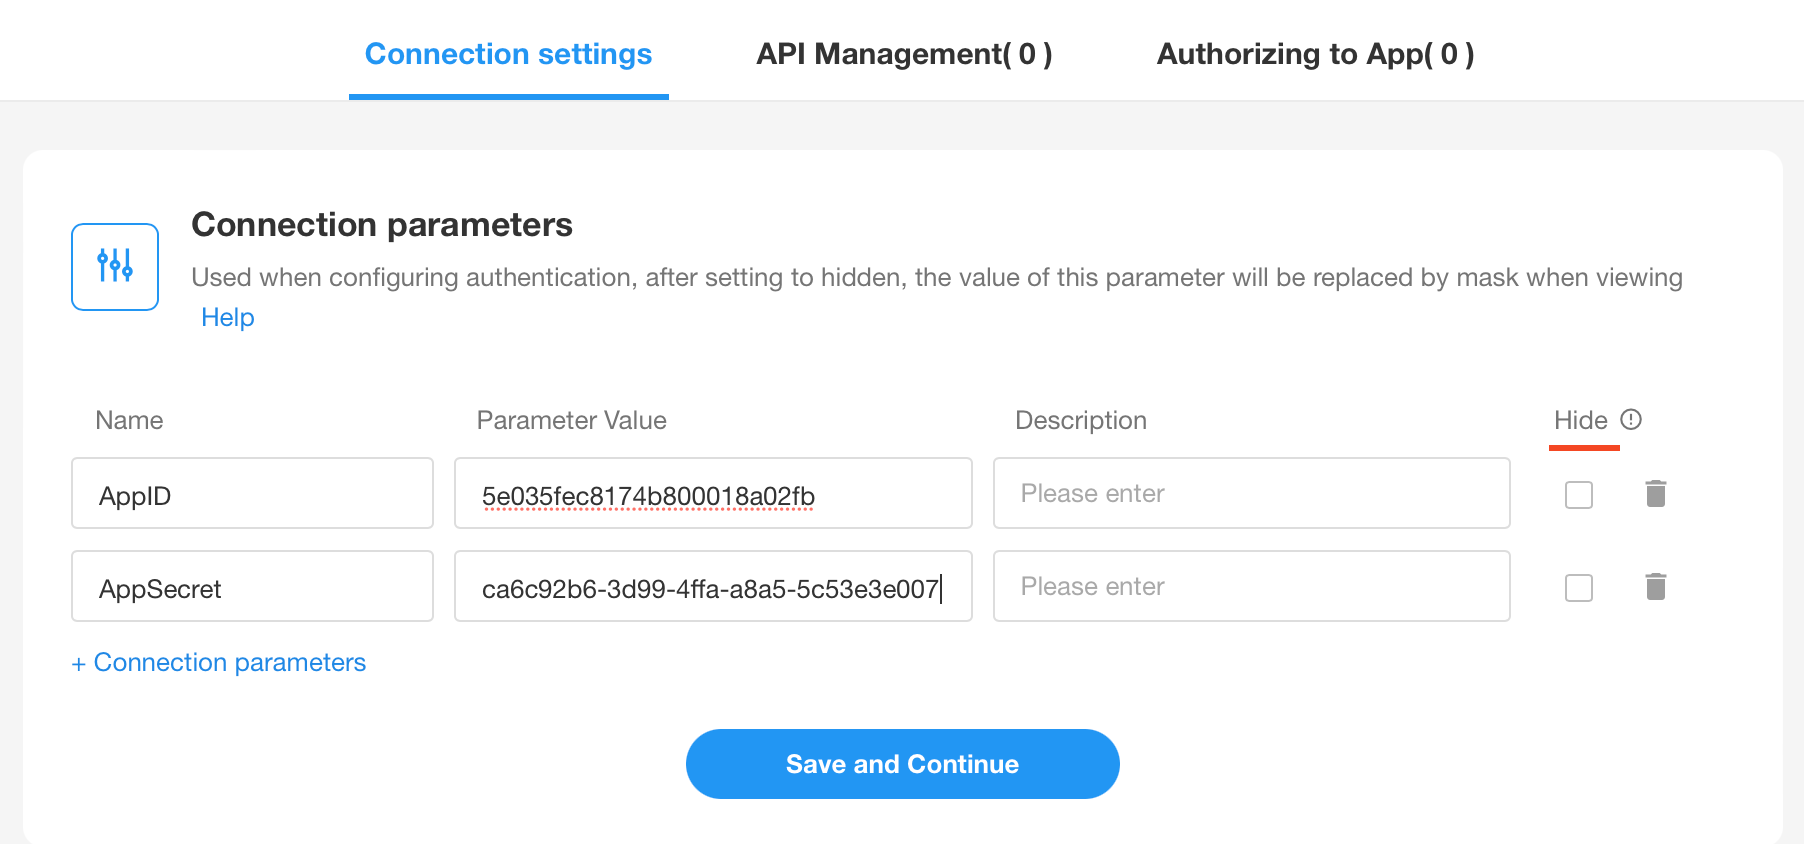
Connection parameters are some identity parameters that are relied upon when configuring authentication, for example, corpid and corpsecret are needed to get token in WeCom, these parameters will be assigned to us by the service provider, just paste them here. If it is not needed in the API, the connection parameters can be left unconfigured.
After obtaining the relevant information from the API service provider, fill in the corresponding parameter value and save it (for the installed API service, you can only fill in the parameter value and cannot change the parameter name and other information).
-
Parameter value can be hidden, if hidden, the parameter value is encrypted, and cannot be shown.
-
Once the parameter value is hidden, it can only be modified and can not be shown again. If you need to view it, go to the service provider's platform to view it.
Connection Parameter: It may be needed not only for getting token, but also for request parameters when calling APIs, so fill in all the basic application information of the service provider here for authentication or API request.
Basic Authentication
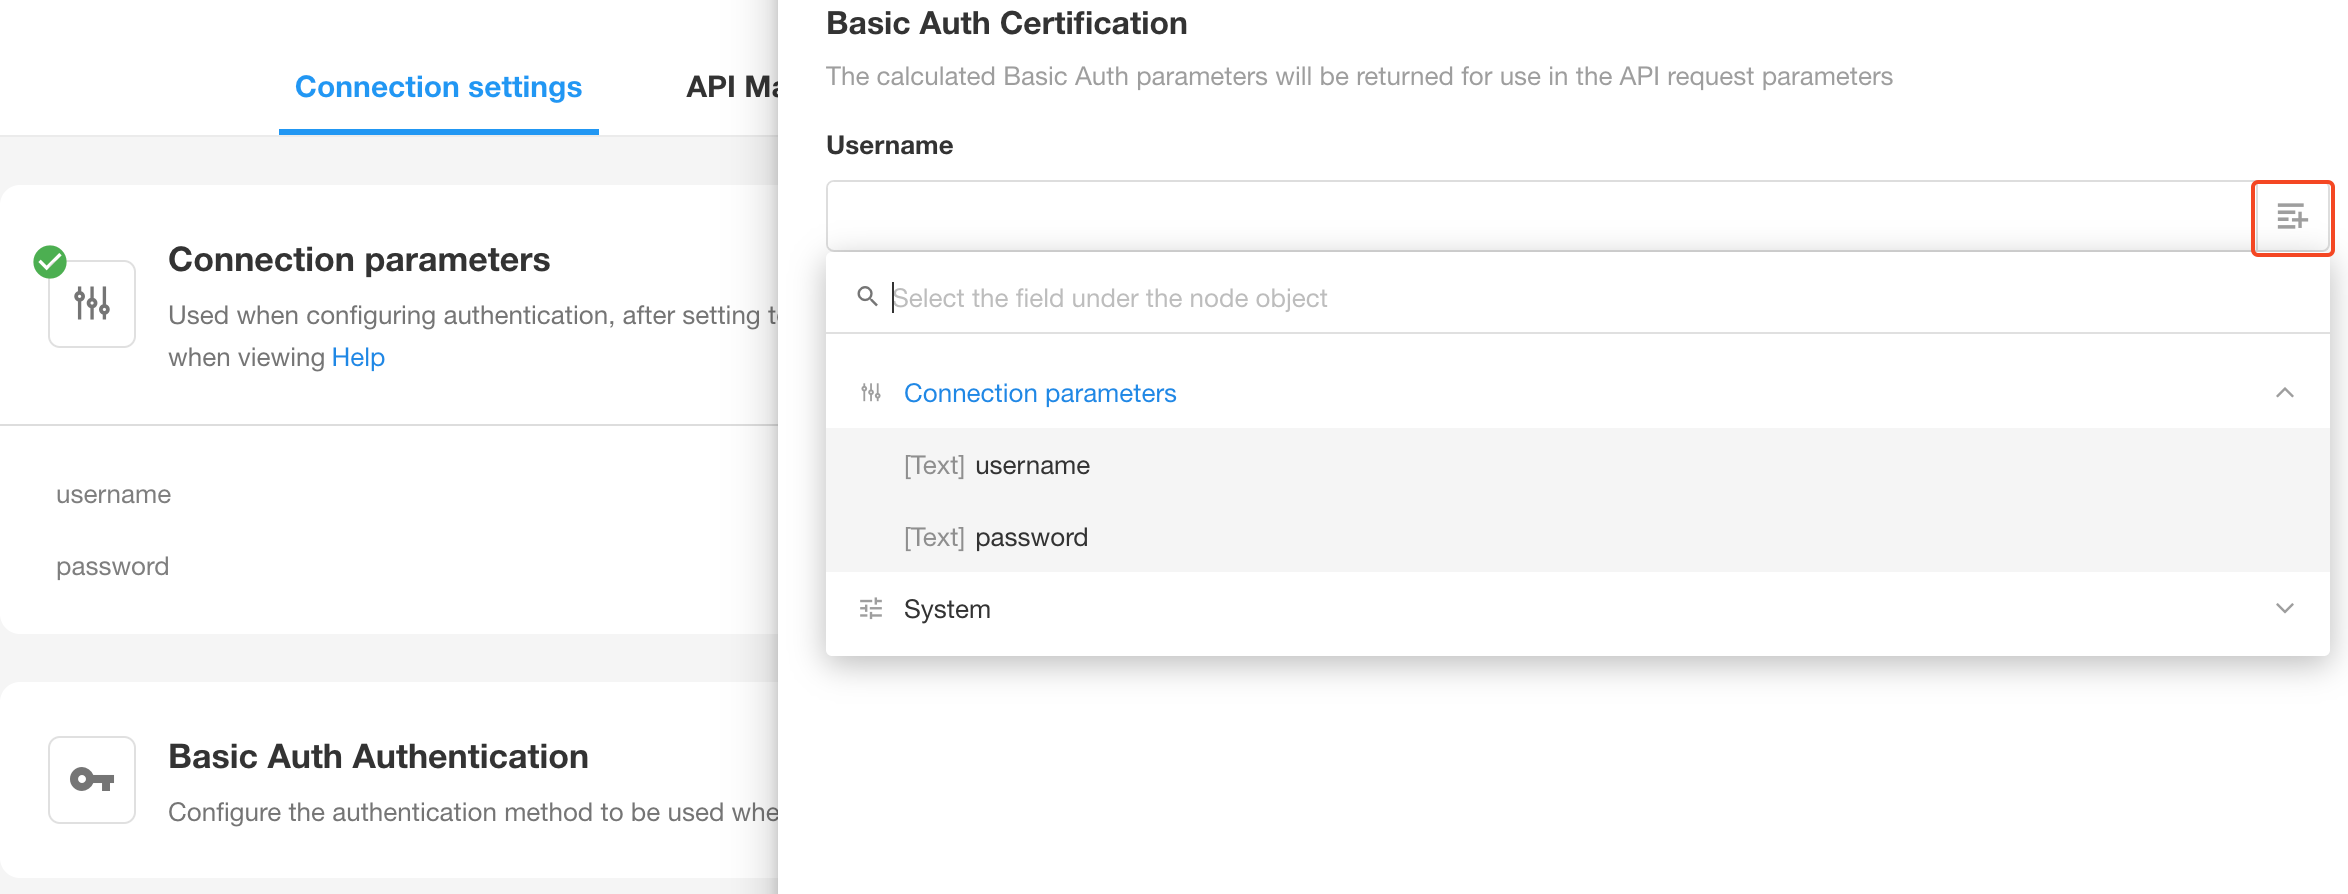
This method means that you need to provide username and password every time API is requested.
The username and password can be written here as fixed values or selected from the configured connection parameters.
OAuth Authentication
This way you can get the Access Token for API requests.
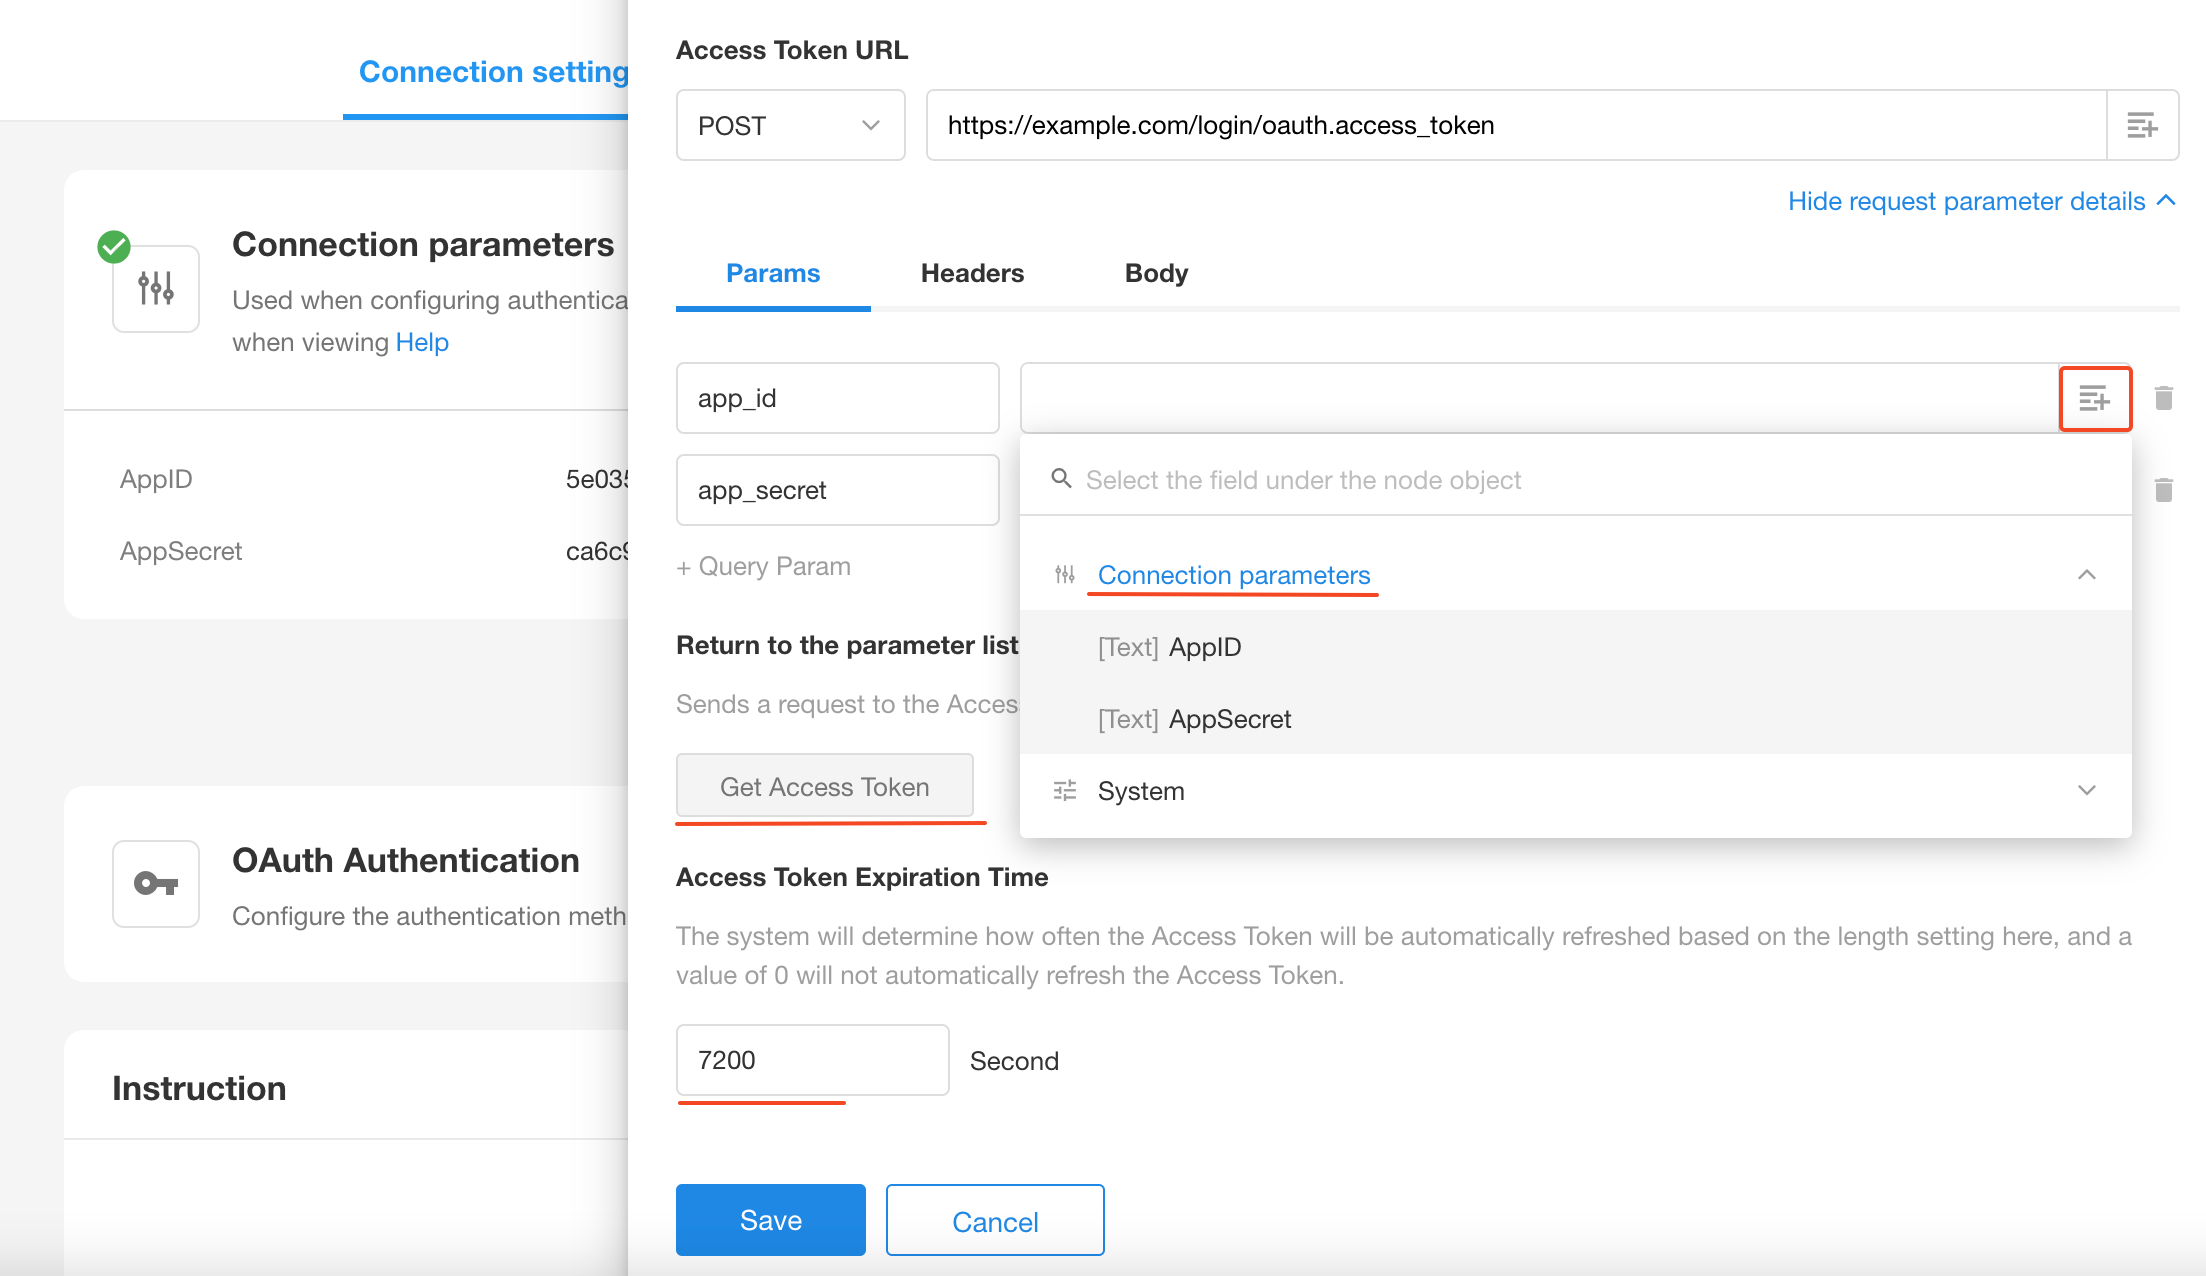
- The app_id and app_secret parameters are generated by default; they can be modified or deleted.
- The parameter values can be selected from the connection parameters.
- Click [Get Access Token] button to test after configuration.
- According to the API service requirements, you can configure the expiration time, and then automatically get a new Token.
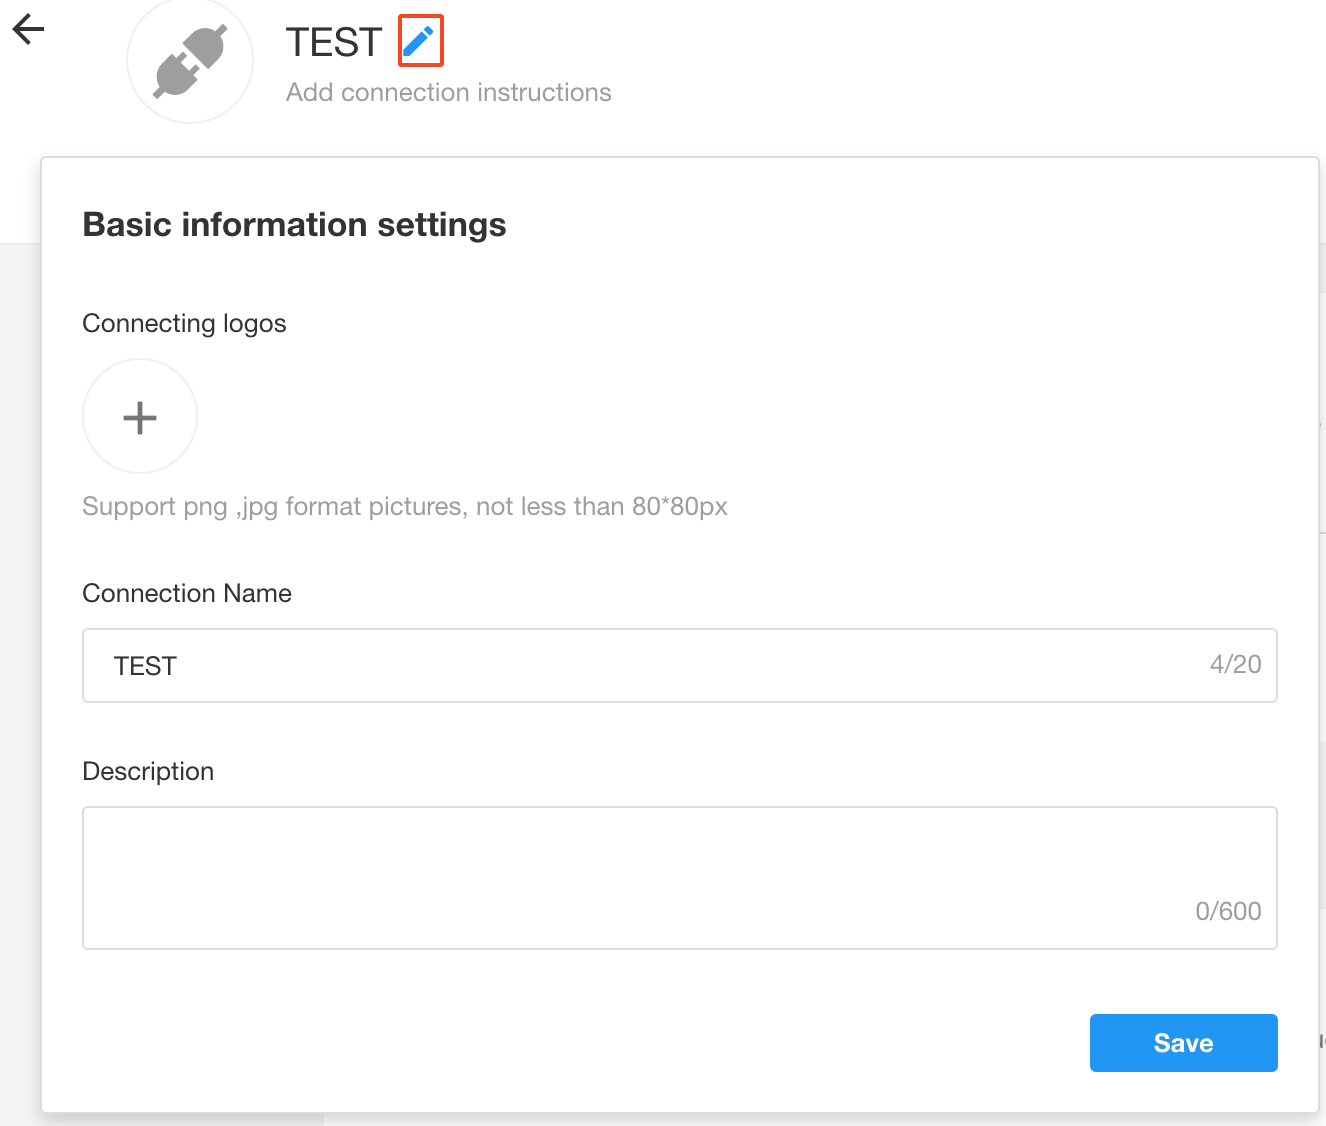
Basic information about the connection
You can set the name, logo, and description of the connection.
Step 2: API Request Configuration
After the authentication configuration is completed, start to configure the API request. In [API Management], click the Create API button to start configuration.
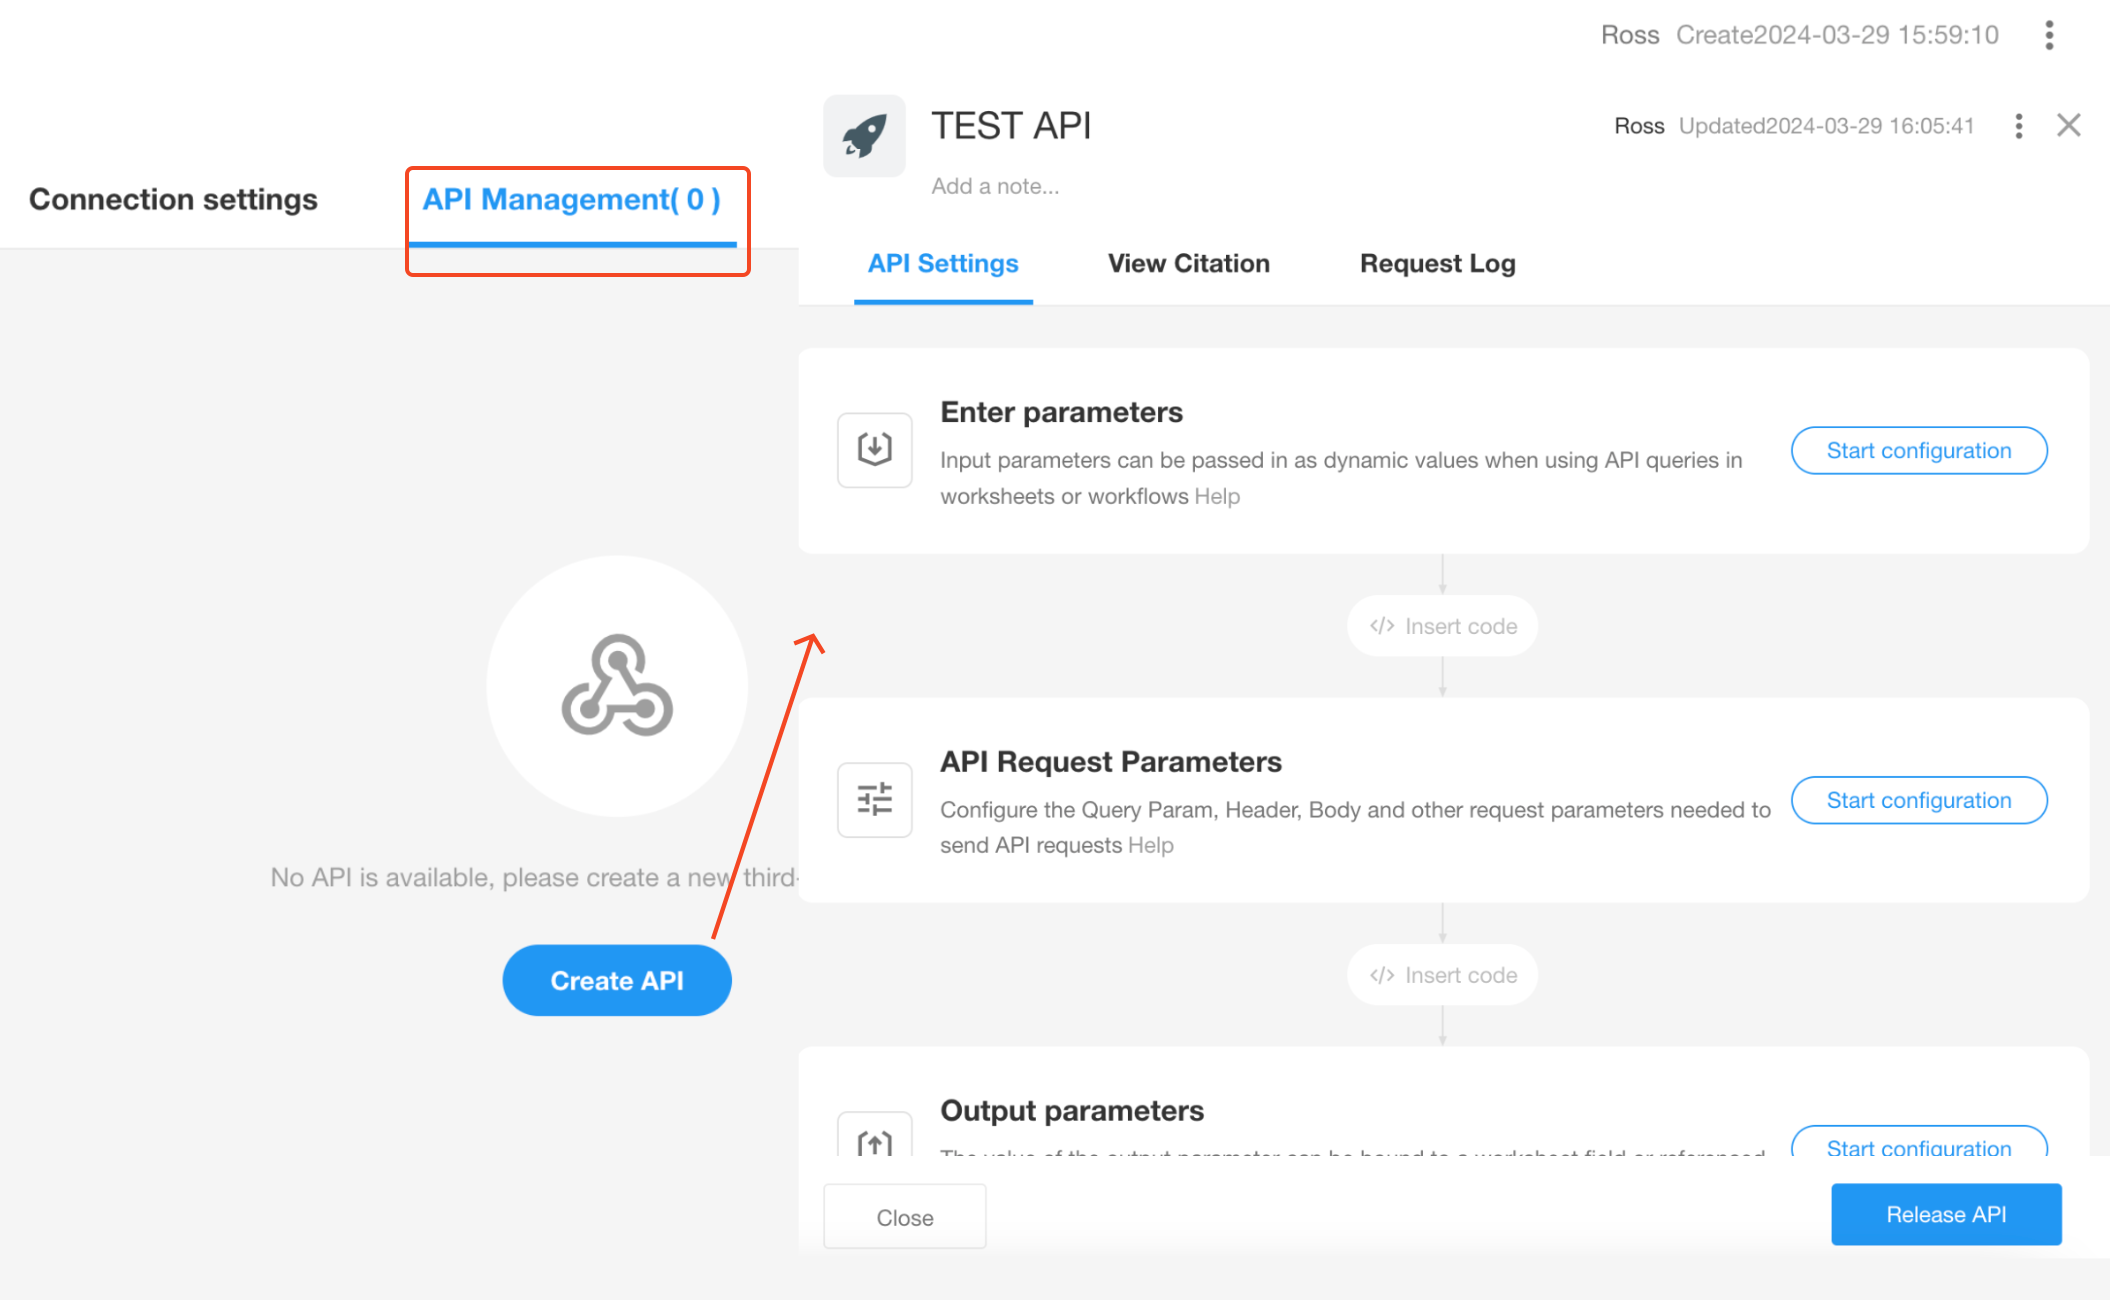
The main configurations are basic information, input parameters, API request parameters, and output parameters, as well as processing input and output parameters with code blocks.
Basic Information
Set the name, description, icon and color of the API.
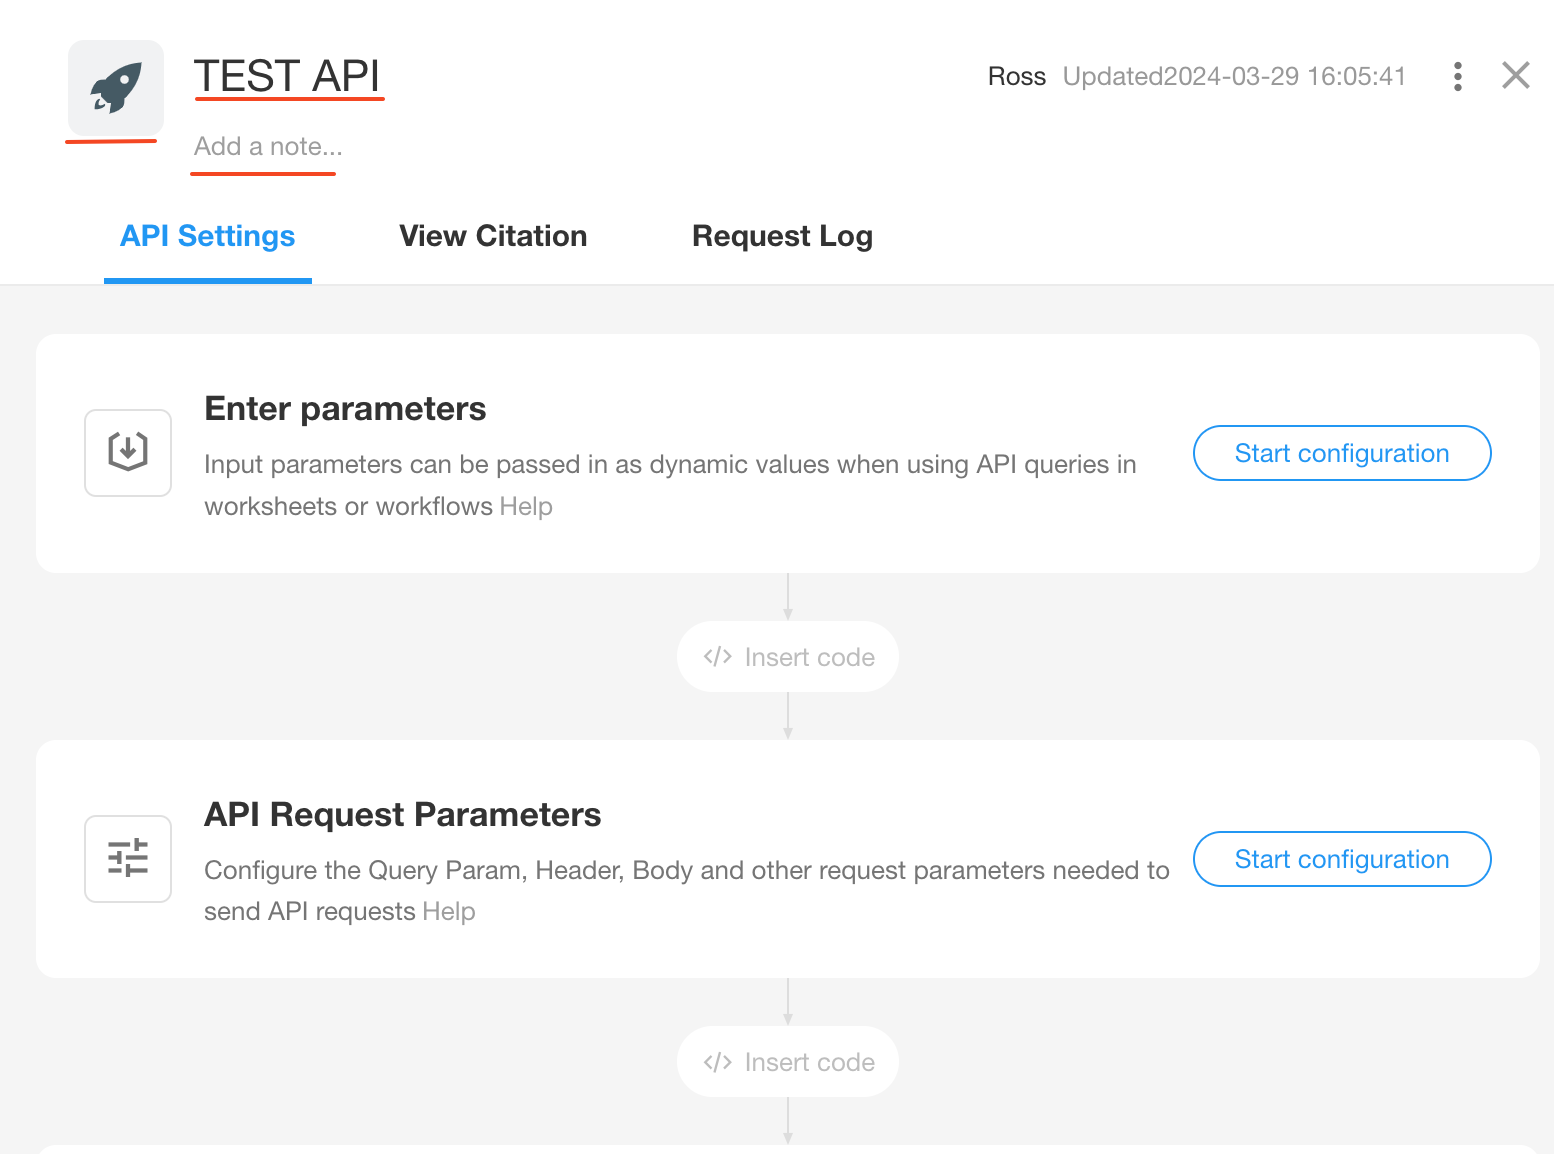
Input Parameters
Input parameters are used to pass in dynamic values when API queries are performed in a worksheet or workflow. Once passed in, the parameter value can be passed to the API request parameter.

Parameter Default Values
-
If the parameter is not required and a null value is passed in, take the default value (if any).
-
If the parameter is required, there must be a value passed in, the default value is not needed, but it can be set ( to be used when the parameter is not required).
Rules for Parameter Format
-
Parameter type: text, number, date and time, members, department, file, array, object array;
-
Regardless of the number of files in the file field, for the passed in array, the format is as follows:
["URL1","URL2","URL3"...], If a URL string is required, process it with a code block before passing it to the API request parameter.
-
For required parameters, the parameters passed in when using this API in worksheets and workflows cannot be empty;
-
Whether the object array is required:
- If the object array is required, the array must be passed in while in use; if not required, it cannot be passed in while in use;
- If the object array is required and the sub-element does not have a required field set, the empty array can be passed in when in use;
- If the object array is required and the sub-element has a required item, it will check whether the passed-in sub-element has a value when in use;
- If the object array is not required but the sub-elements have required items, the sub-elements are not checked for values when the object array is not passed in; when the array is passed in, the required sub-elements need to be checked for values;
-
Alias rule: only letters, numbers, underscores, dashes (minus signs) are supported.
-
When sending an API request, for sub-elements of an array object, take the alias as the key.
-
Default values can be set for parameters.
Insert Code
When the format or data of the passed in parameter does not meet the requirements of the API parameter, it can be processed by code block and then passed to the API parameter. The result returned by API can also be processed by code block and then output.
It supports Javascript and Python.
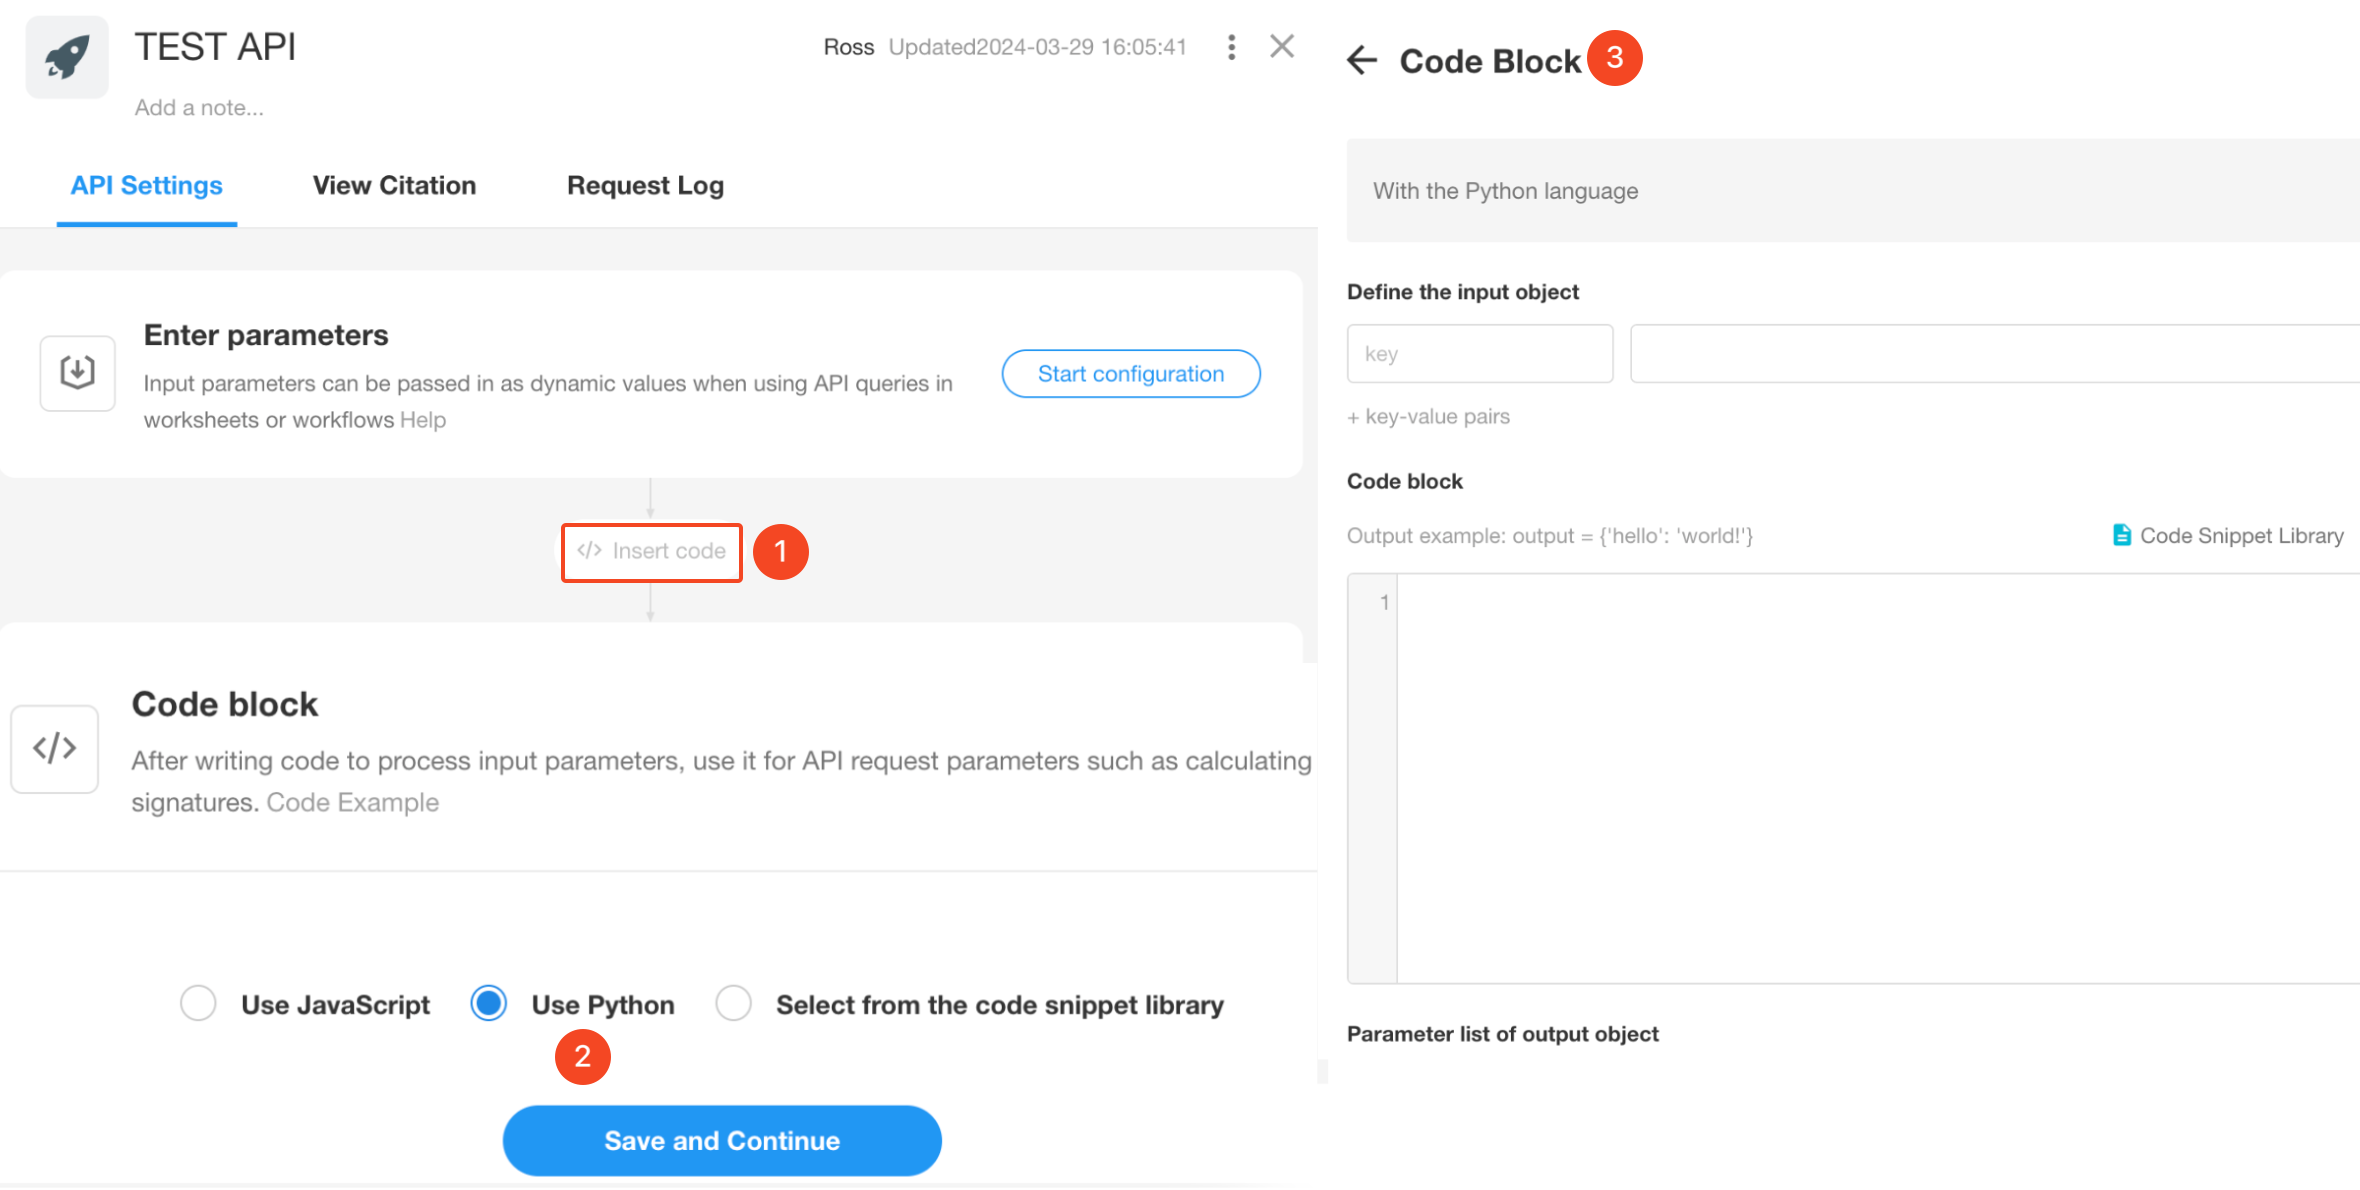
Use Case:
-
Get token after encryption combined with timestamp, key, etc.
-
Remove the +86 when passing a cell phone number.
-
Pass the URL string when passing the attached image.
-
Encapsulate the data returned by the API into a JSON array and output it.
-
Process the JSON data returned by the API and output it.
More details about Code Block node
API Request Configuration
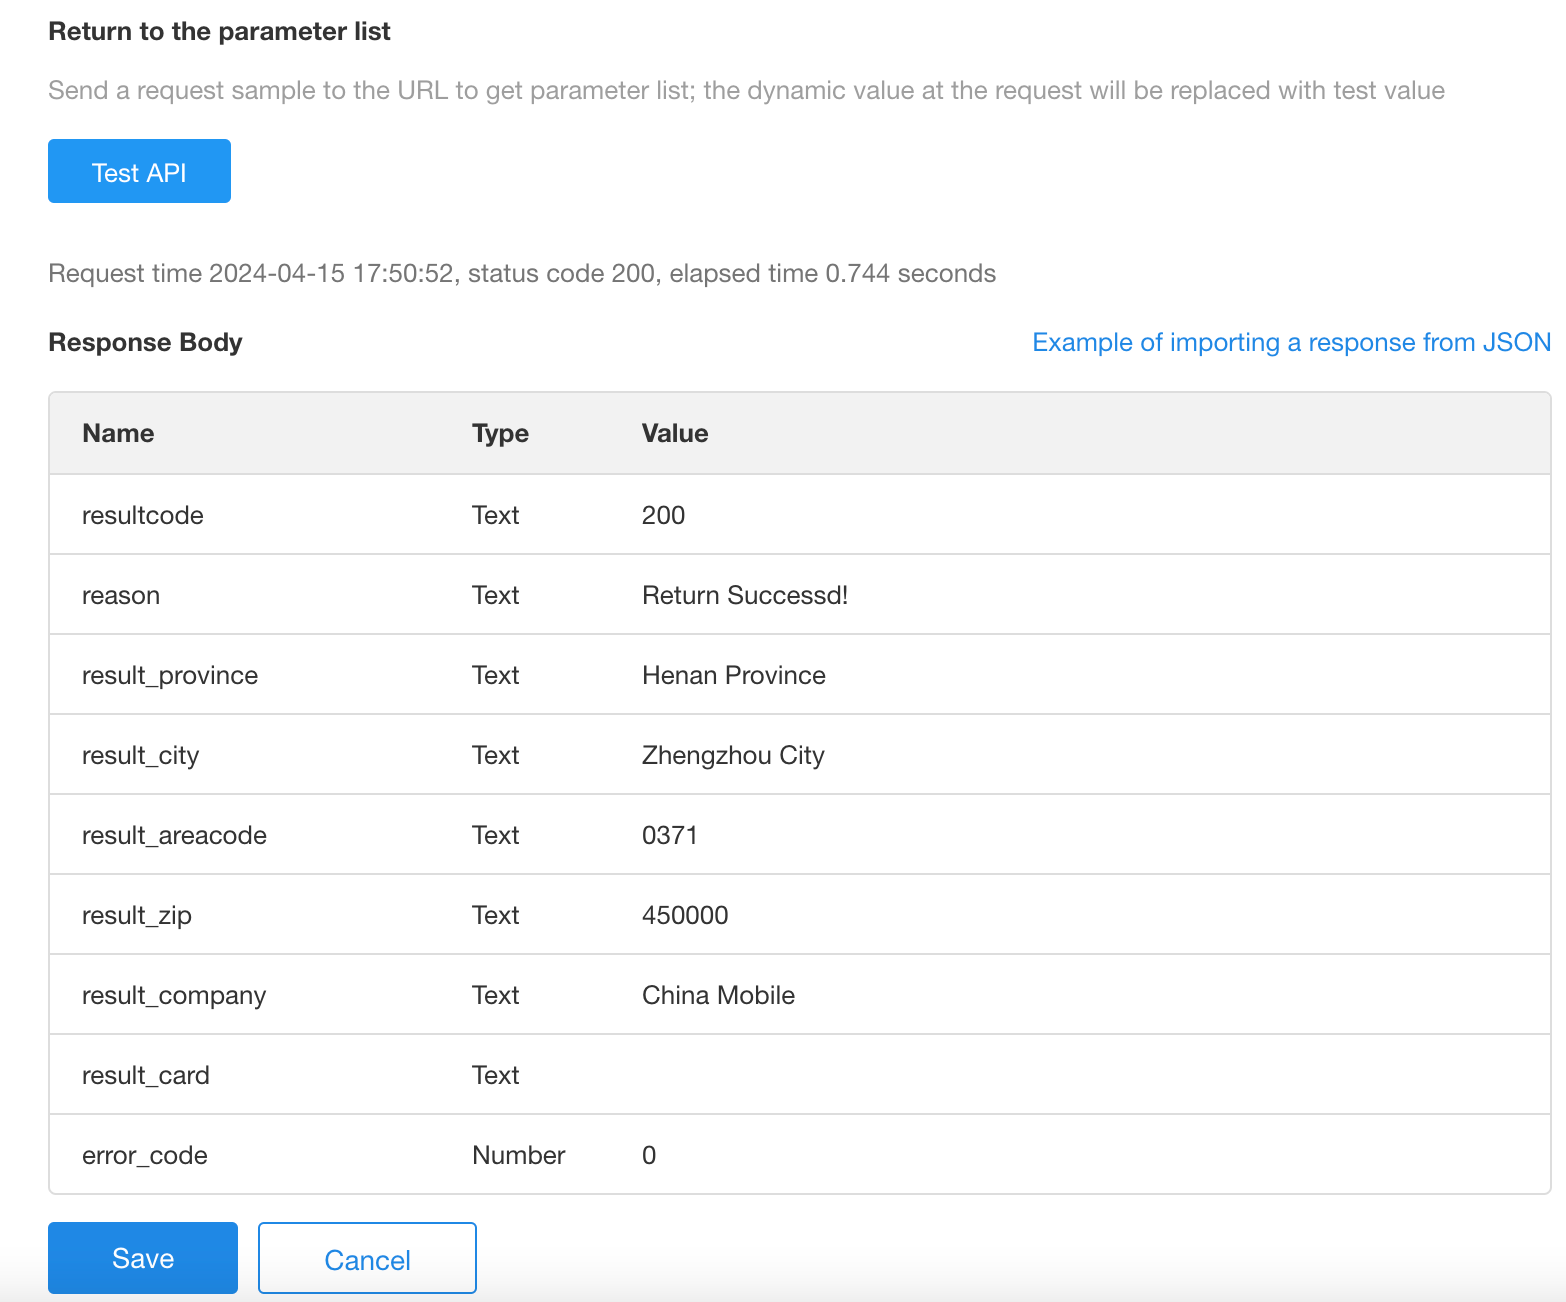
Configure the URL, Query Param, Header, Body, and other request parameters needed when sending API requests.
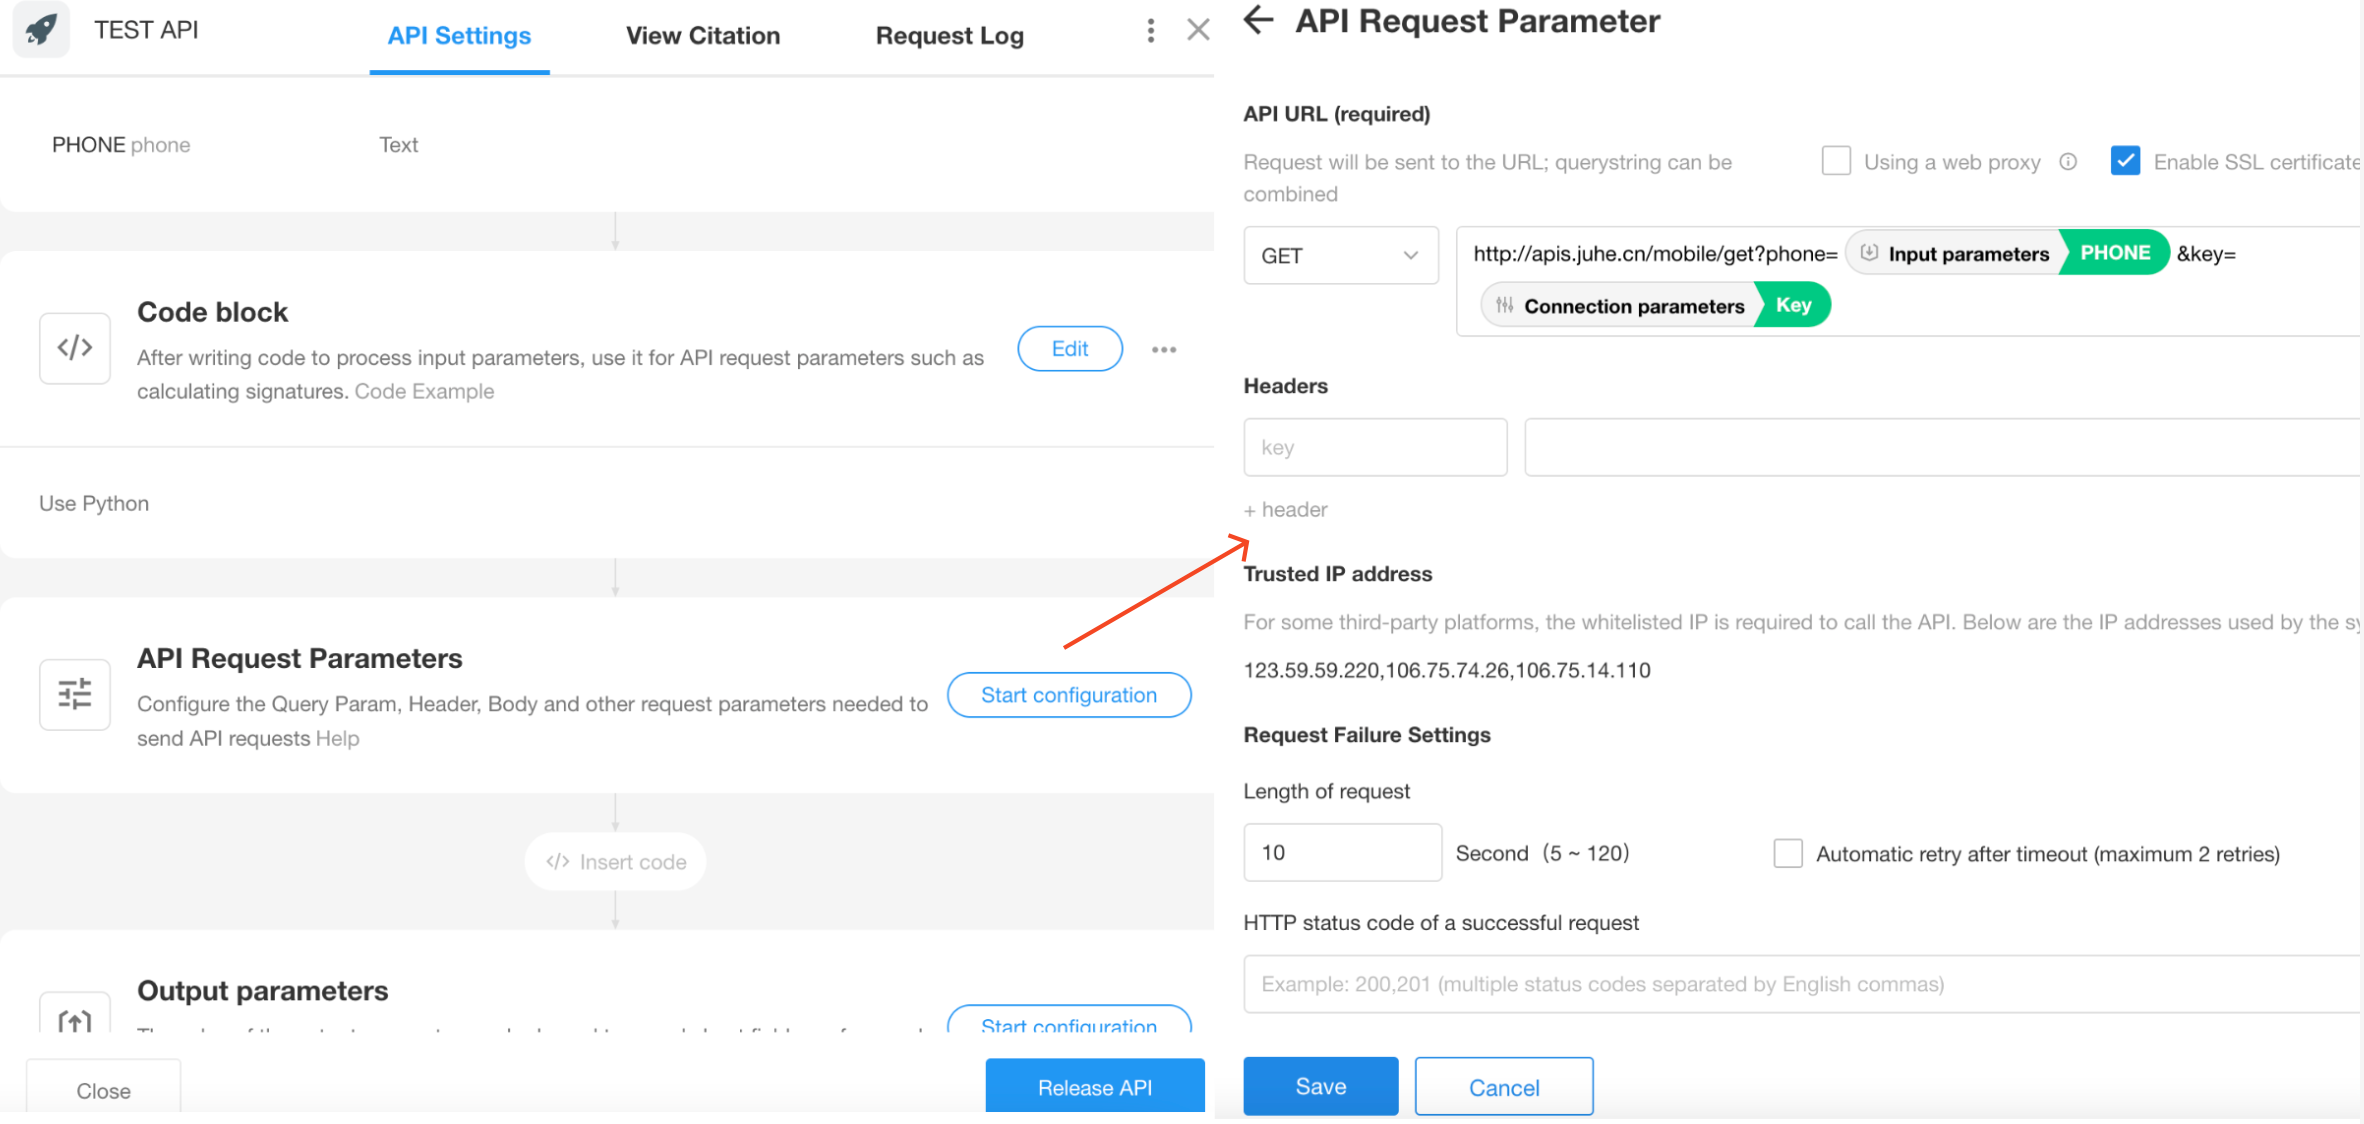
The parameter values in the request can be the dynamic values in [Connection Parameters], [Input Parameters] and [Authentication].
After configuration, click [Test API].
More details about Send API Request node
Output Parameters
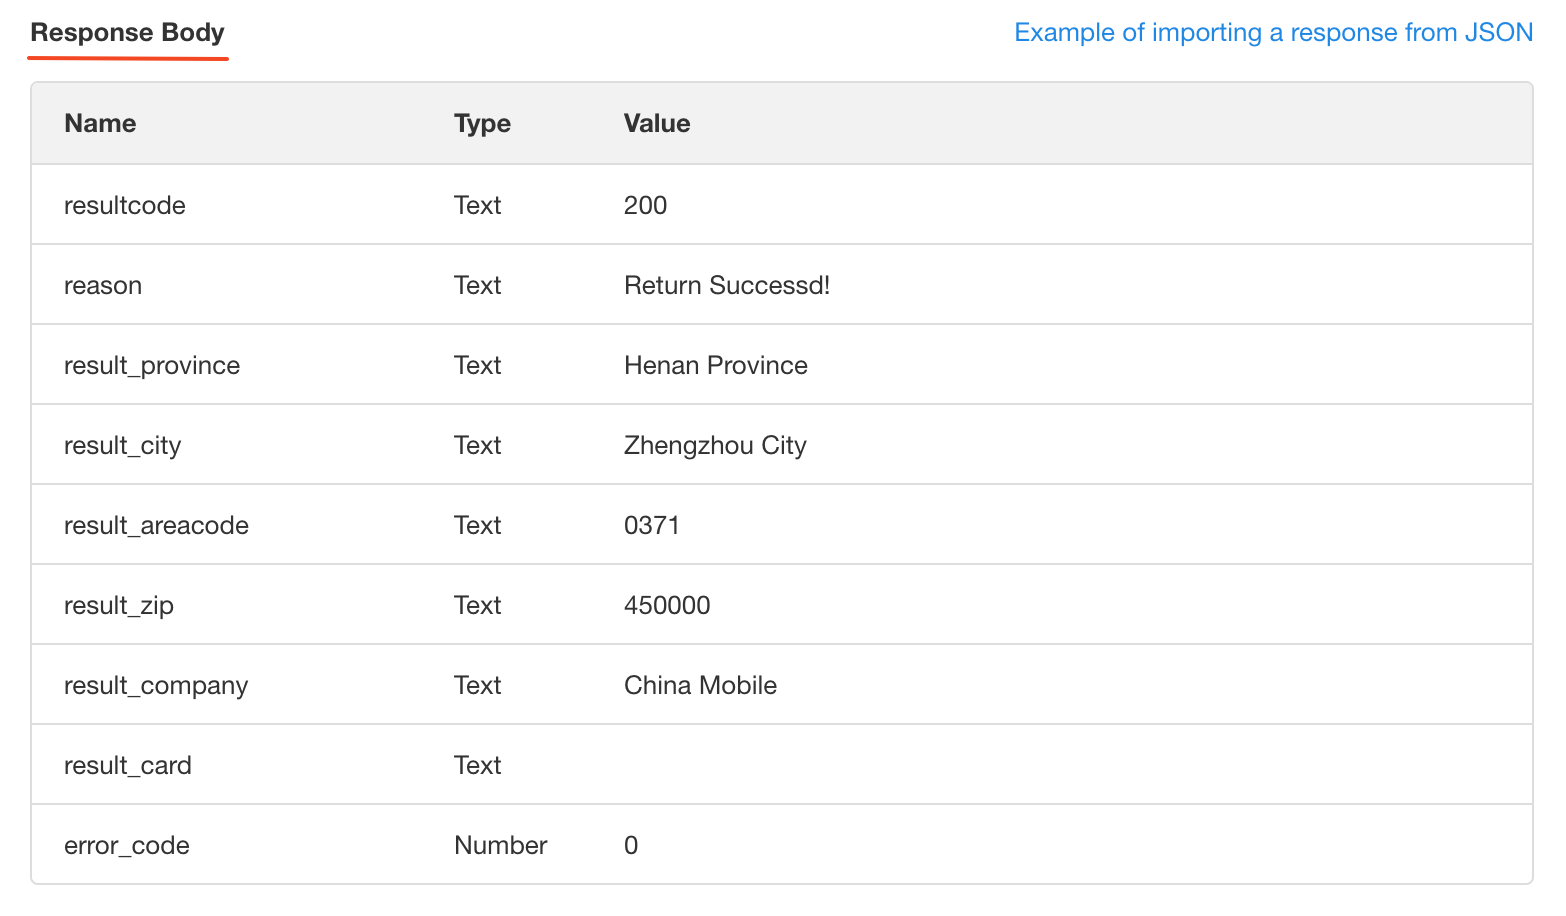
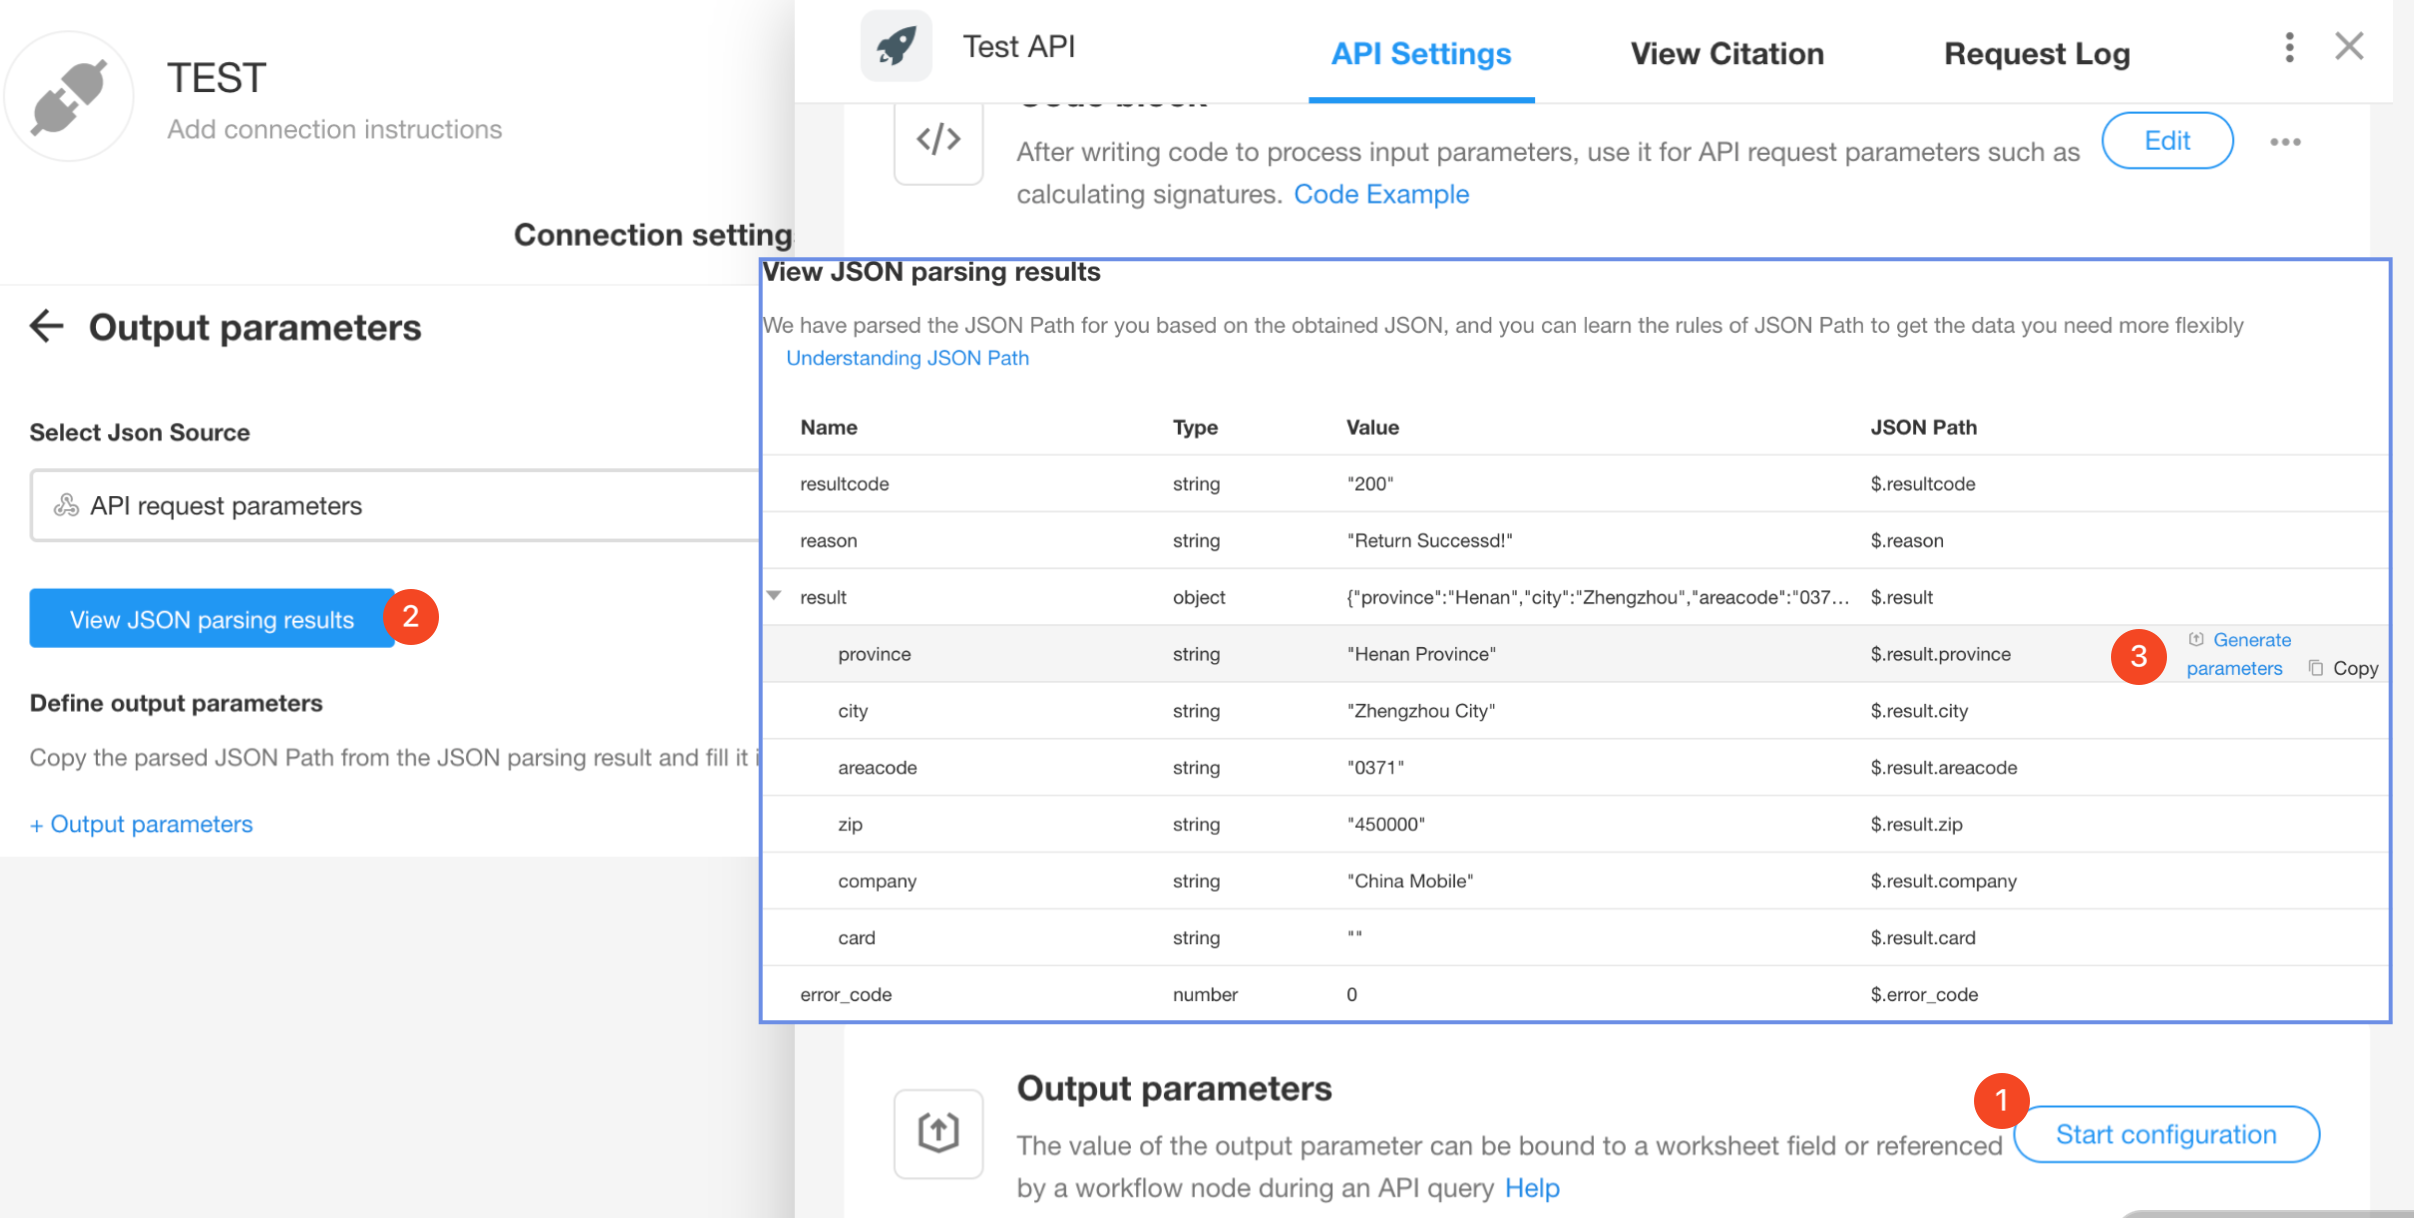
After performing the API request, output the obtained data in a format so that it can be used by worksheet fields or by workflow nodes.
The example data on which this is based is the data in the response Body returned in the previous test step.
Configuration: After JSON parsing add the needed content to the parameters. More details about JSON Parsing node
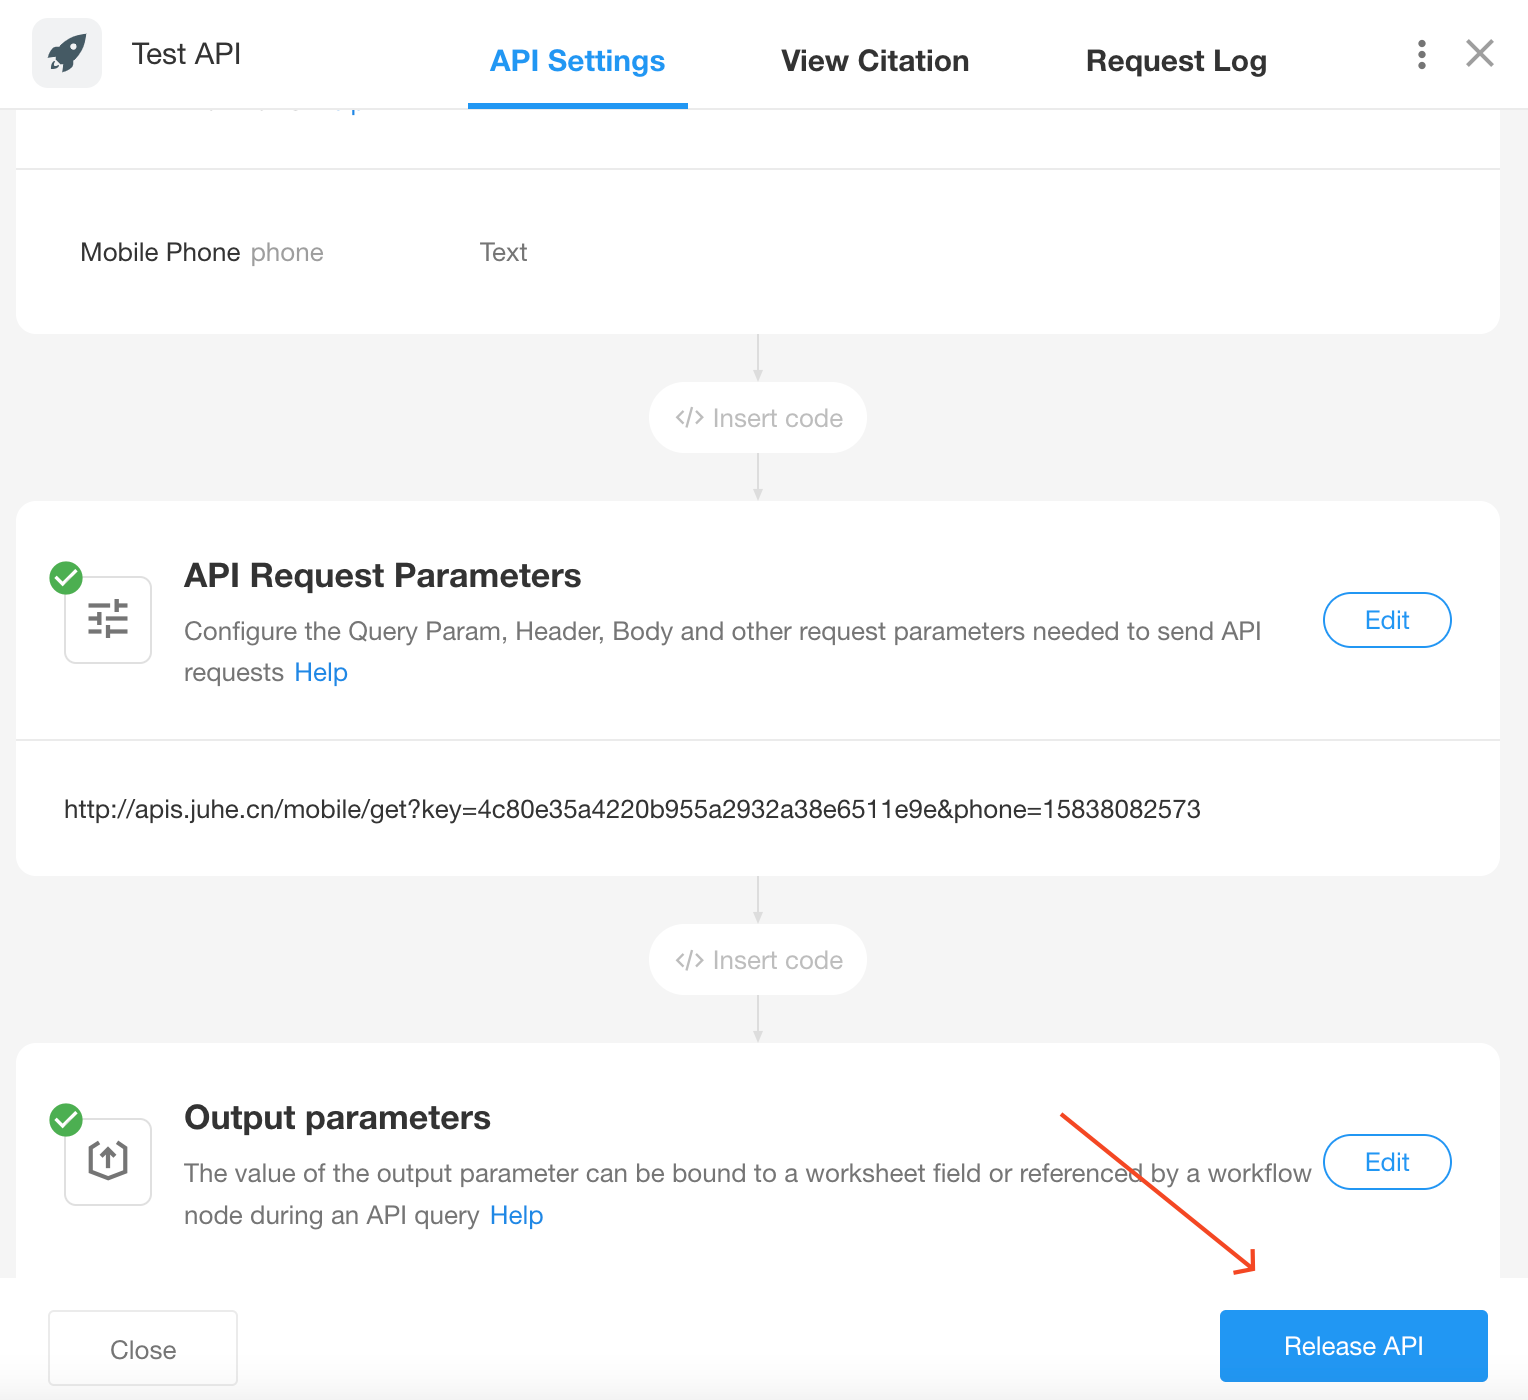
Release API
After the output parameters are configured, the API can be released. Only after releasing can it be used by worksheets or workflows.
Add More APIs
Multiple API requests can be added to a single connection authentication.

Step 3: Authorize the API to applications
For the API configured in the Integration Center, you need to configure the owner of the connection, the error alert, and the authorized application, as the application can only call the API after it is authorized. Click [Authorizing to App] to grant authorization to aaplications.

Connection Owner
The owner of the connection can modify and view the configuration of the connection and receive error messages.
Send error message
Whether to send a notification message to the owner if an error occurs when calling the API, and if so, you can configure the type of message to be sent and the time interval for sending messages of the same type.
Grant authorization to applications
Only the applications of the organization can be added and authorized, and after authorization, the worksheets and workflows in the application can use the API.
Step 4: How to call integrated APIs
- API Query field in worksheet
- Call Integrated API node in workflow
Connection and API Management
Connection Management
In [My Connection], there are all the connections created, including those with incomplete configurations. Organization Admins can manage all the connections in the organization.
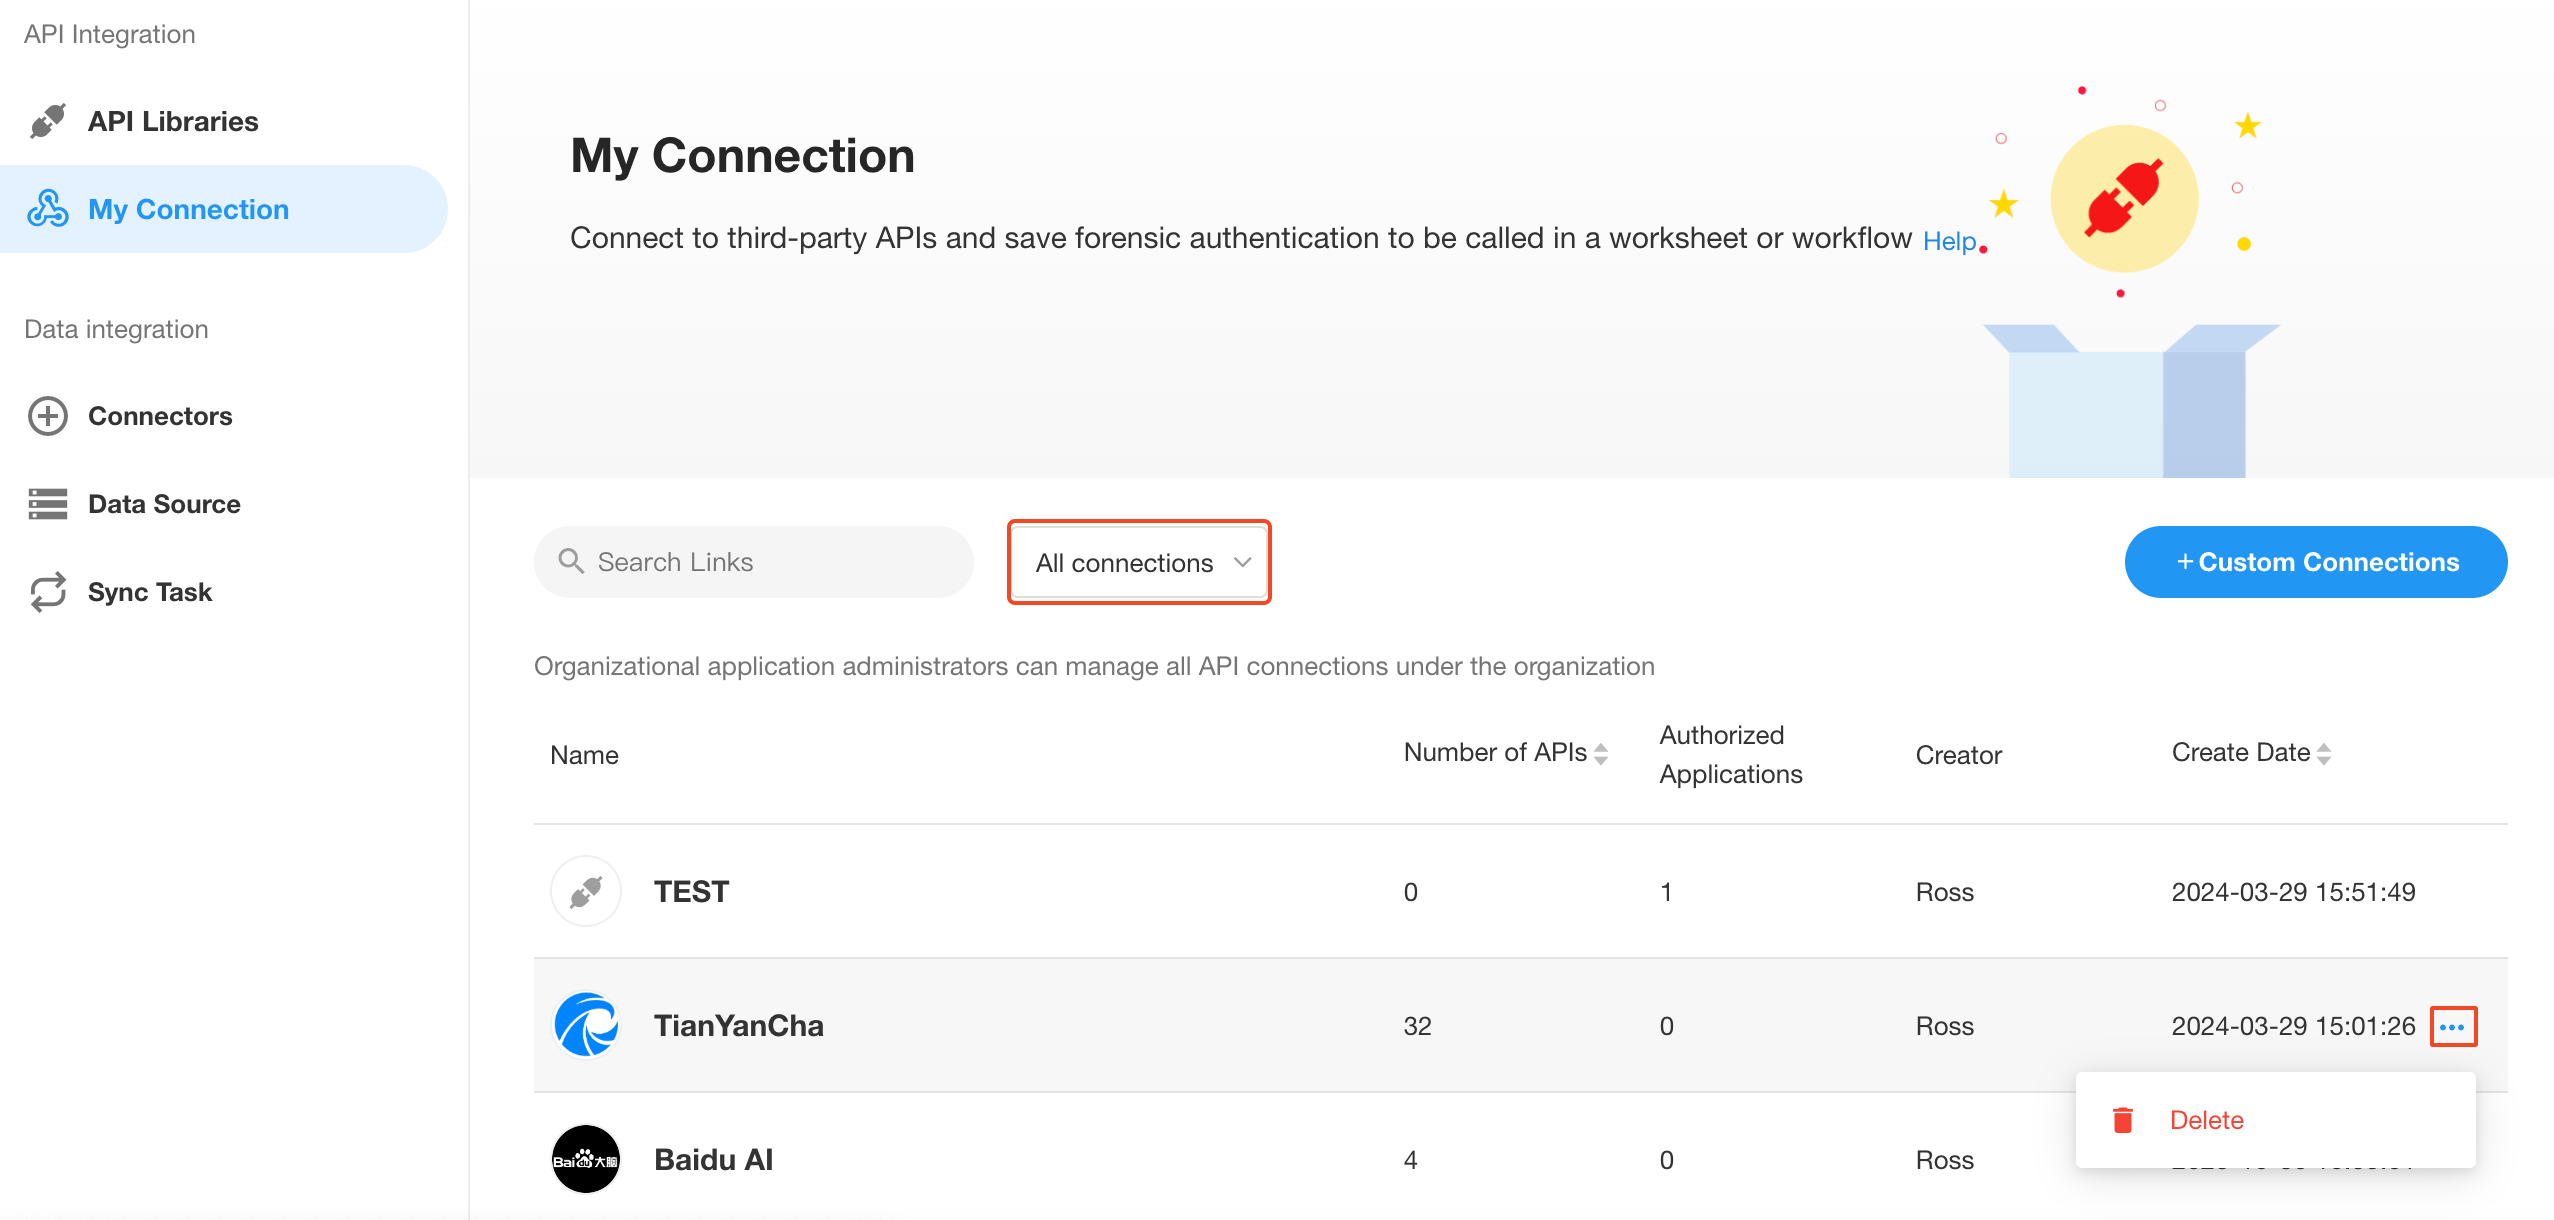
Click the connection name to go to the management page of this connection, to continue to configure the API and authorization, delete the connection or apply to publish it to the API library.

API Management
In [API Management] of a connection, manage all APIs of this connection, to enable or disable APIs.
Click an API to further view and manage the information of it.

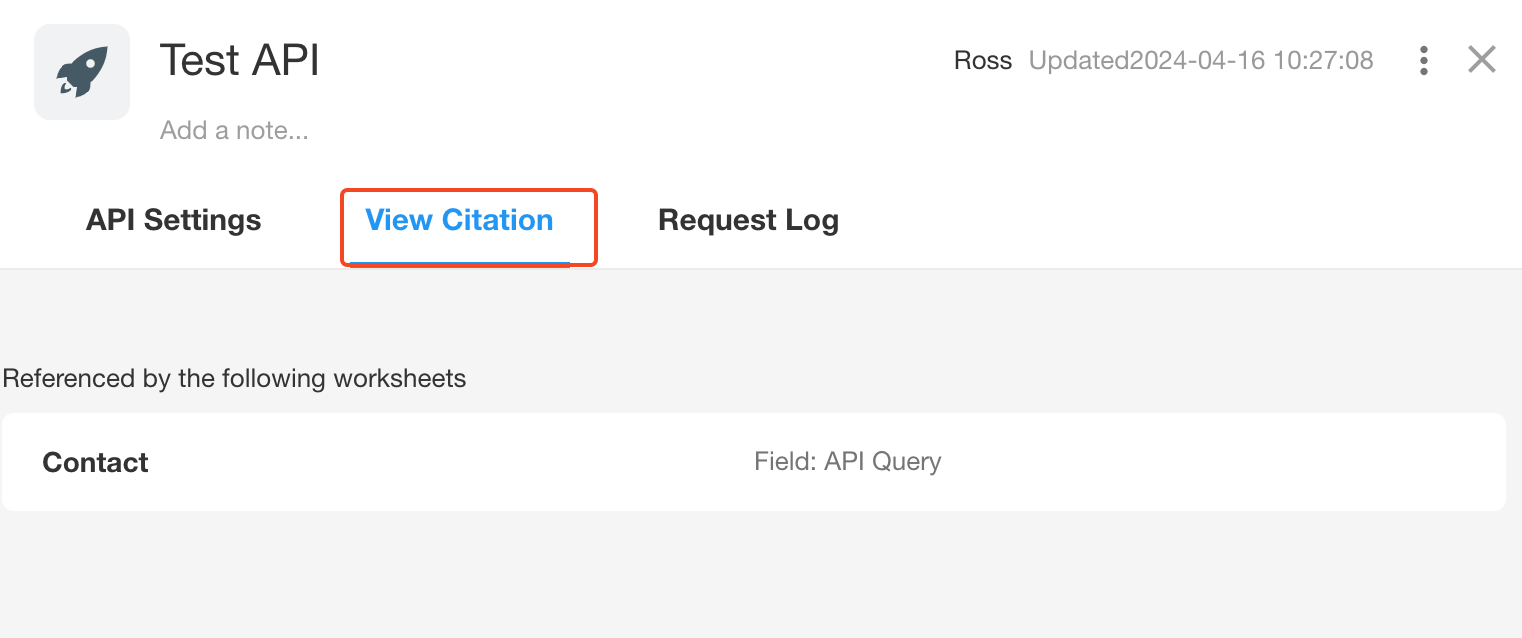
View API Calls
Check that the interface is called by which worksheets and workflows. Click the worksheet or workflow name to open the corresponding editing page.
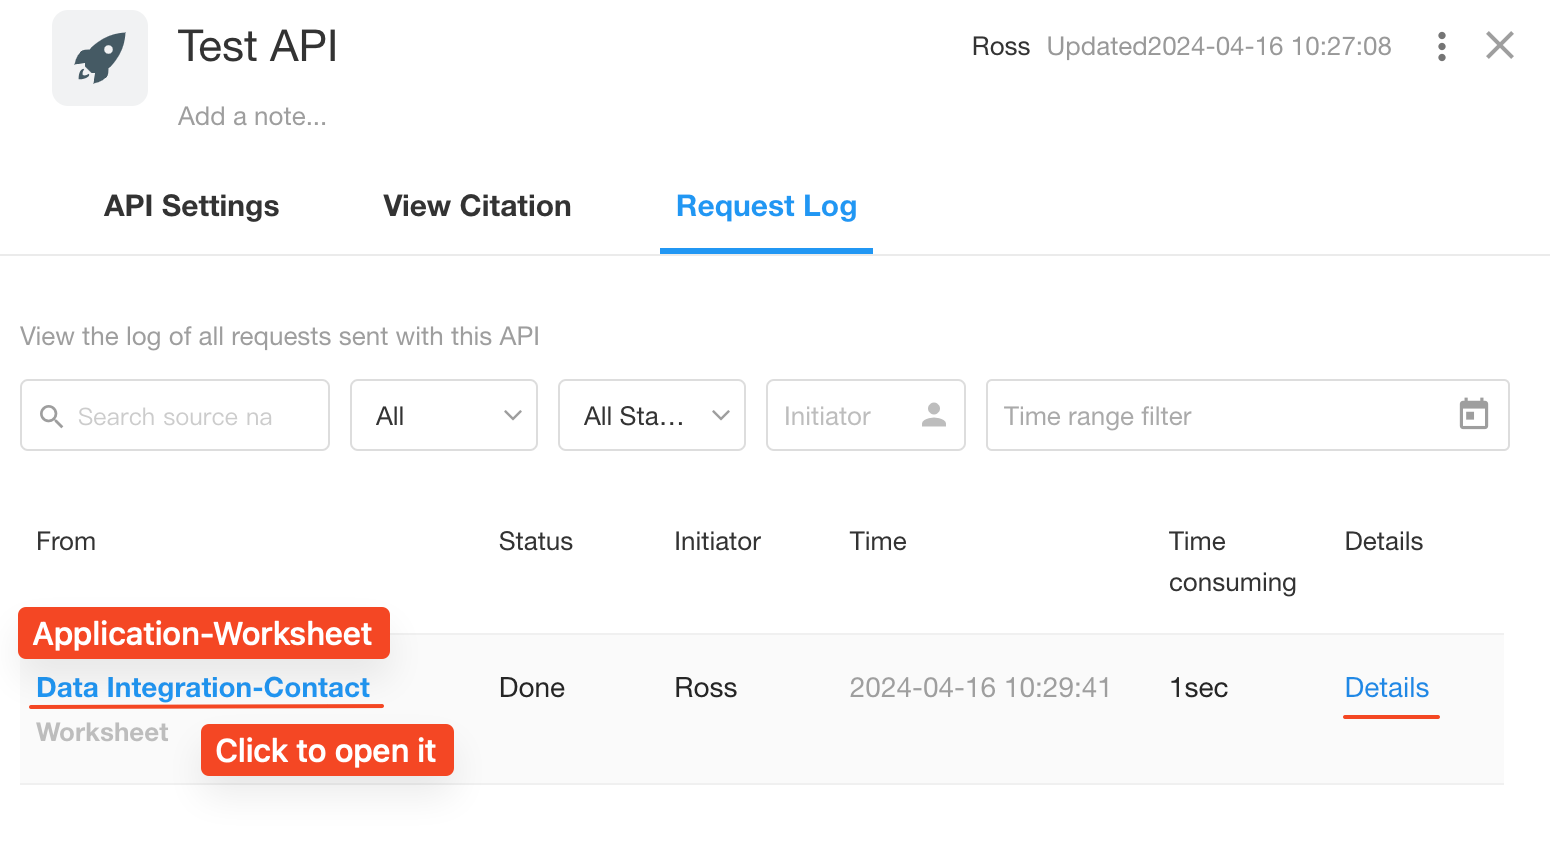
Request Log
View request logs for all calls to an API. Those who do not have permissions cannot view the logs.
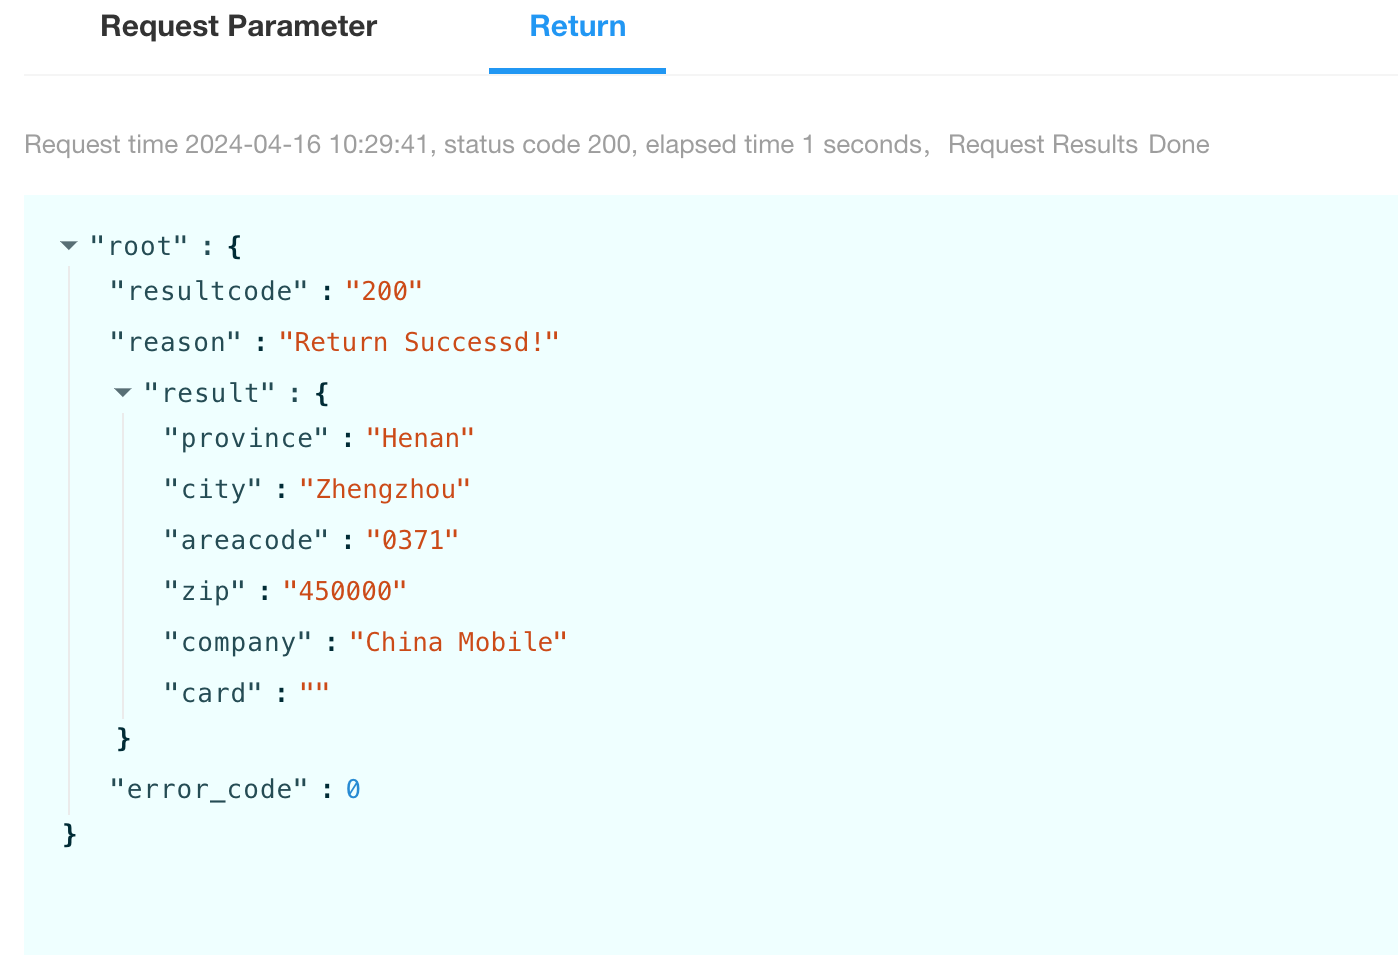
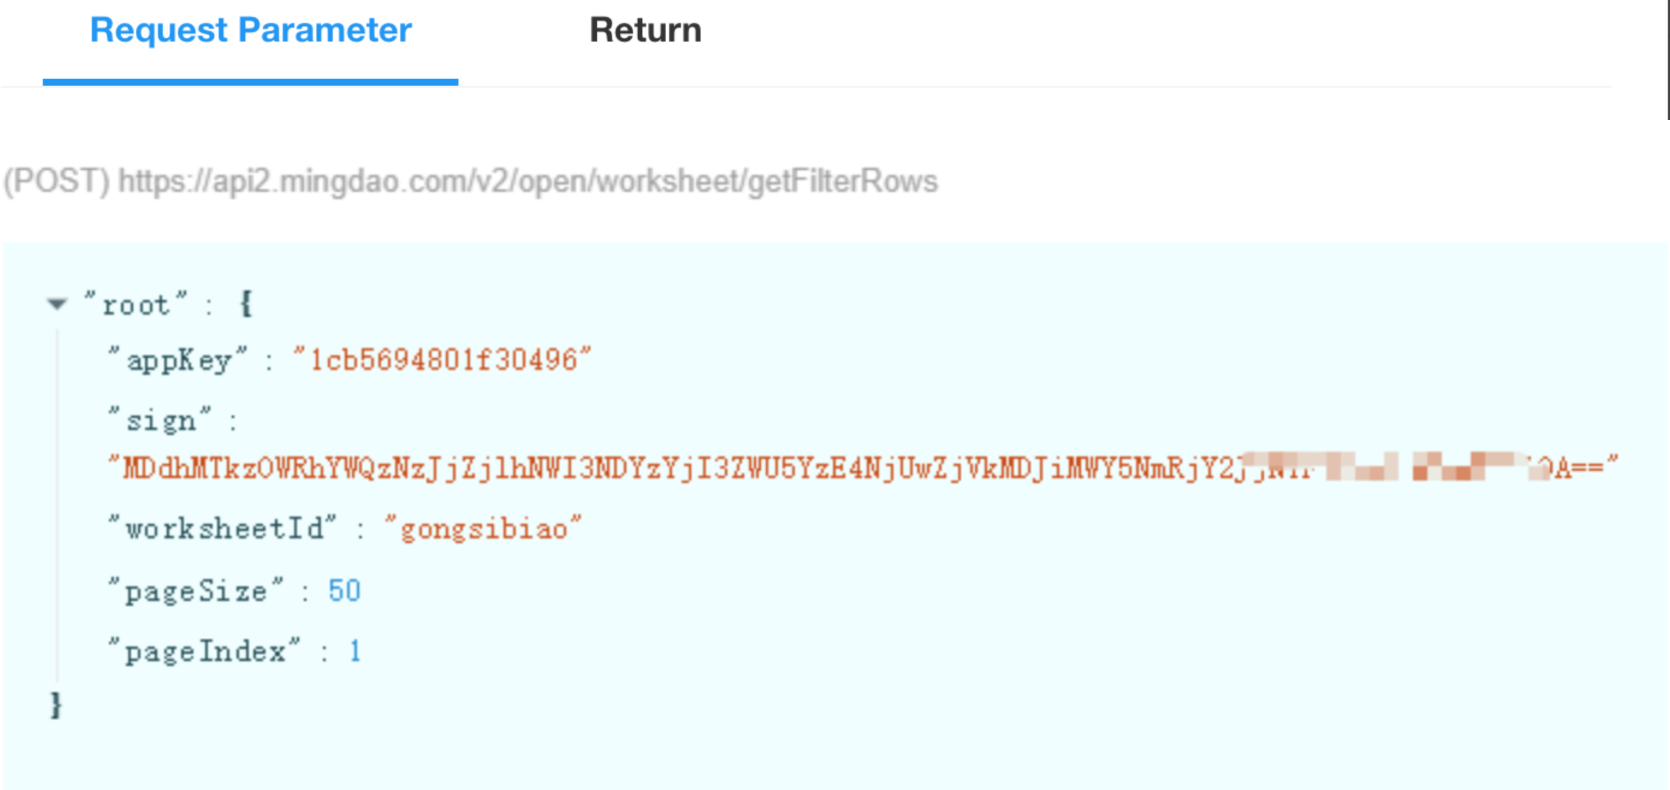
Example of request parameters:
Example of return result:
