Data Integration
Data integration is designed to solve the problem of data dispersion in business systems by achieving real-time data sync through database connections. Users only need to configure field mapping rules to sync data between databases and worksheets, as well as between databases. It can be used for the following four scenarios:
- Batch migrate data from old systems to this platform
- Real-time sync of data from other systems to this platform
- Real-time sync of data from this platform to other databases
- Data sync between different databases
Currently supported databases include:
| Database | As Source | As Target | Supported Versions |
|---|---|---|---|
| Worksheet | ✅ | ✅ | - |
| MySQL | ✅ | ✅ | 5.6, 5.7, 8.0.x Also supported: Alibaba Cloud, Tencent Cloud |
| SQL Server | ✅ | ✅ | 2012, 2014, 2016, 2017, 2019 Also supported: Alibaba Cloud, Tencent Cloud |
| Oracle | ✅ | ❌ | 9i, 10g, 11g, 12c+ |
| PostgreSQL | ✅ | ✅ | 9.6, 10, 11, 12+ |
| MongoDB | ✅ | ✅ | >= 3.6 Also supported: Alibaba Cloud, Tencent Cloud |
| MariaDB | ✅ | ✅ | 10.3 and above Also supported: Alibaba Cloud, Tencent Cloud |
| IBM db2 | ✅ | ❌ | 11.5x |
| Kafka | ✅ | ❌ | 2.3.x |
Overview of Integration Steps
Entrance
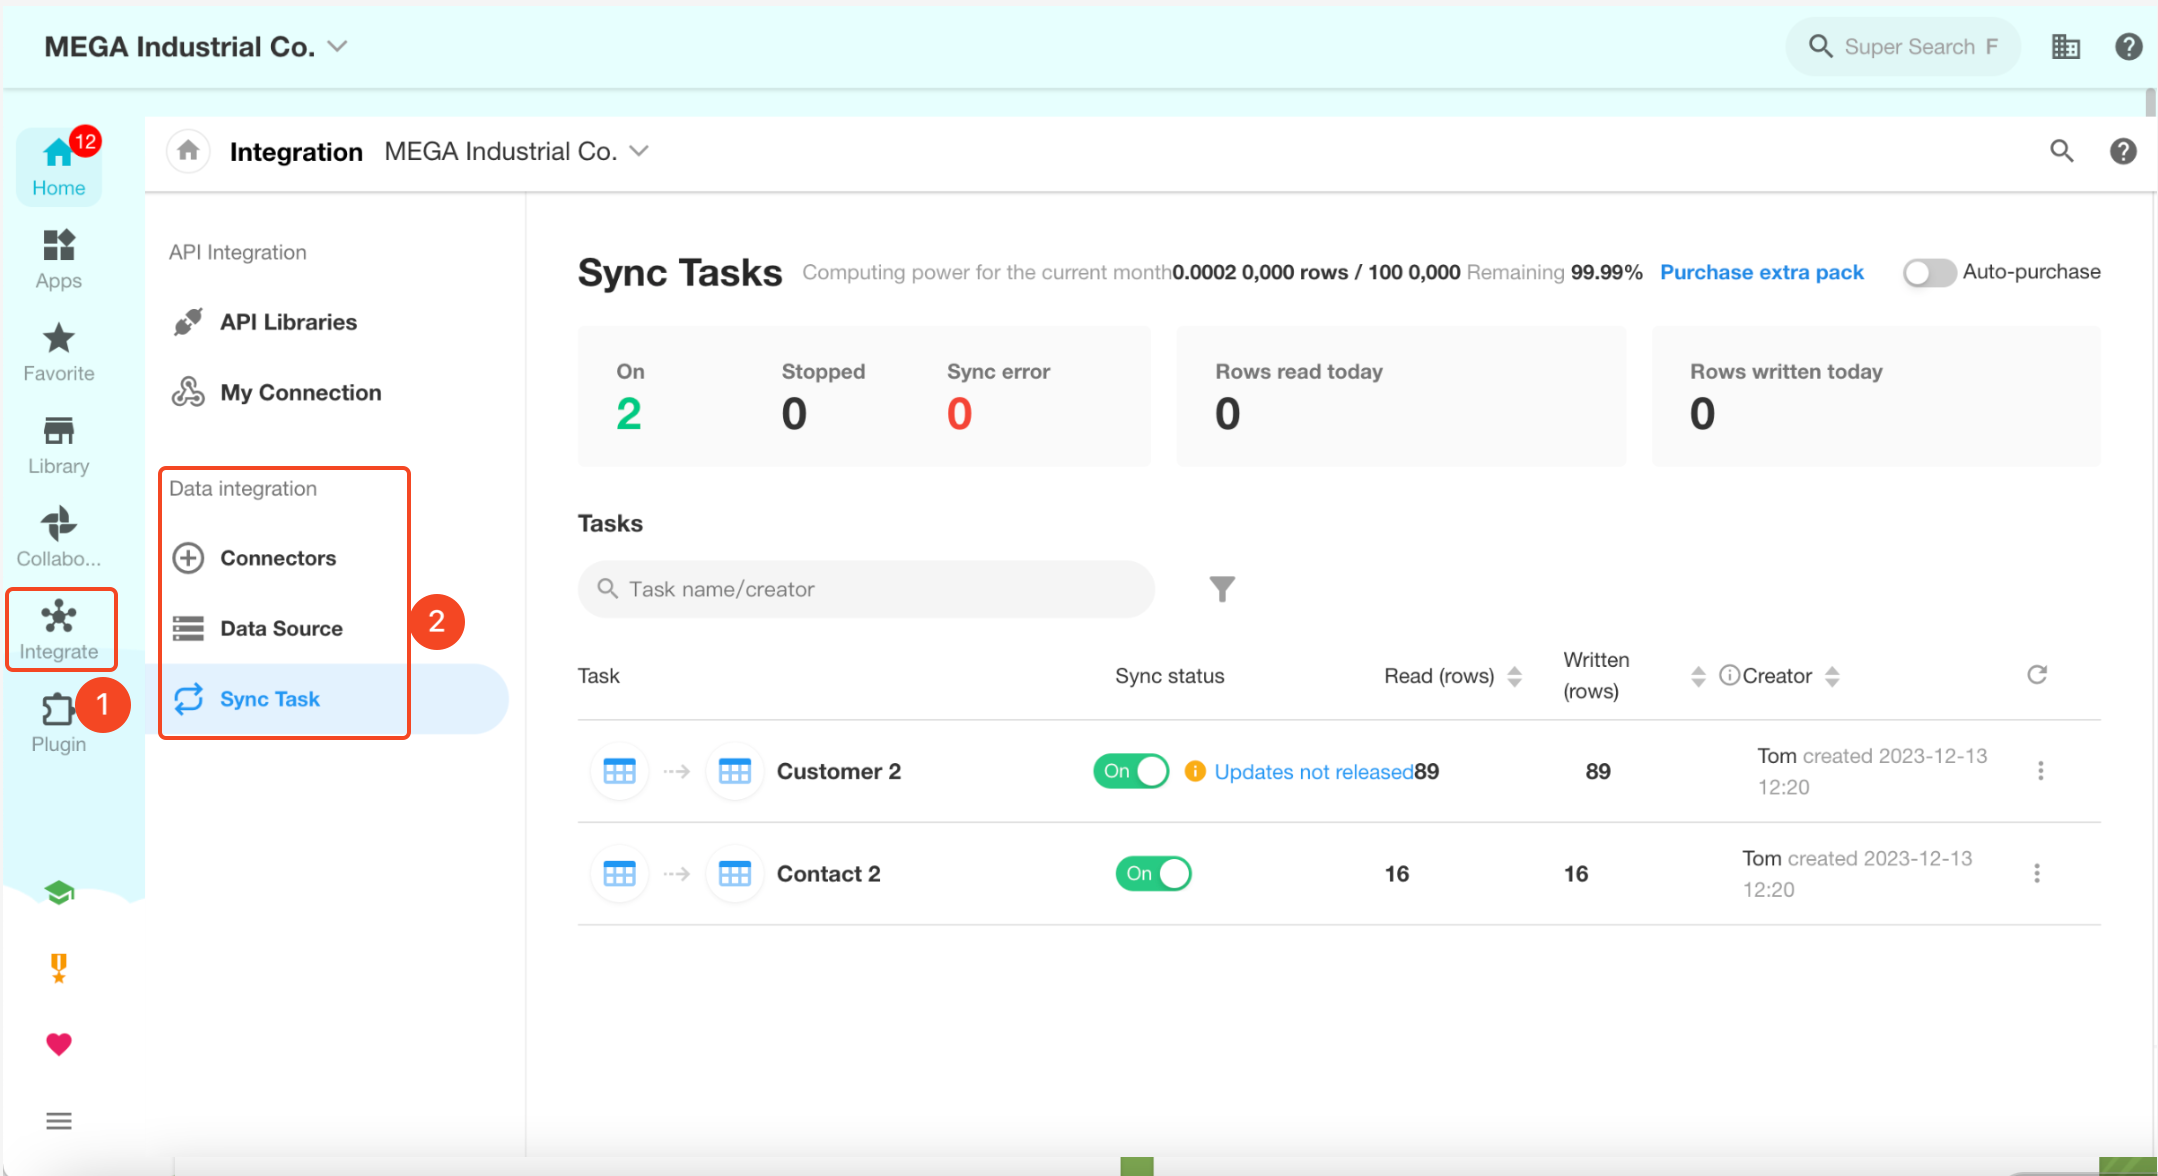
On the home page, click [Integrate] on the left navigation to enter Data Integration.
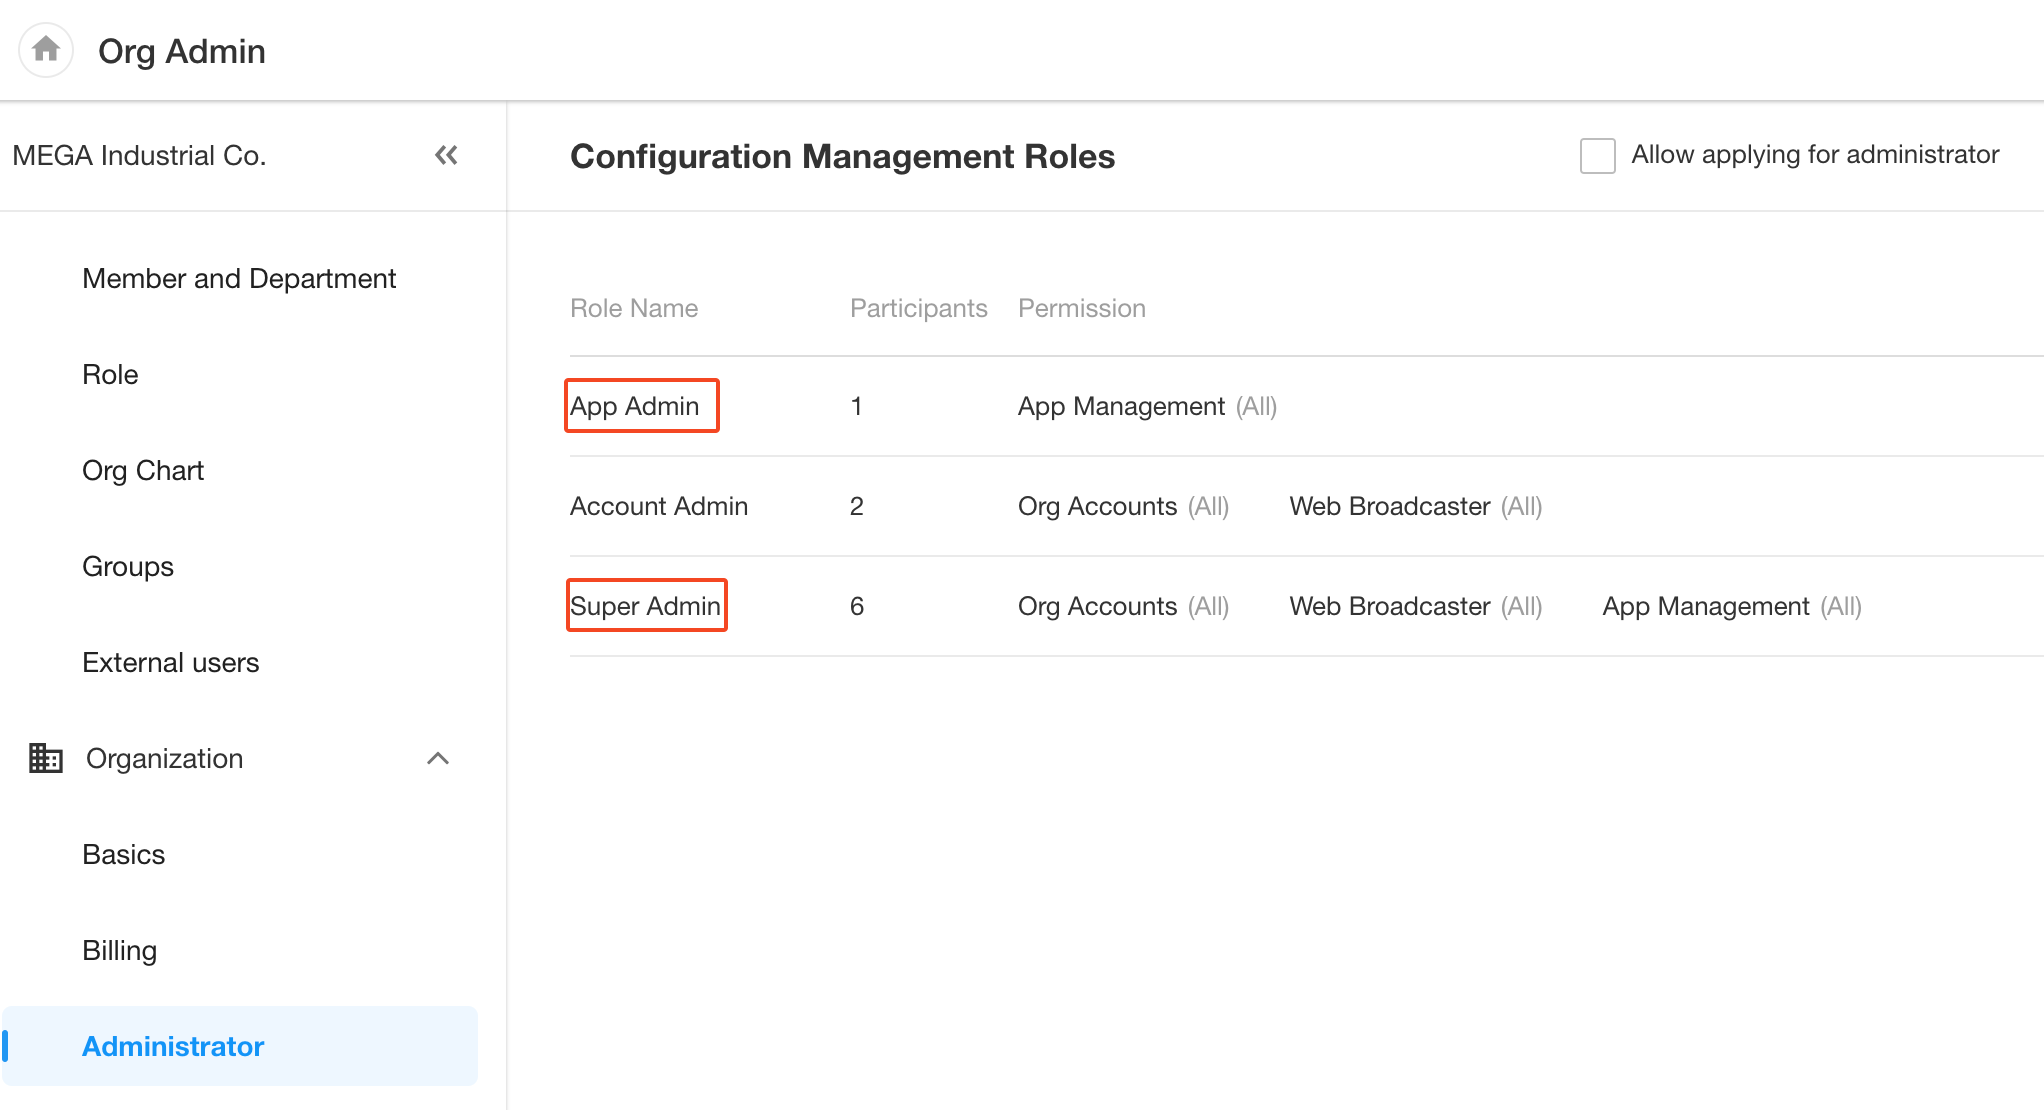
This feature is only visible to the organization's Super Administrators or Application Administrators.
Three Steps of Data Integration
Create Connectors
Connectors are rules for establishing connections between two databases and mapping fields. When creating a connector, users can create multiple sync tasks for multiple worksheets with the same data source at once.
-
Select source data type and destination type
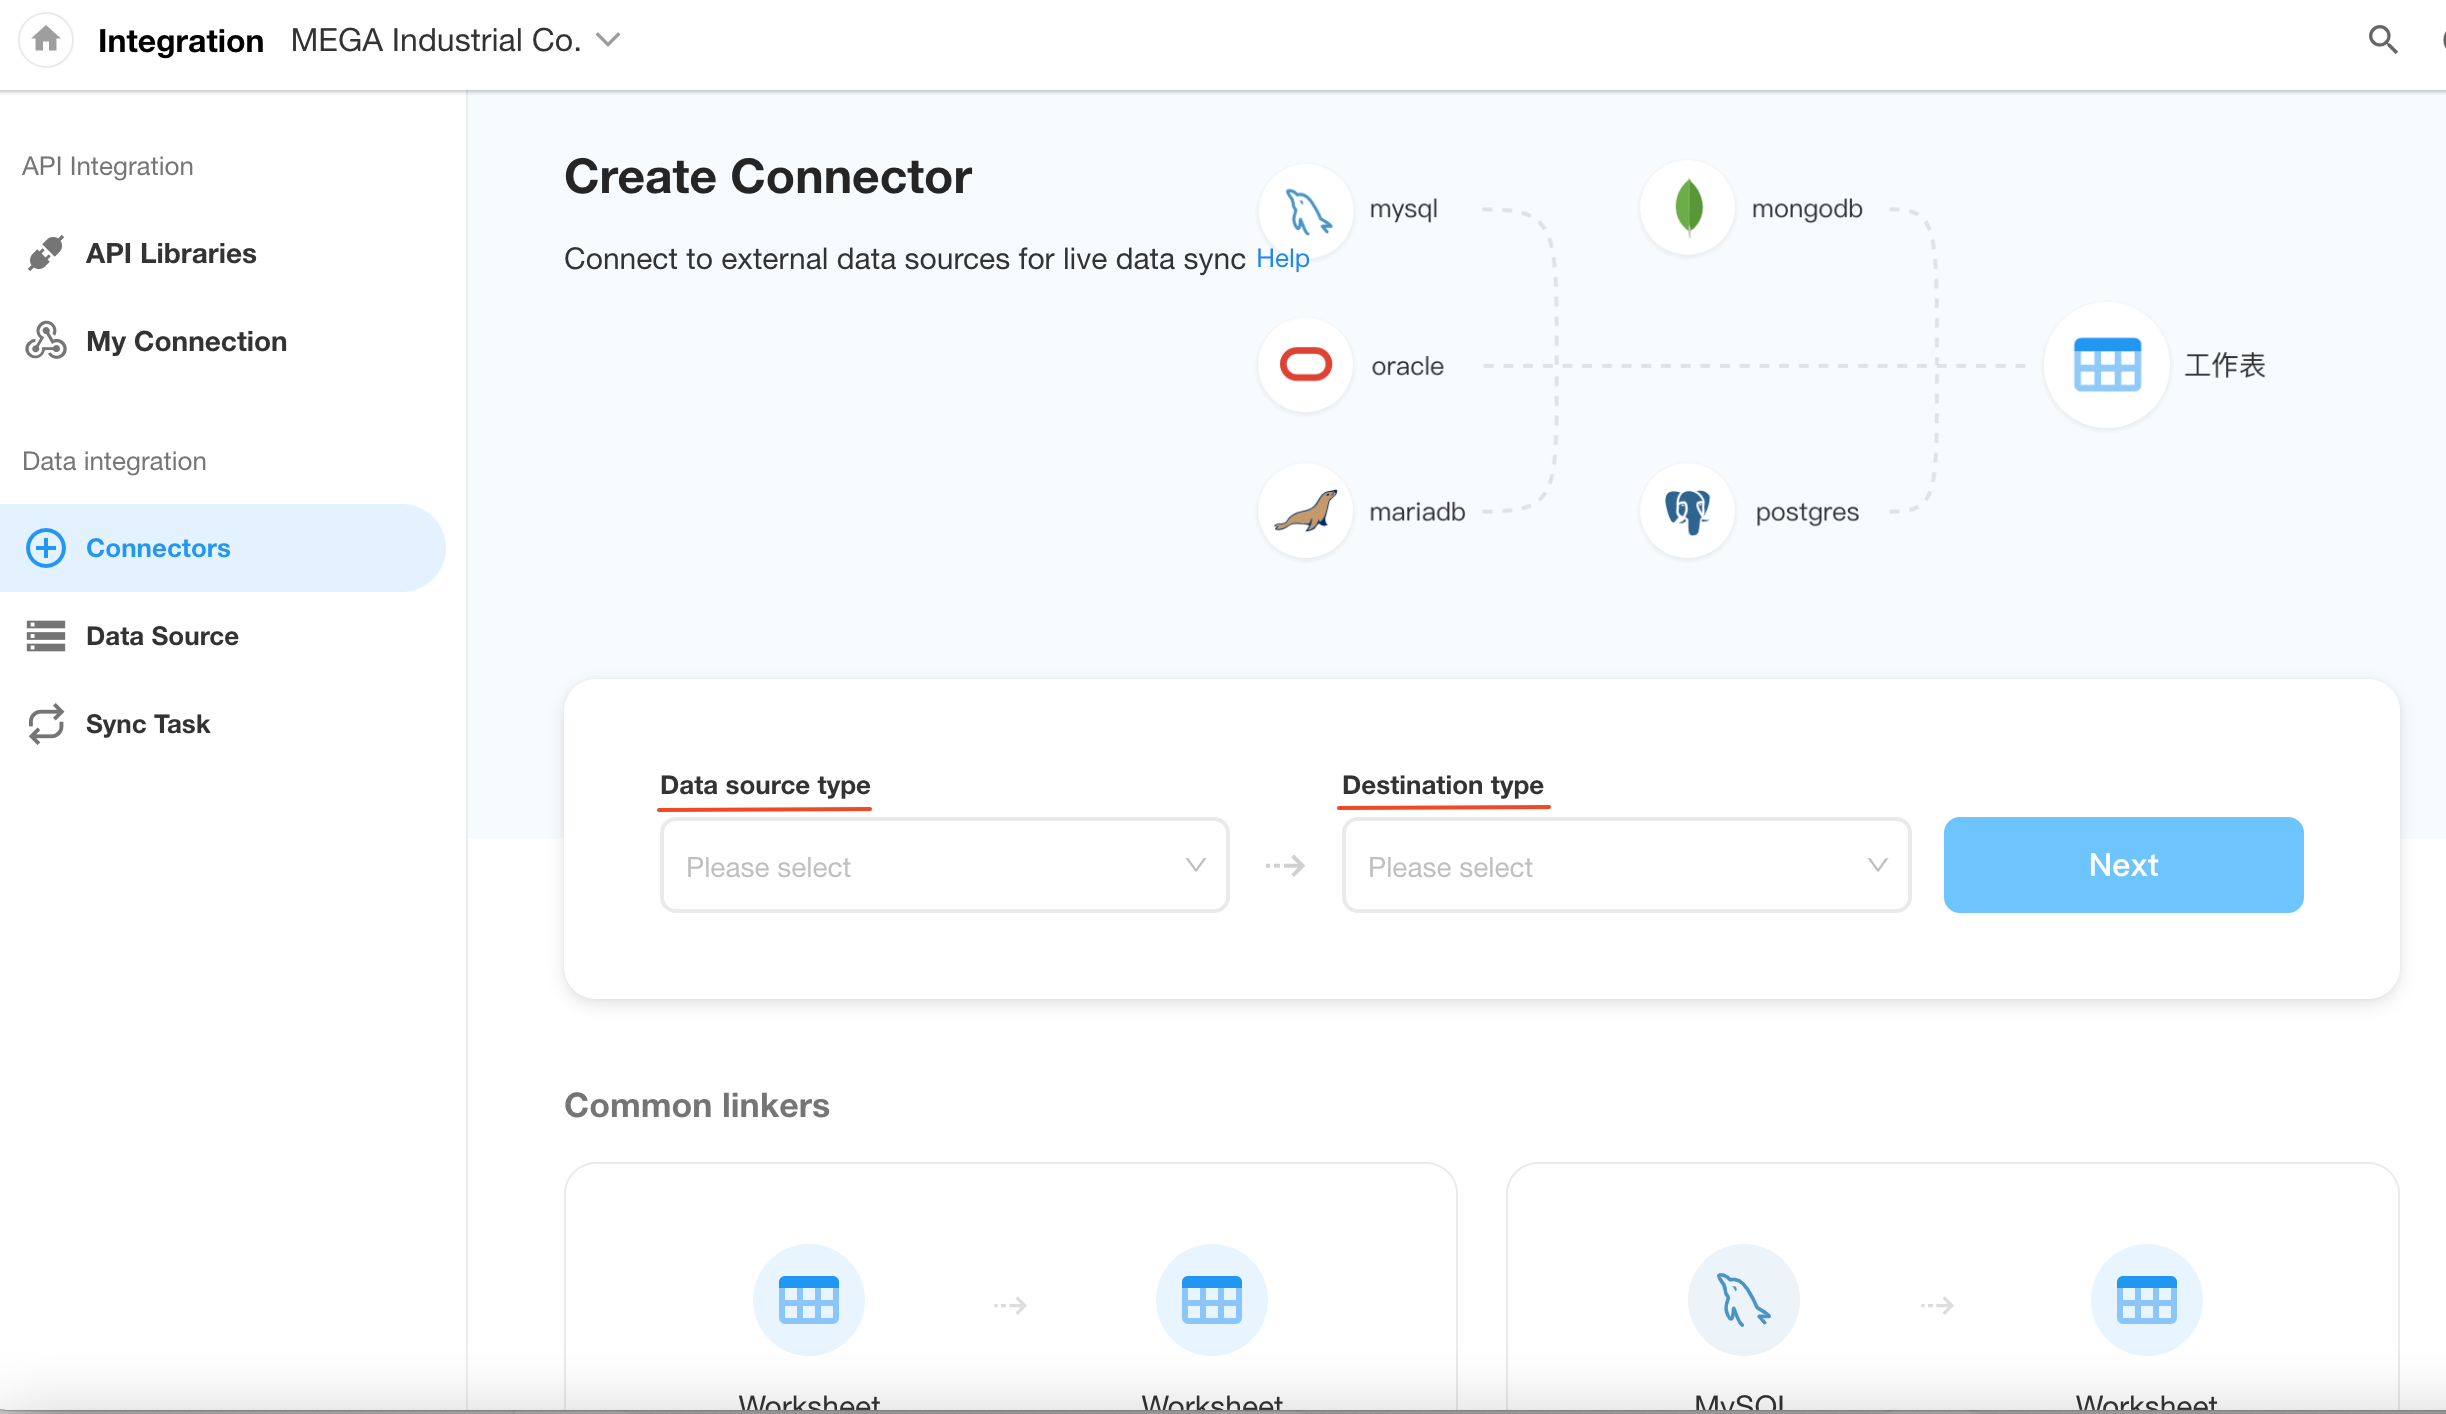
For example, if both the source data and destination support MySQL, the following 4 types of data syncs can be achieved:
- Synchronize data from a worksheet to another worksheet
- Synchronize data from a MySQL database to a worksheet
- Synchronize data from a worksheet to a MySQL database
- Synchronize data from a MySQL database to another MySQL database
-
Configure data source and destination
-
If it is a worksheet, select the application to which the worksheet belongs.
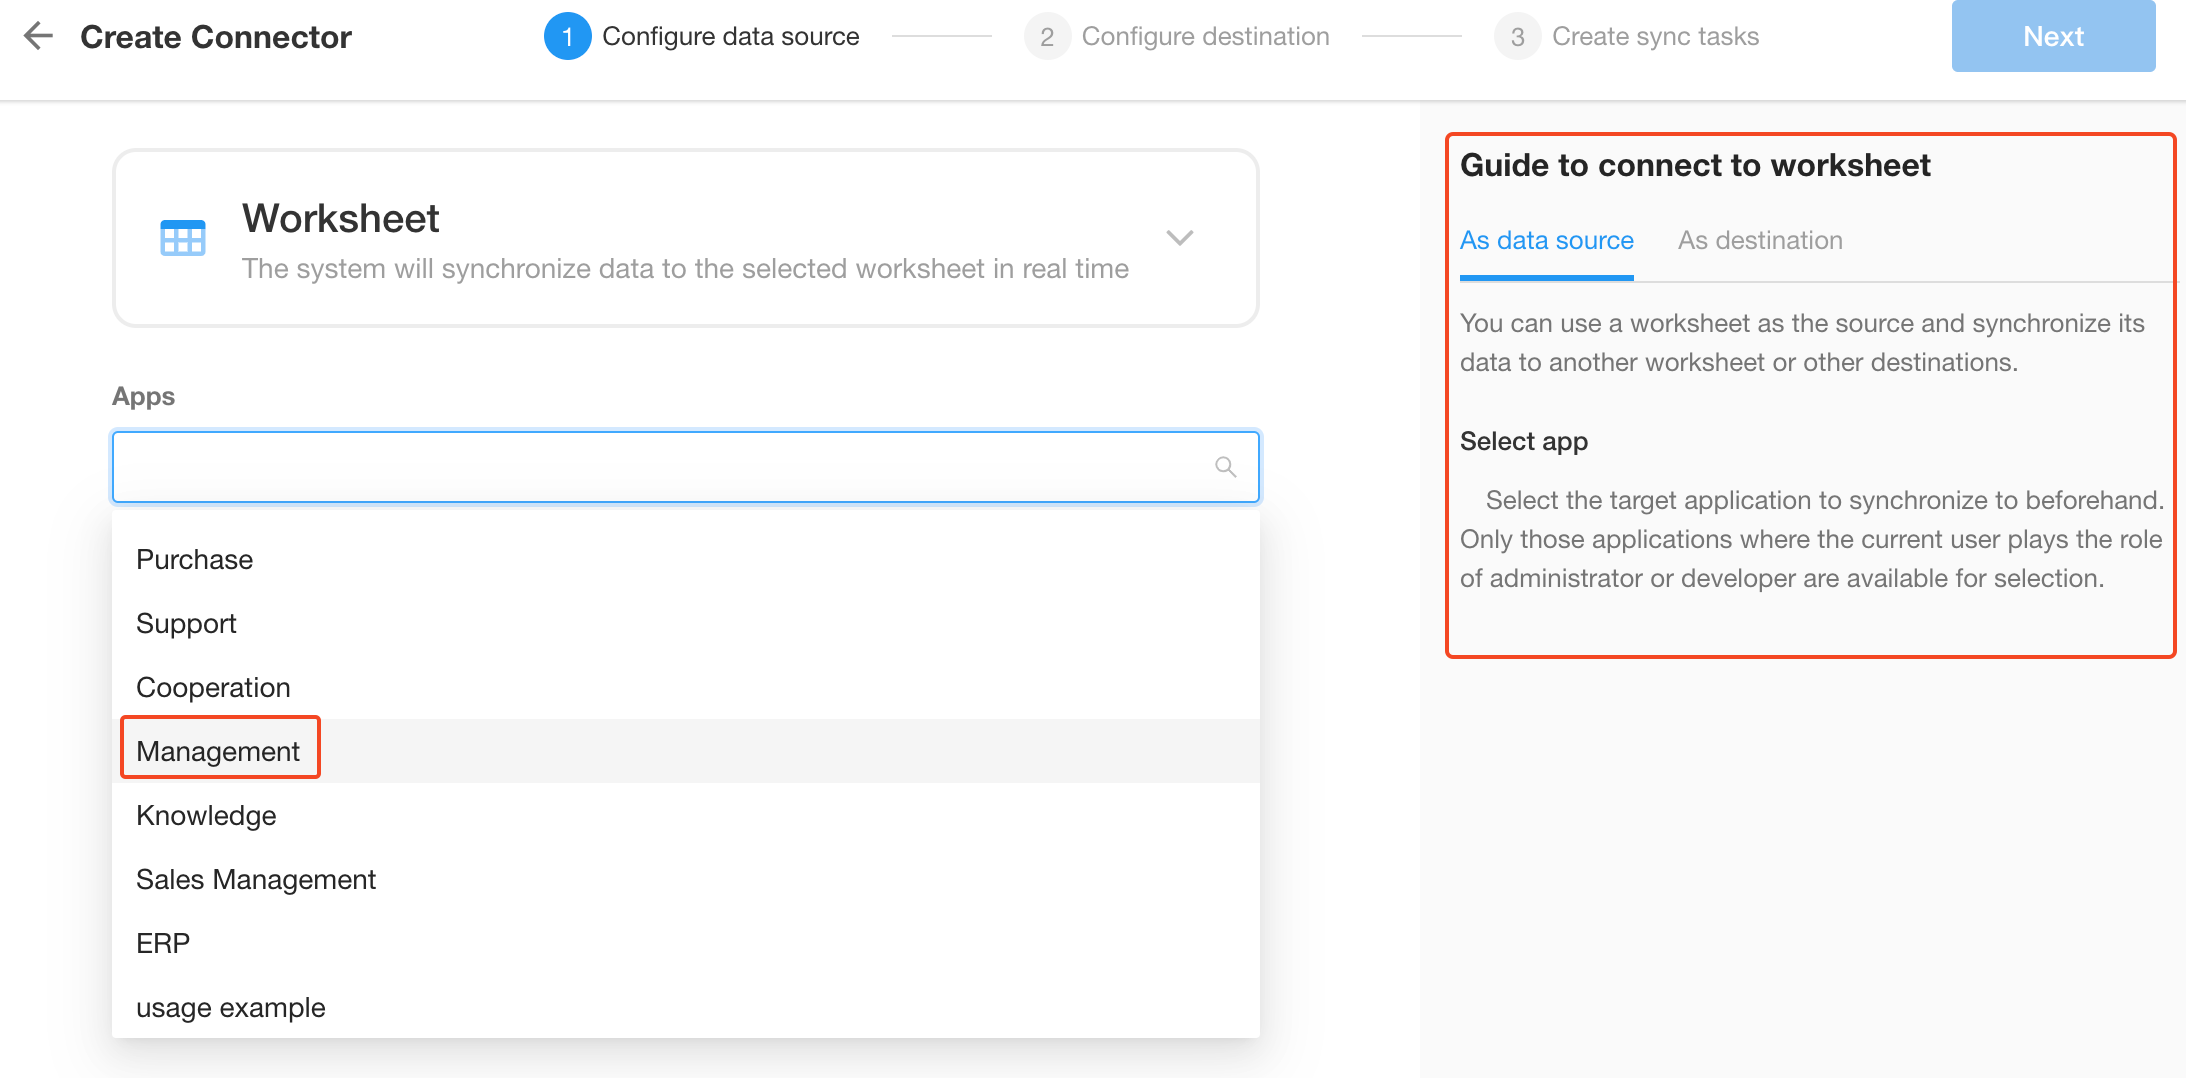
-
If it is an external database, configure the database information.
For external databases, a configuration guide is listed on the right side.
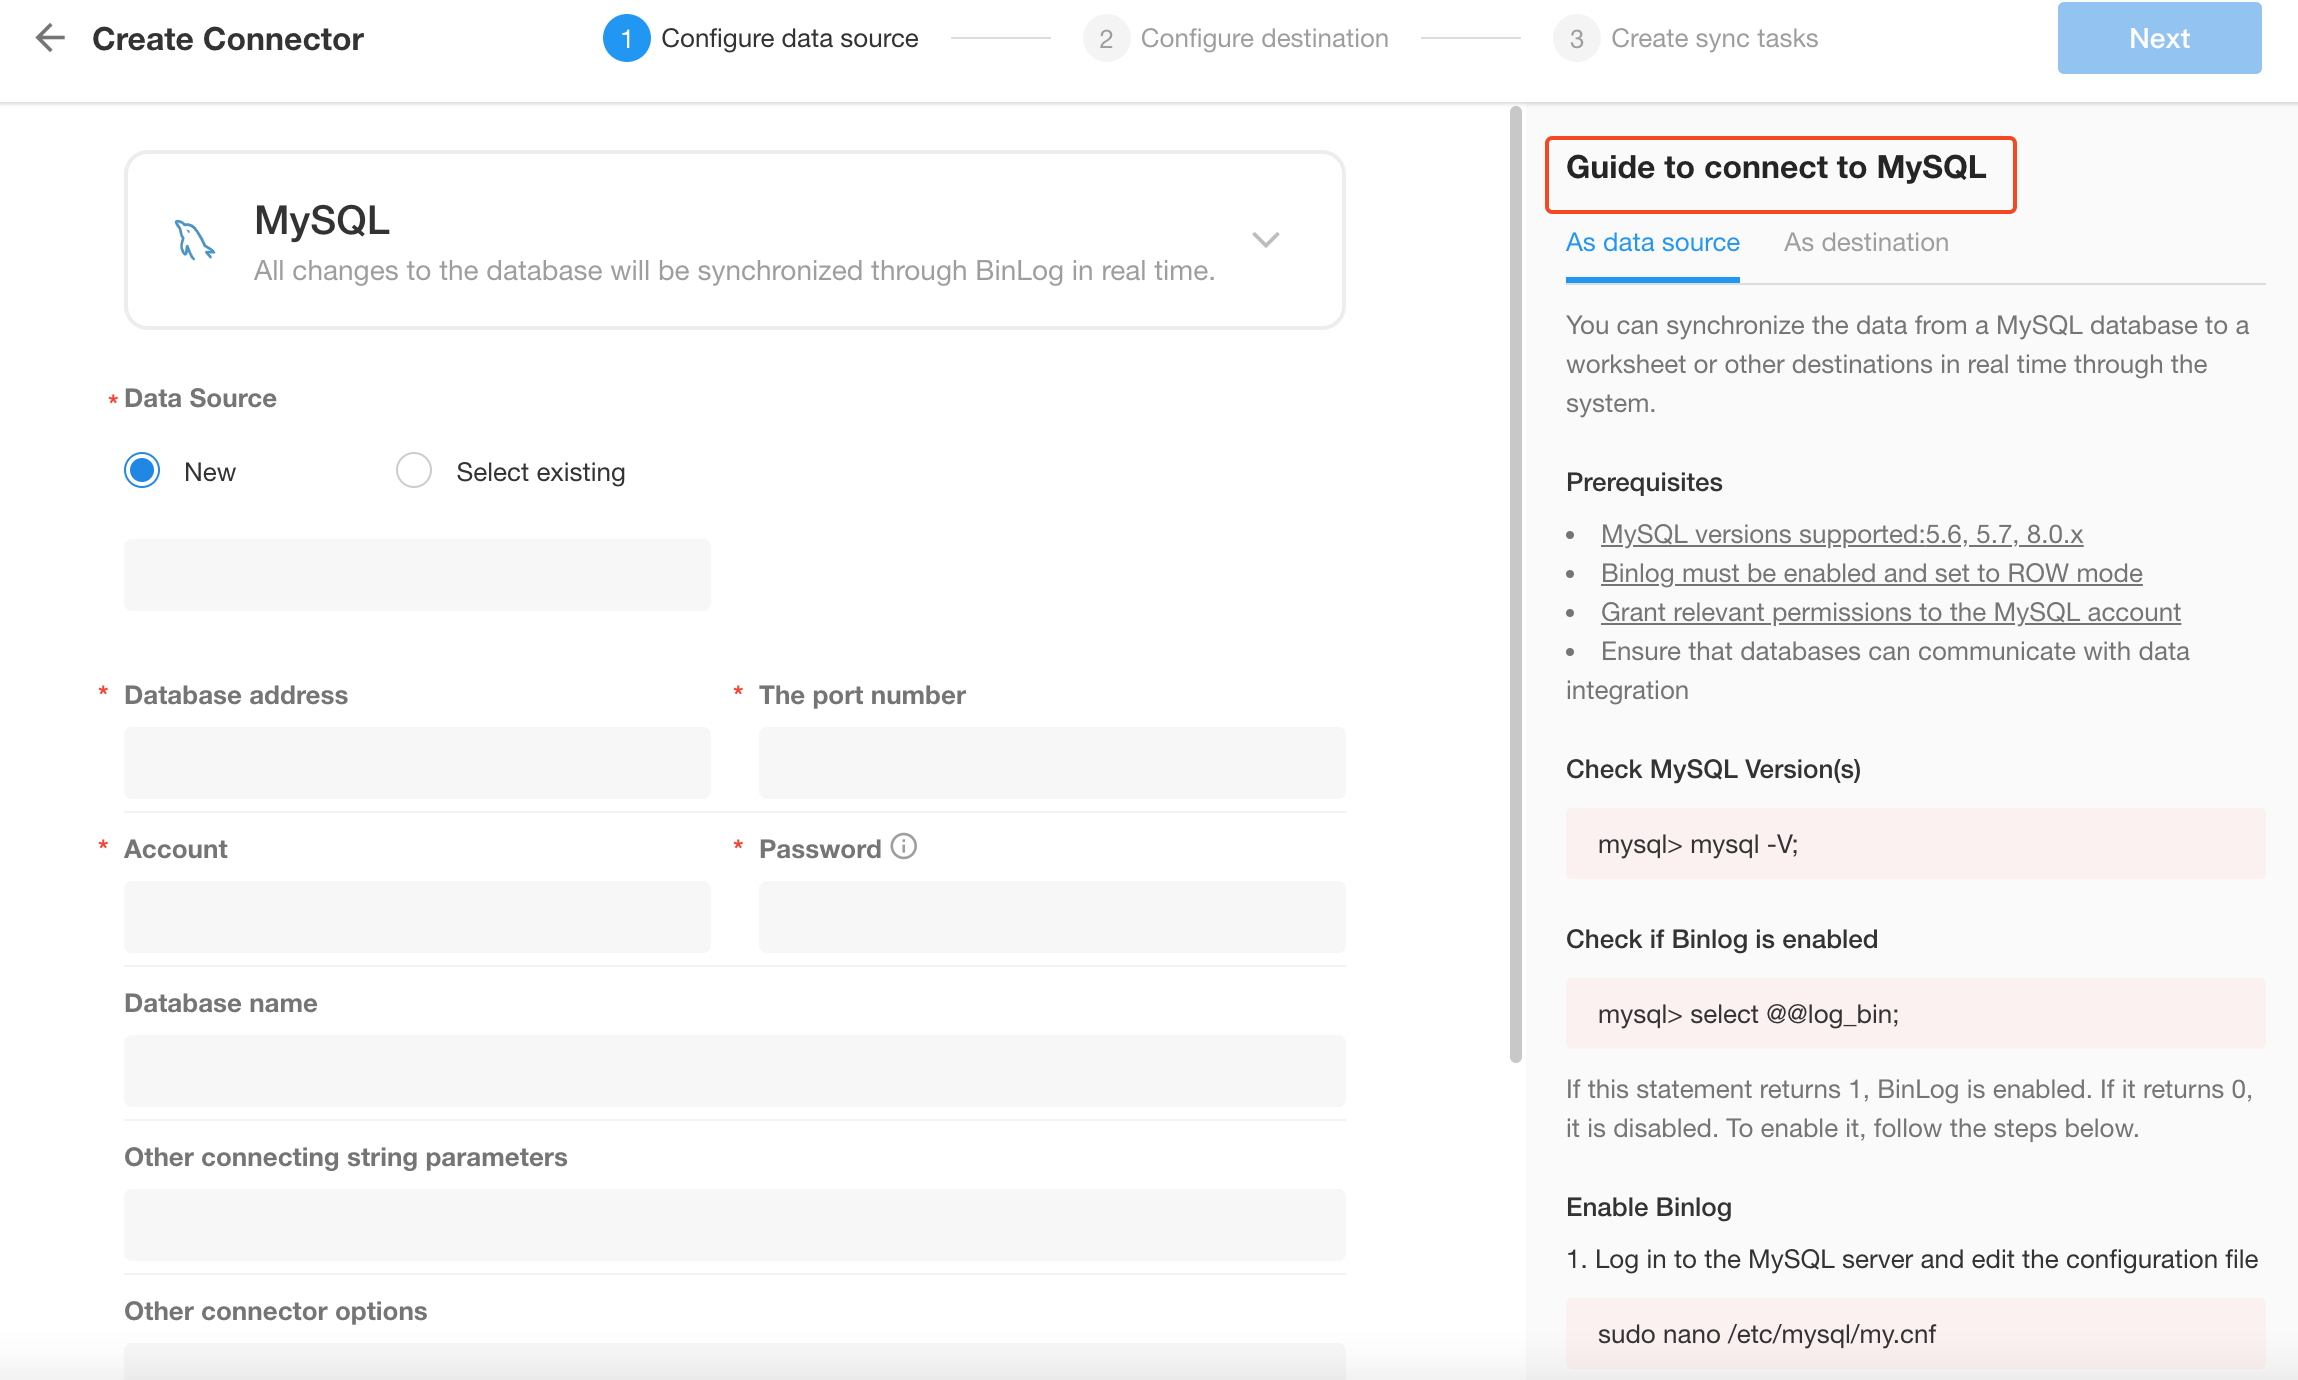
-
-
Create sync tasks
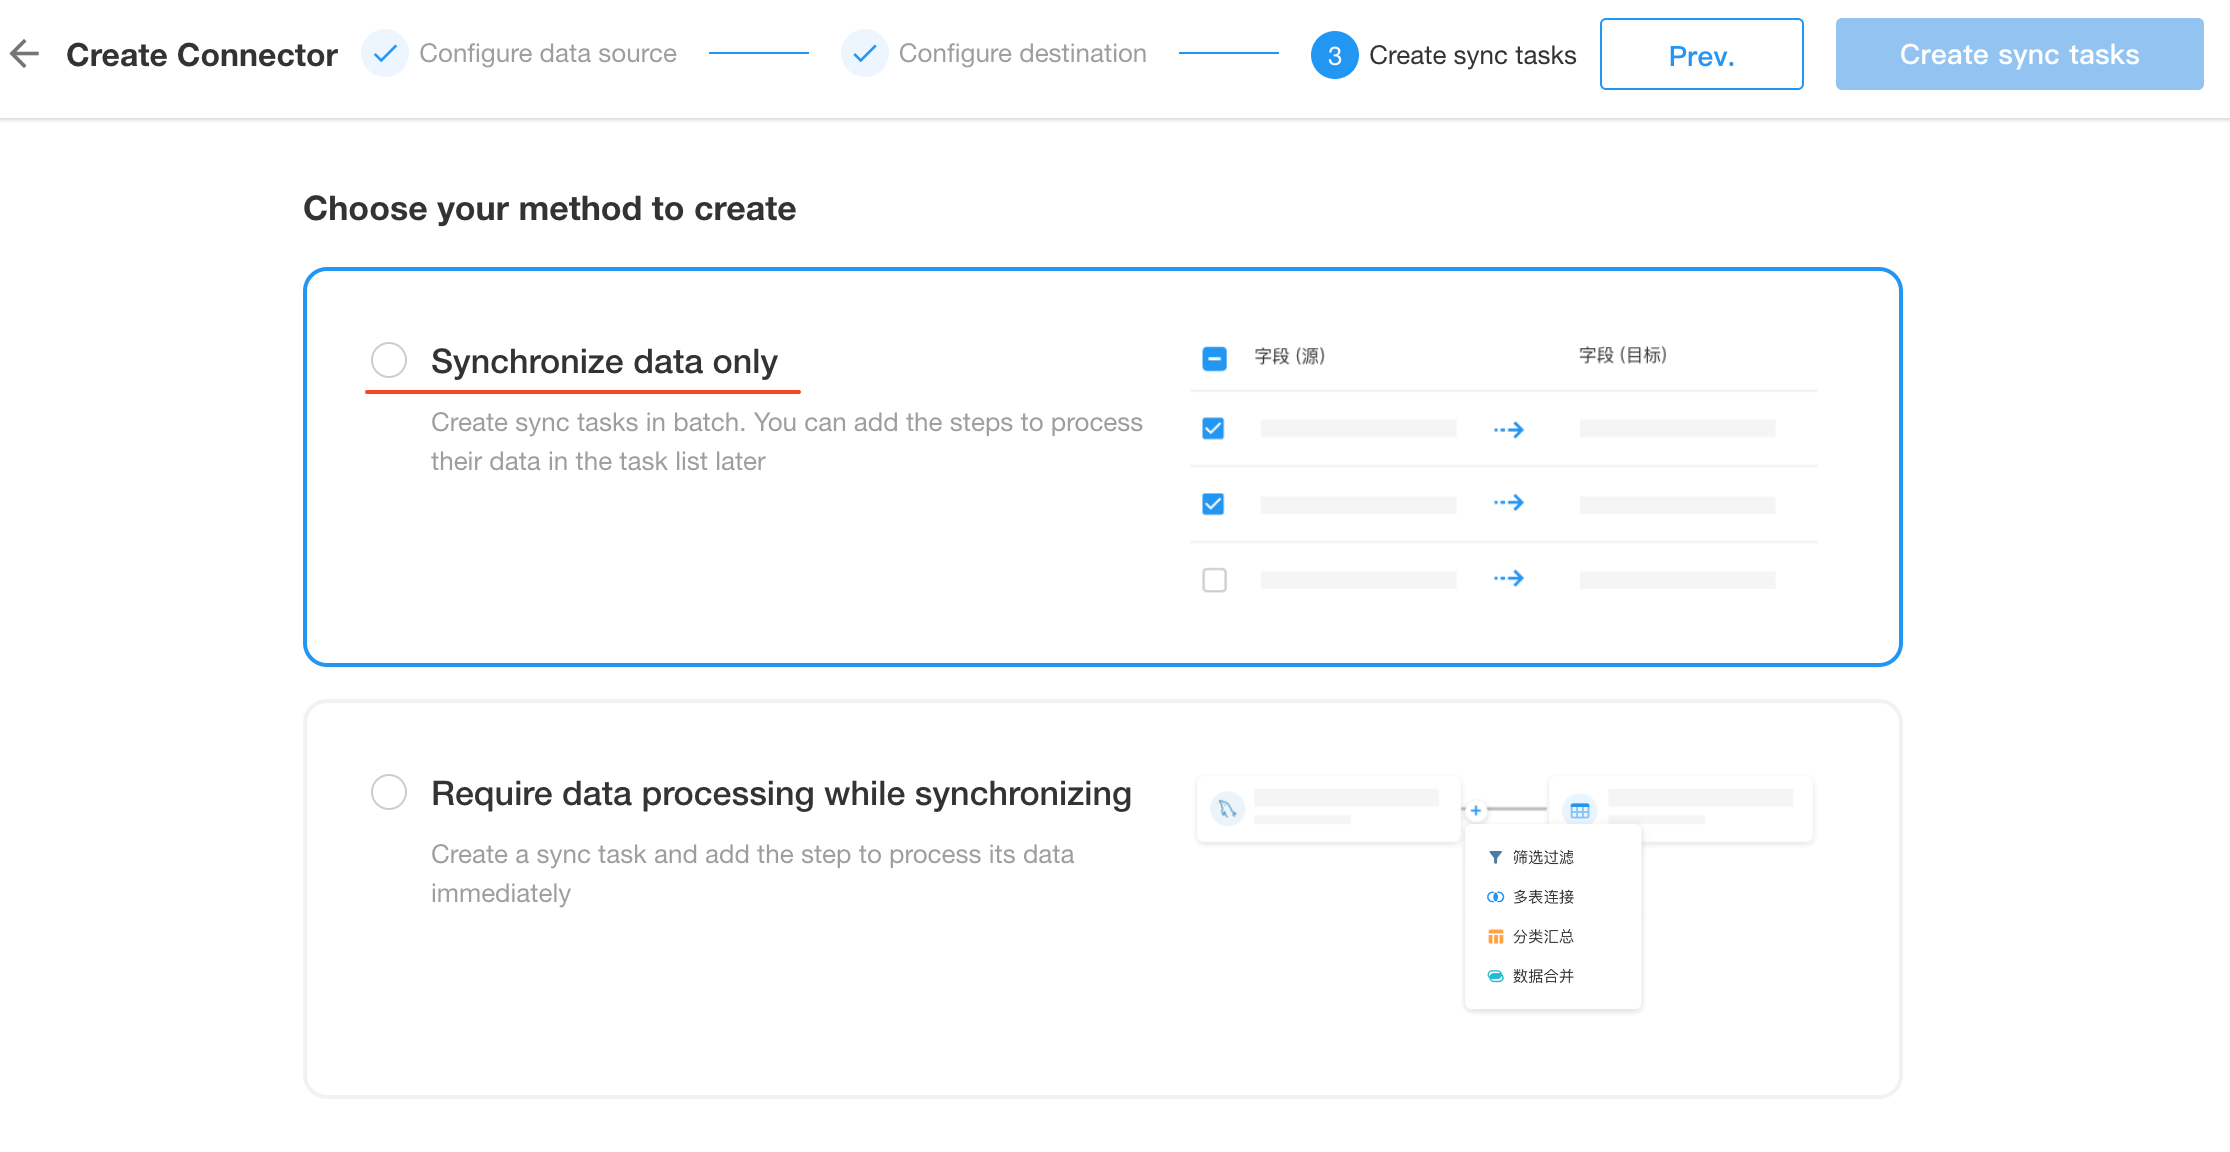
After configuring the database connection, select the data sync method.
- Only sync data
- Process data during sync
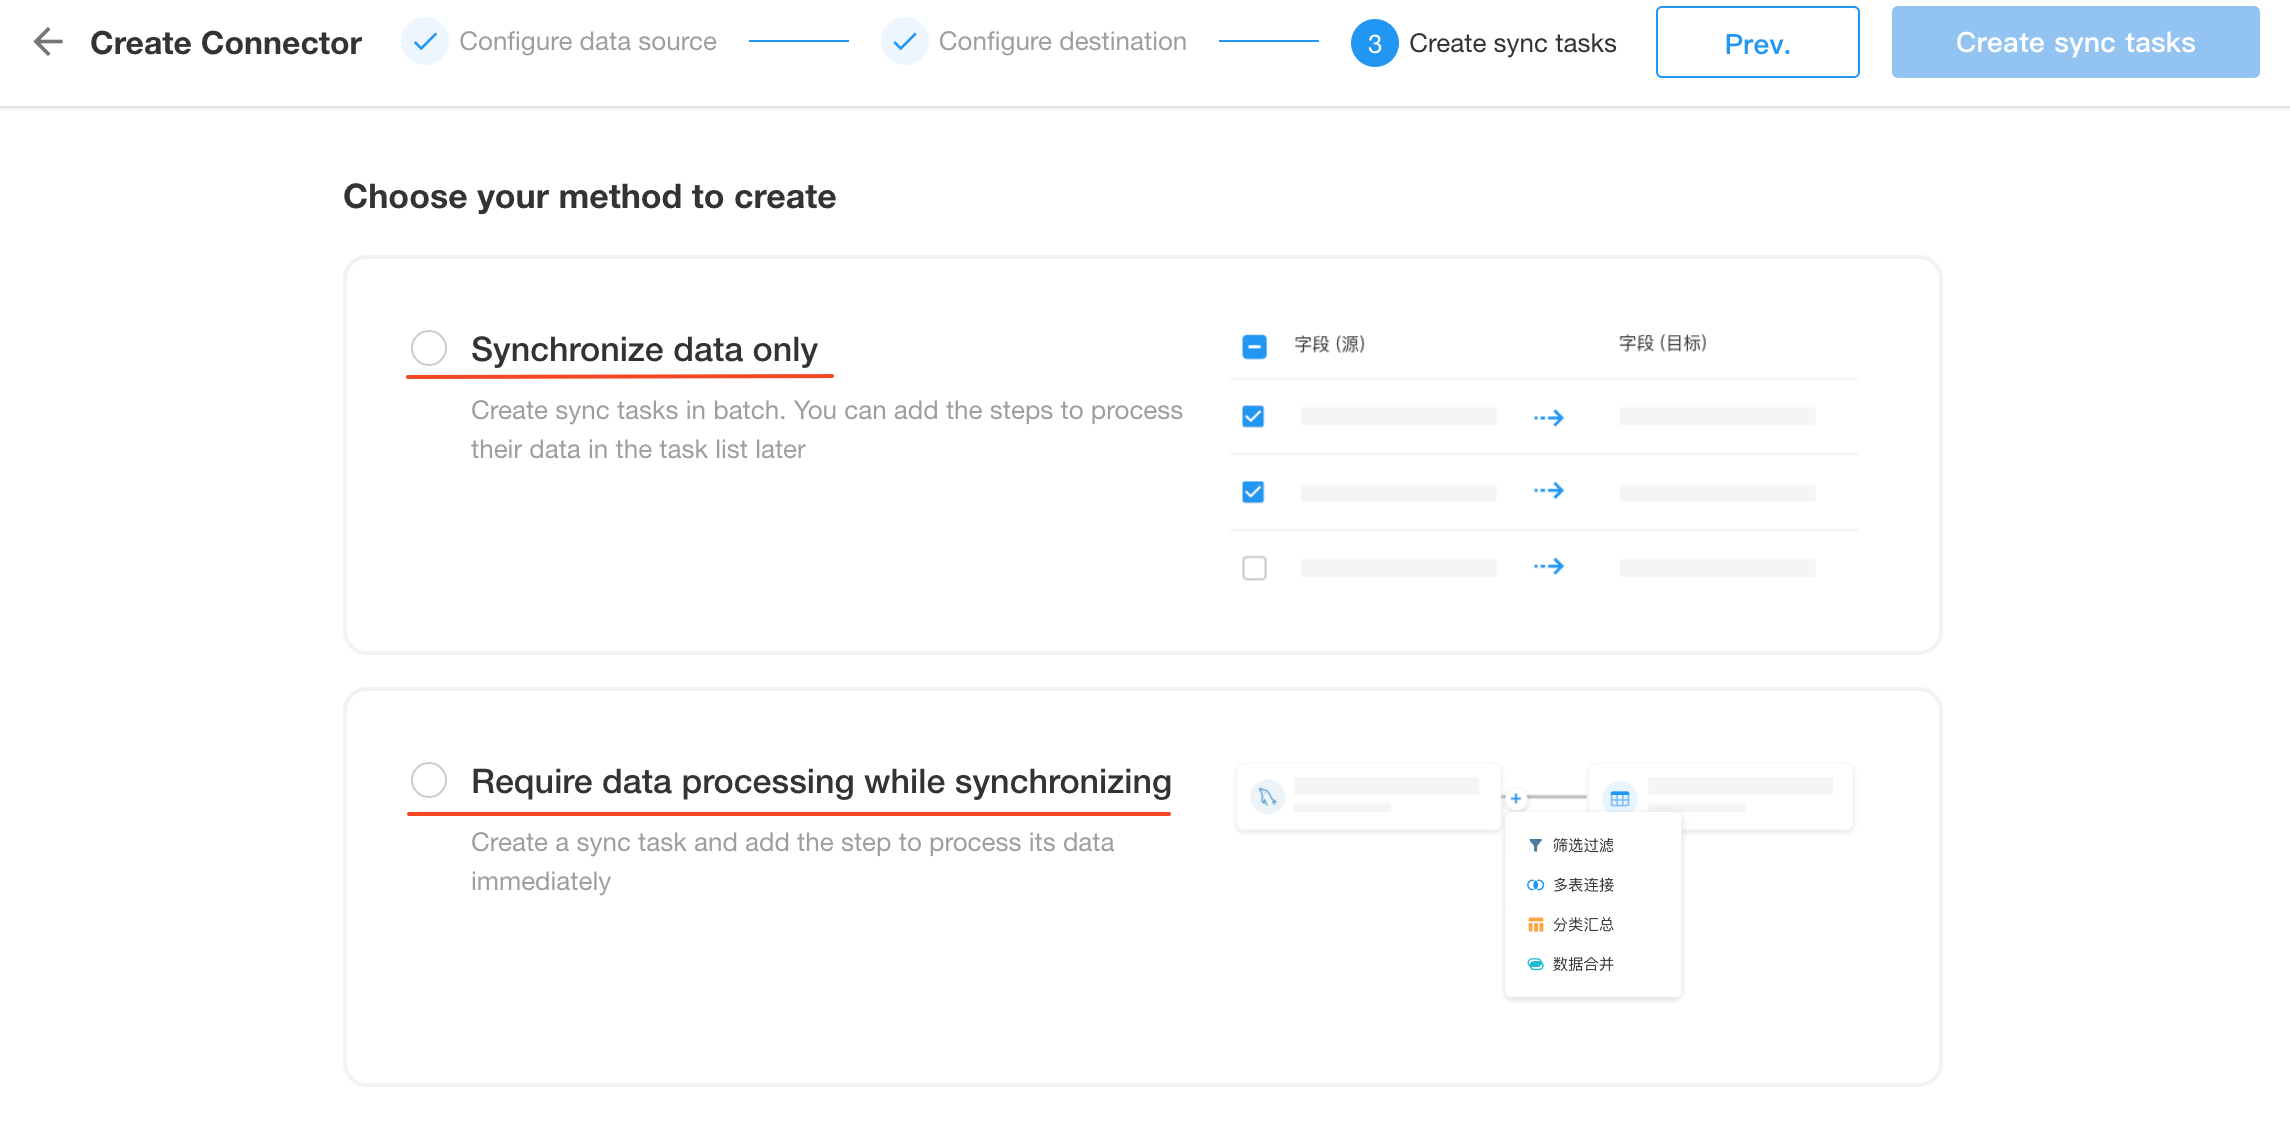
Then, configure field mapping and click "Create X sync tasks" at the top right.
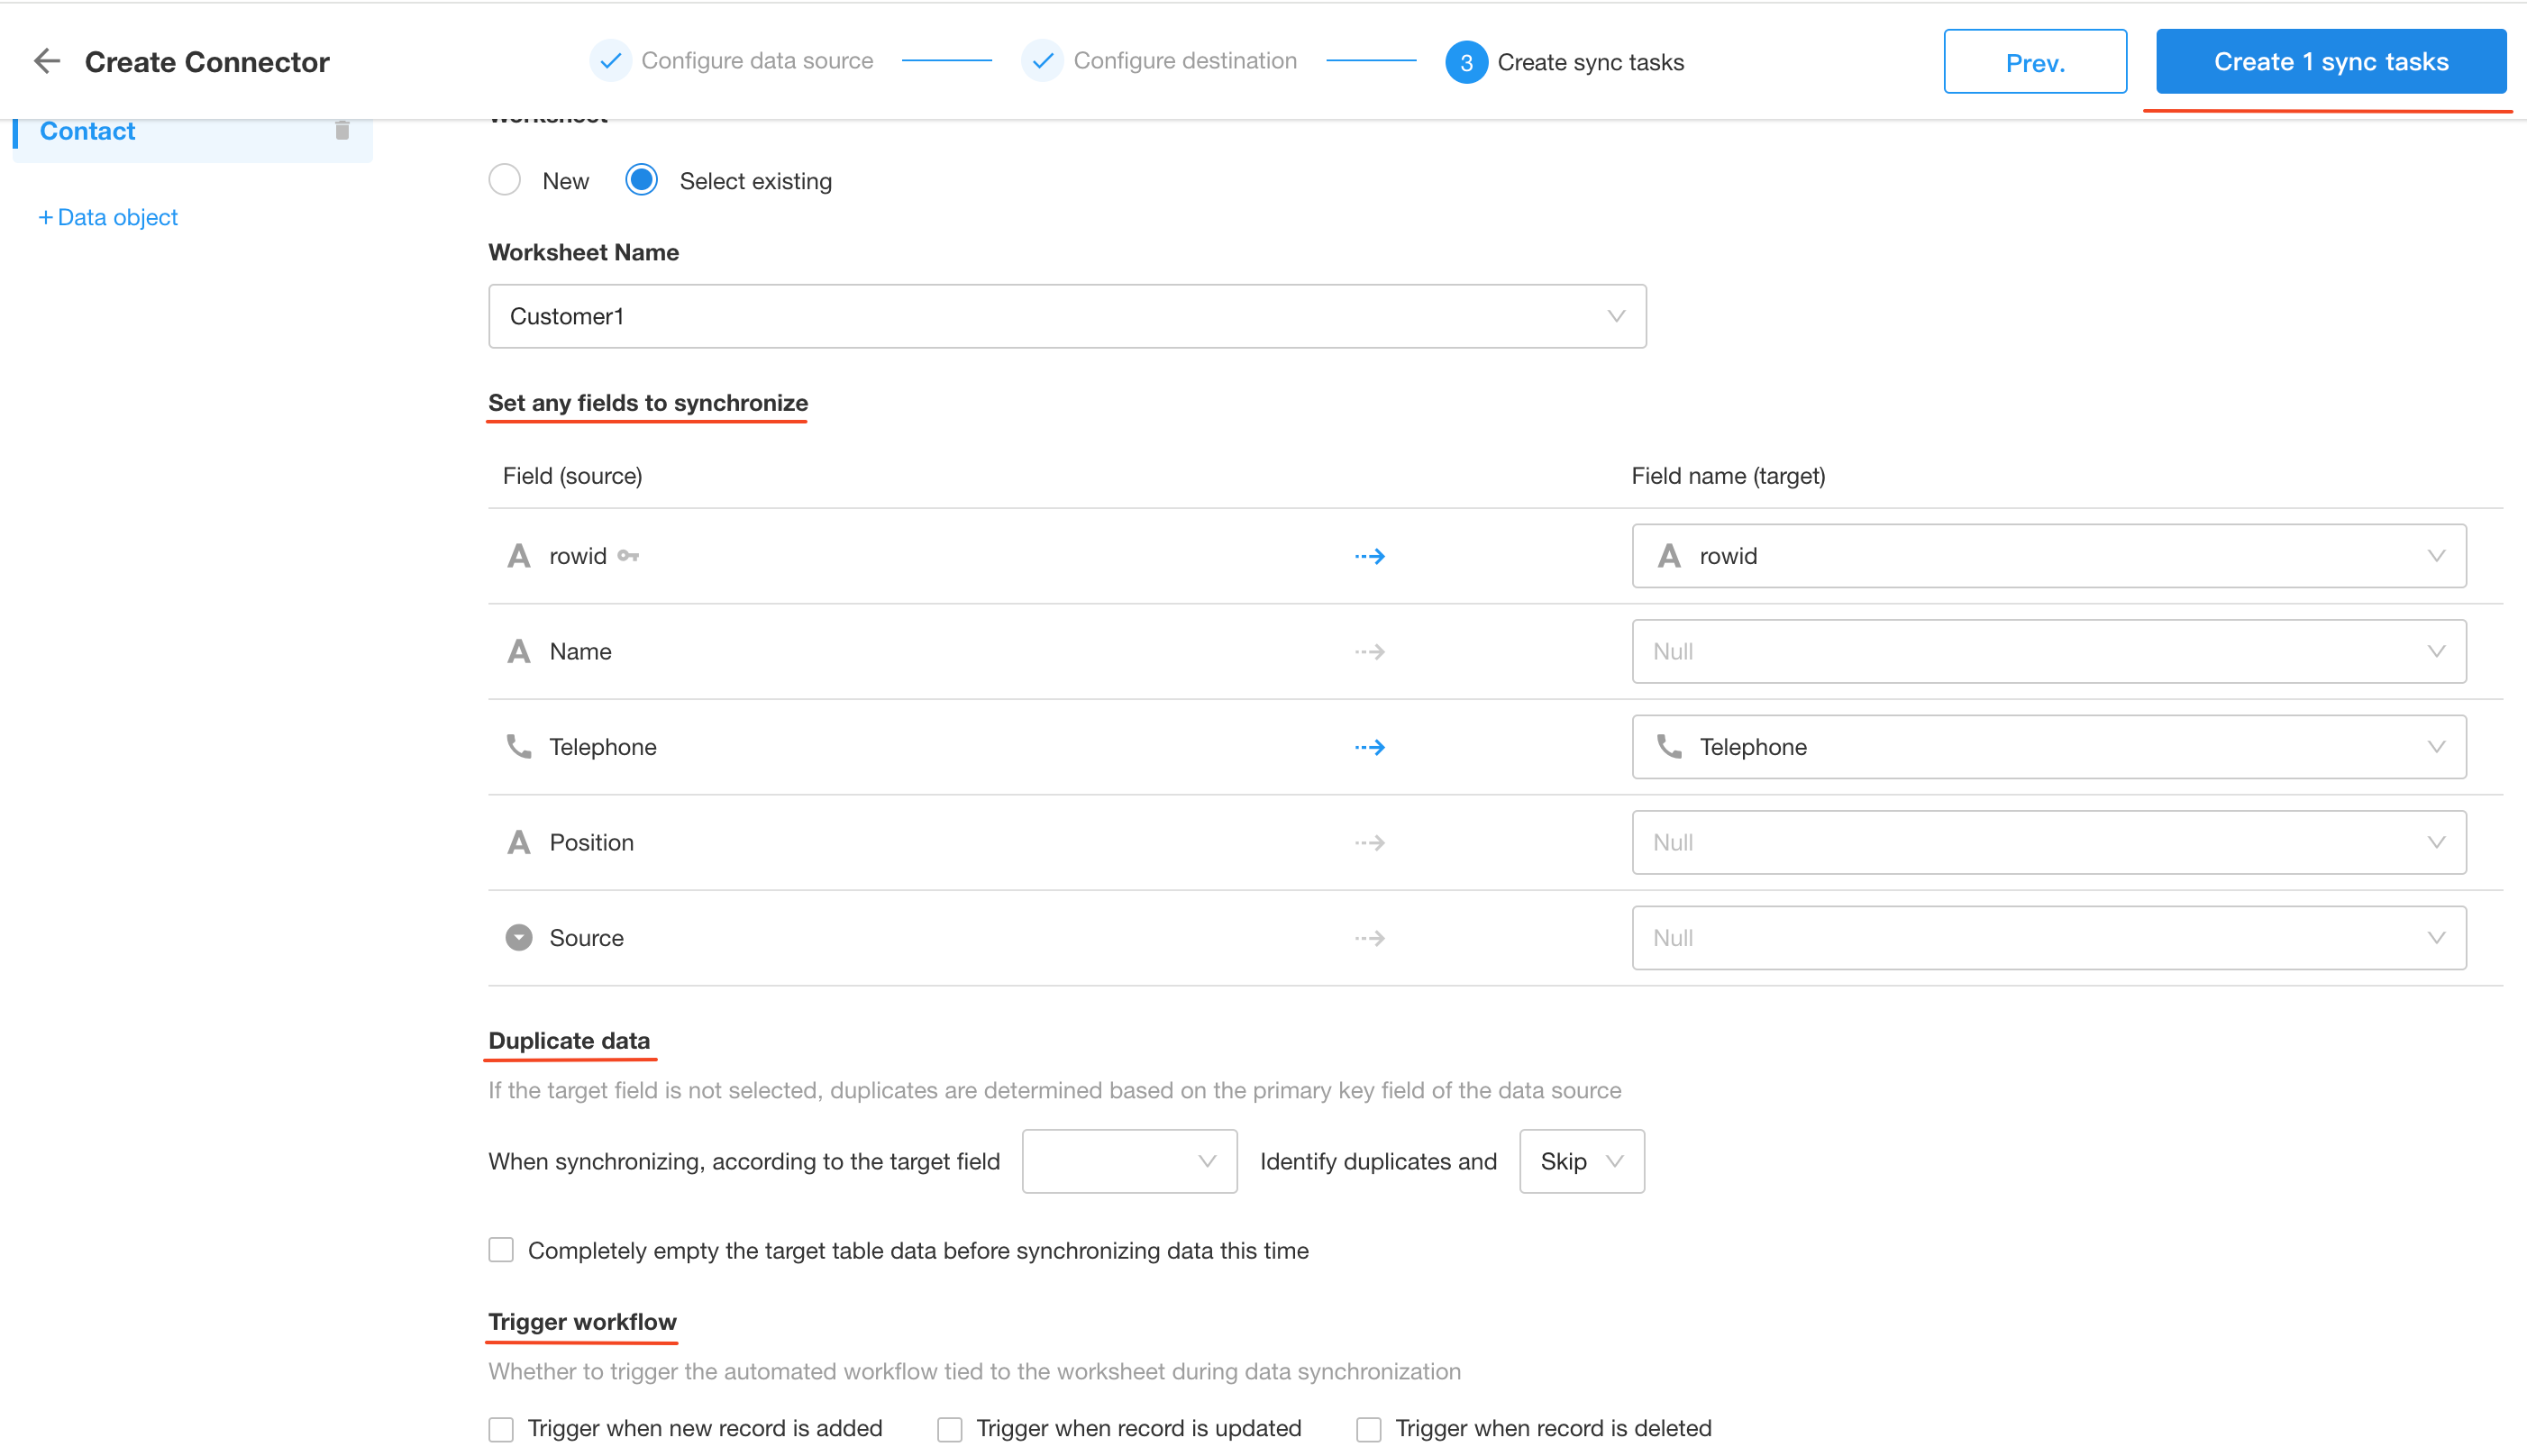
- Each data table needs to be configured separately, and a corresponding sync task will be created for each data table.
-
Check data sync
- Check if all data in the existing worksheets has been syncd
- Update records in the source data table to see if they are syncd
- Add a new record to see if it is syncd
Manage Synchronization Tasks
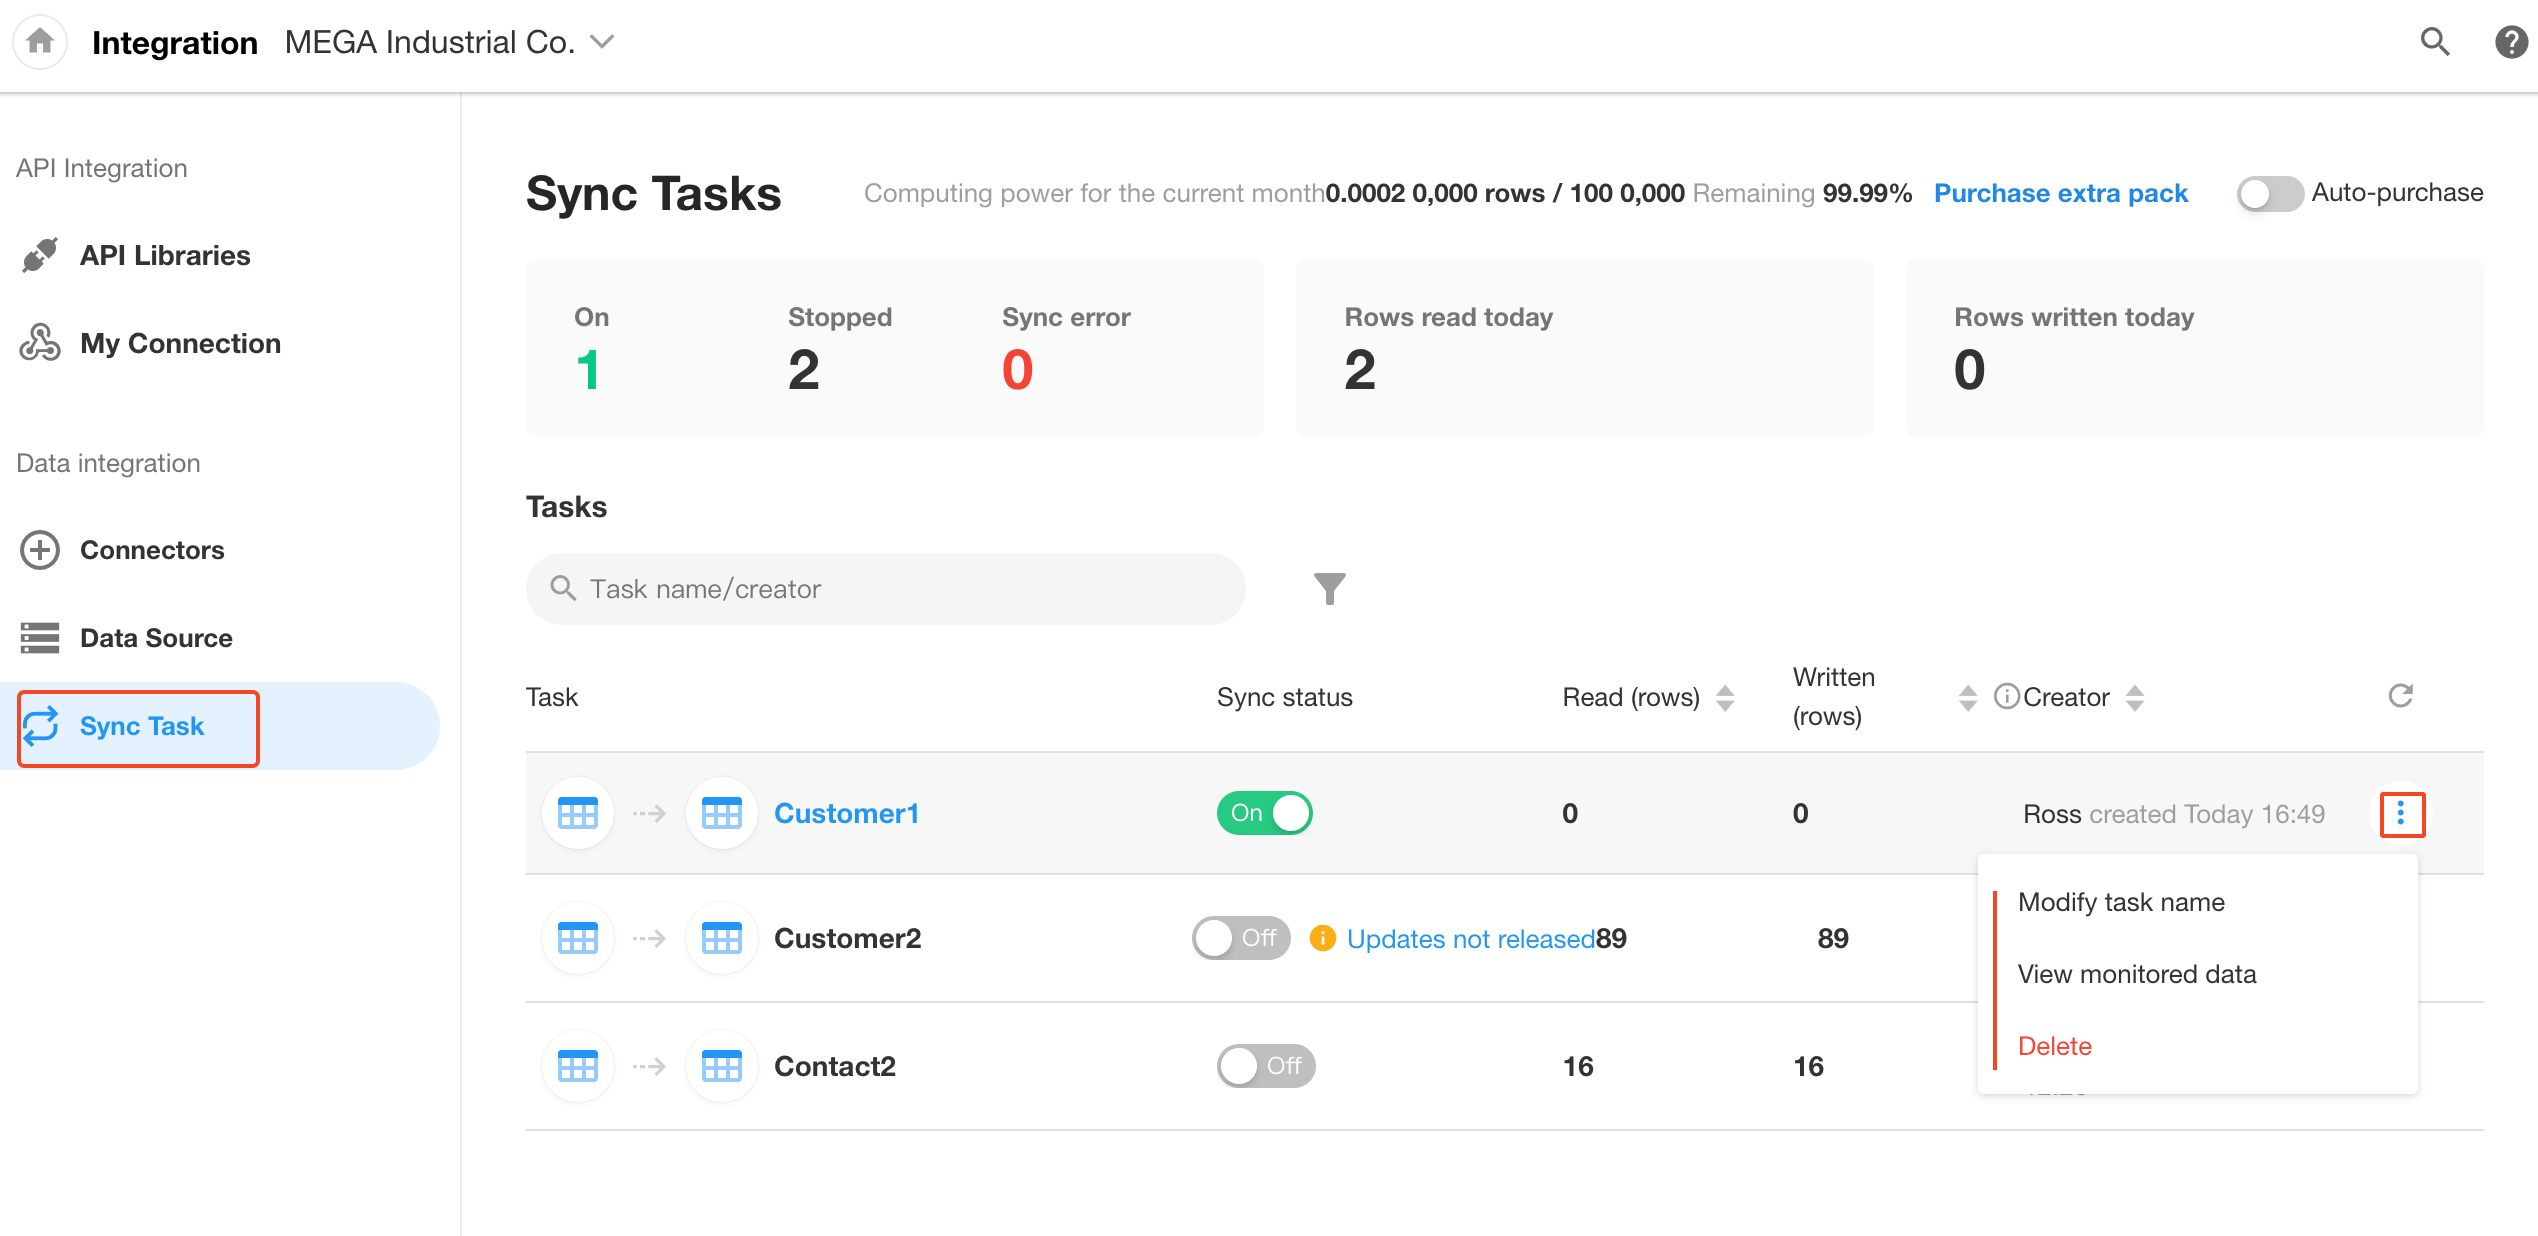
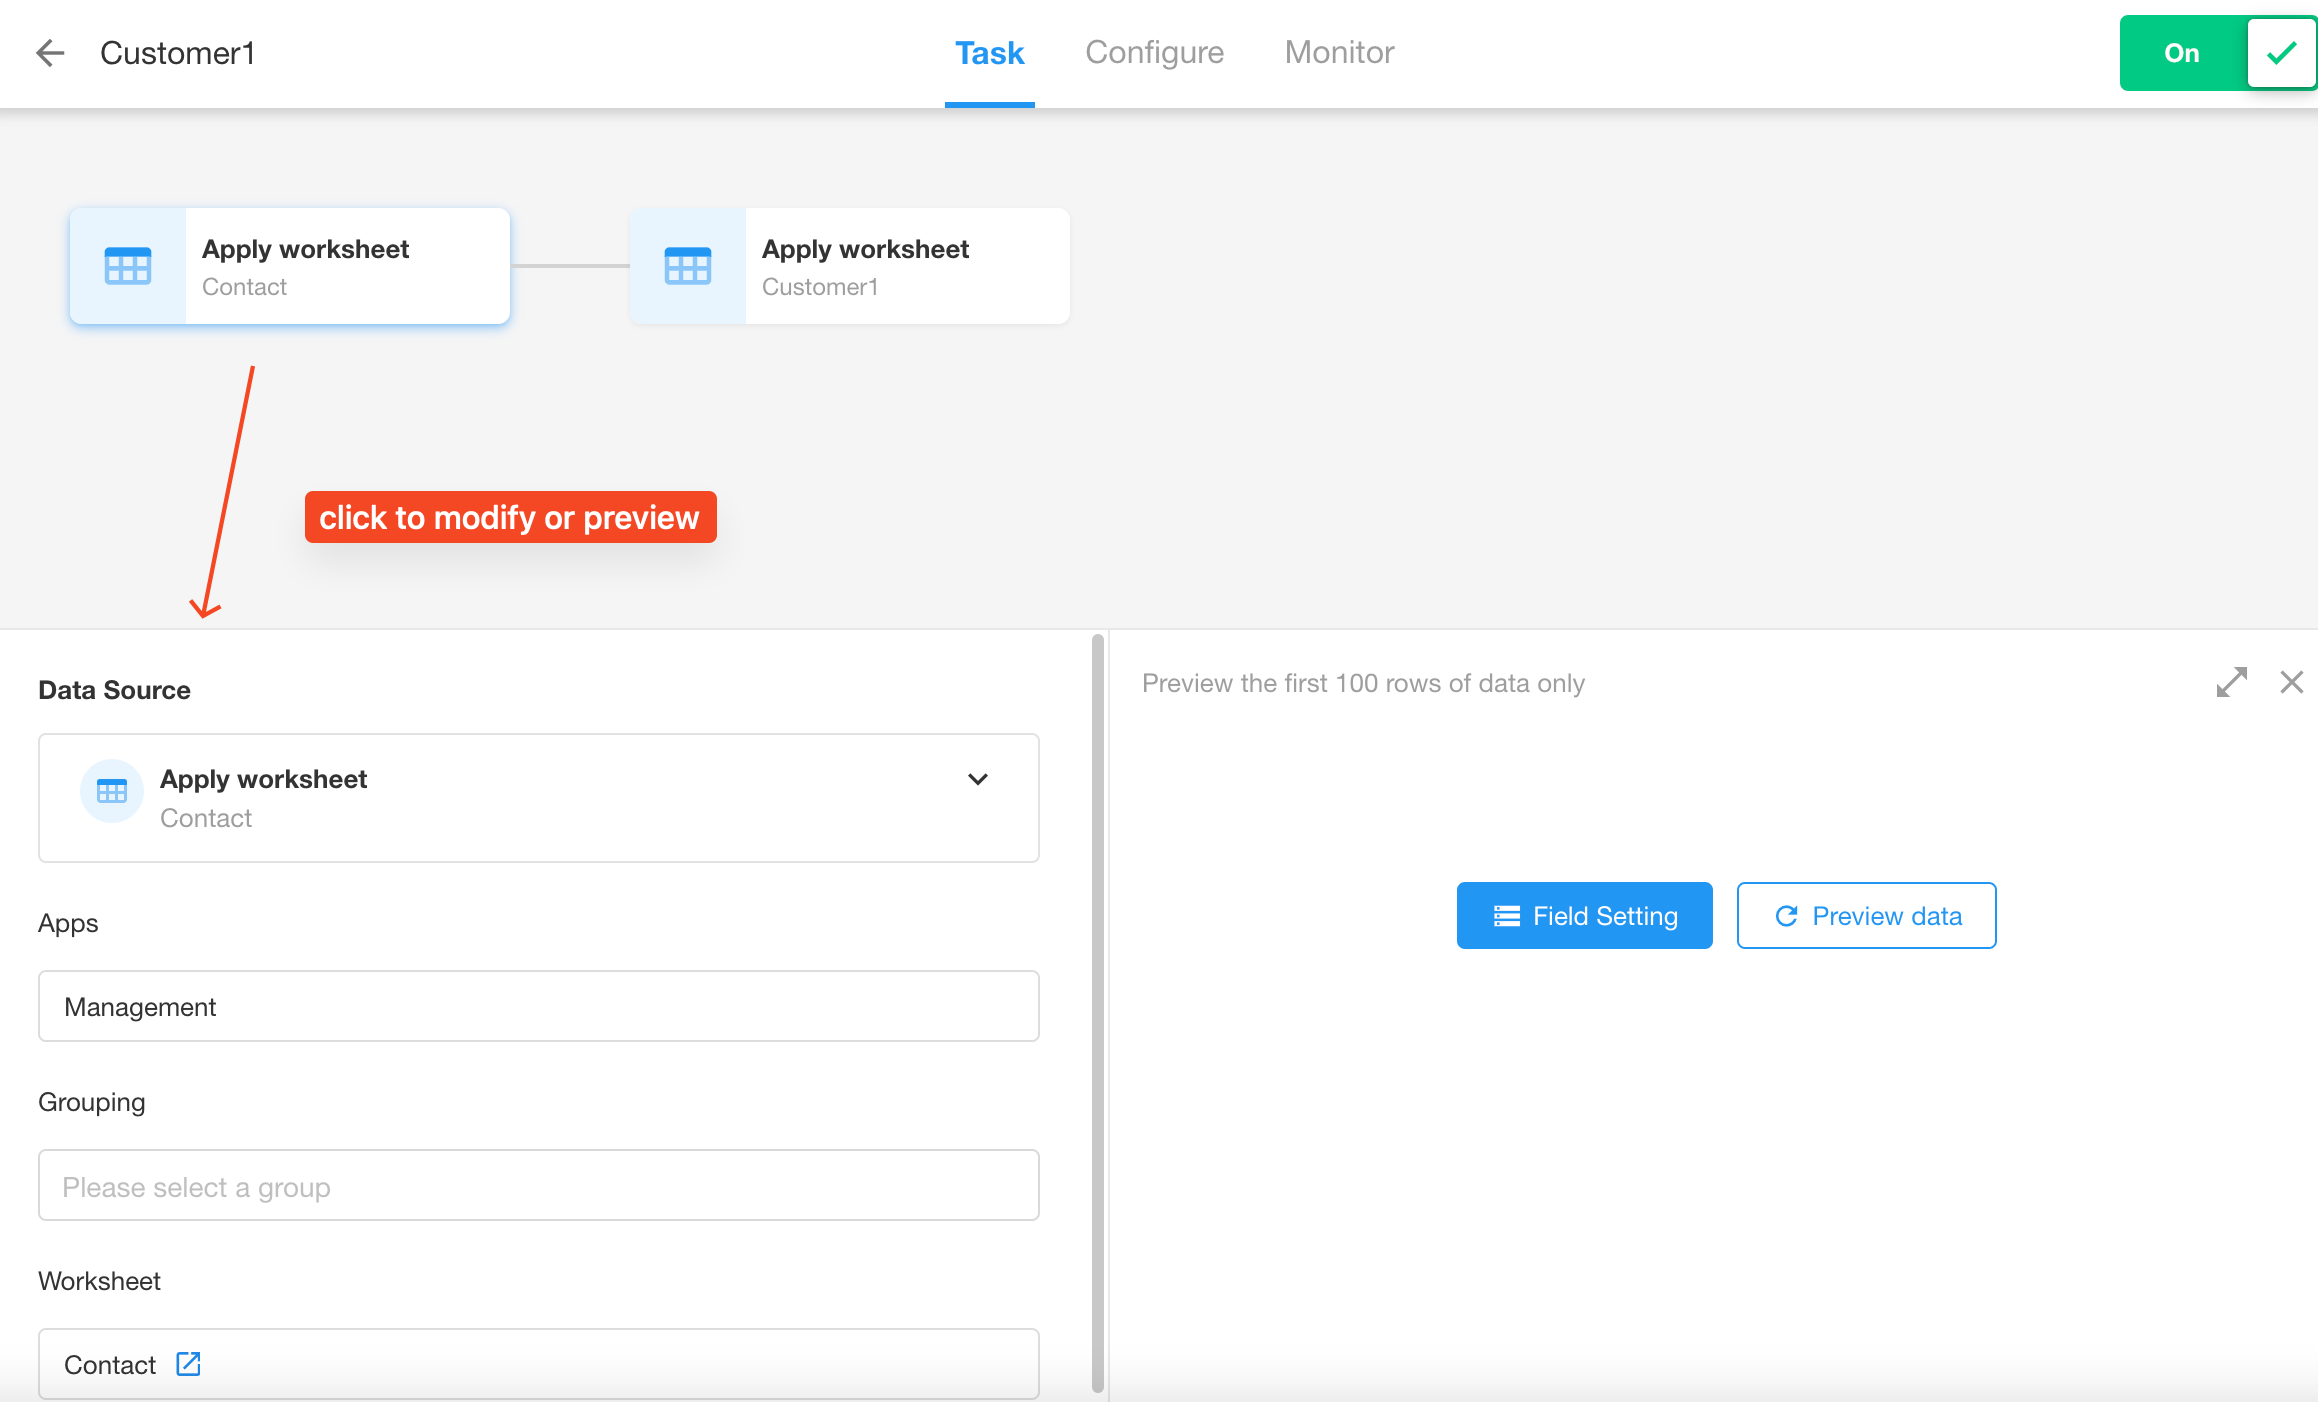
Once a sync task is created, you can adjust the relevant settings and view the task's status and syncd data. On the task monitoring page, you can also view the task's cumulative duration, cumulative amount of data read and written, as well as line graphs of the most recent data read and written.
Modify tasks
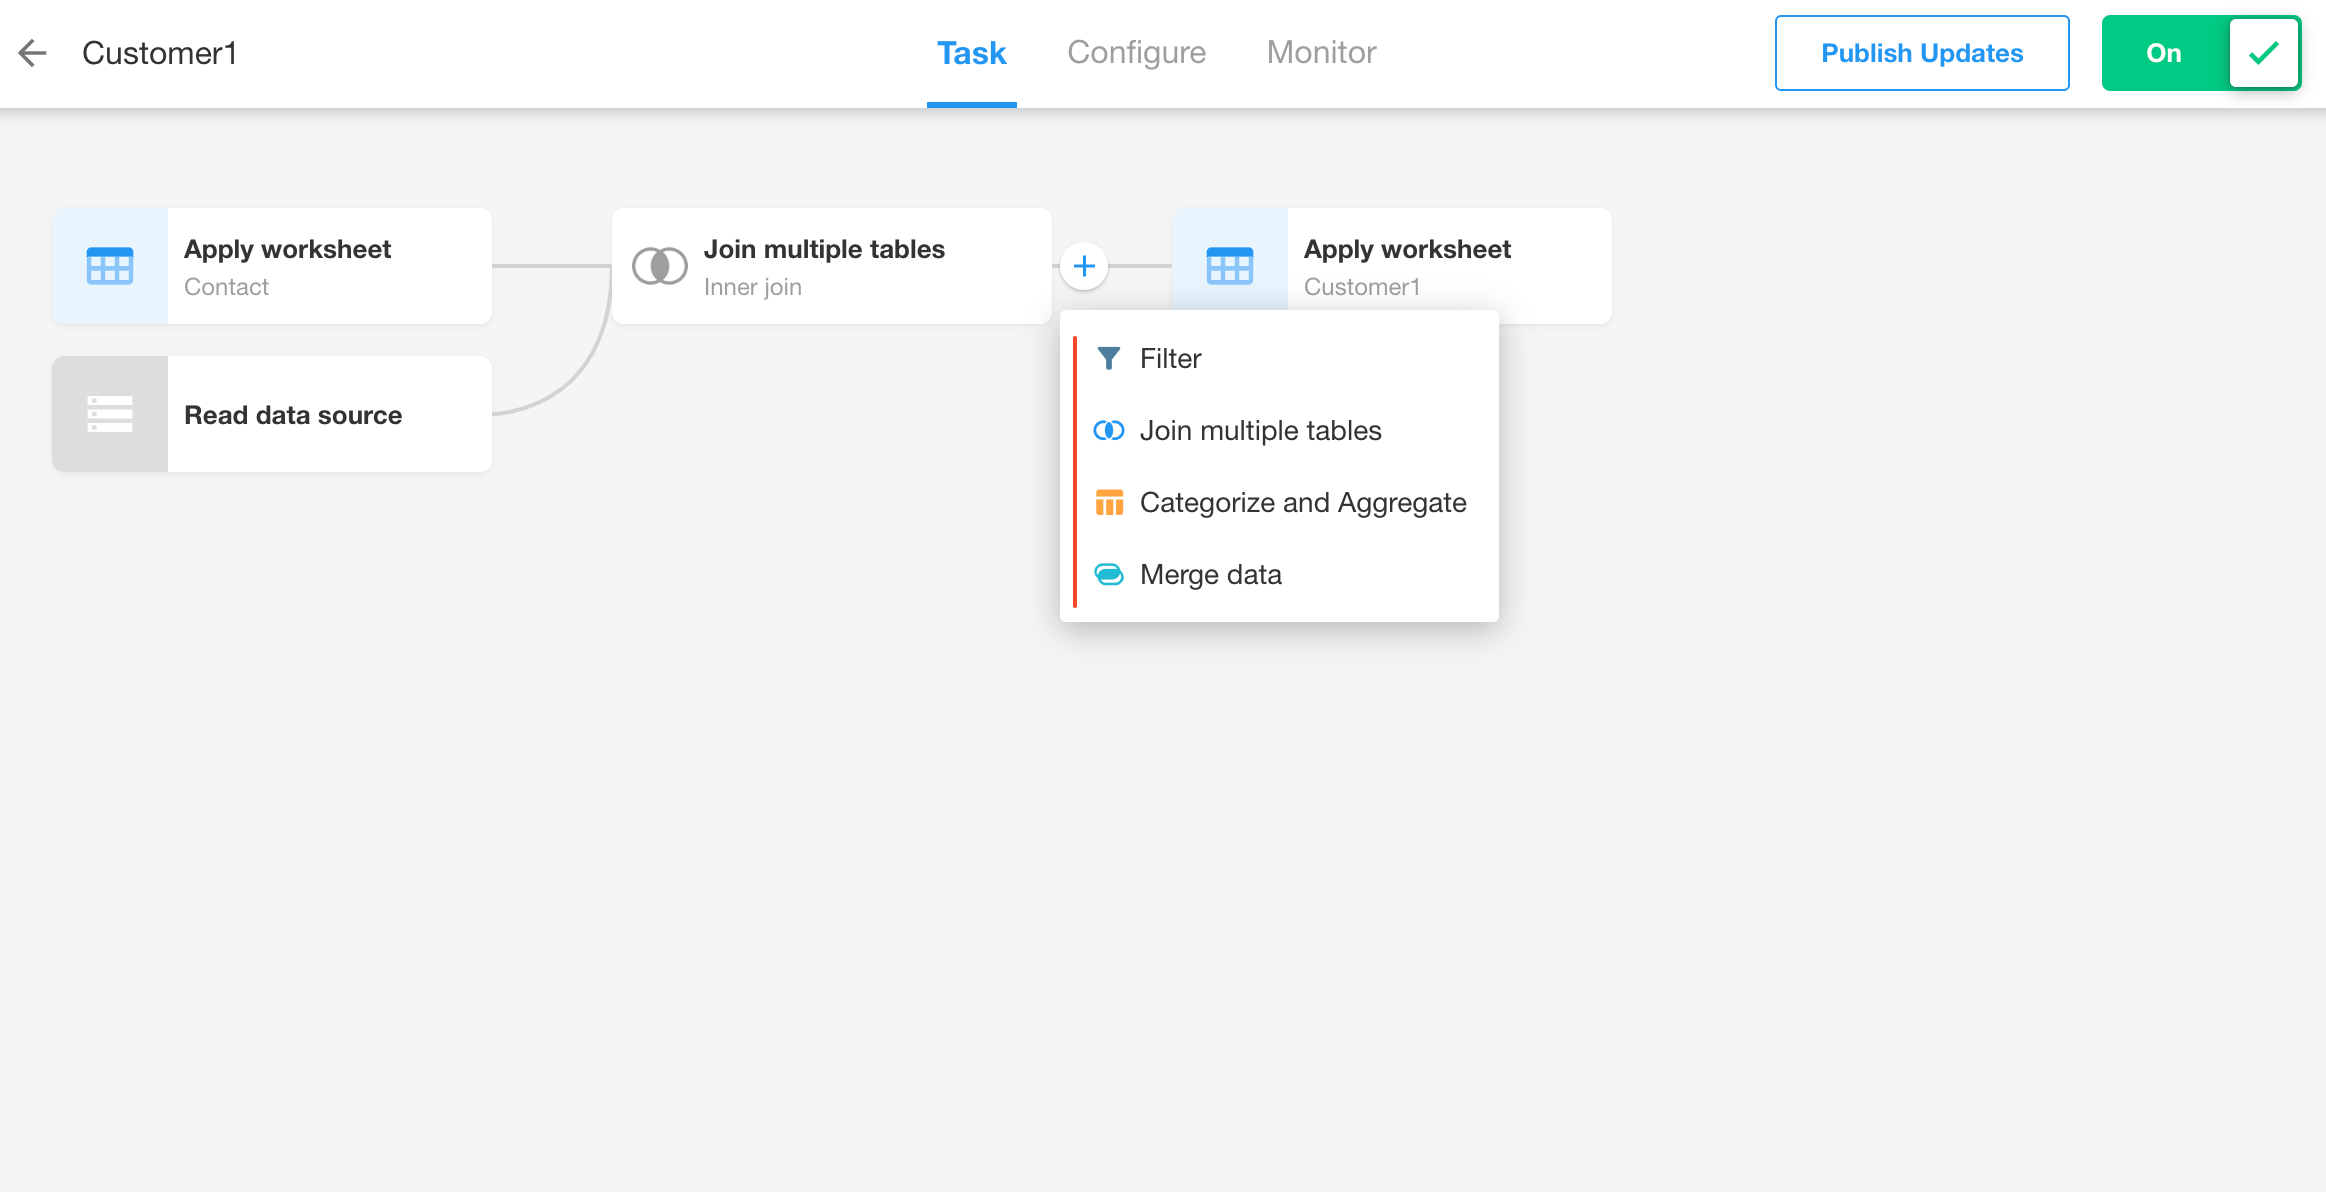
ETL data processing
ETL enhances data integration capabilities, which stands for Extract, Transform, and Load, covering the process of extracting data from a source, data processing and transformations, and finally loading it into another data source.
In data integration, there are four ways to process and sync data to the destination database.
- Synchronize after filtering
- Synchronize after multi-table connection
- Synchronize after grouping and summarizing
- Synchronize after merging data
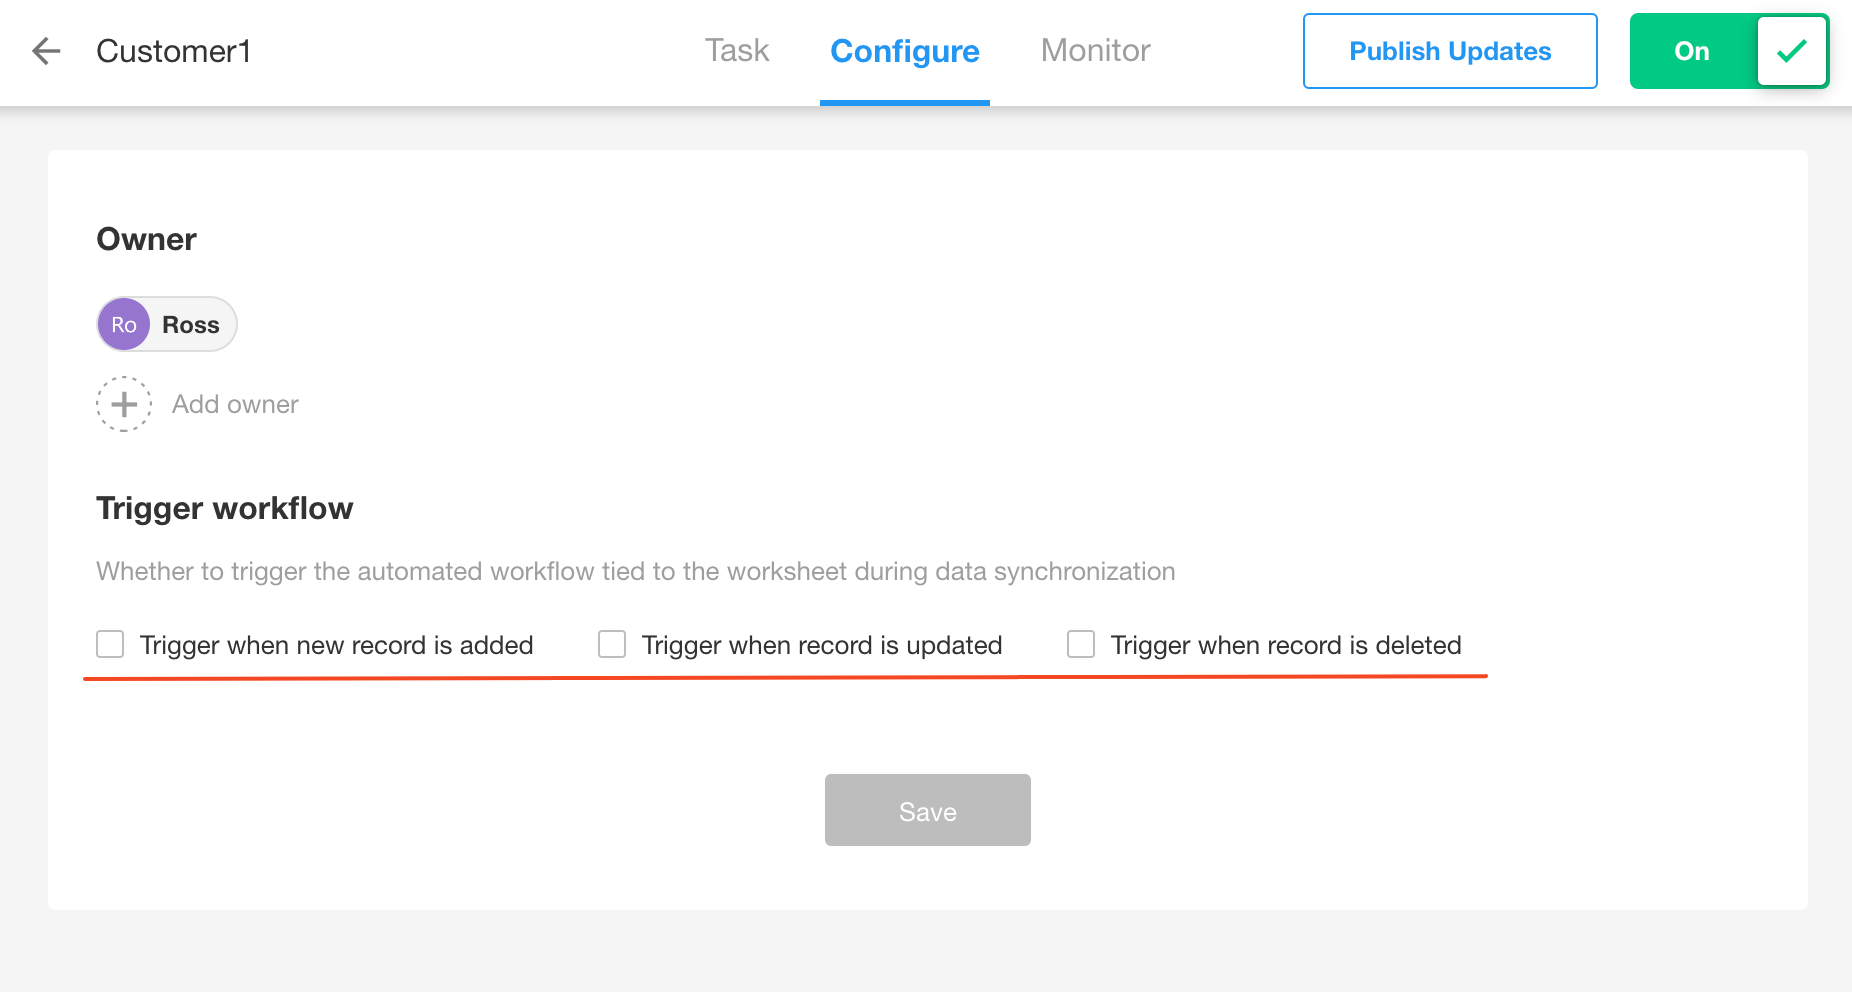
Wether to trigger workflows
By clicking the name of the sync task, you can configure whether the syncd data triggers a workflow.
Will the destination table still sync after data deletion?
-
After syncing source table data to destination Table A, if some records are deleted in Table A (not permanently deleted) and the corresponding records in the source table are modified:
-
The target worksheet will not restore these records
-
Synchronization will not be maintained
Only after restoring from the recycle bin will subsequent changes be synced
-
-
If the deleted data is permanently erased: No synchronization will be performed
-
After permanent deletion: To continue syncing these records, you can create a new sync task
Permanent deletion refers to emptying the recycle bin or further deleting records from the recycle bin.
Manage Data Sources
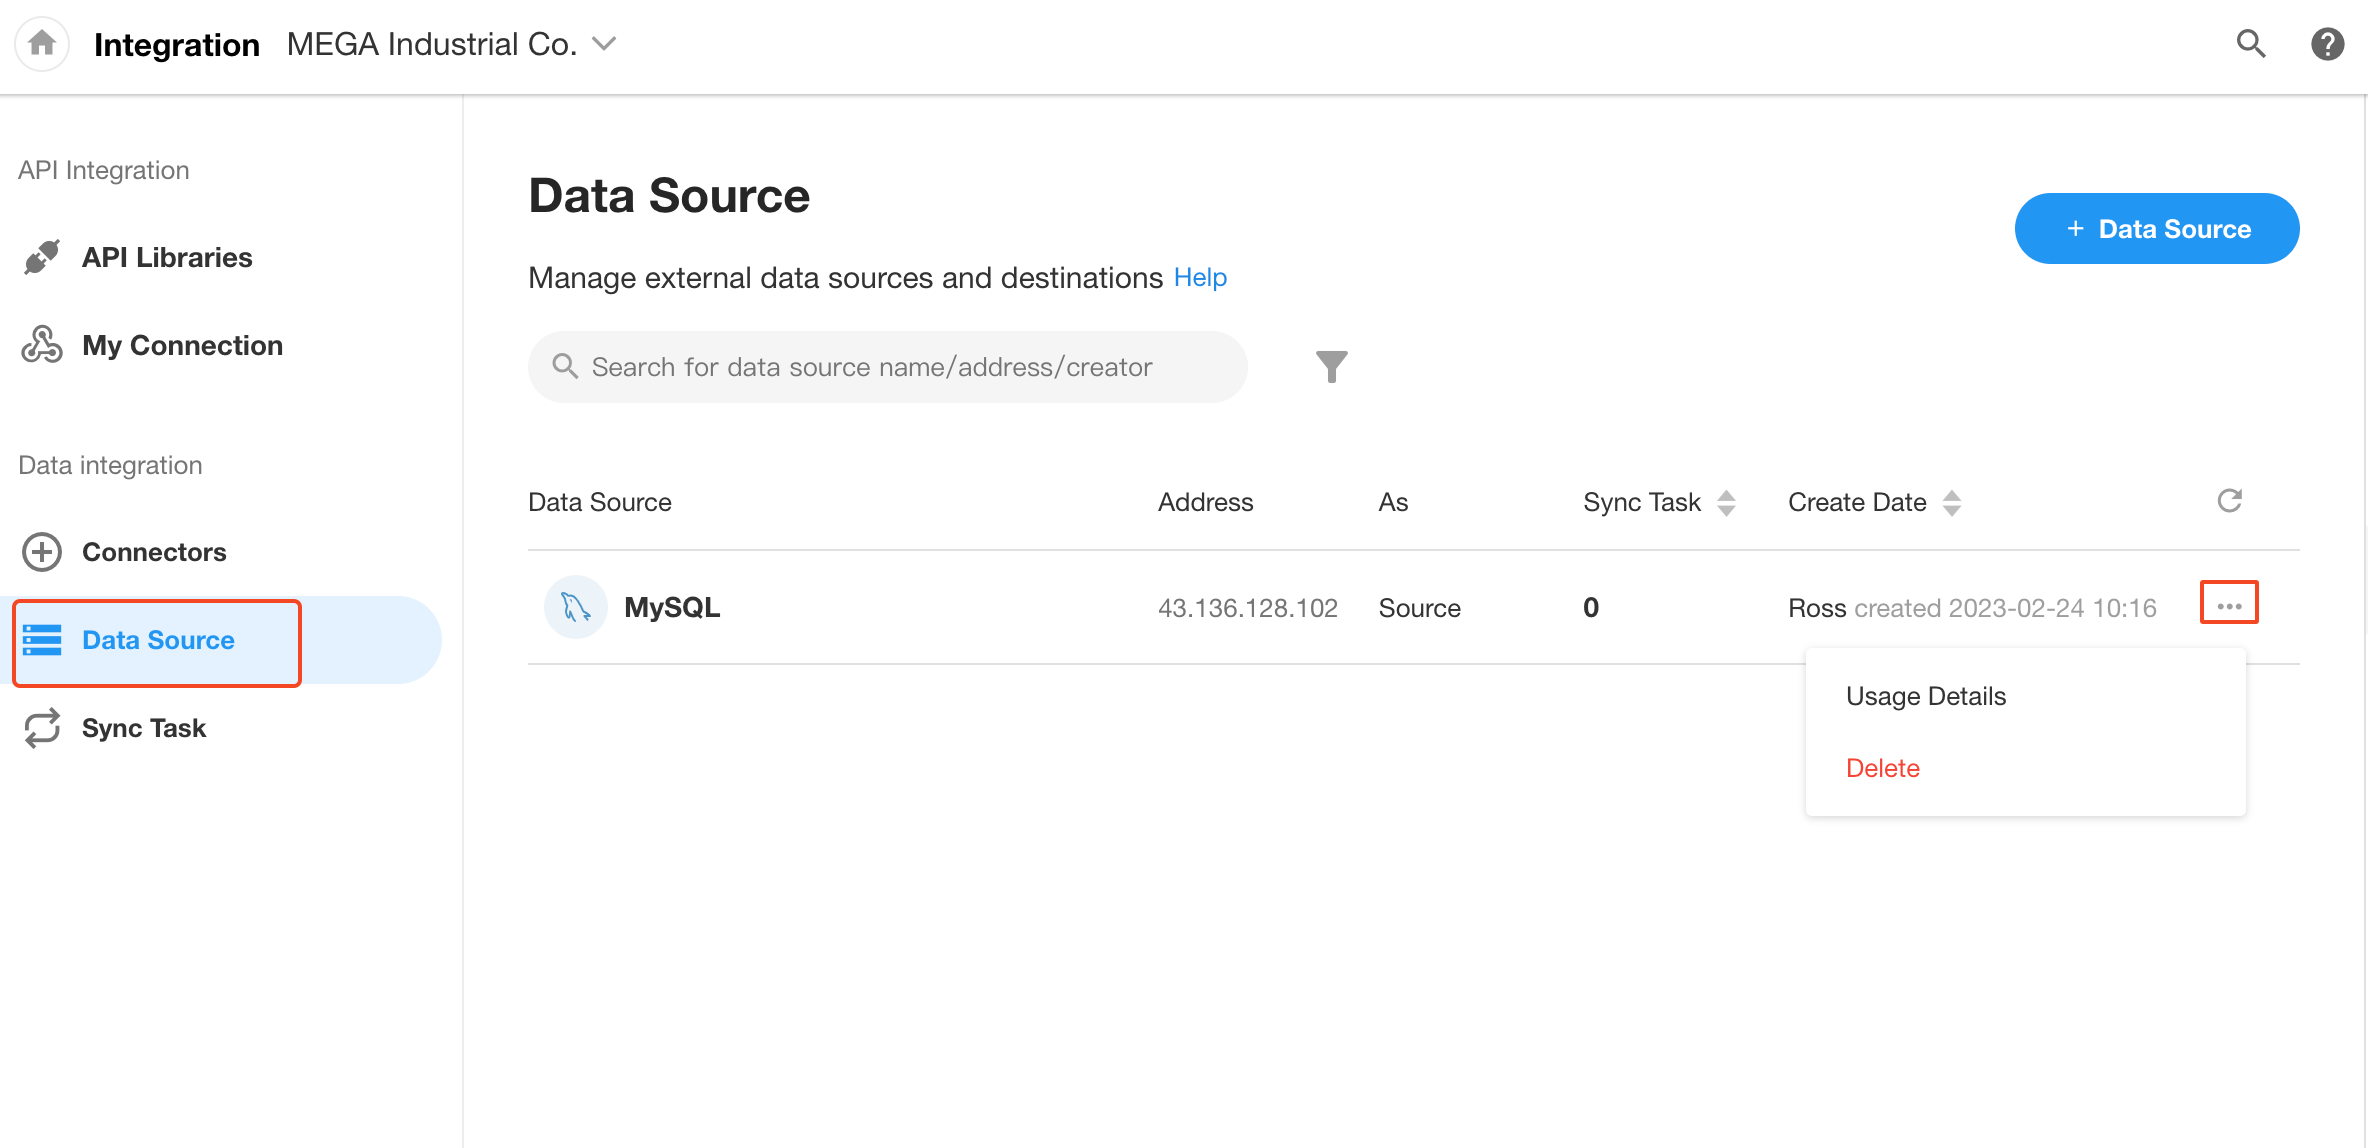
The data sources page displays all the data sources and destinations created by users when creating connectors. You can directly use the created data sources when creating other sync tasks. Rest assured, passwords entered by users when filling in connection information are encrypted and securely stored. HAP also has a robust mechanism to ensure that this information is not visible to and cannot be decrypted by developers.
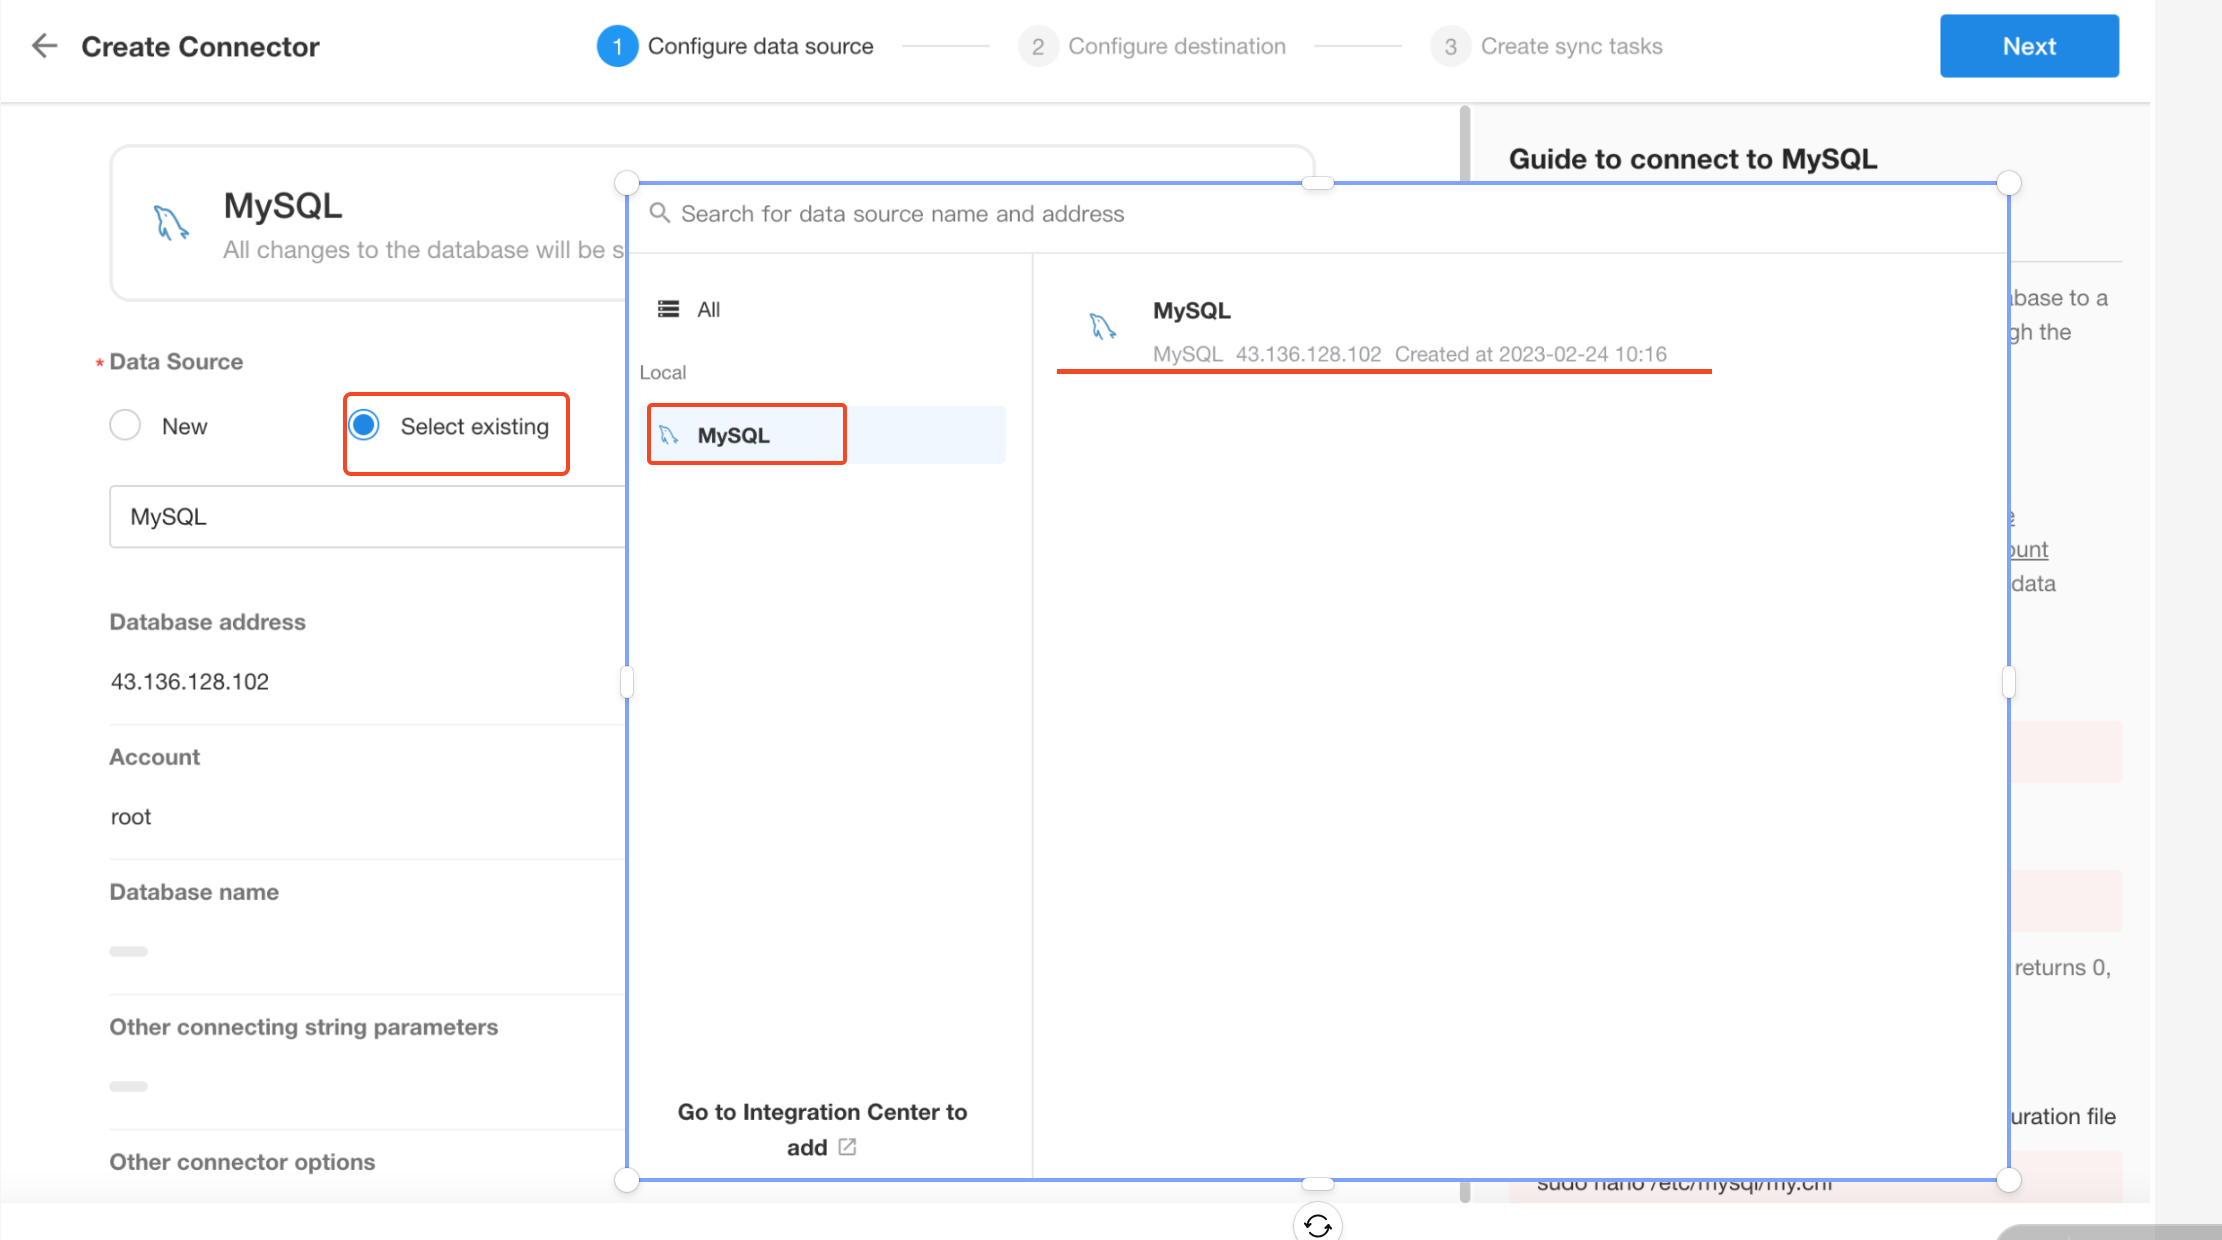
When creating a new connector, select an existing data source.
Field Sync Rules
Fields that cannot be synced
| No. | Control Name | Control Type No. | Description |
|---|---|---|---|
| 1 | Uppercase | 25 | |
| 2 | Remarks | 10010 | |
| 3 | Free Link | 21 | |
| 4 | Embedded | 45 | |
| 5 | Section | 22 | |
| 6 | Tabs | 52 | |
| 7 | Relationship | 29 | Multiple |
| 8 | Foreign Field | 30 | Sync only |
| 9 | Signature | 42 | |
| 10 | Barcode | 47 | |
| 11 | API Query | 49 | Query Button |
| 12 | OCR | 43 | |
| 13 | Query Records | 51 |
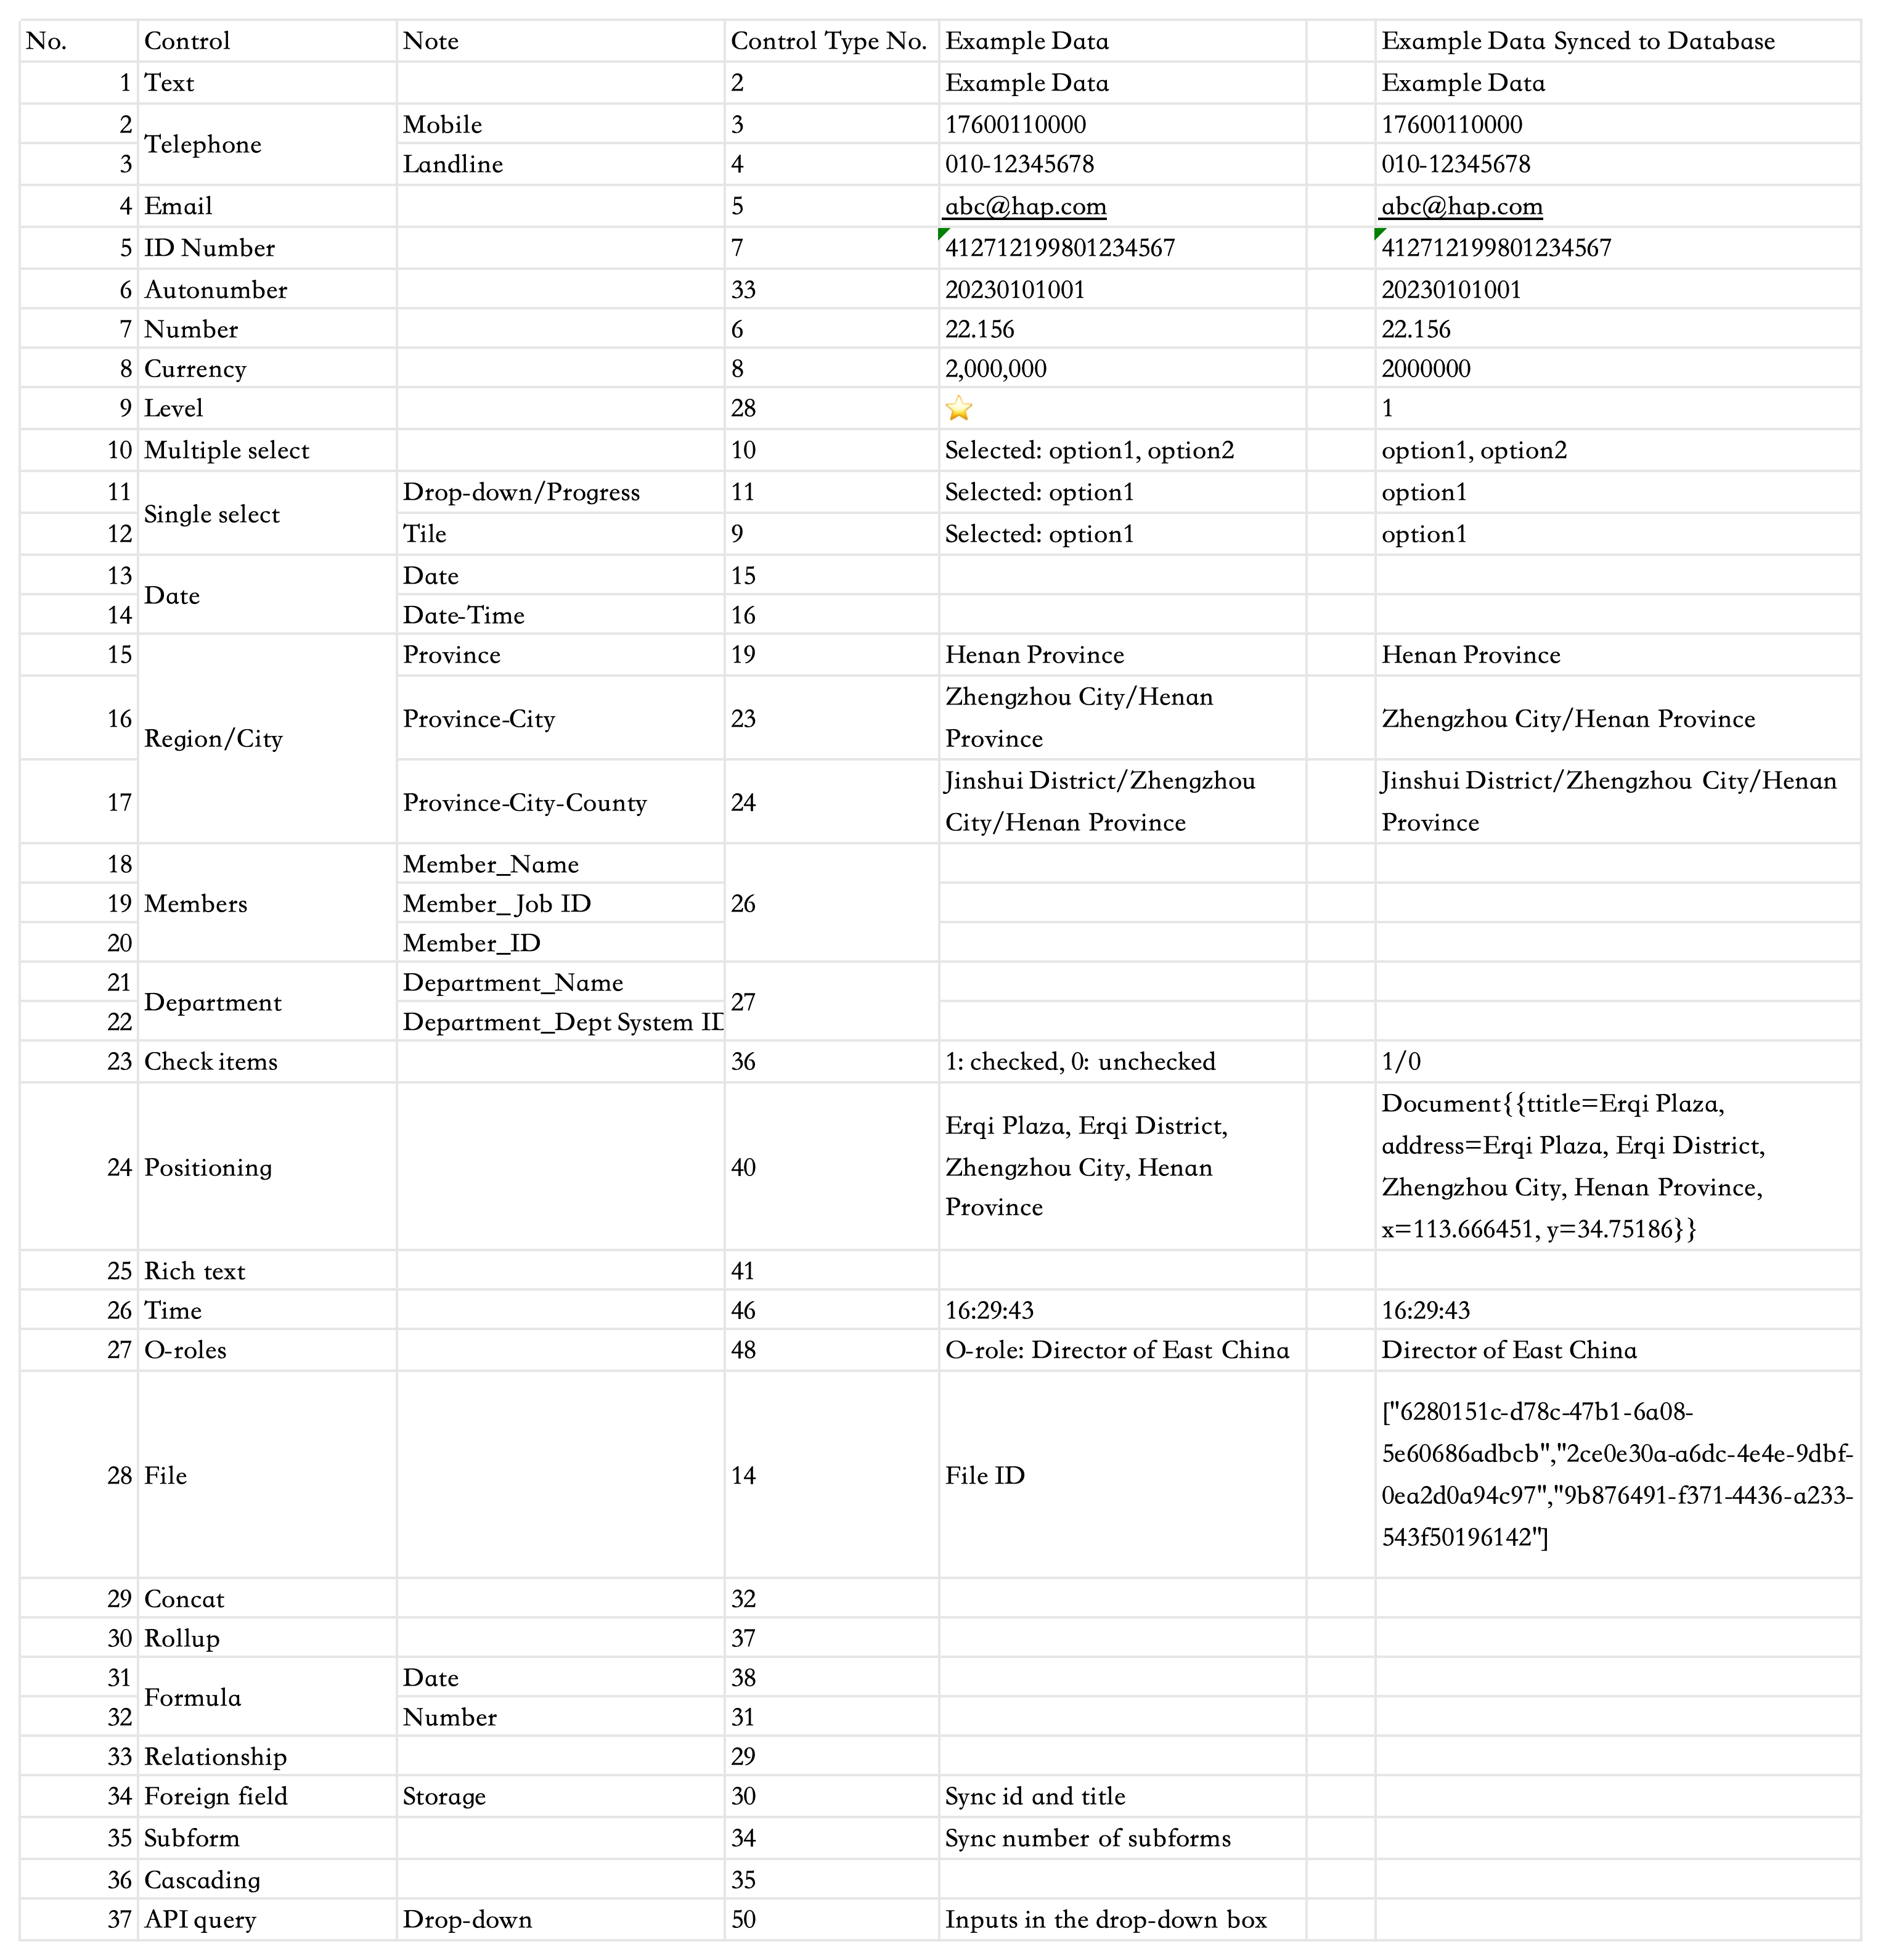
Field Sync Examples
System Fields Supported for Sync
| No. | Control Type | Field Name | Control Type No. | Field ID (system fields have fixed values) |
|---|---|---|---|---|
| 1 | Text | Record ID | 2 | rowid |
| 2 | Members | Owner | 26 | ownerid |
| 3 | Members | Creator | 26 | caid |
| 4 | Date/Time | Creation Time | 16 | ctime |
| 5 | Date/Time | Last Modified Time | 16 | utime |
| 6 | Members | Last Modified By | 26 | uaid |
| 7 | Text | Workflow Name | 2 | wfname |
| 8 | Members | Node Owner | 26 | wfcuaids |
| 9 | Members | Initiator | 26 | wfcaid |
| 10 | Date/Time | Start Time | 16 | wfctime |
| 11 | Date/Time | Node Start Time | 16 | wfrtime |
| 12 | Formula (Date) | Remaining Time | 38 | wfftime |
| 13 | Single select | Workflow Status | 11 | wfstatus |
Examples of Data Integration
- Example 1: Synchronize data from one worksheet to another
- Example 2: Synchronize data from local MySQL to a worksheet
Example 1: Synchronize Data from One Worksheet to Another
Within an organization, data from one worksheet can be syncd to a worksheet in the current application or another application.
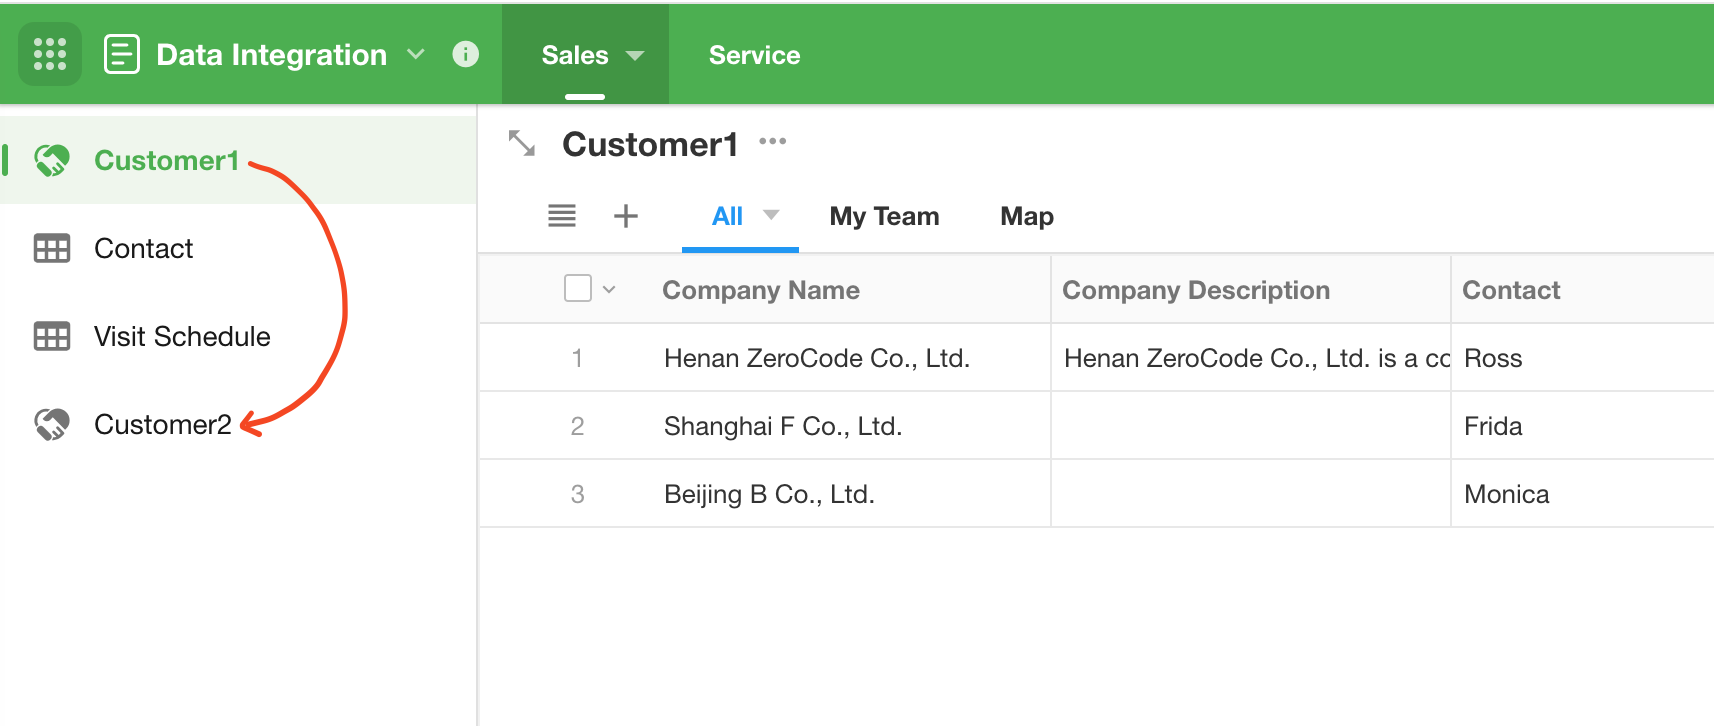
For example: Synchronize data from Customer 1 worksheet to Customer 2 worksheet.
Create a connector
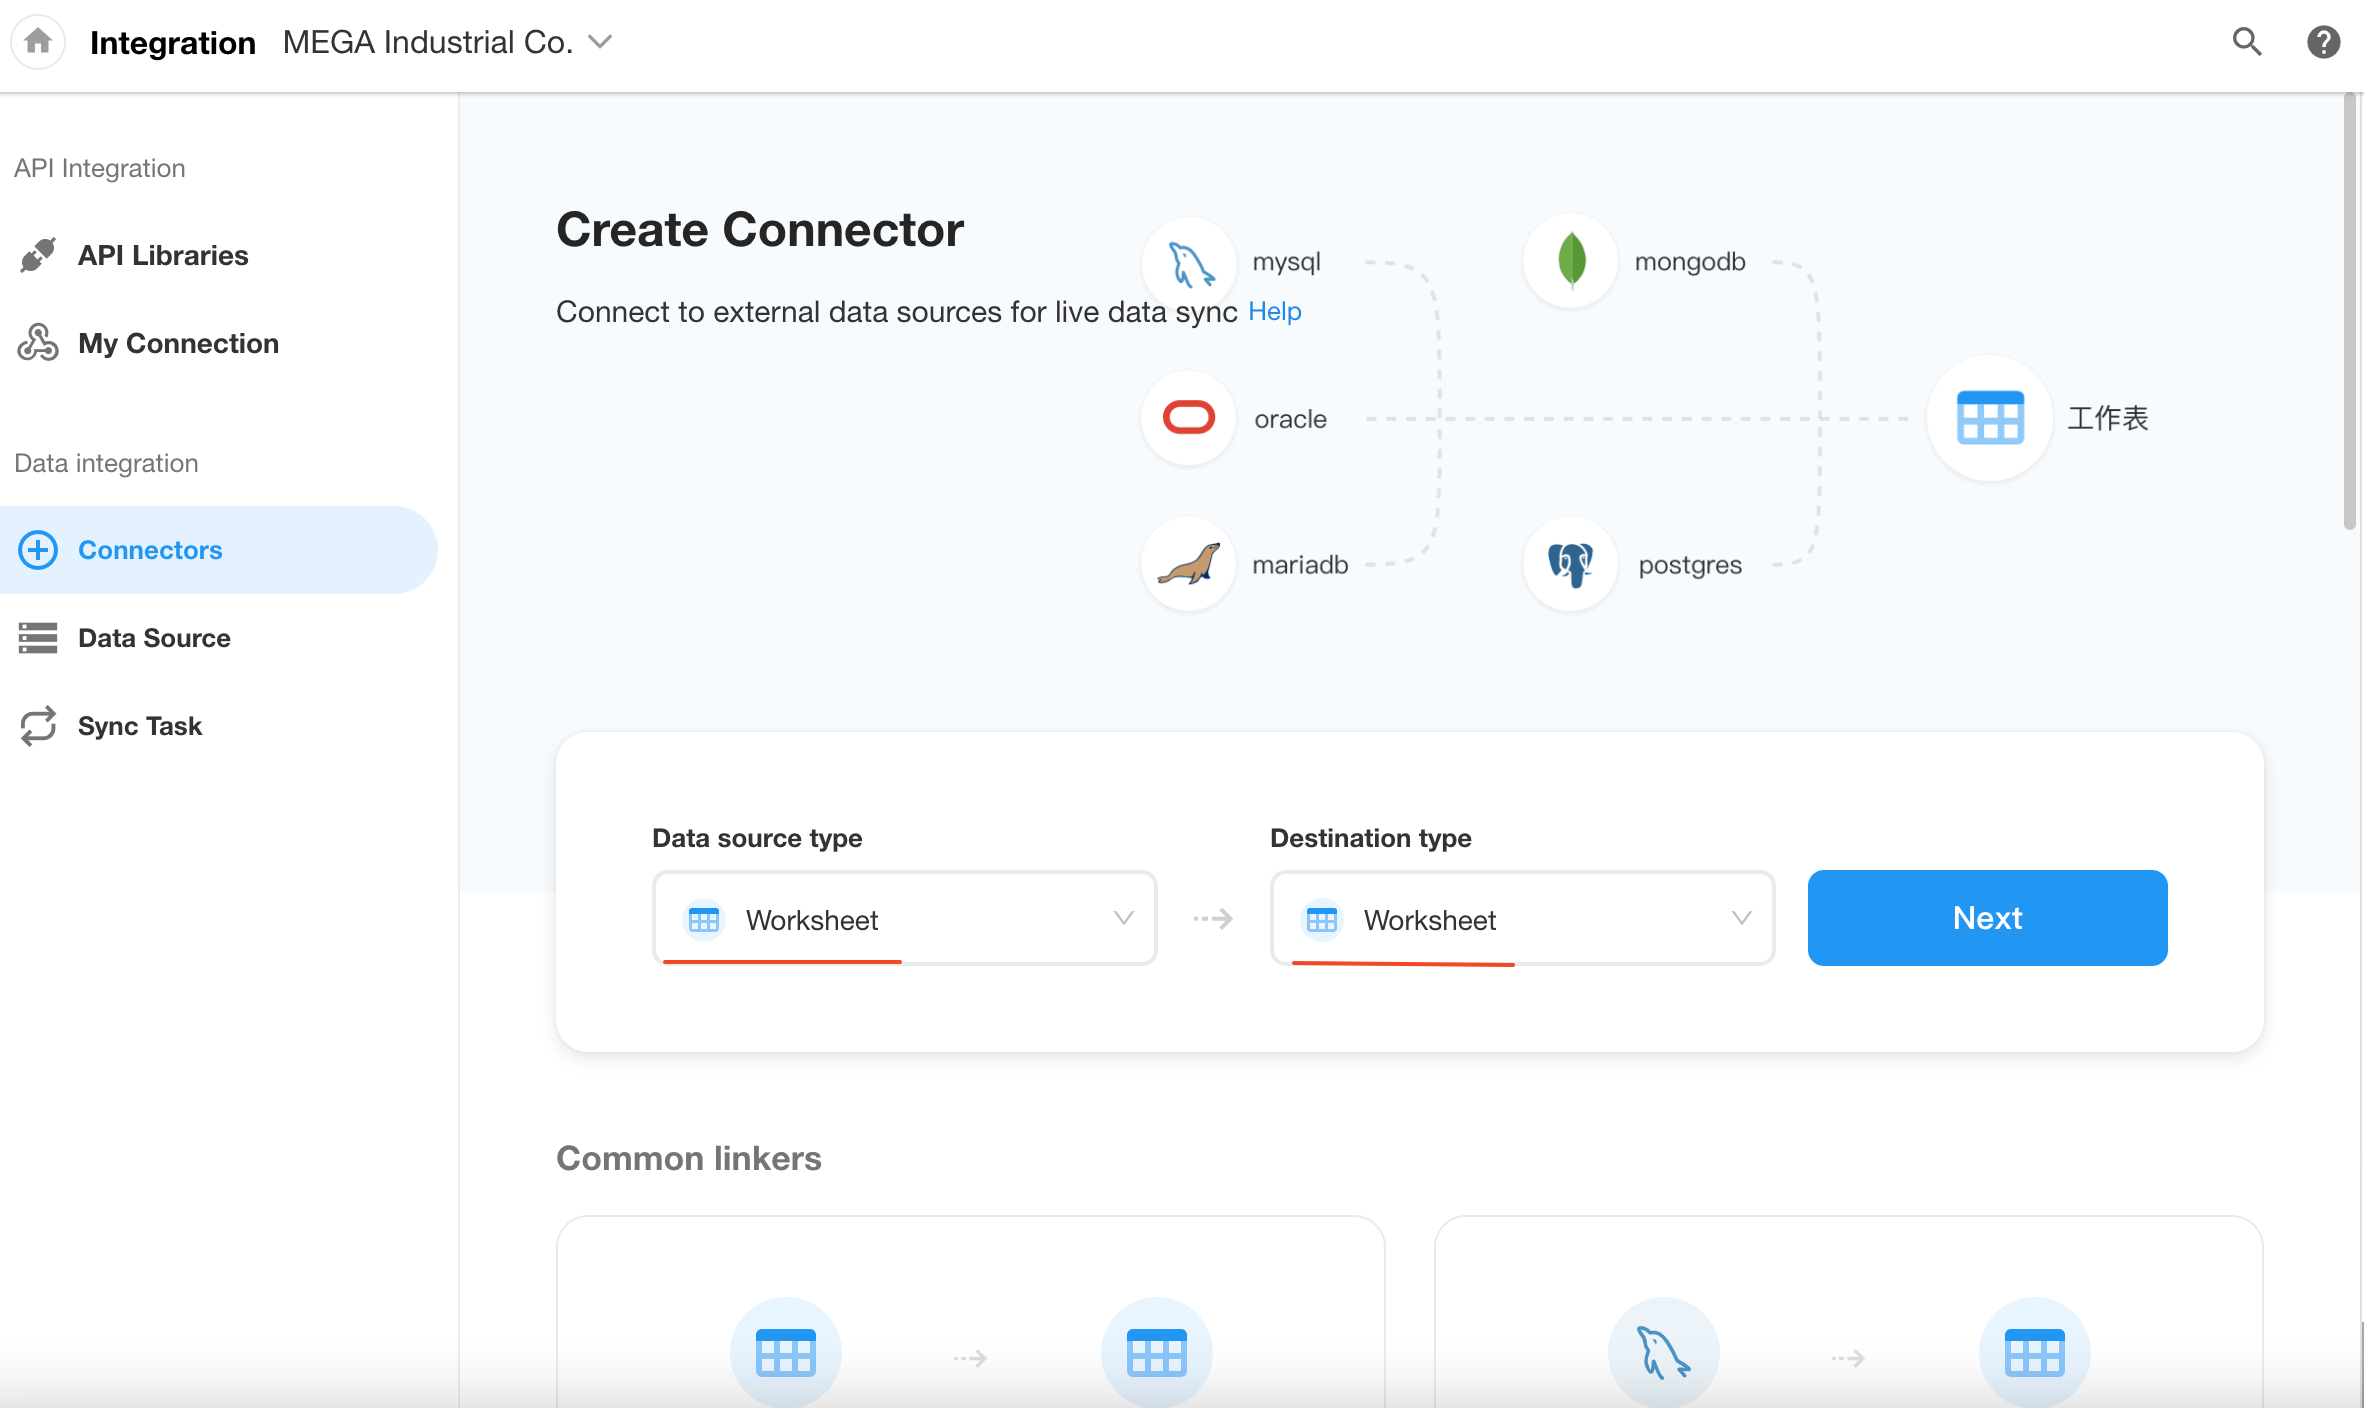
1. Select the database
Choose worksheet for both the data source and destination, then click Next.
2. Configure source data
Select the application to which Customer 1 worksheet belongs, then click Next.
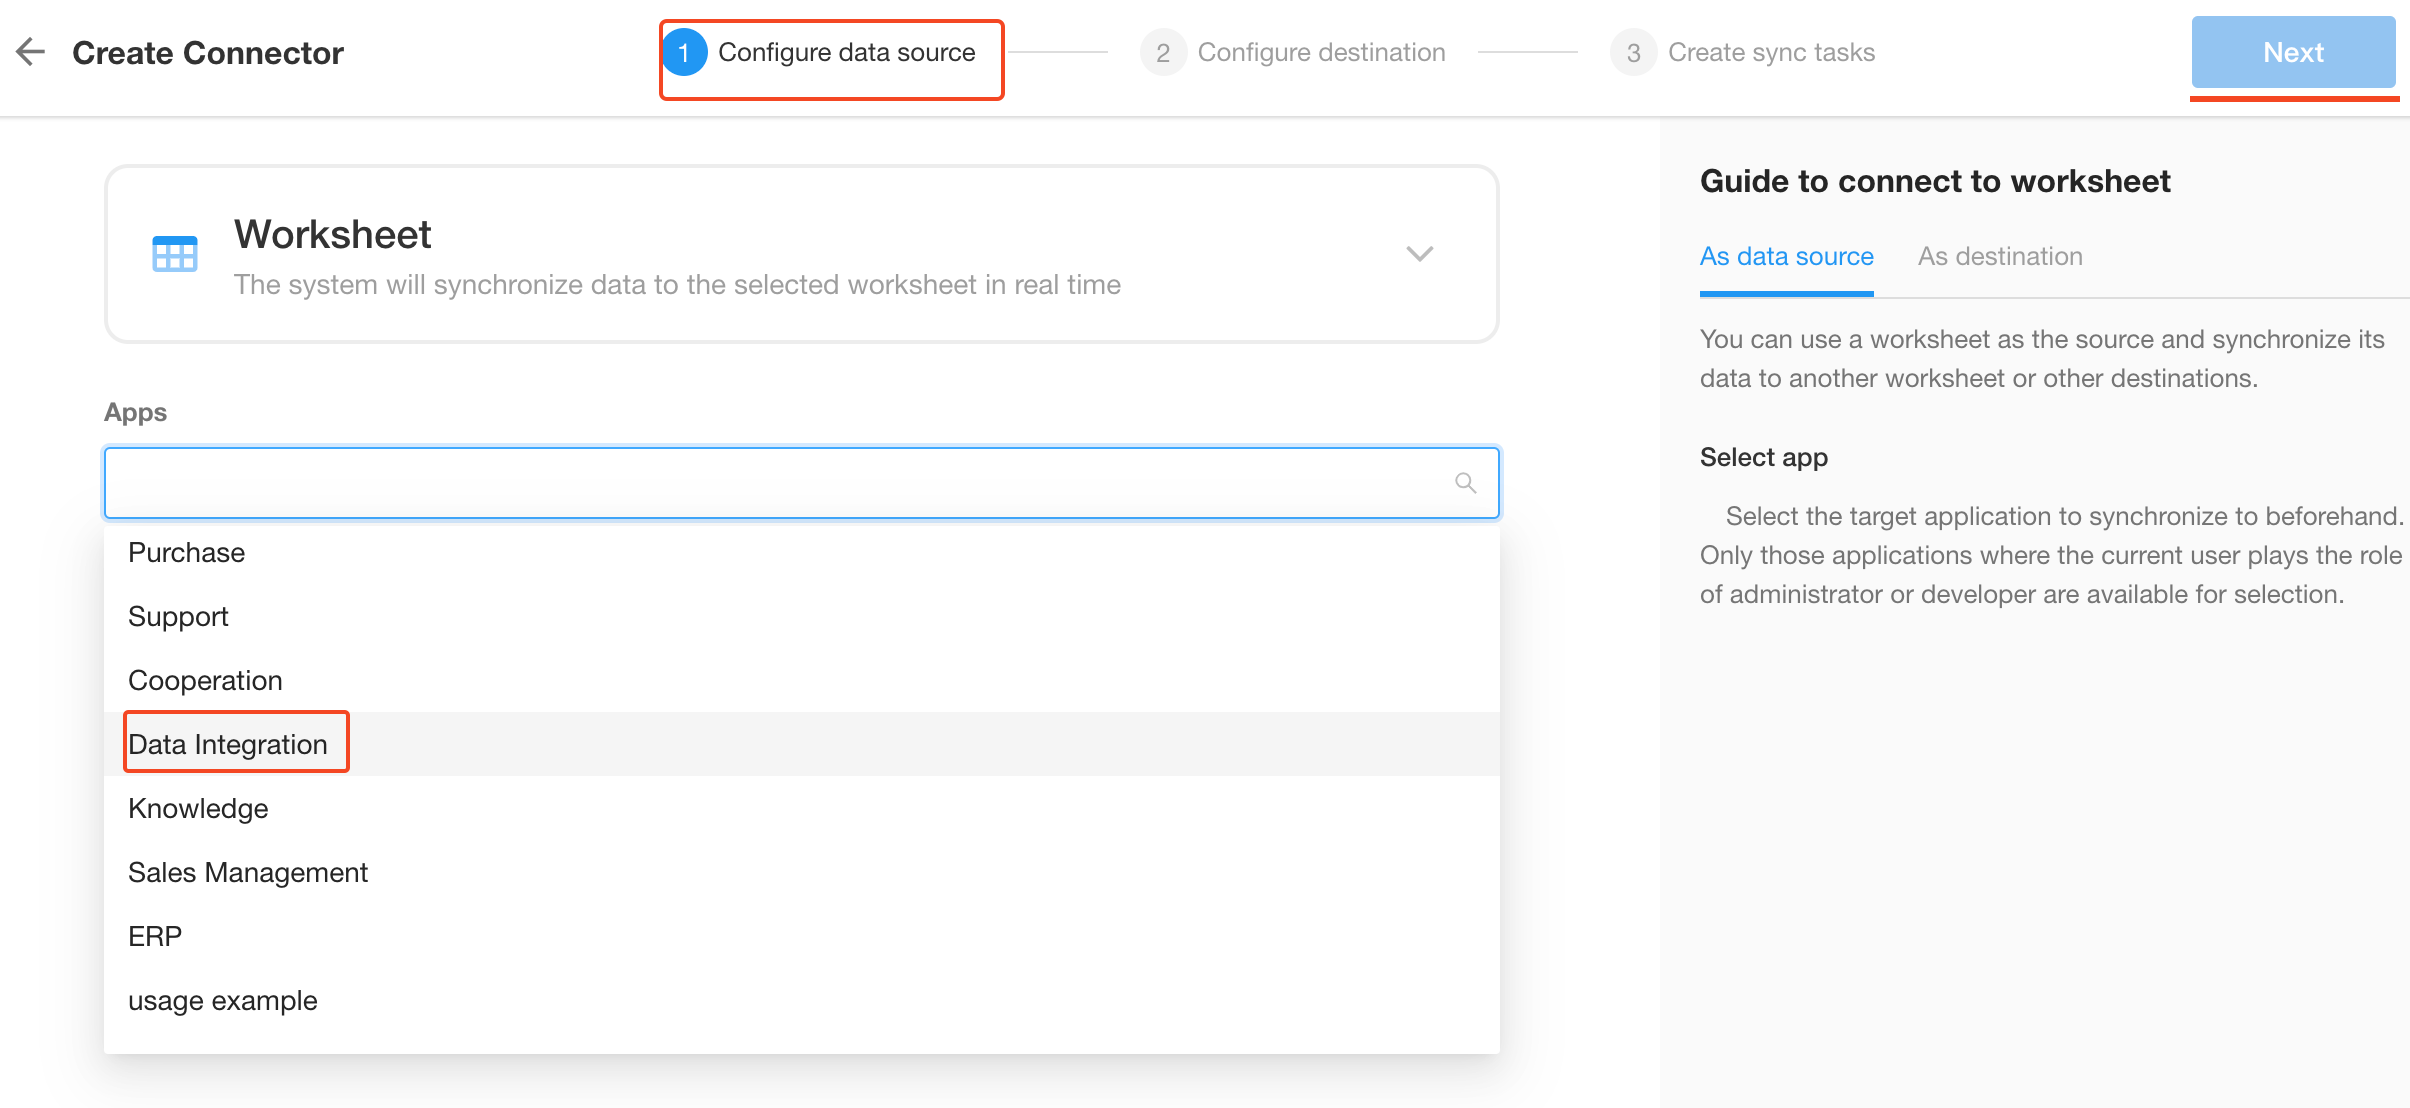
Only applications you have joined as an Application Administrator will be displayed here.
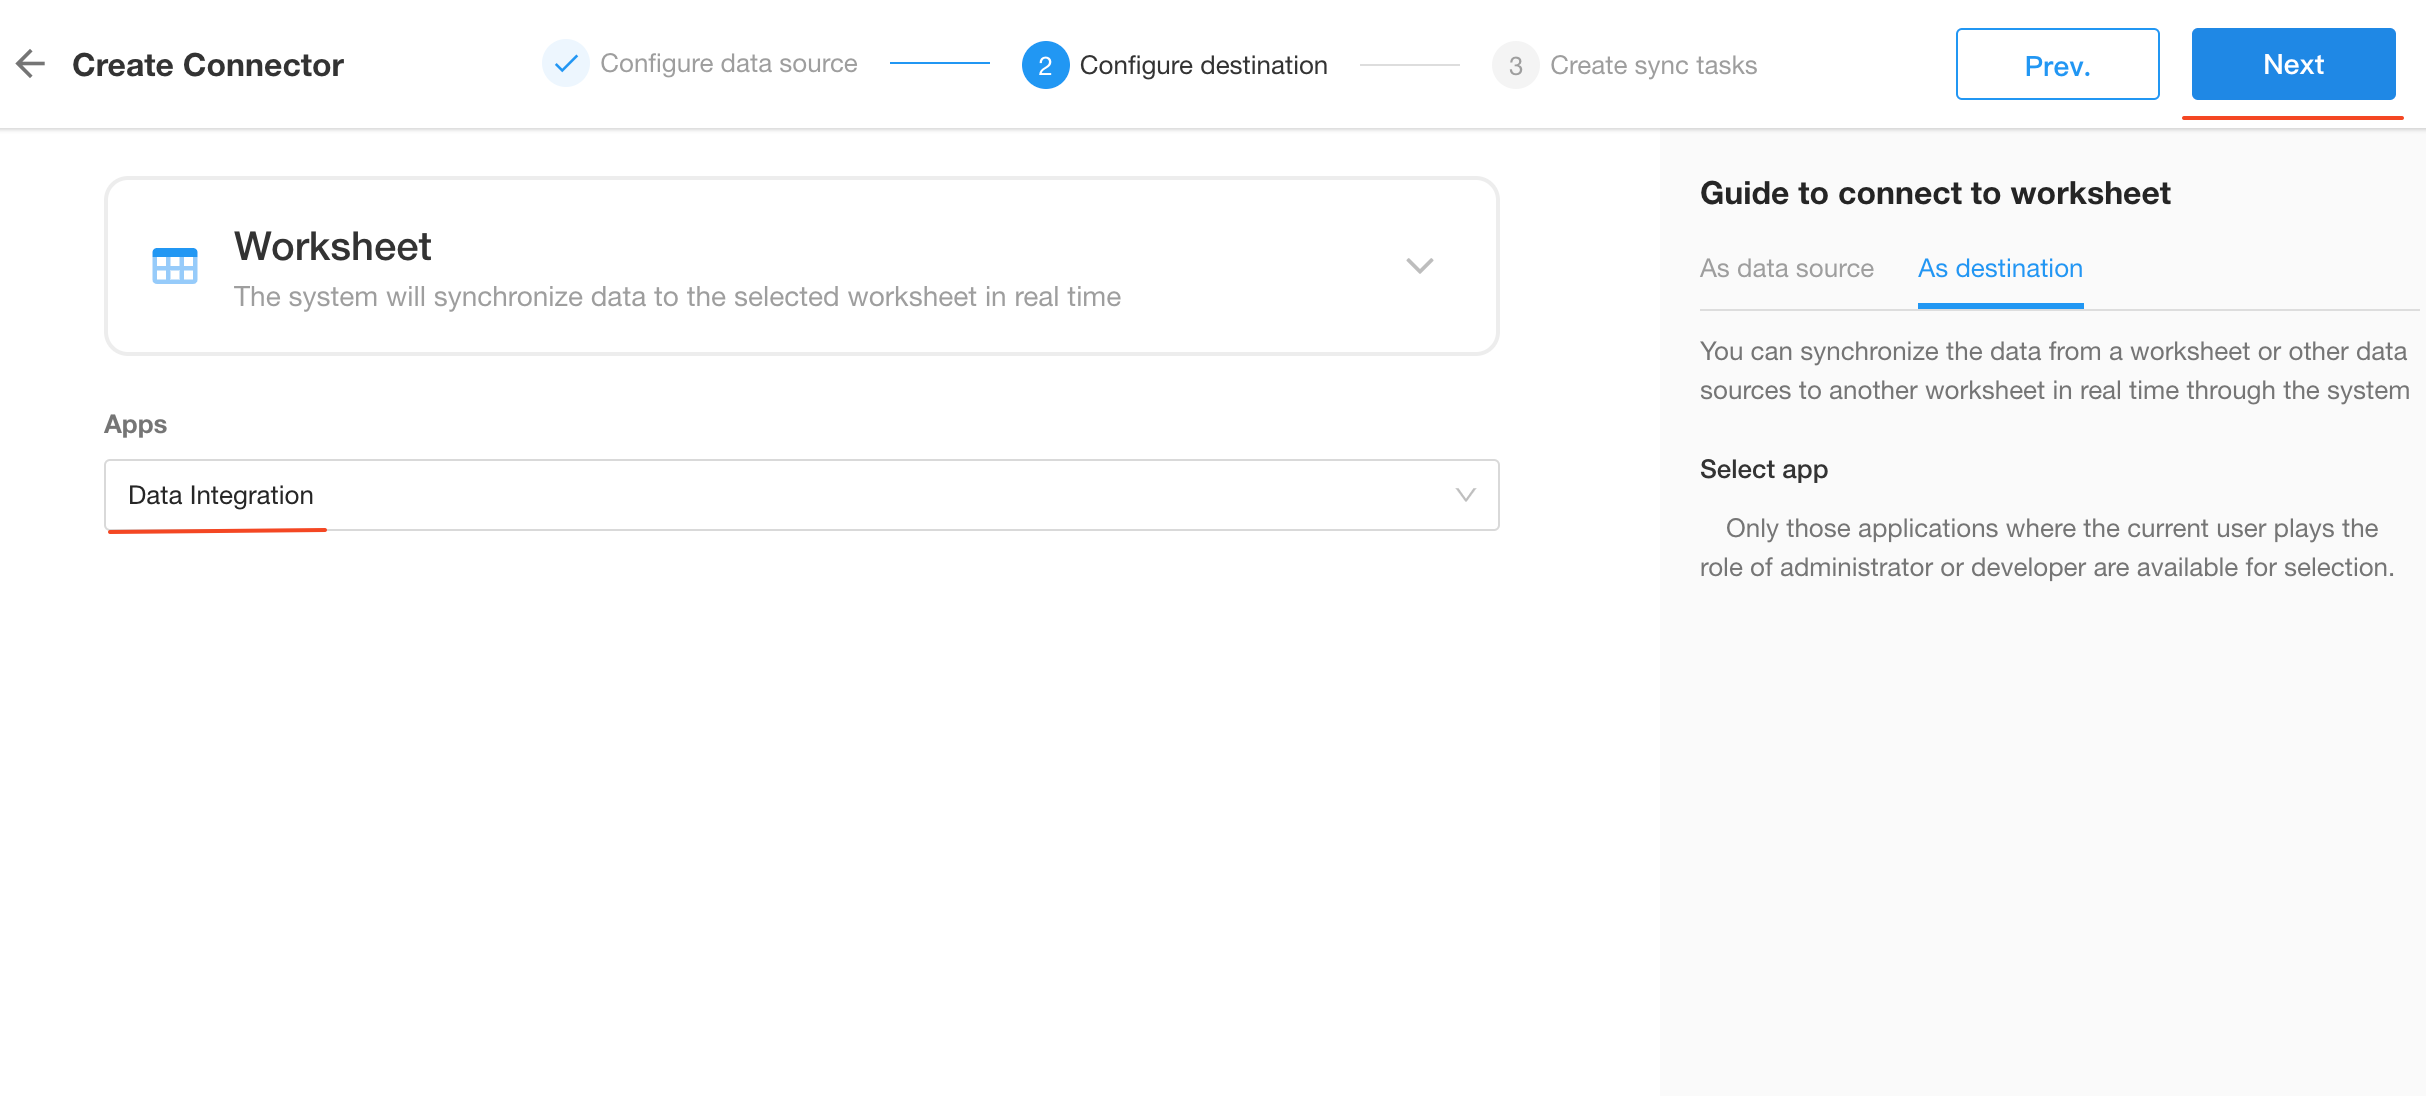
3. Configure destination
Select the application to which the Customer 2 worksheet belongs. For demonstration, we have placed both worksheets in the same application. Click Next to create the sync task.
Create sync tasks
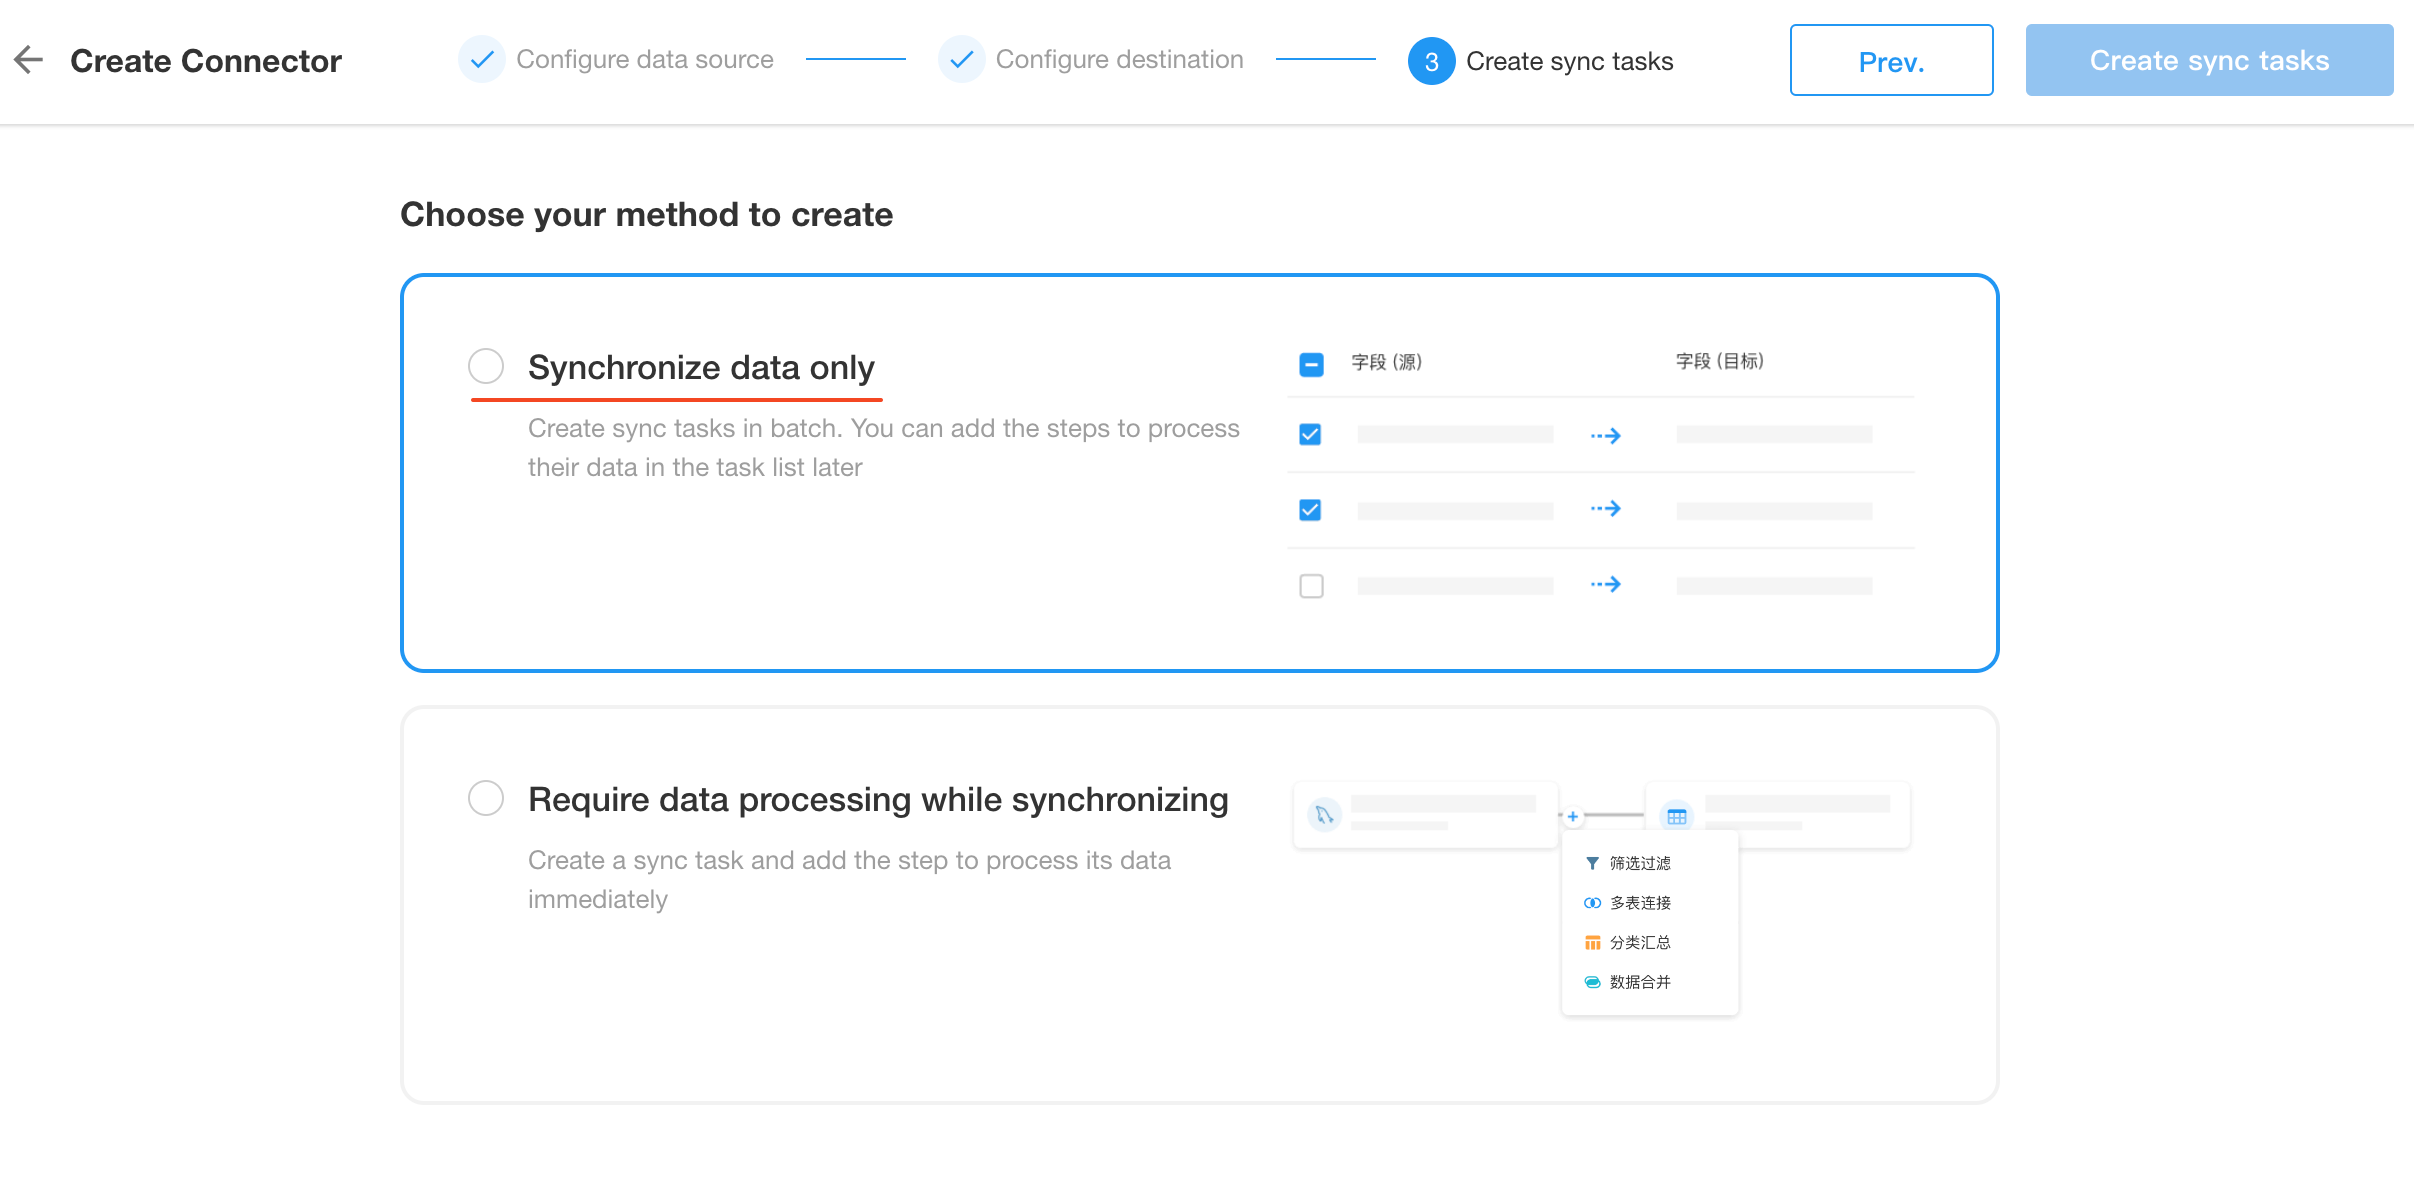
1. Choose a sync method
Select [Sync data only].
2. Select the worksheets to be syncd
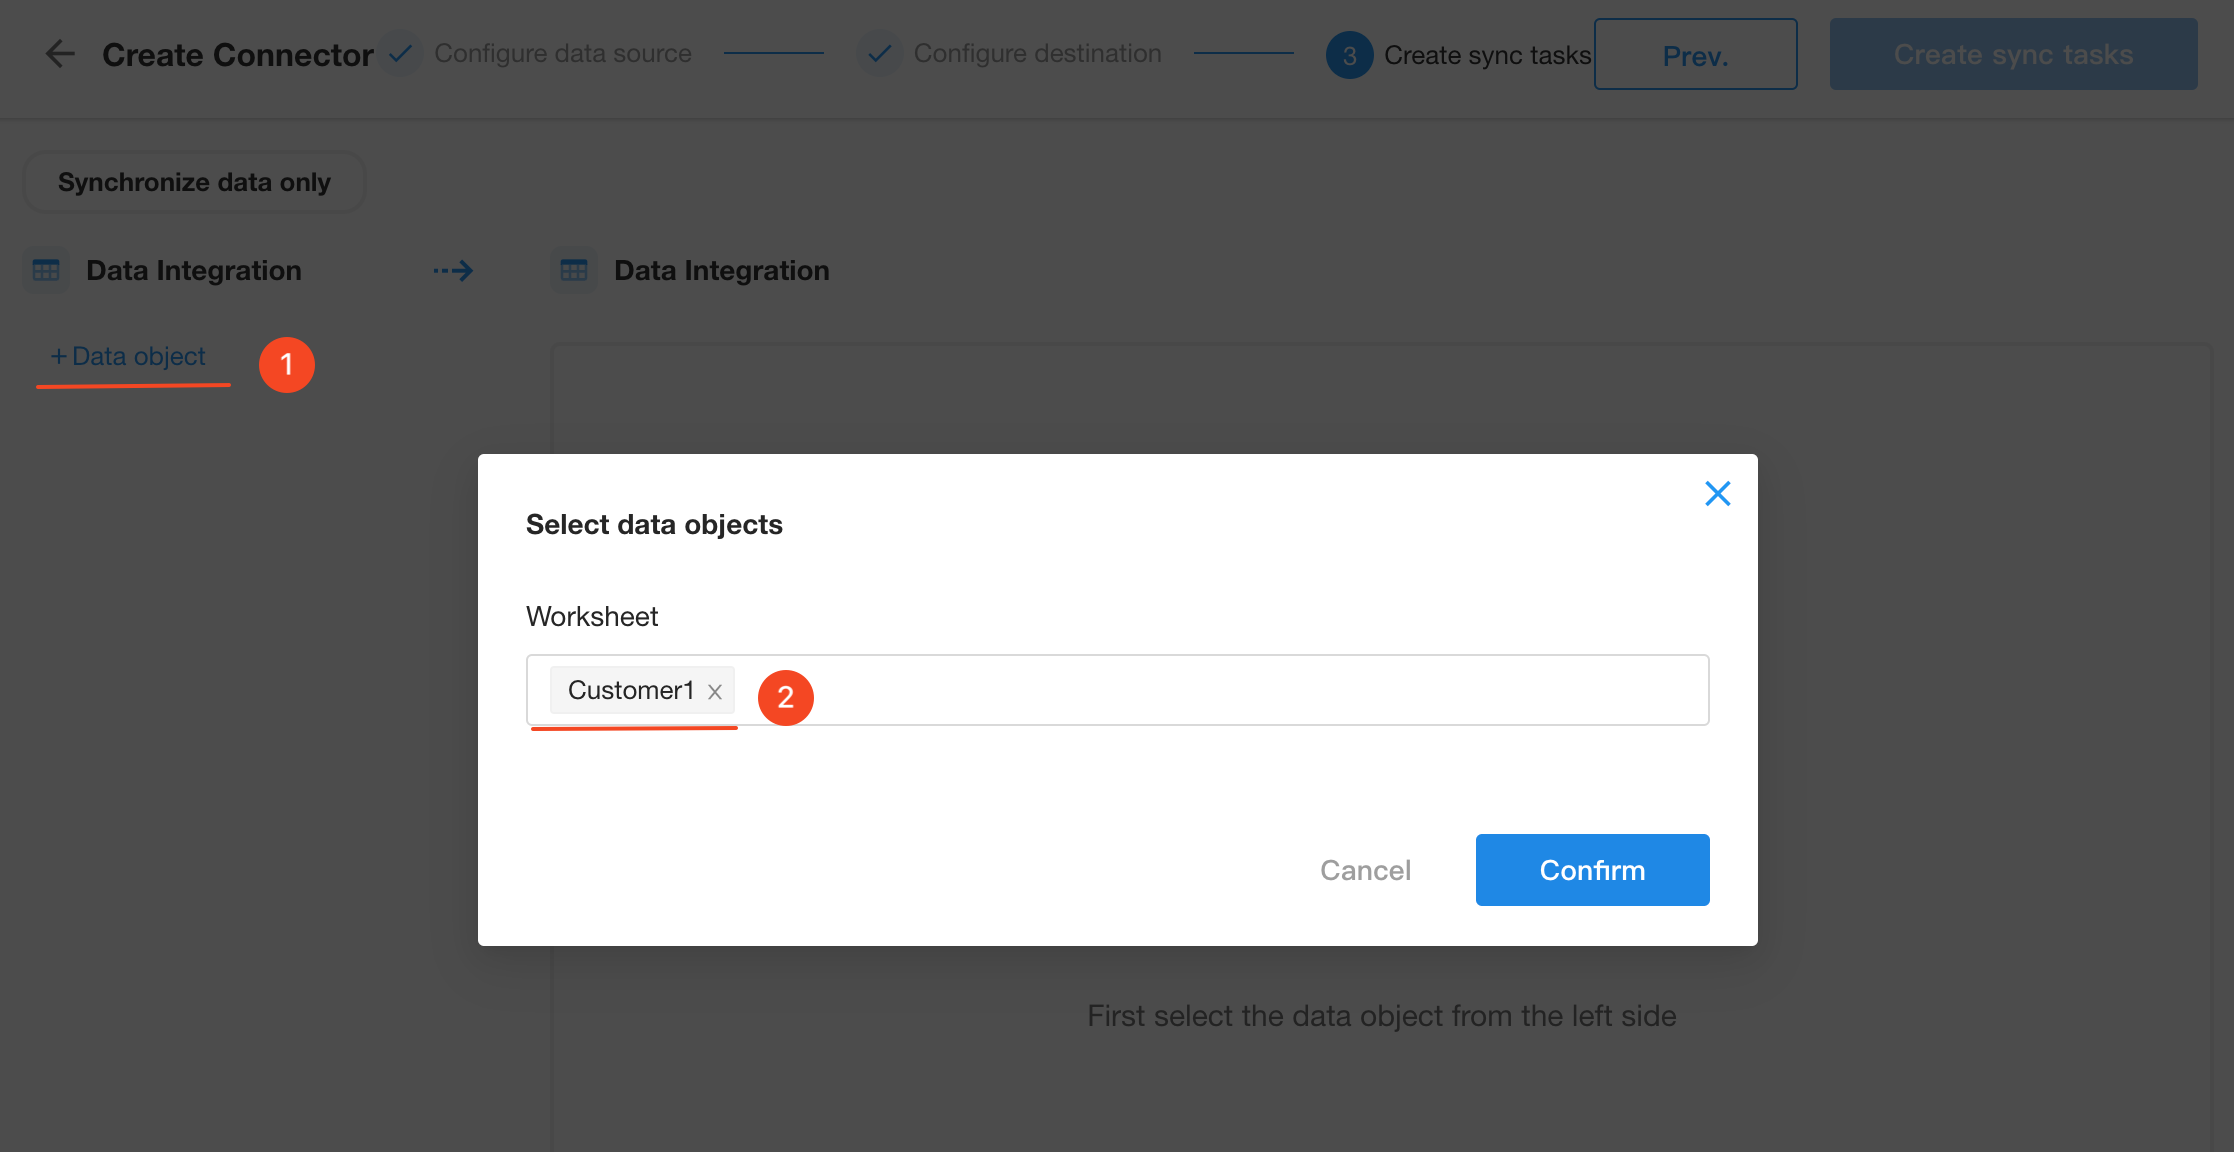
Click [+ Data Object] to select the Customer 1 worksheet to be syncd.
You can select multiple worksheets to be syncd at once, or continue clicking [+ Data Object] to add more worksheets to be syncd.
3. Configure field mapping with the destination worksheet
Since the Customer 2 worksheet already exists, choose the existing worksheet.
-
Configure field mapping.
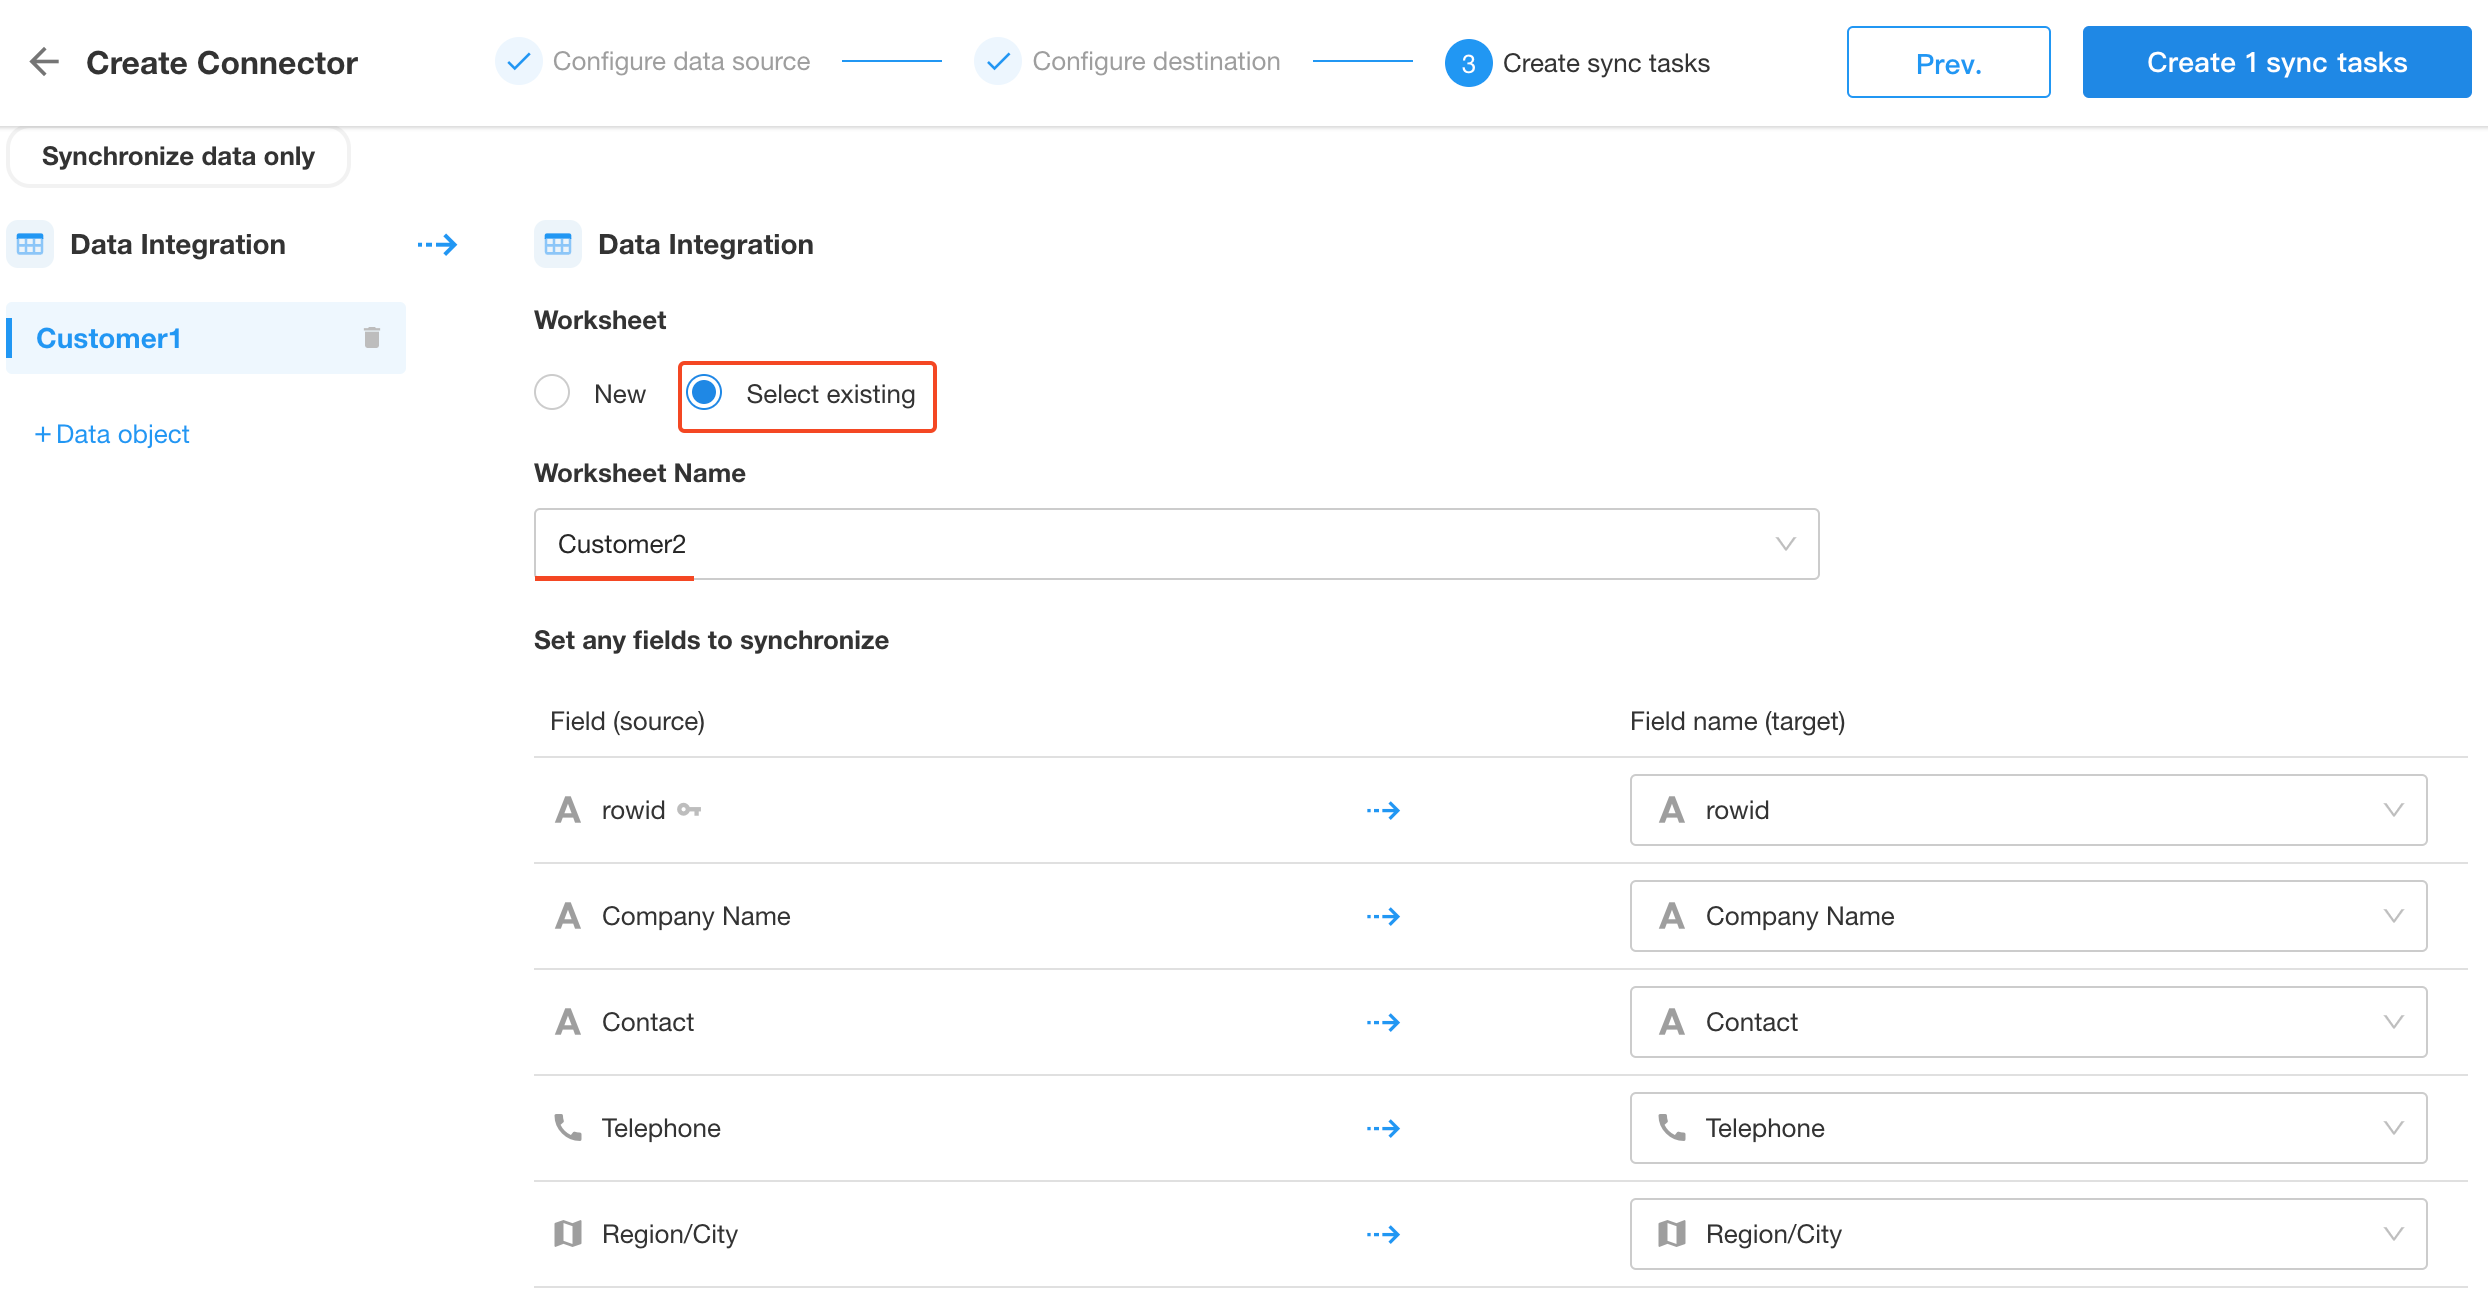
When creating a sync task, worksheet or field names cannot contain the following special characters:
``~!@#$%^&*()-+=<>?:"|,./;'[]·!¥…()—《》?:“”【】、;‘,。『』「」`
4. Duplicate data
You can choose a basis field to identify duplicate data. If the field is a duplicate, it means the record already exists. You can choose to overwrite or skip duplicate data.
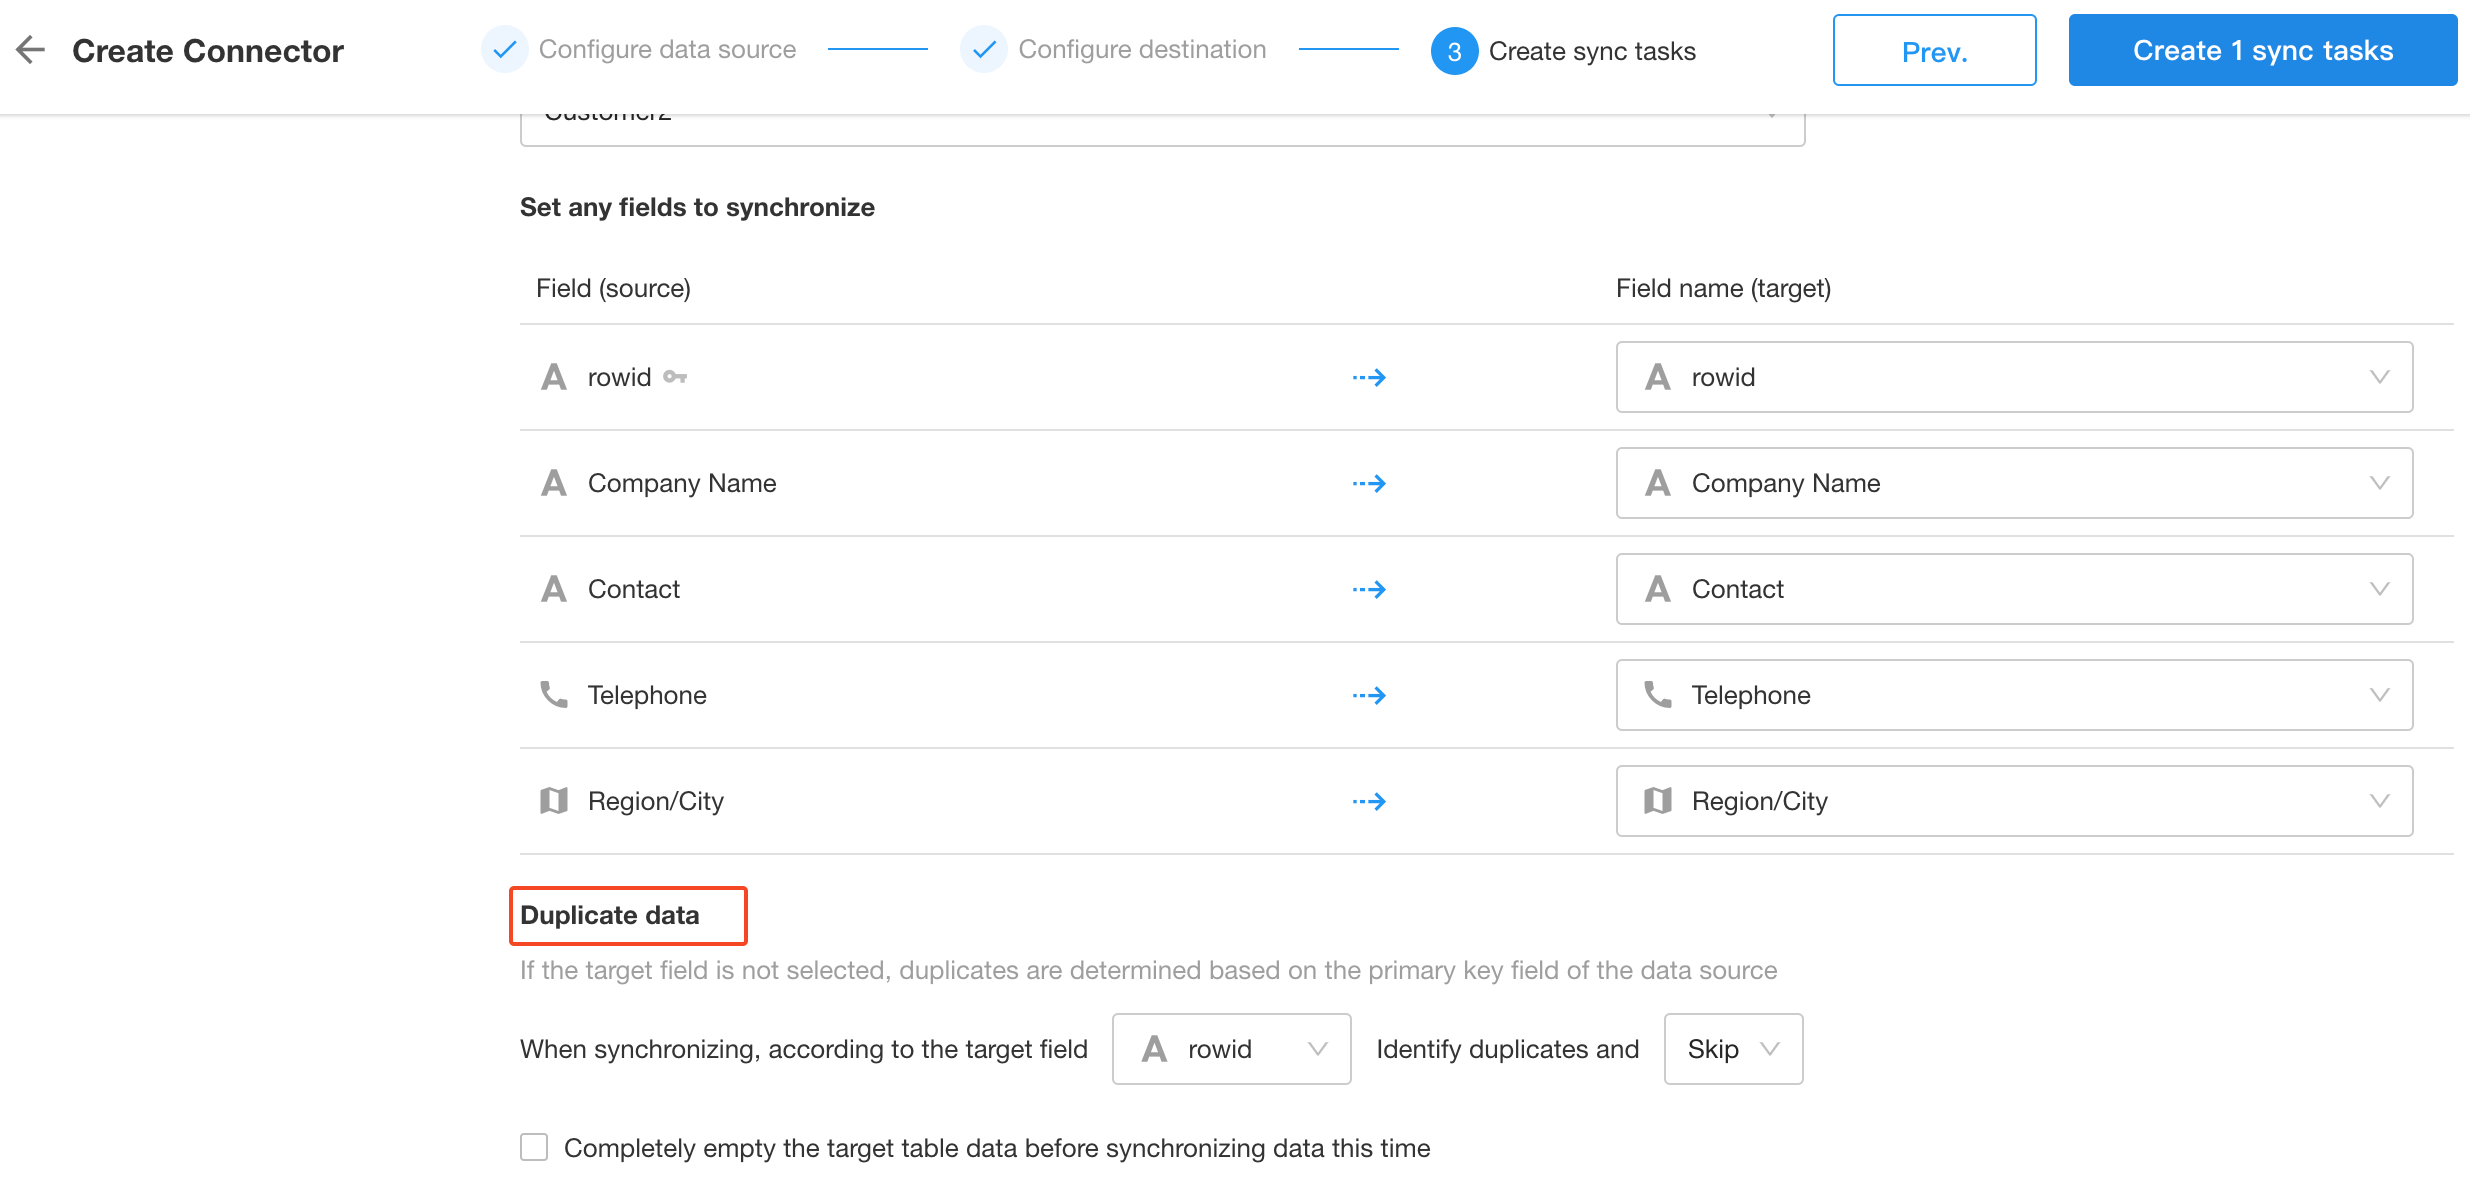
If you check [Completely empty the target table data before syncing data this time], the data in the Customer 2 worksheet will be cleared while the first sync.
5. Whether to trigger workflows when synchronizing data
When synchronizing data, the worksheet data may be added, updated, and deleted. You can configure whether these actions trigger the workflow.

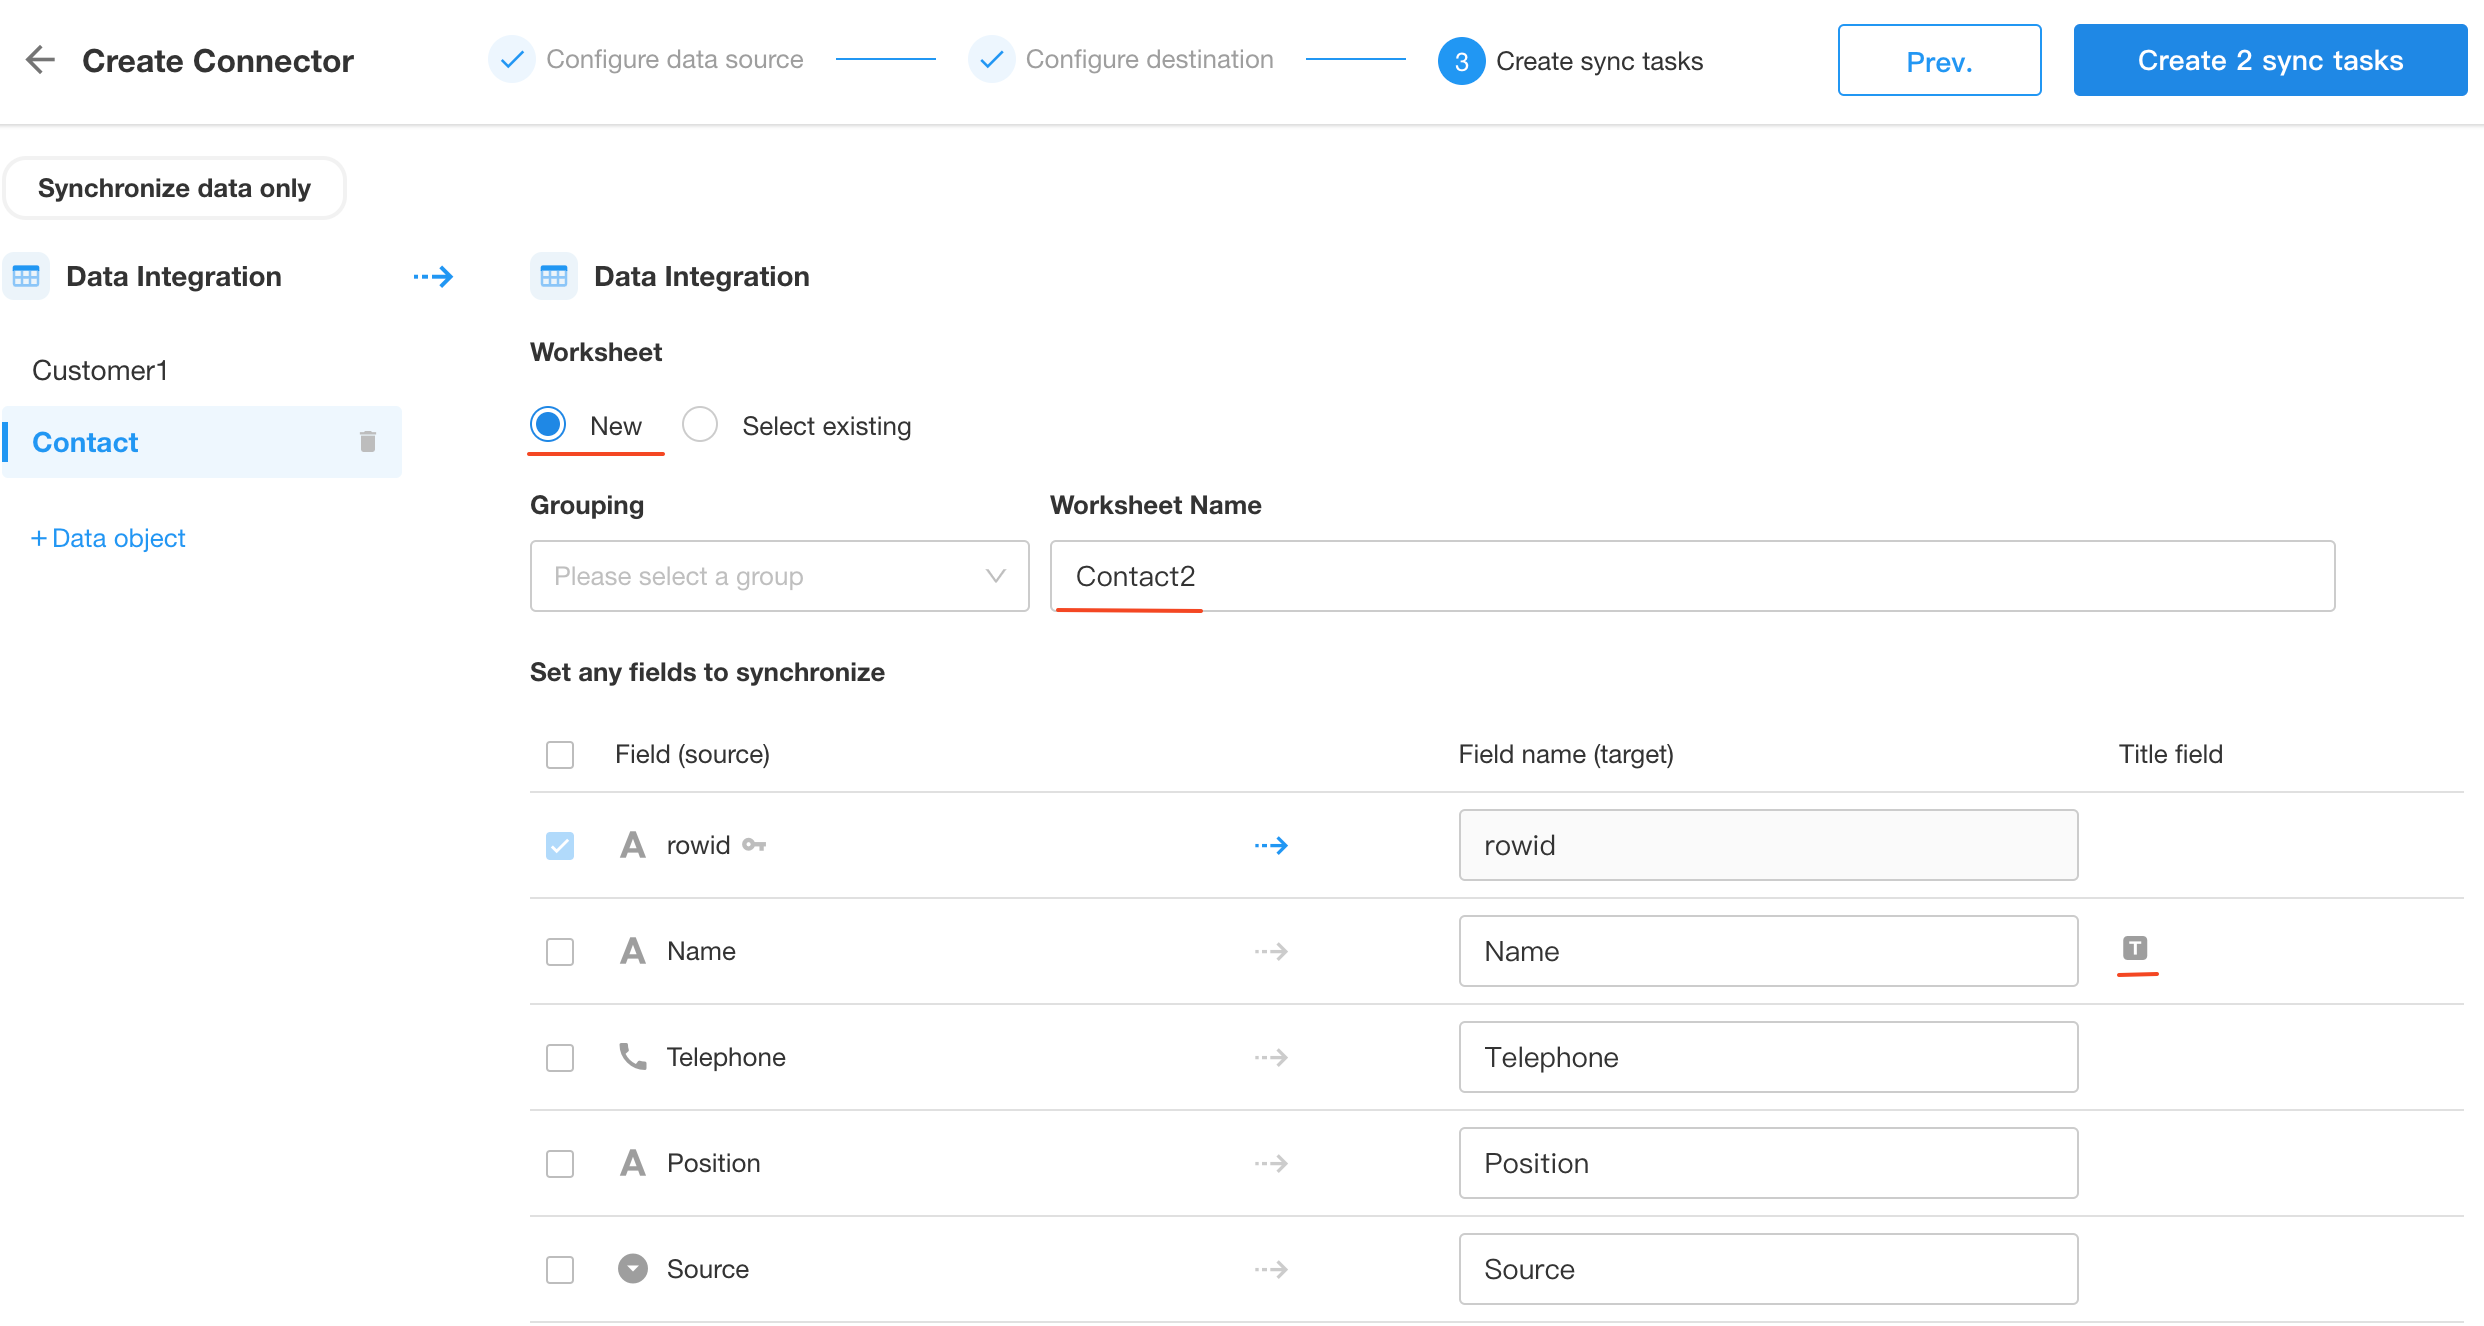
6. Add a Contact worksheet
Click [+ Data Object] and select the Contact worksheet.
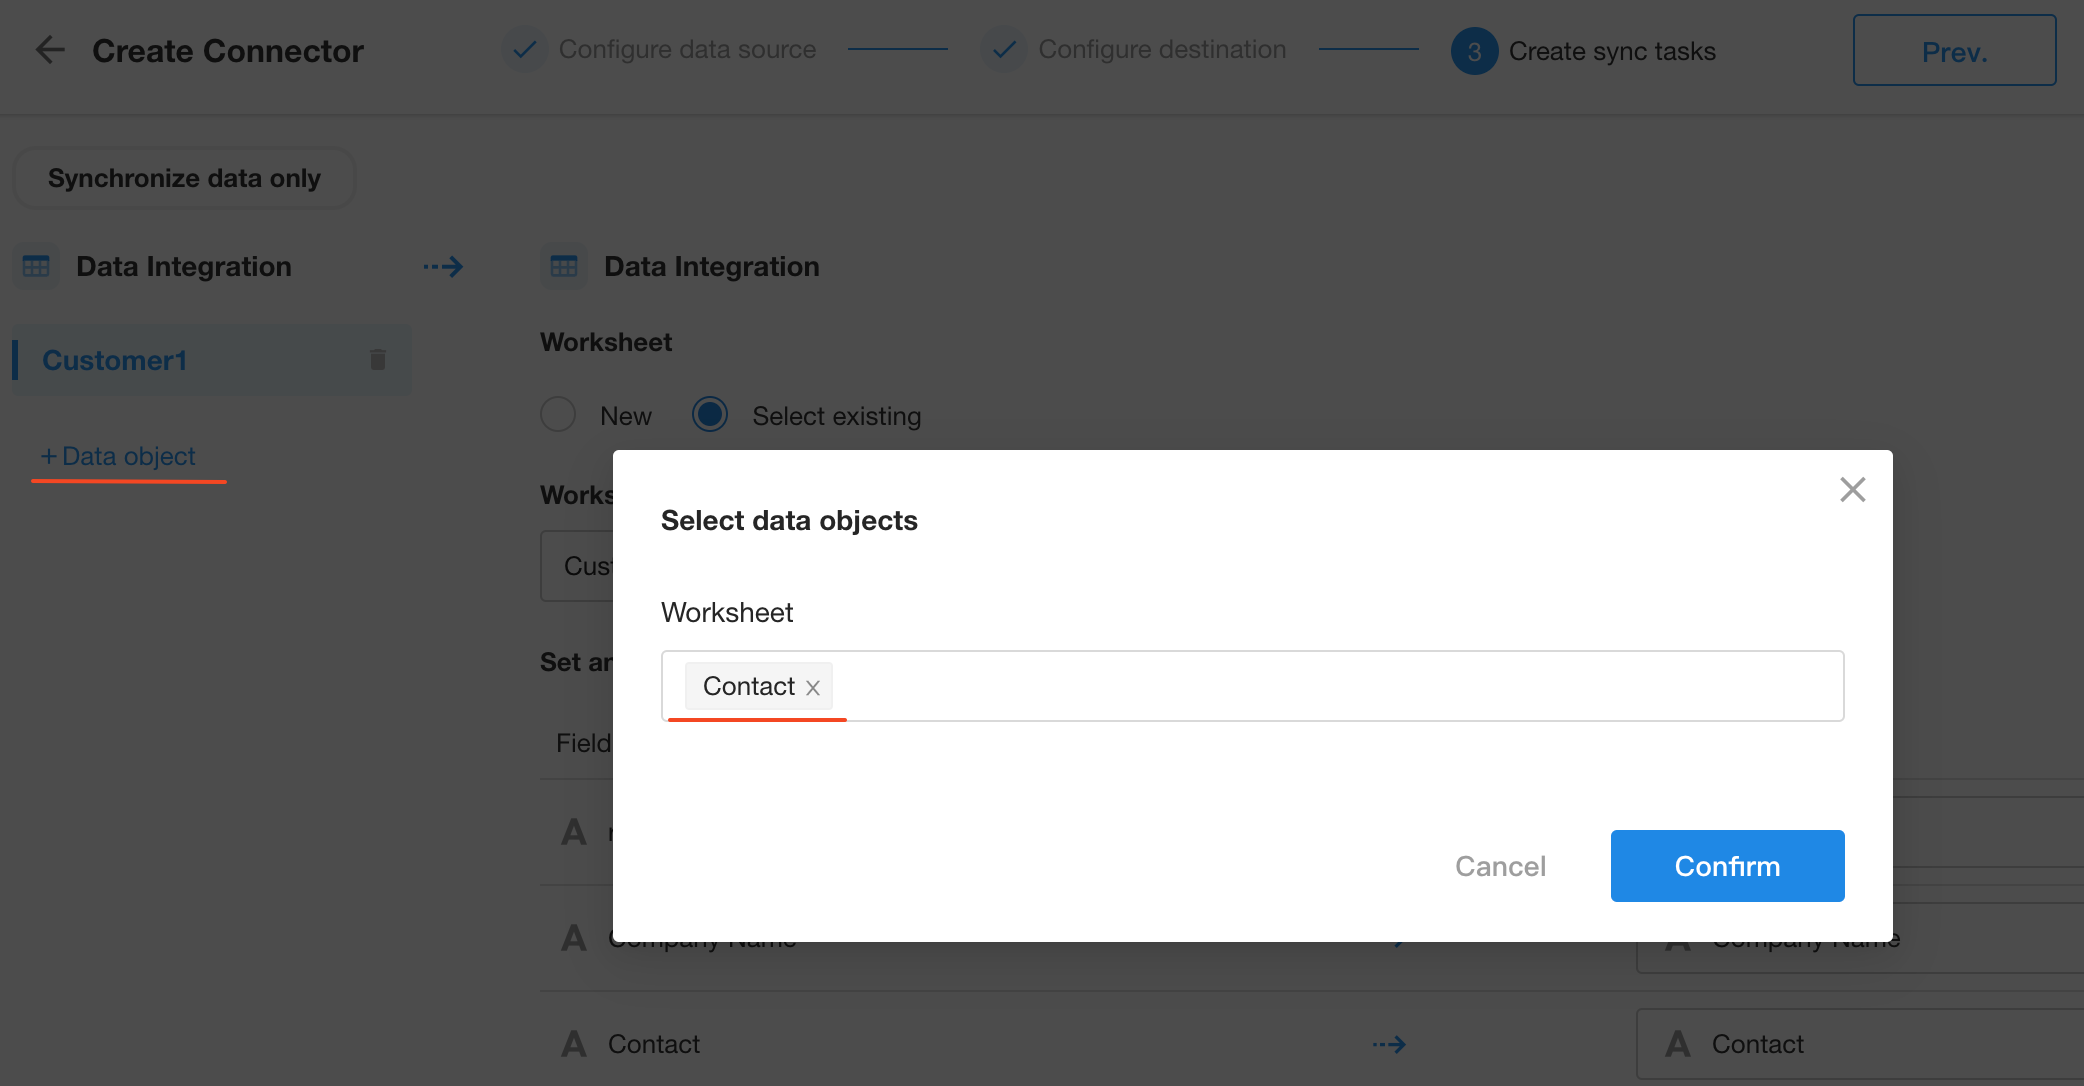
Since the destination Contact worksheet does not exist, choose to create a new worksheet.
-
Set the name of the new worksheet
-
Check the fields to be syncd
-
Sey the field names in the new worksheet
-
Set the title field in the new worksheet
7. Create Synchronization Tasks
After configuring all field mappings, click [Create X sync tasks].
Upon successful creation, a notification will appear.
8. Check Data Synchronization
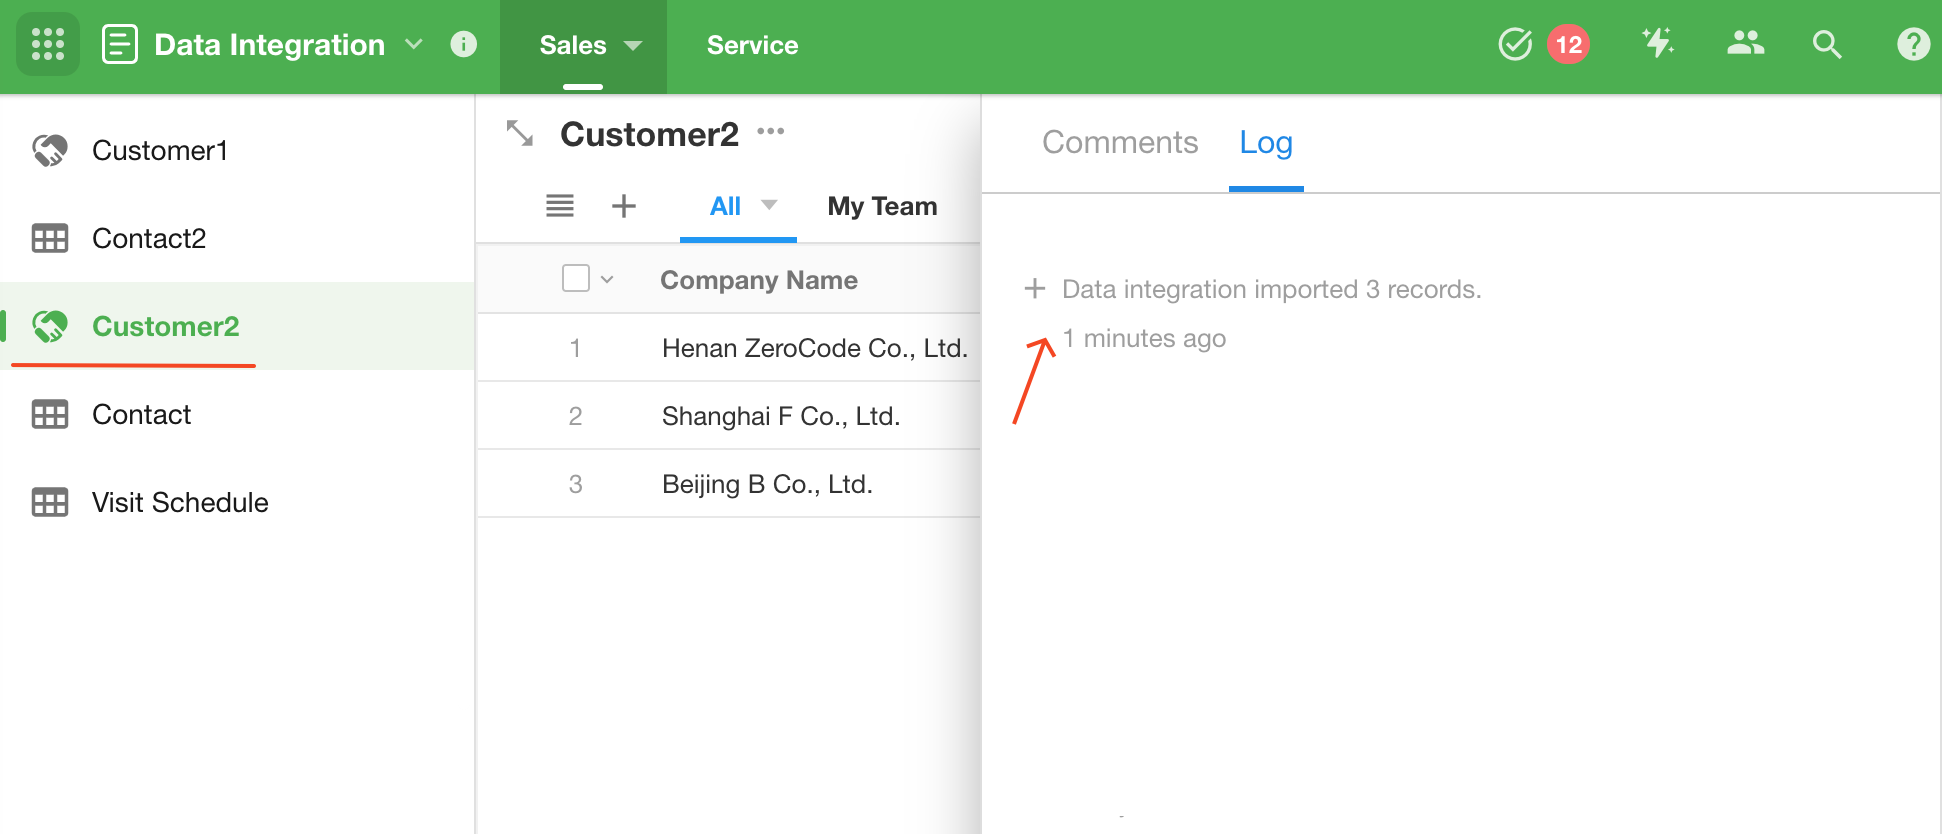
Navigate to Customer 2 worksheet, where you will see that all data from Customer 1 worksheet has been syncd.
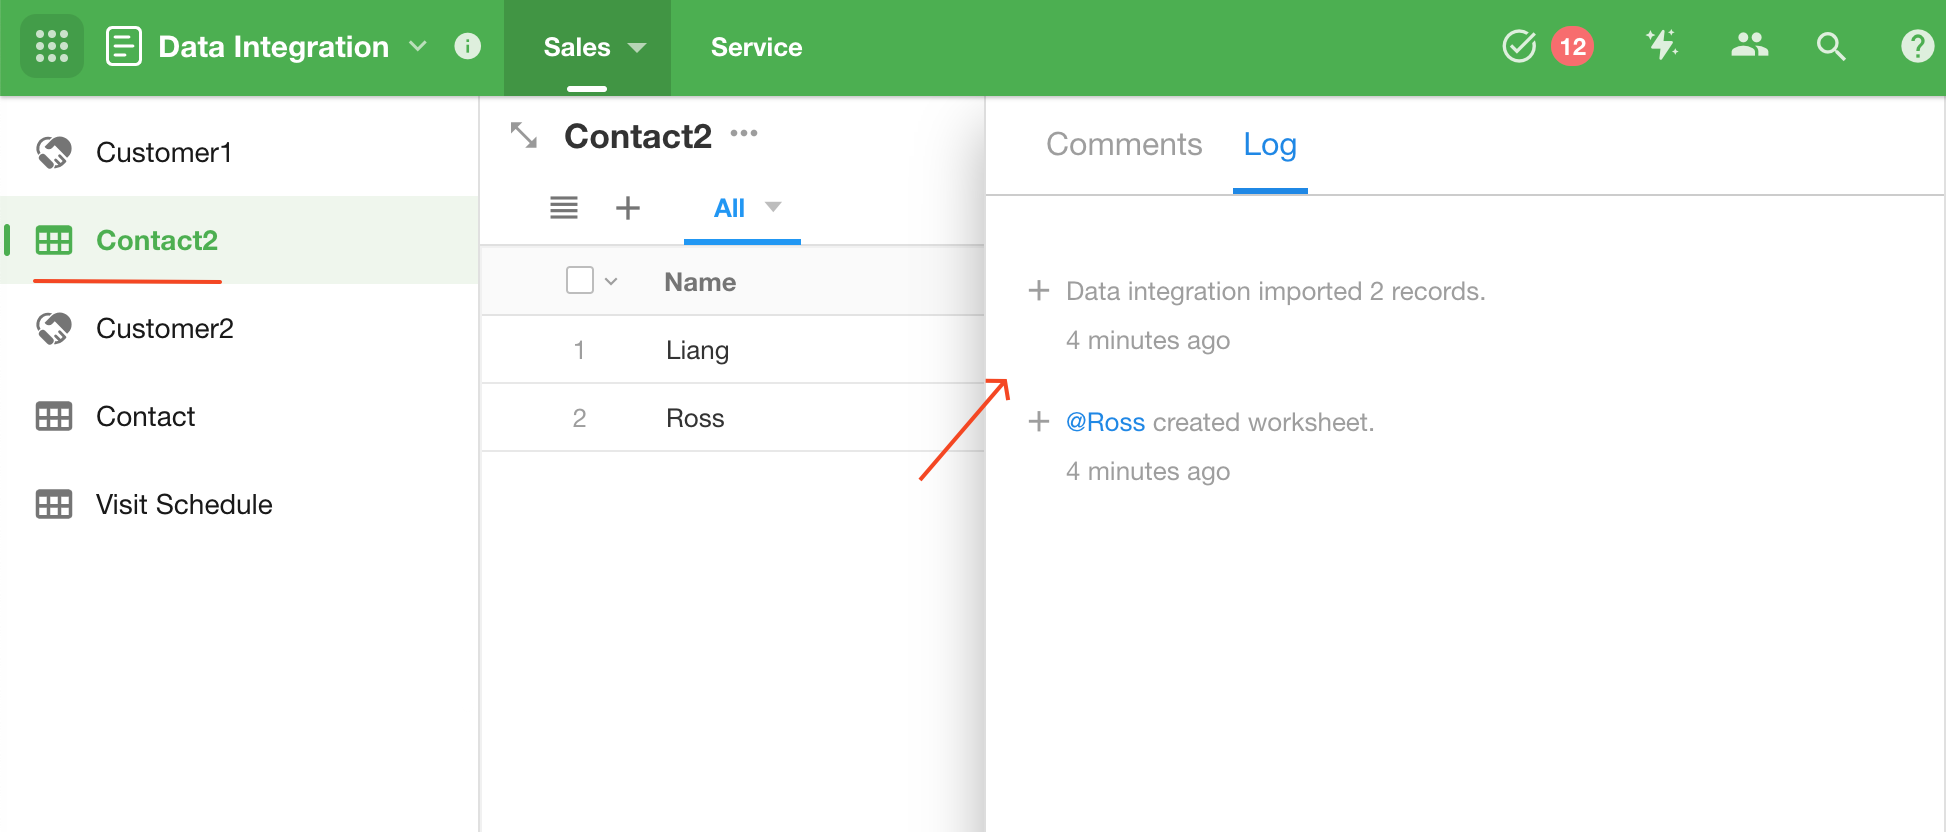
The Contacts 2 worksheet will also be automatically created and data will be syncd into it.
You can modify existing data in Customer 1 worksheet or add a new record to check if the modifications are syncd to Customer 2 worksheet.
From the logs, we can see that during sync, data is not written all at once, but in batches. Data sync may take longer if there are too many tasks queued up at the time.
Example 2: Sync Data from MySQL to Worksheet
Create a connector
1. Choose data source and destination

2. Configure the database connection
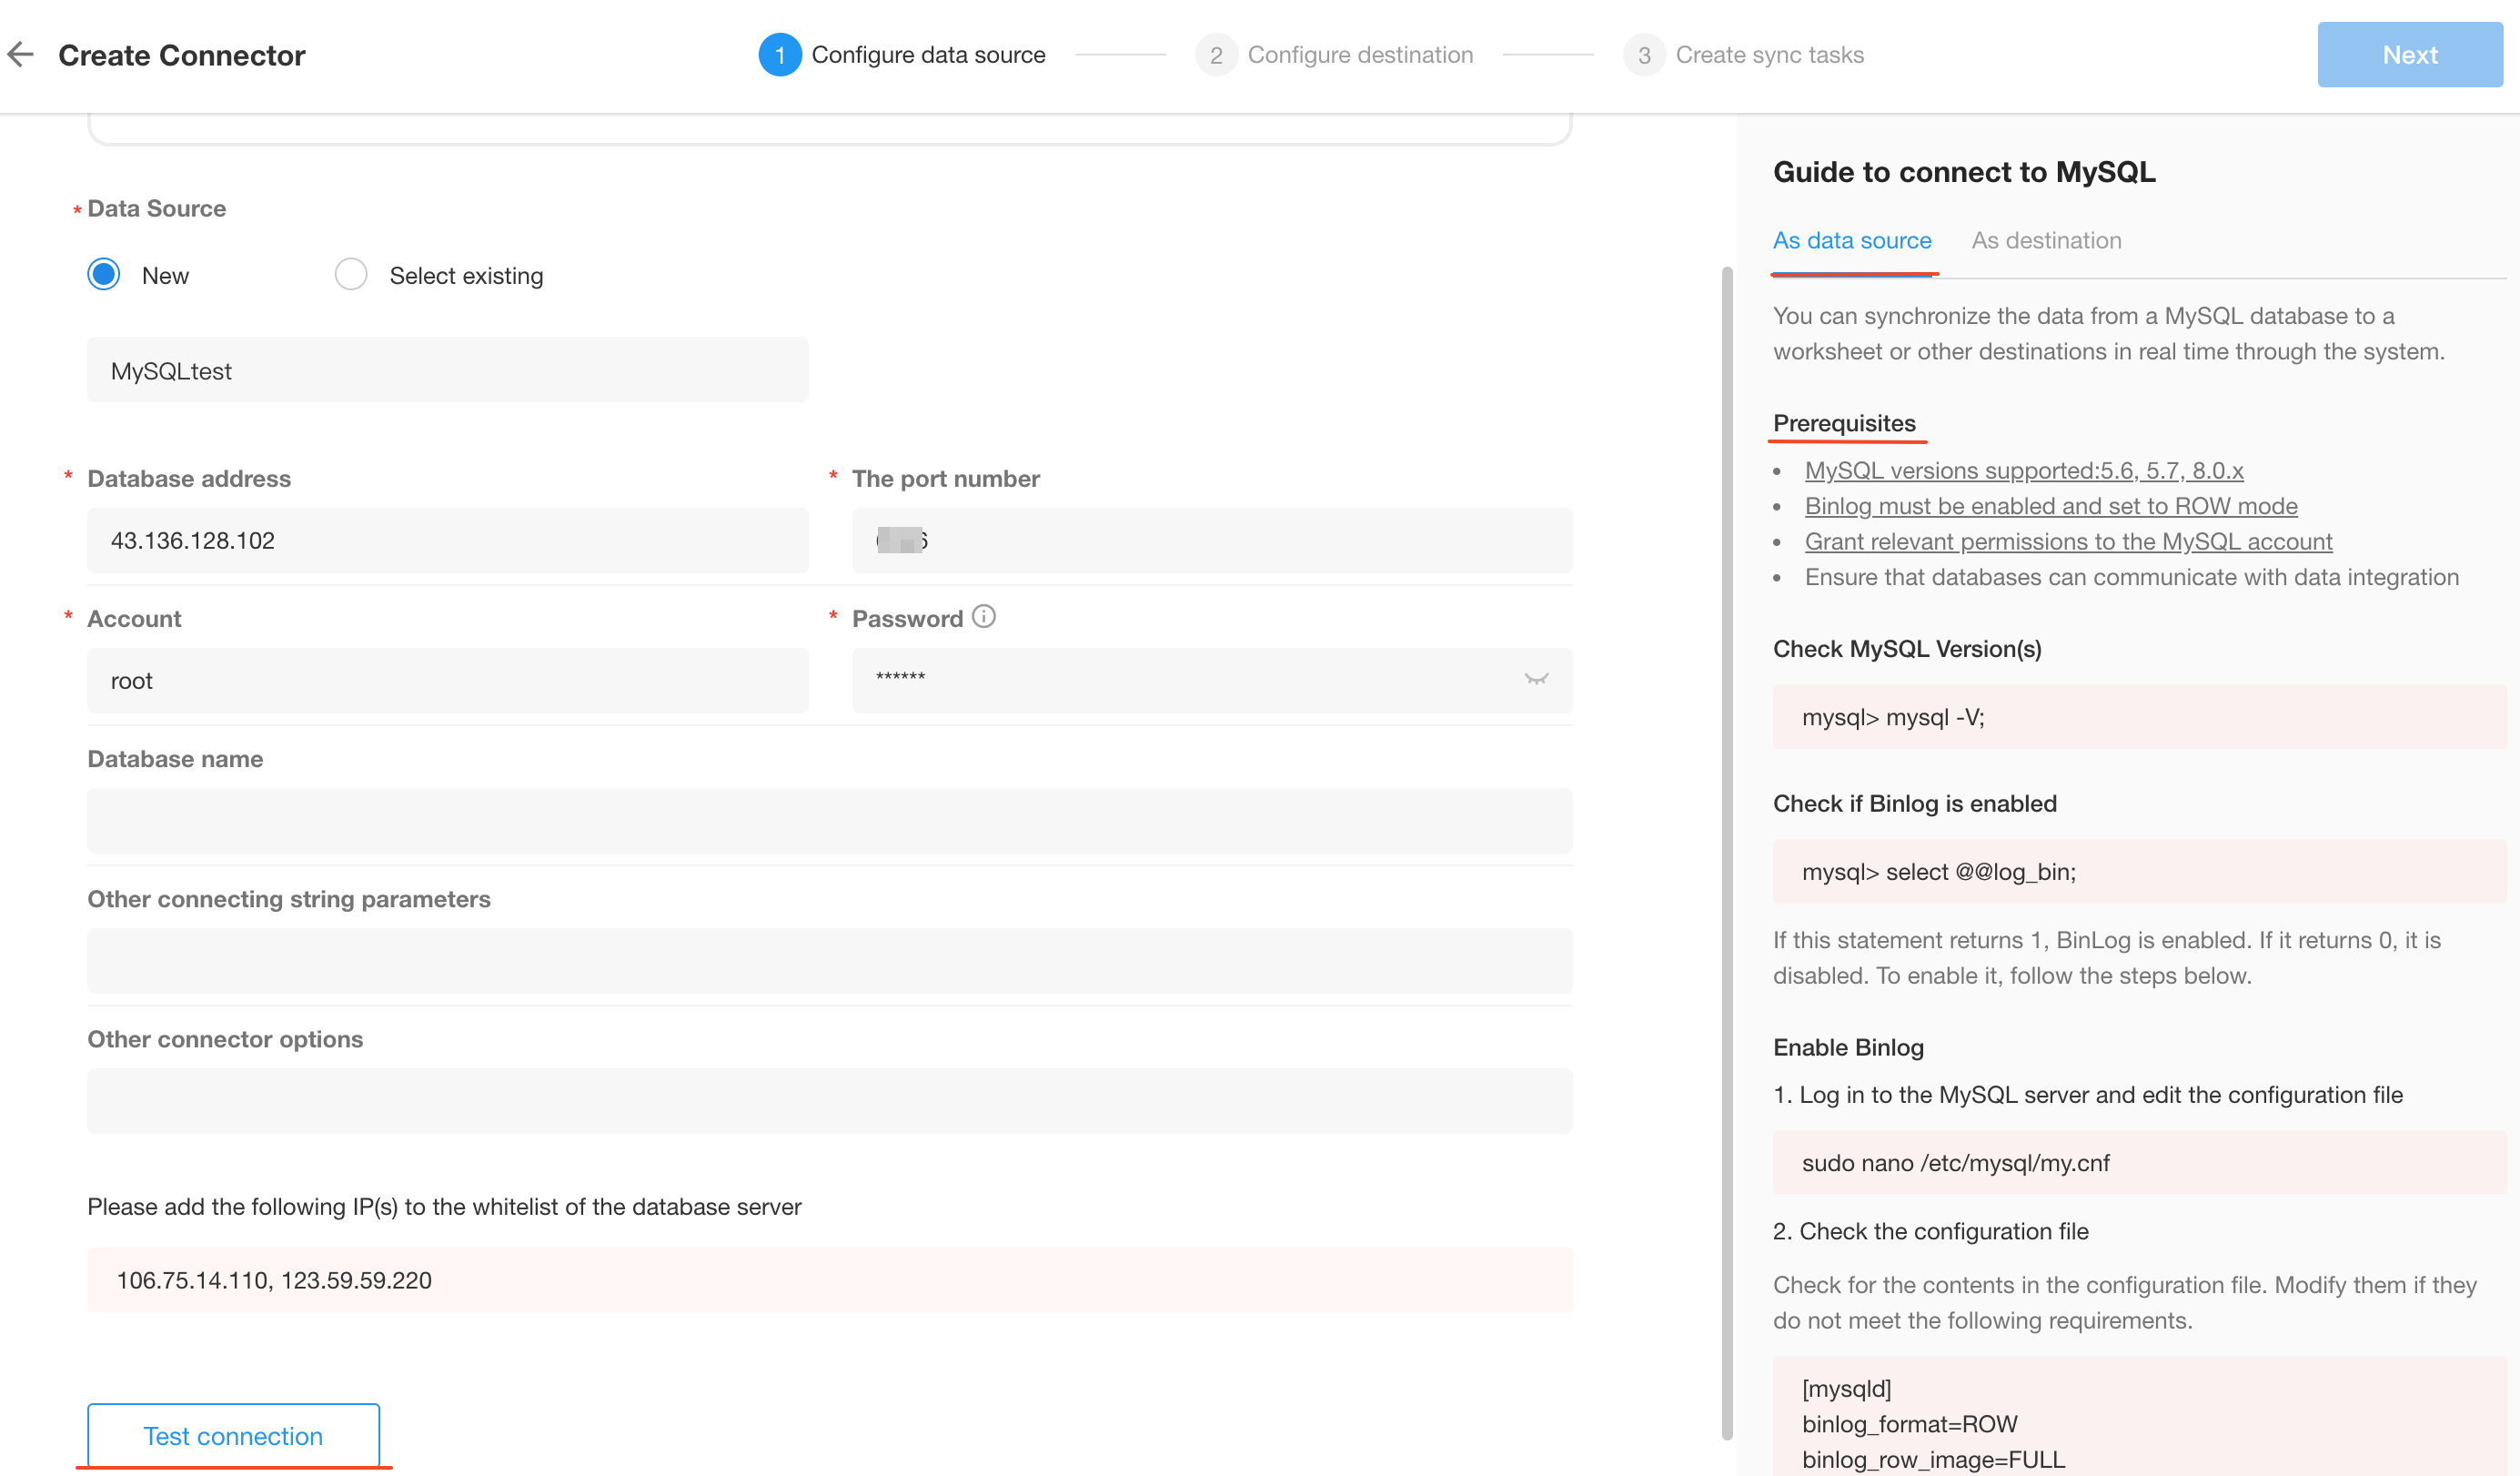
When connecting to an external database, you will need database version, permissions, IP whitelist, and other settings.
You can follow the configuration guide on the right to ensure a successful connection.
After this, input the information to access the database on the left and click [Test Connection]. Once successful, click Next.
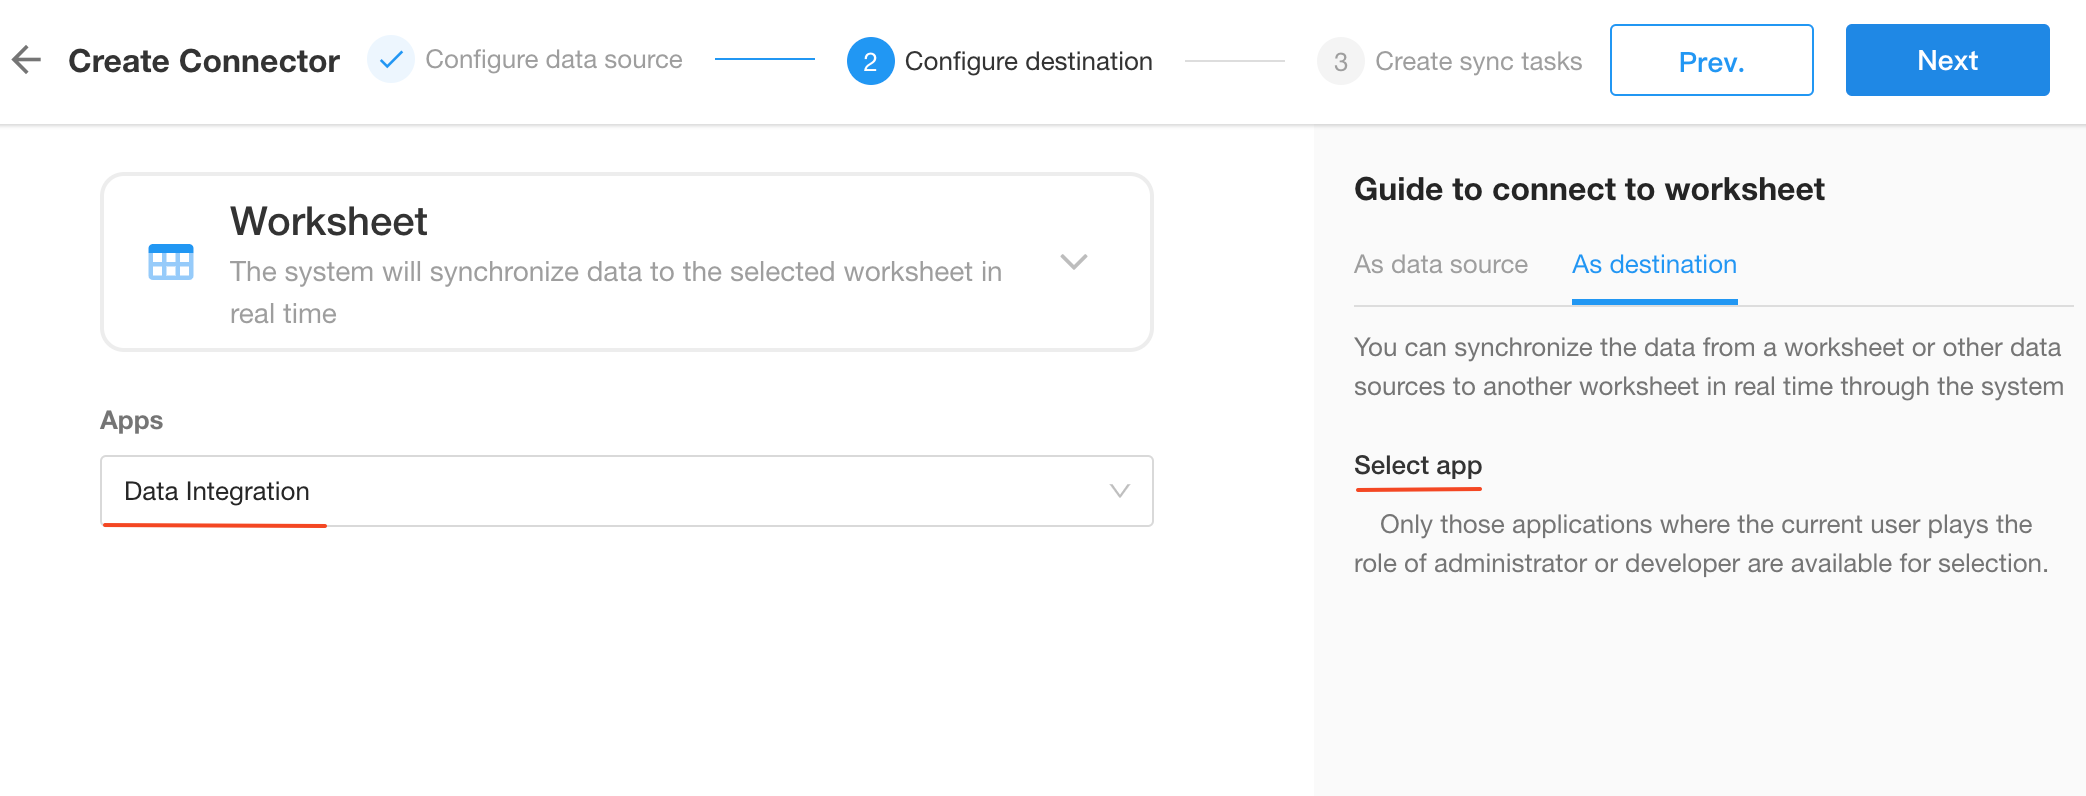
3. Configure destination data
Choose the application where the data will be synced to and click Next.
Create sync tasks
1. Choose sync method: Sync data only
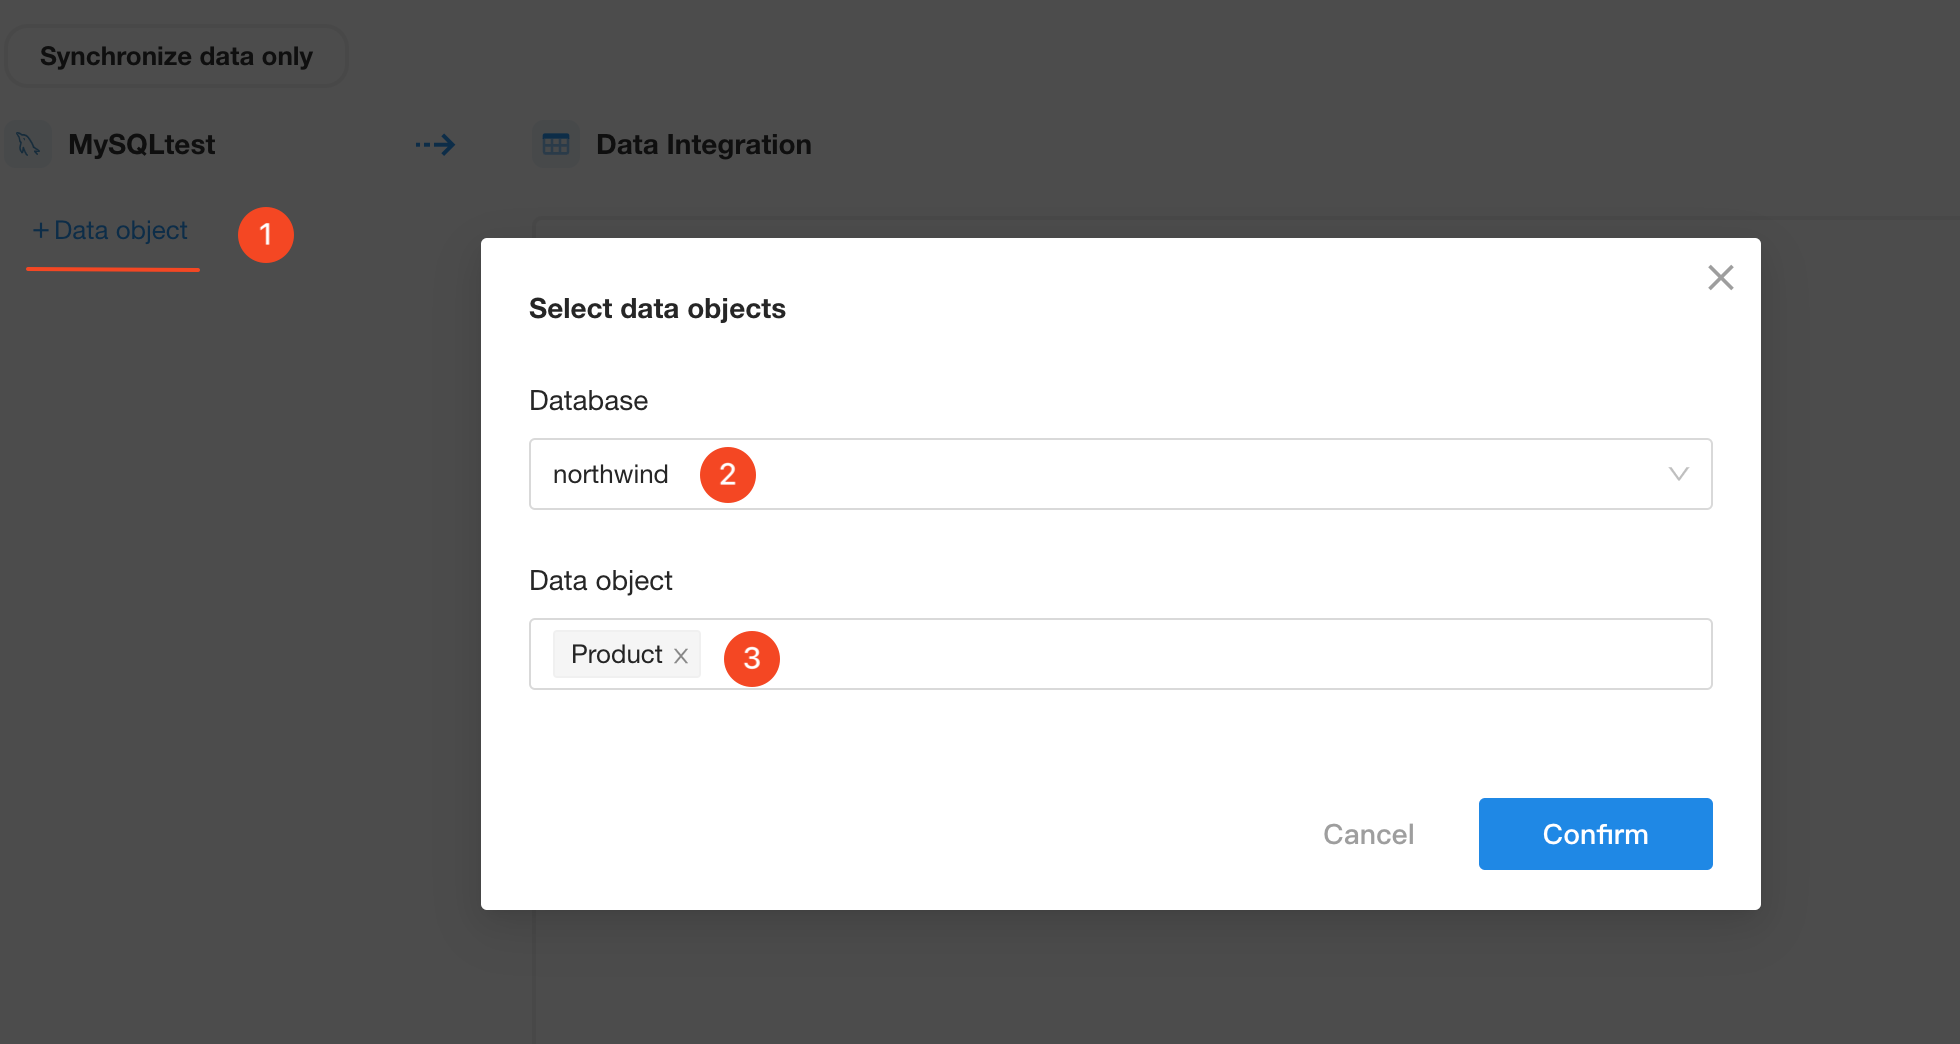
2. Select the database and data tables to be synced
3. Choose the destination worksheet and configure field mapping
- Create a new worksheet here.
- Select the fields to be synced.
- Set field names and field types.
- Set the title field.
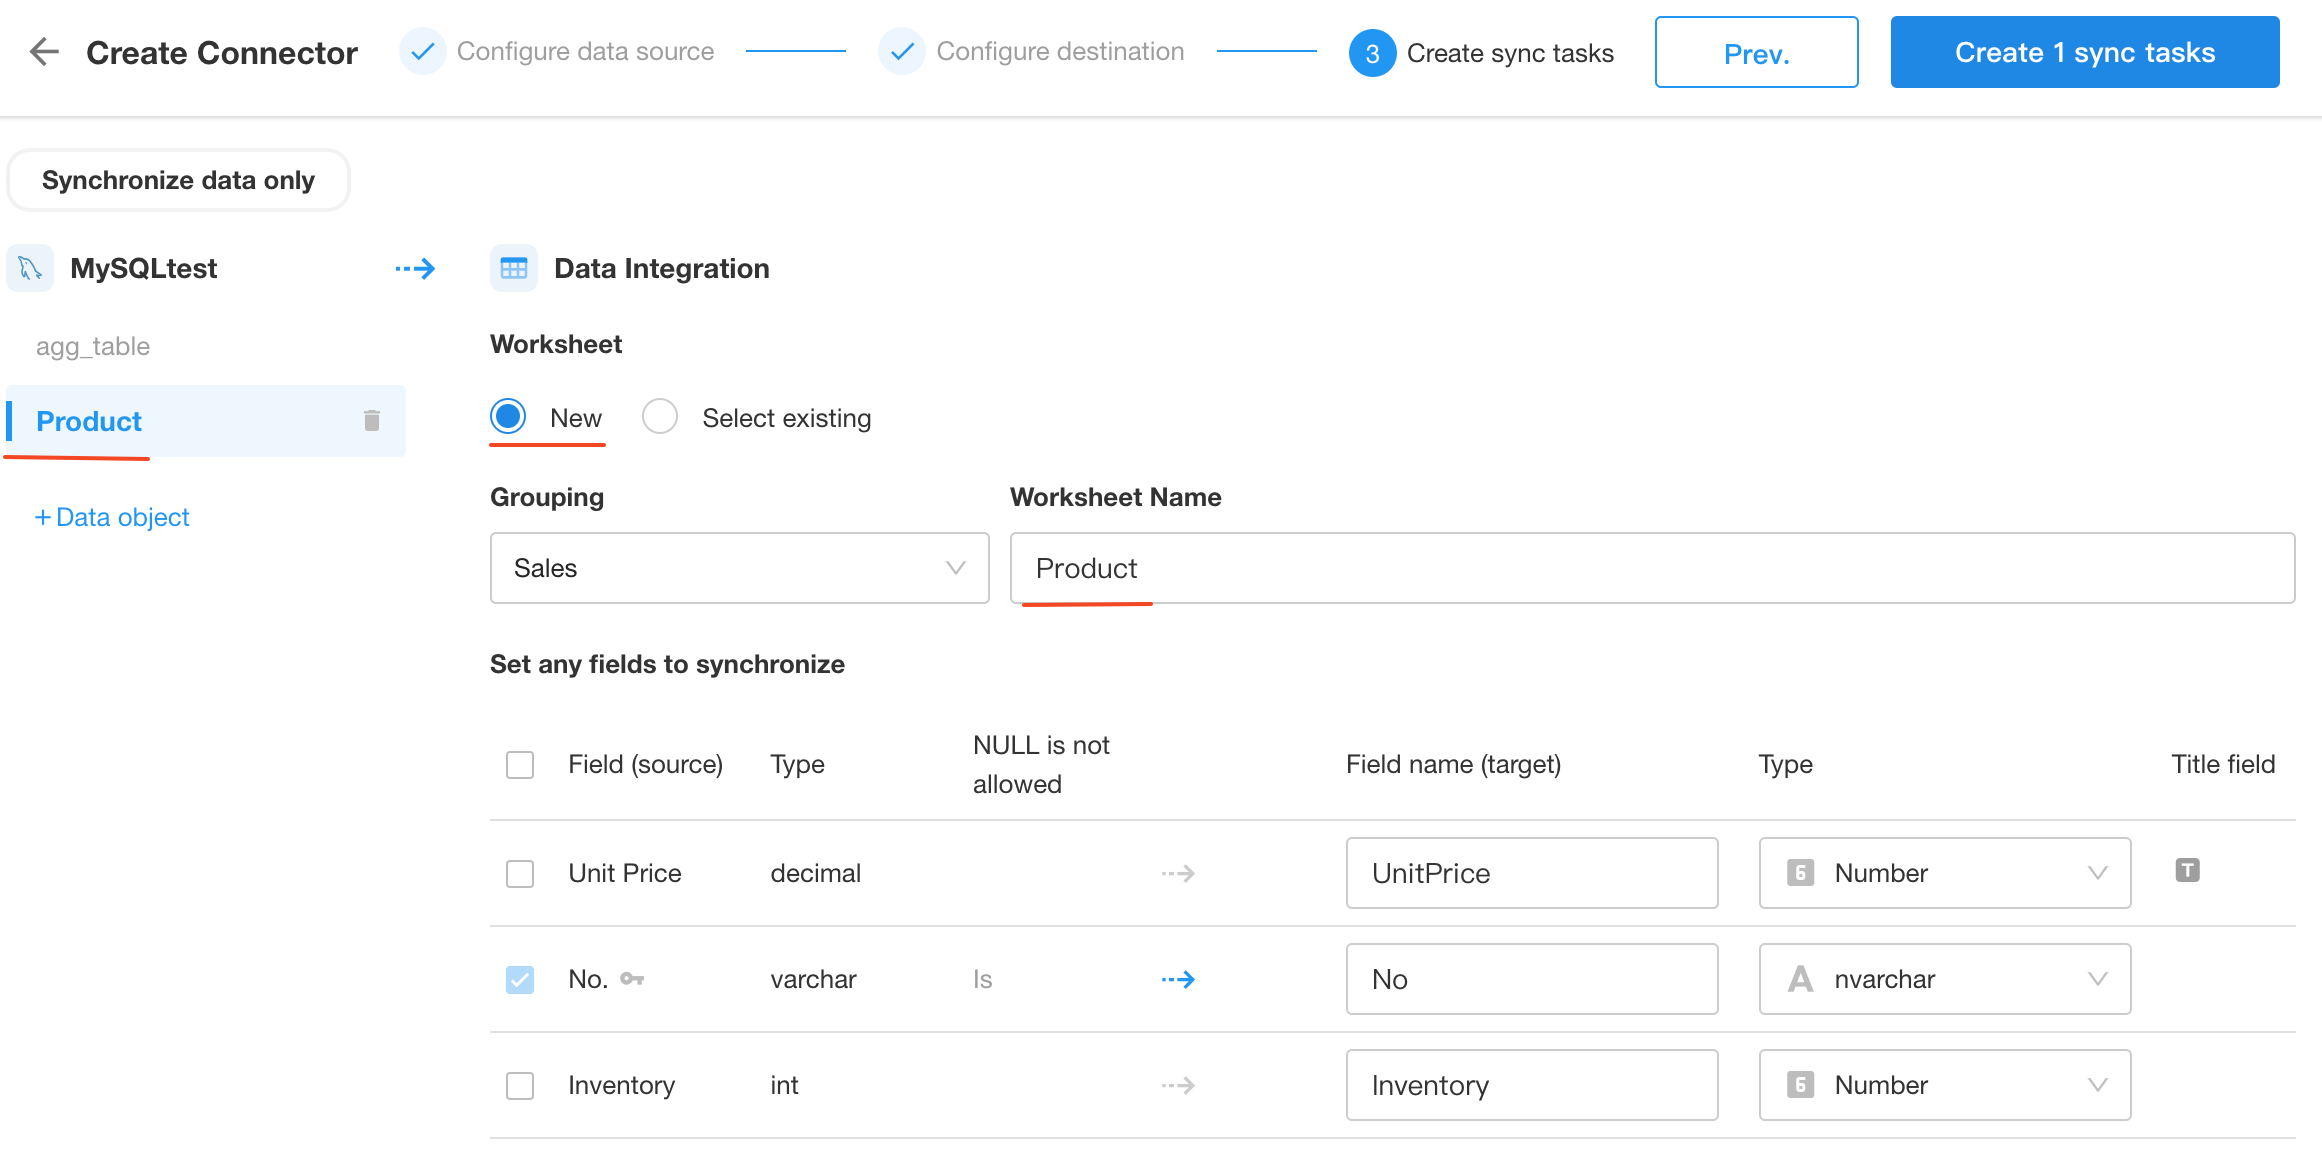
After this, click [Create X sync tasks].
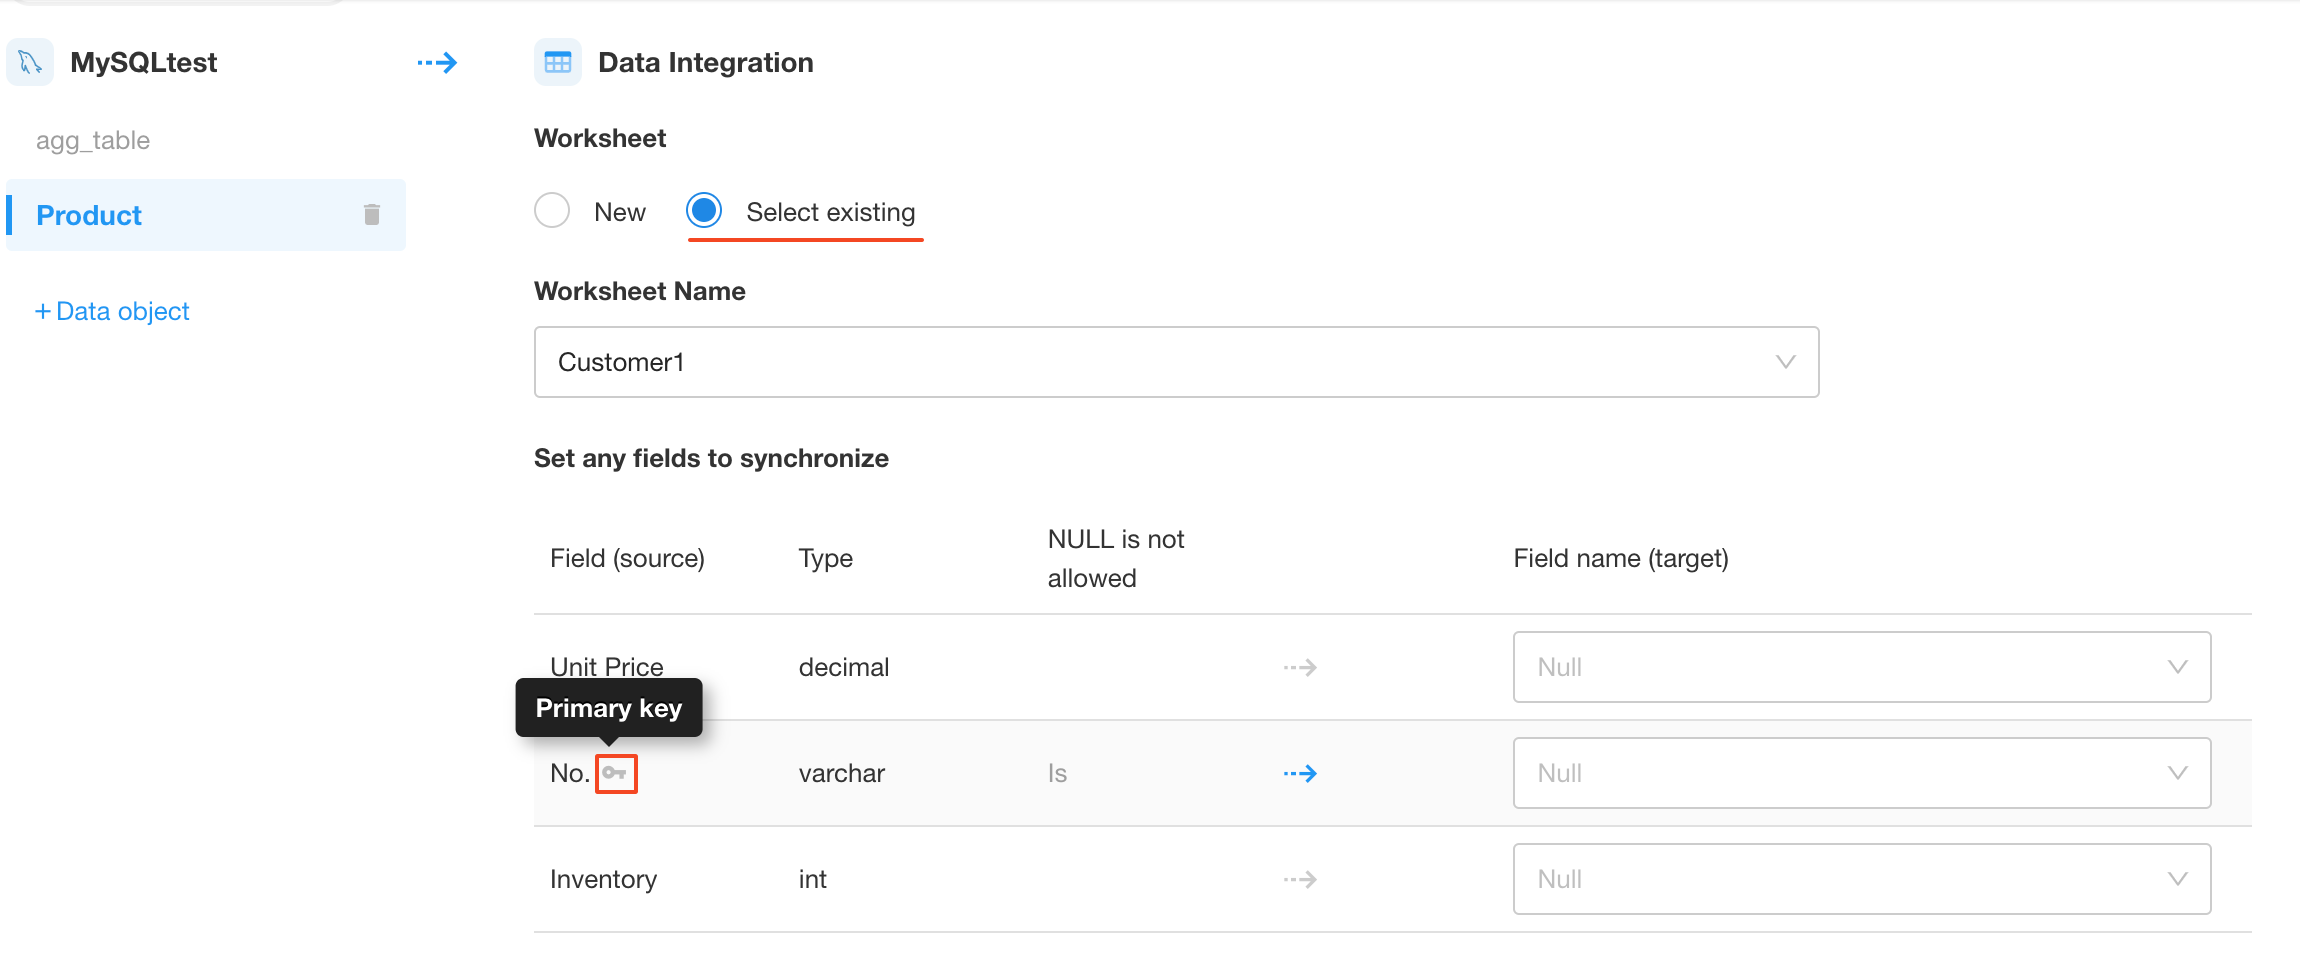
Sync to an existing worksheet
If you choose to sync to an existing worksheet, you can identify duplicate data based on the primary key in the data, and choose whether to overwrite or skip duplicate data.
4. Check data sync
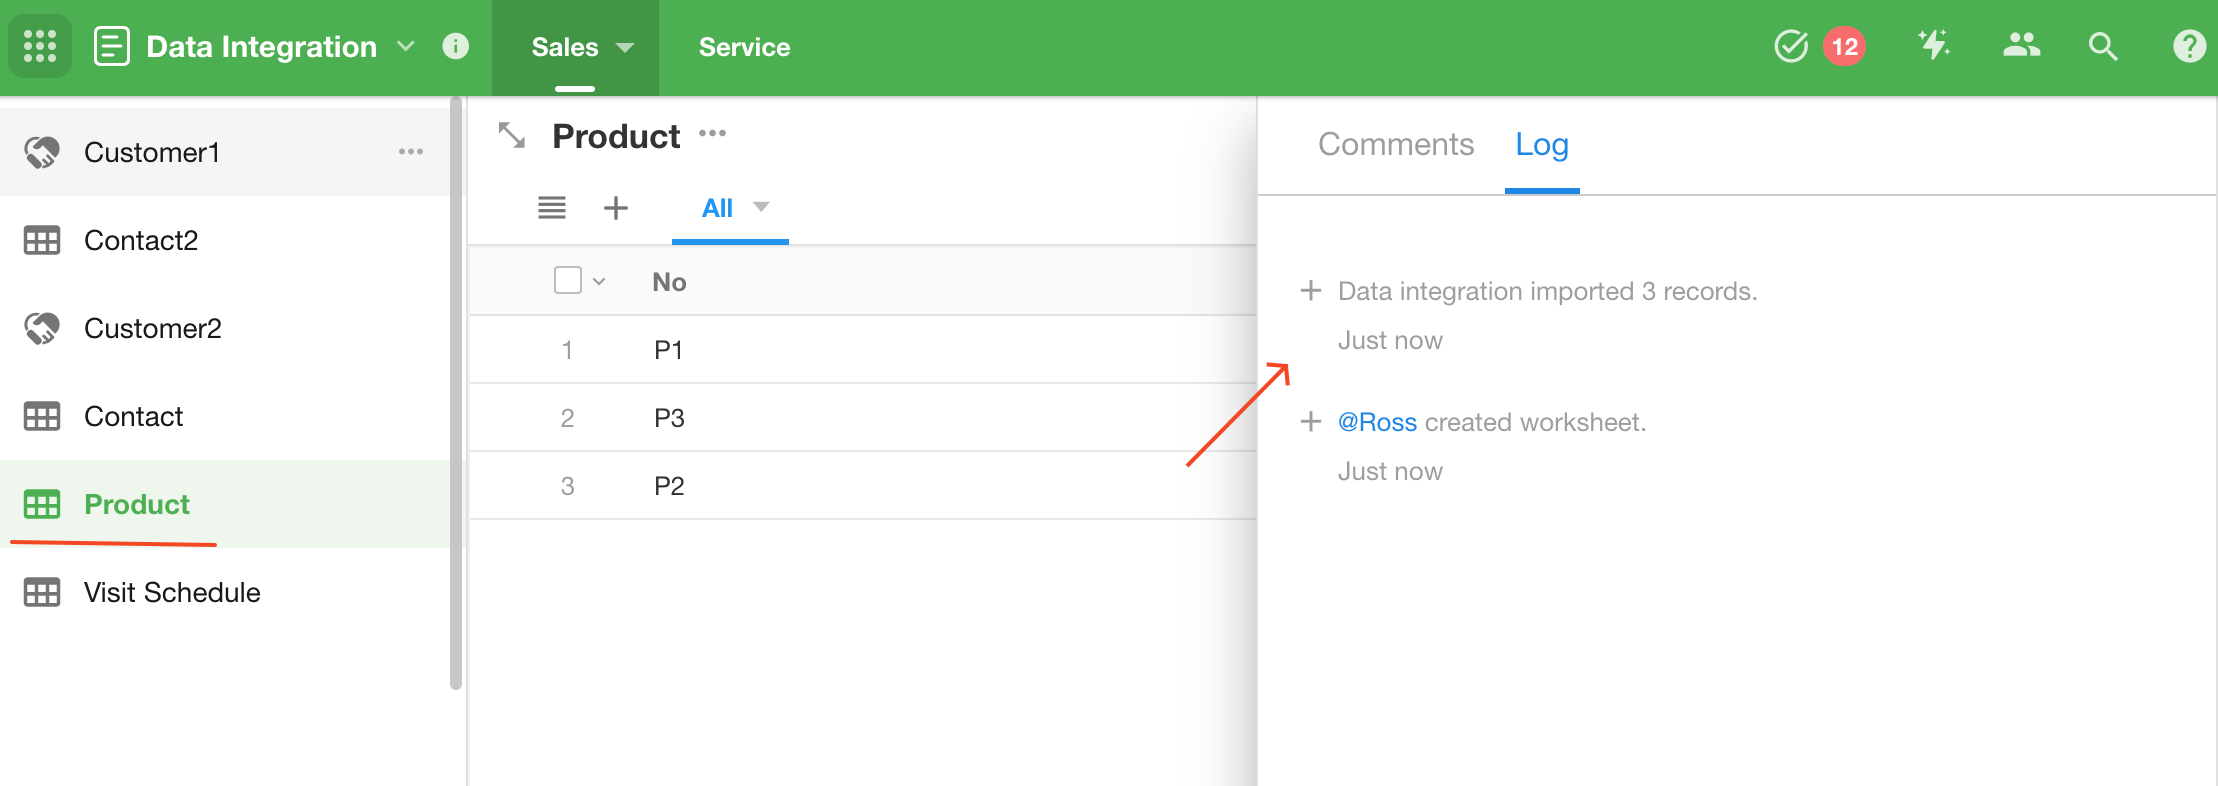
When you enter the Data Integration application, you can see that a new Product worksheet has been created and records have been added. You can continue to modify data in MySQL or add new records to check data sync.
