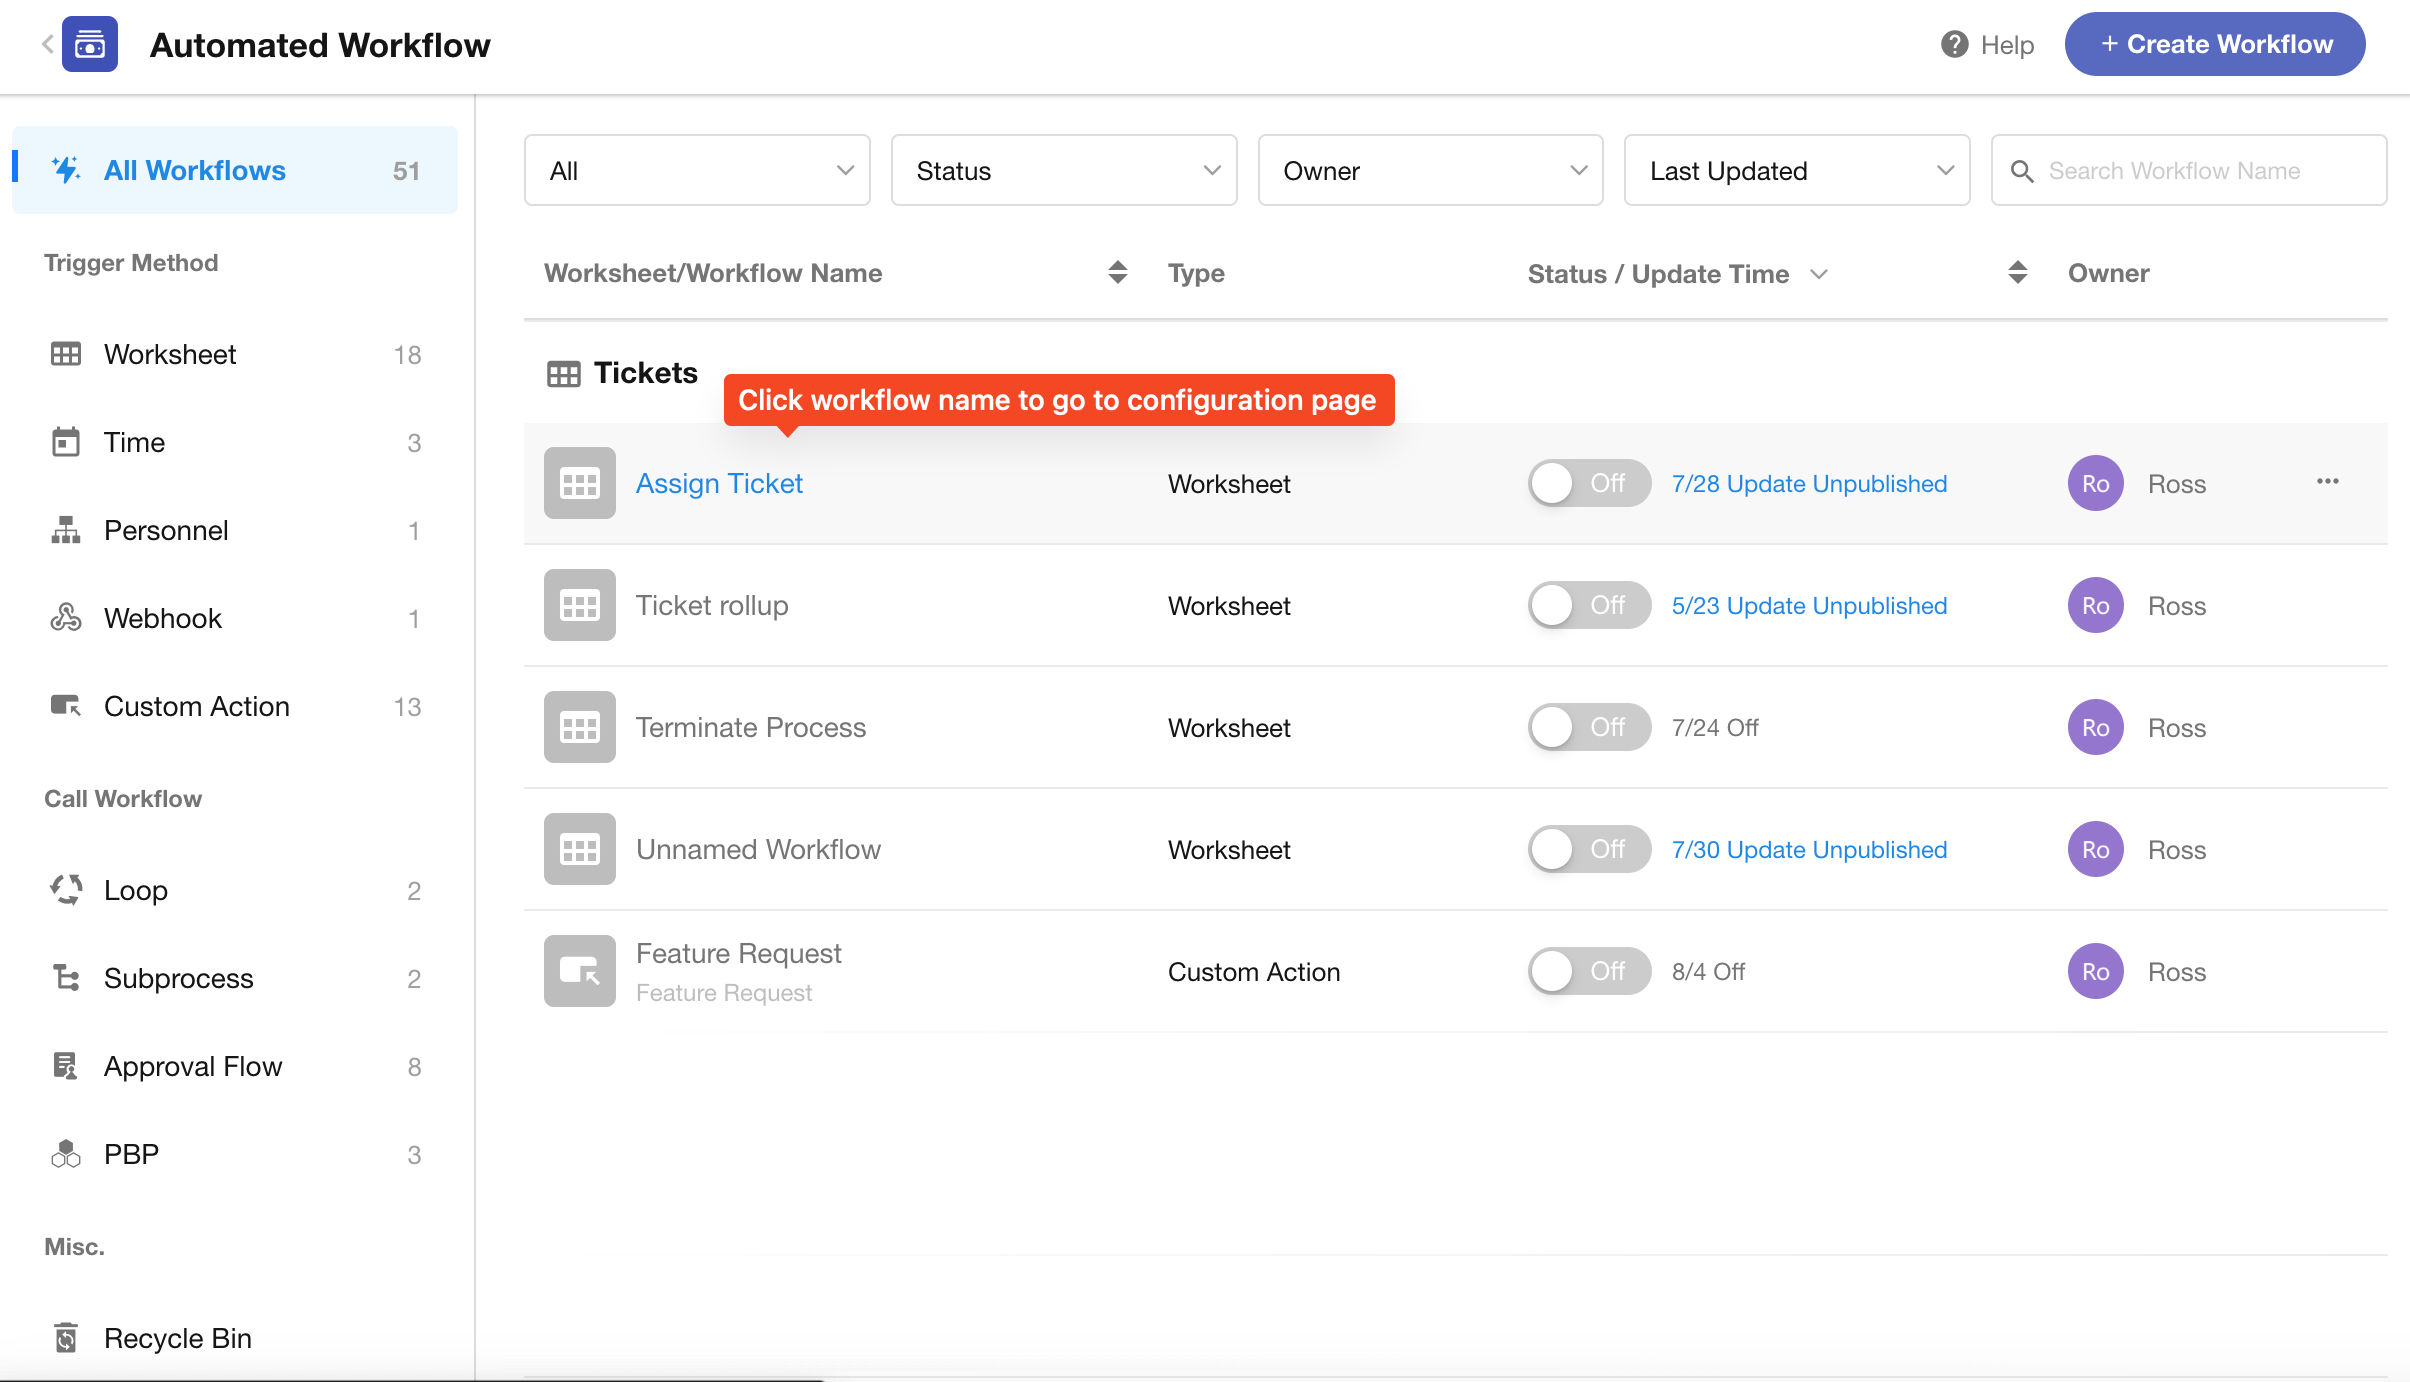
Managing Individual Workflows
In an application, find the workflow you want to modify and click its name to enter the workflow configuration page.
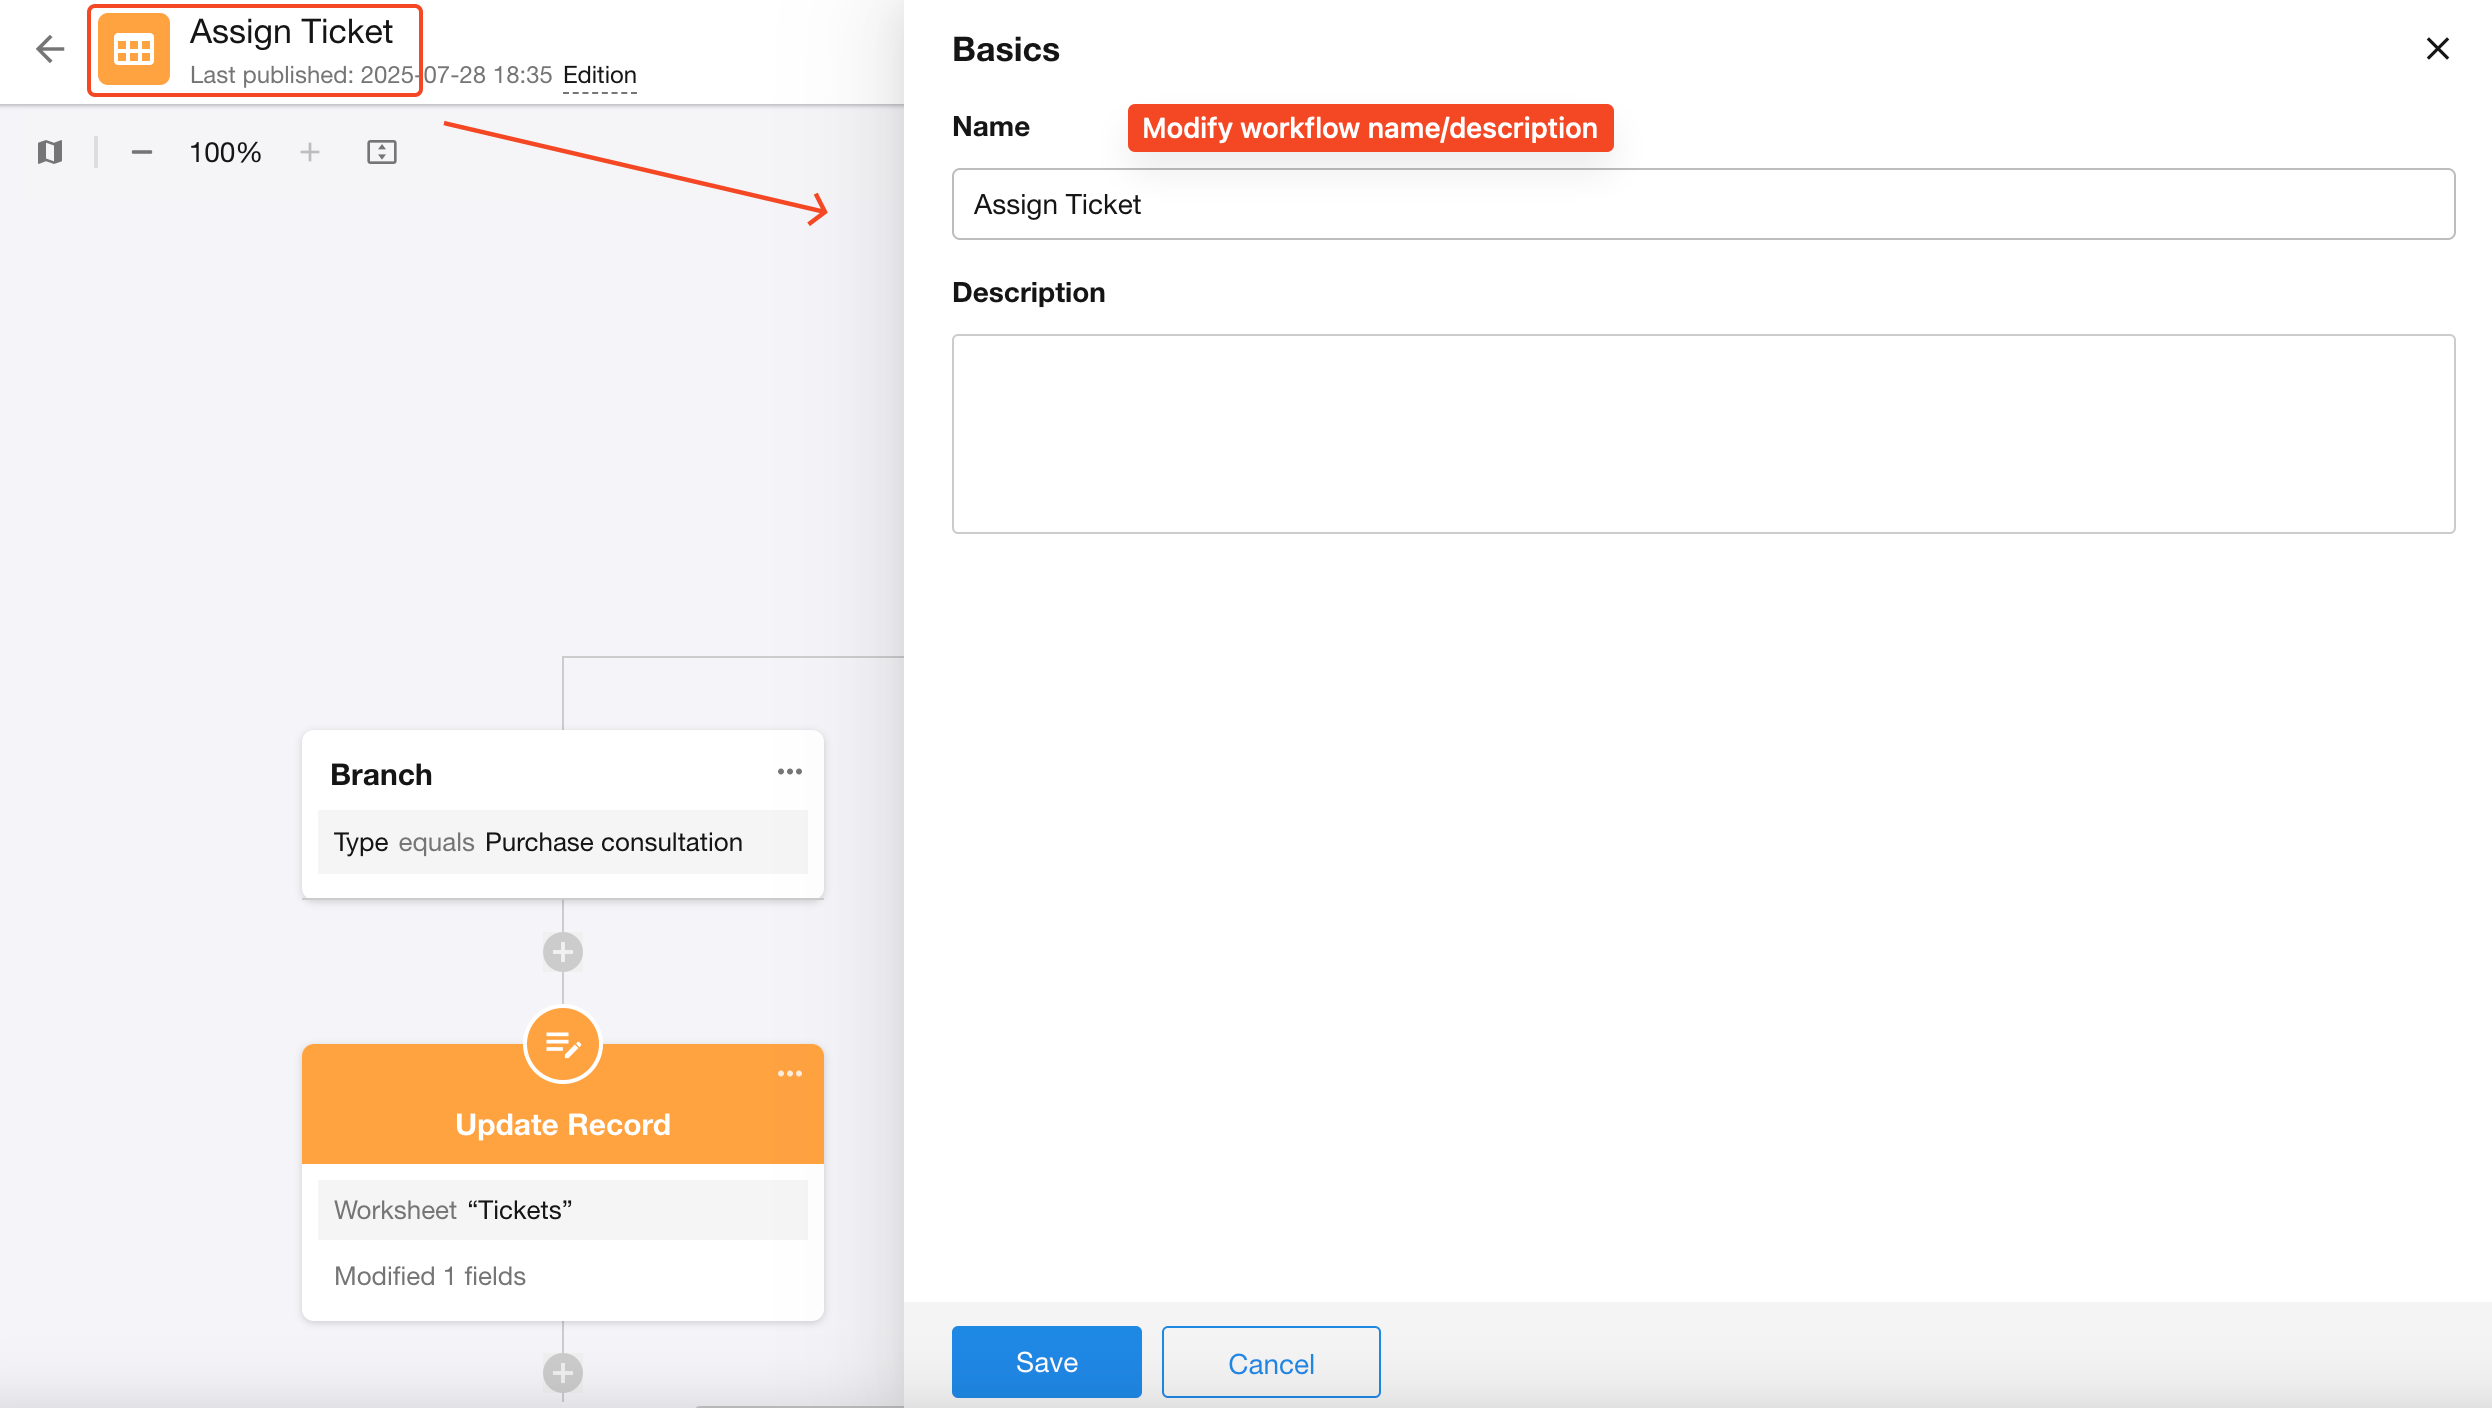
1. Modify Workflow Name/Description
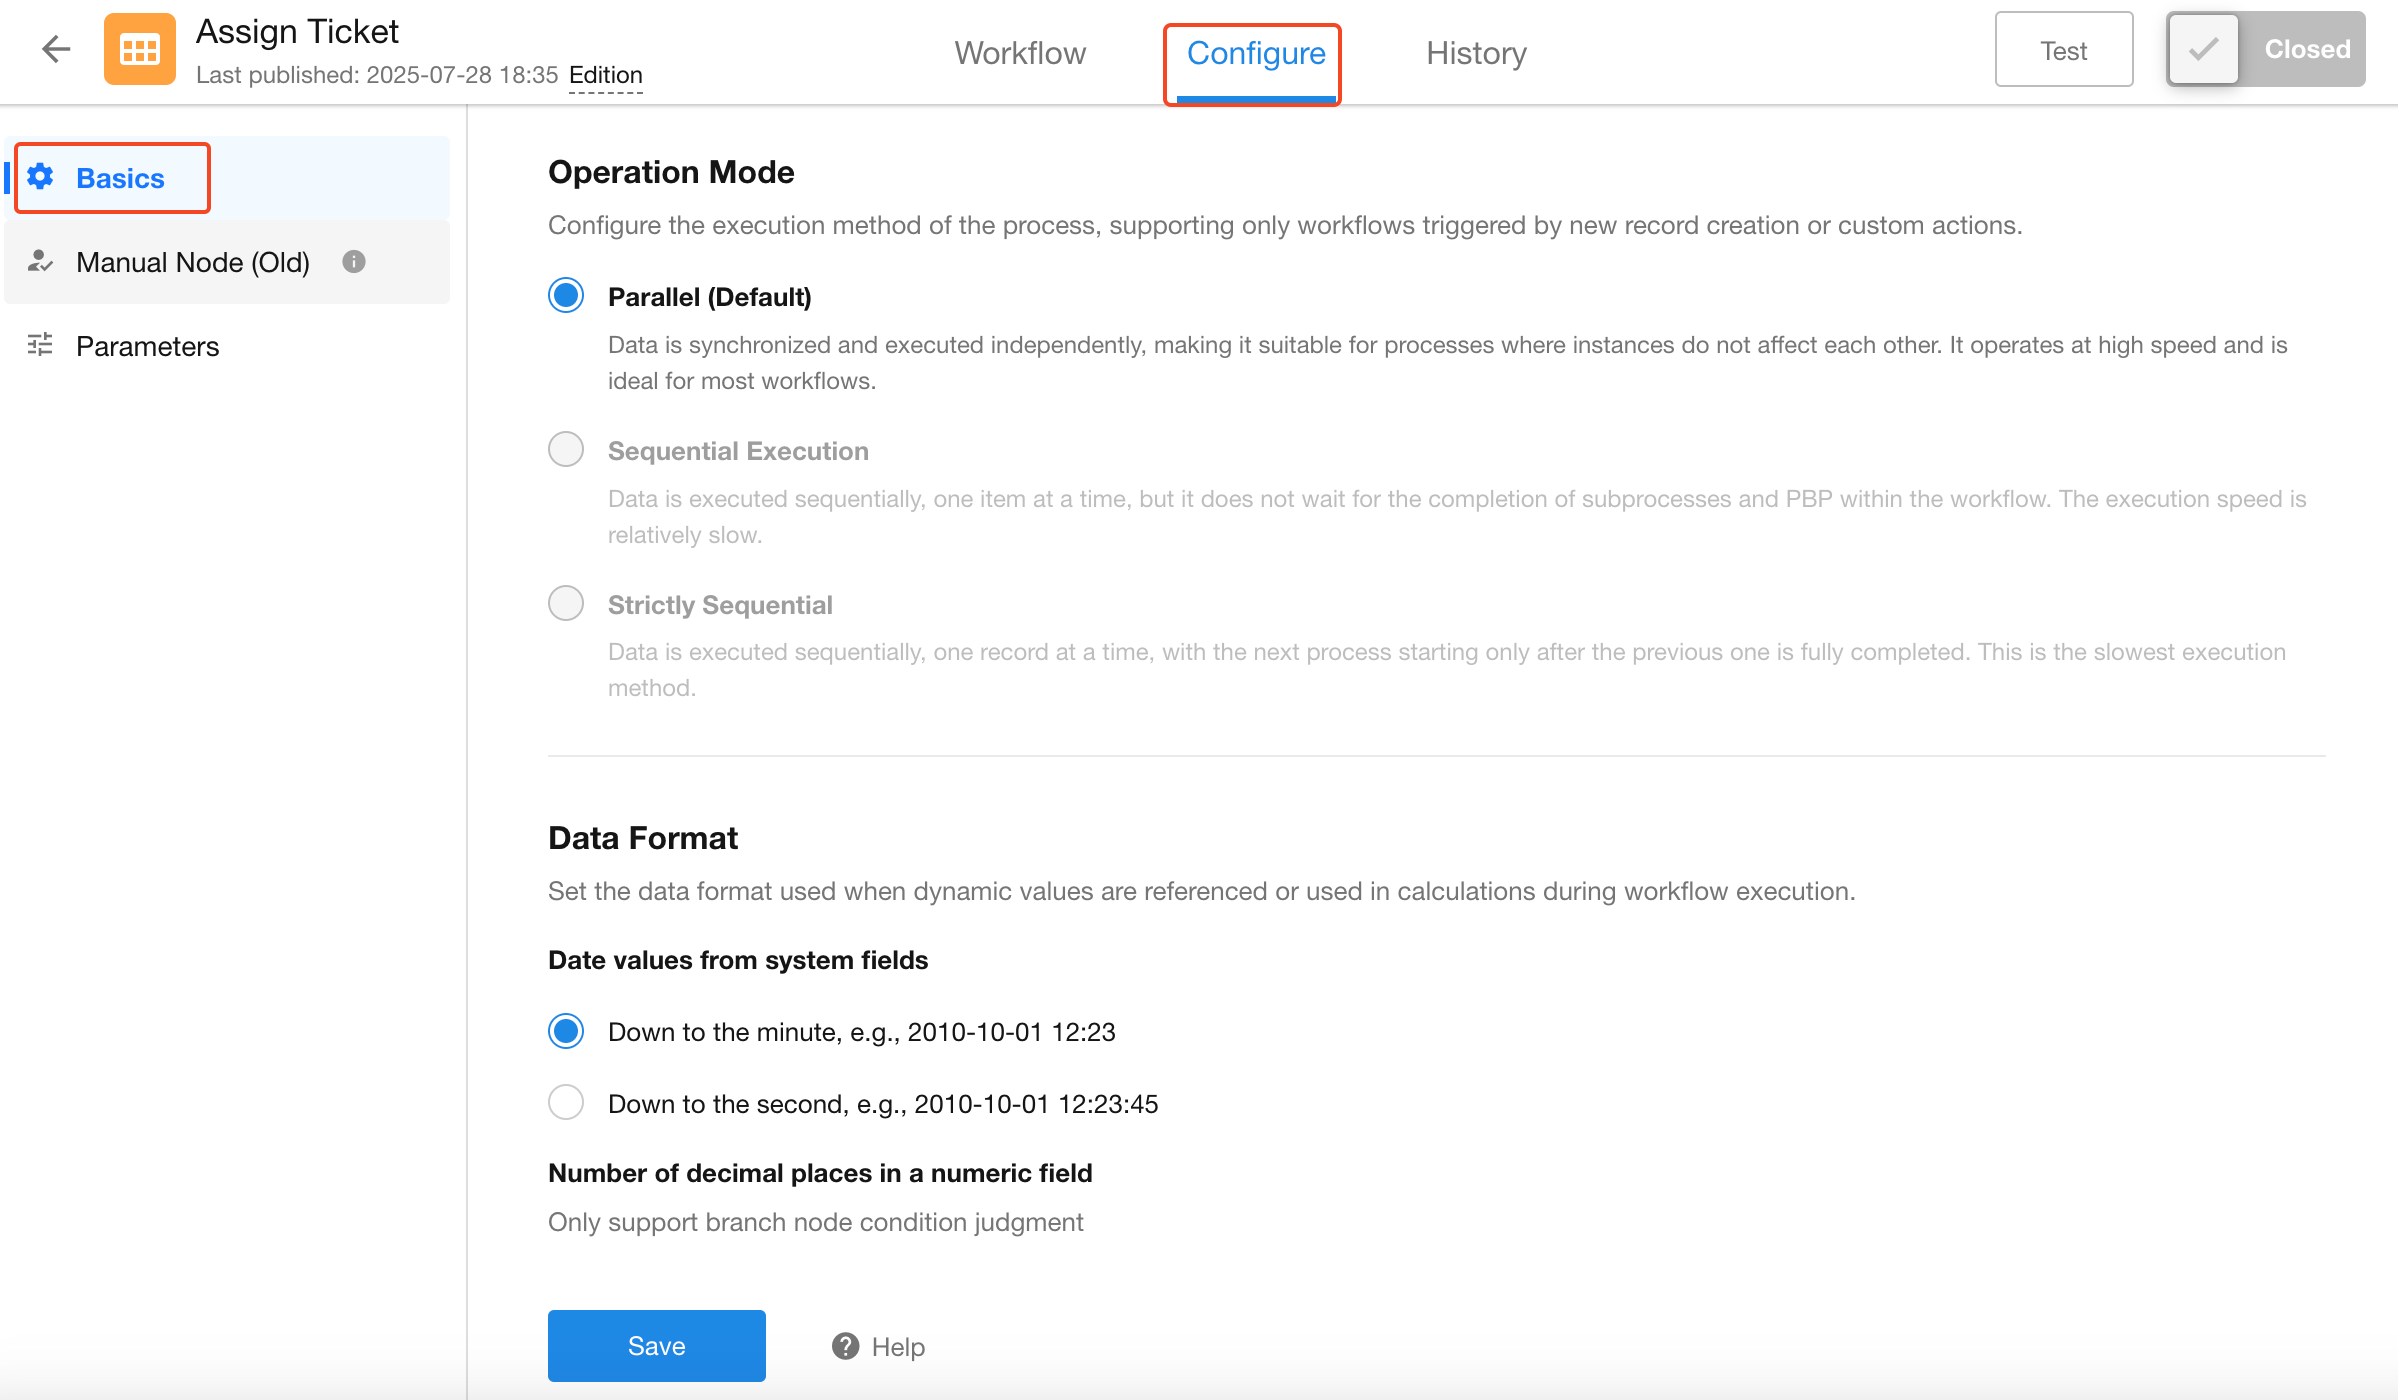
2. Modify Workflow Global Configuration
Configure the workflow’s execution settings, automatic approval for approval nodes, etc. More details
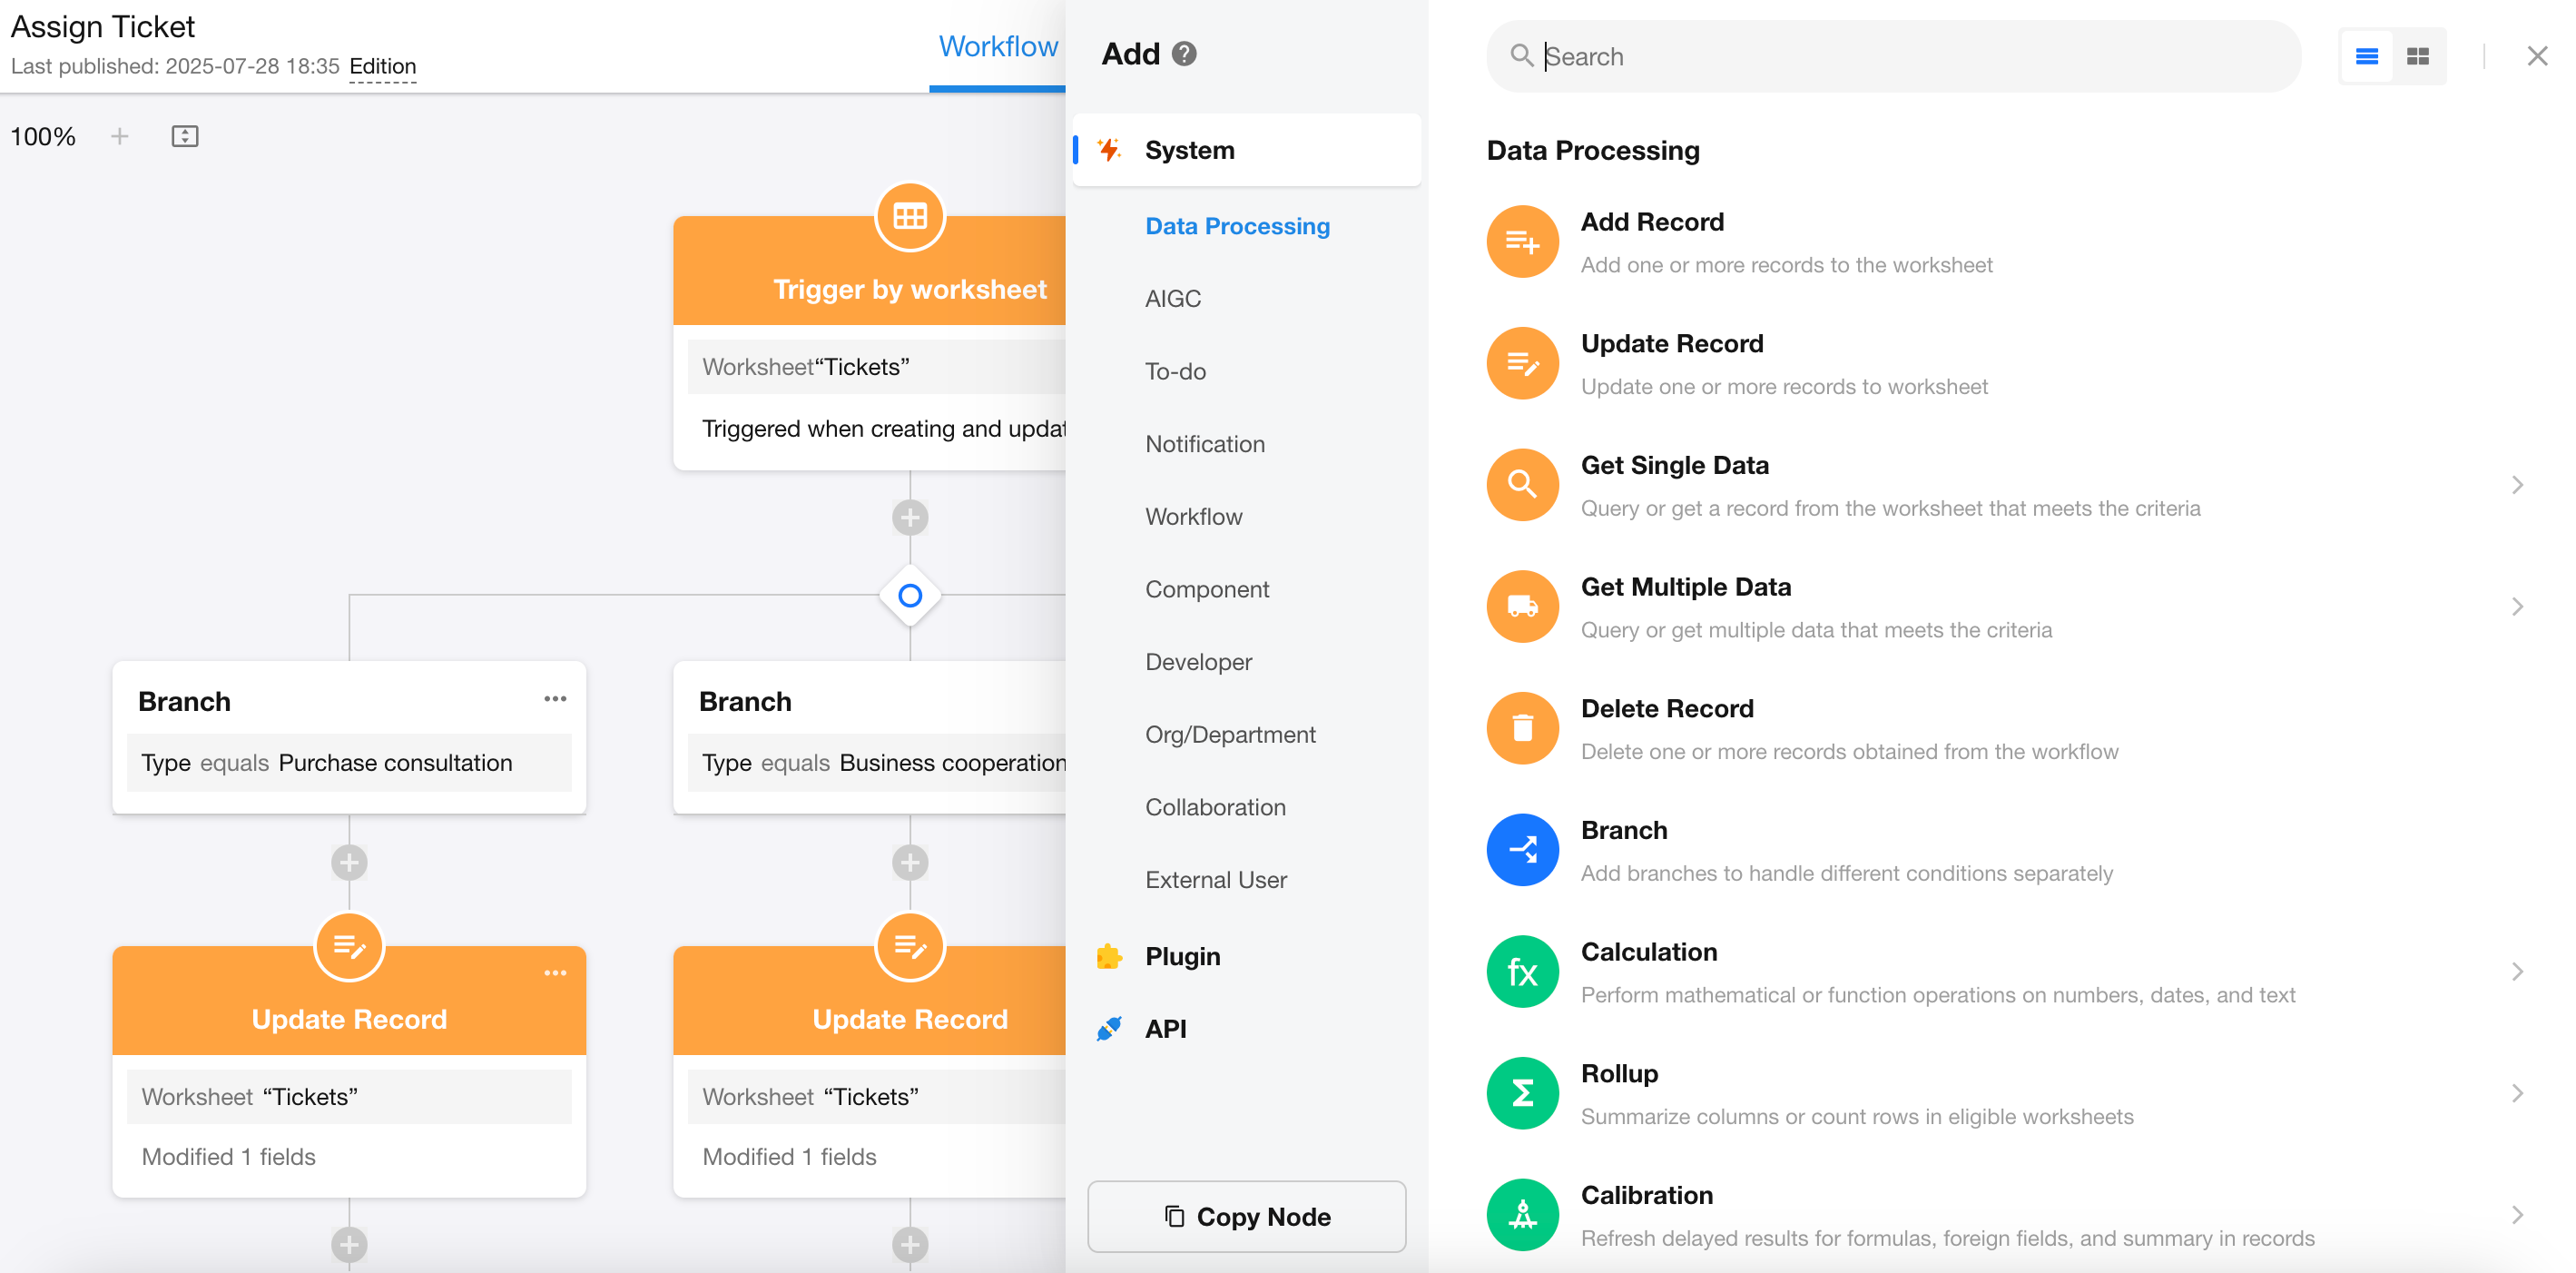
3. Modify Workflow Automation Settings
Click on an existing node within the workflow to modify it, or click the "+" icon to add a node.
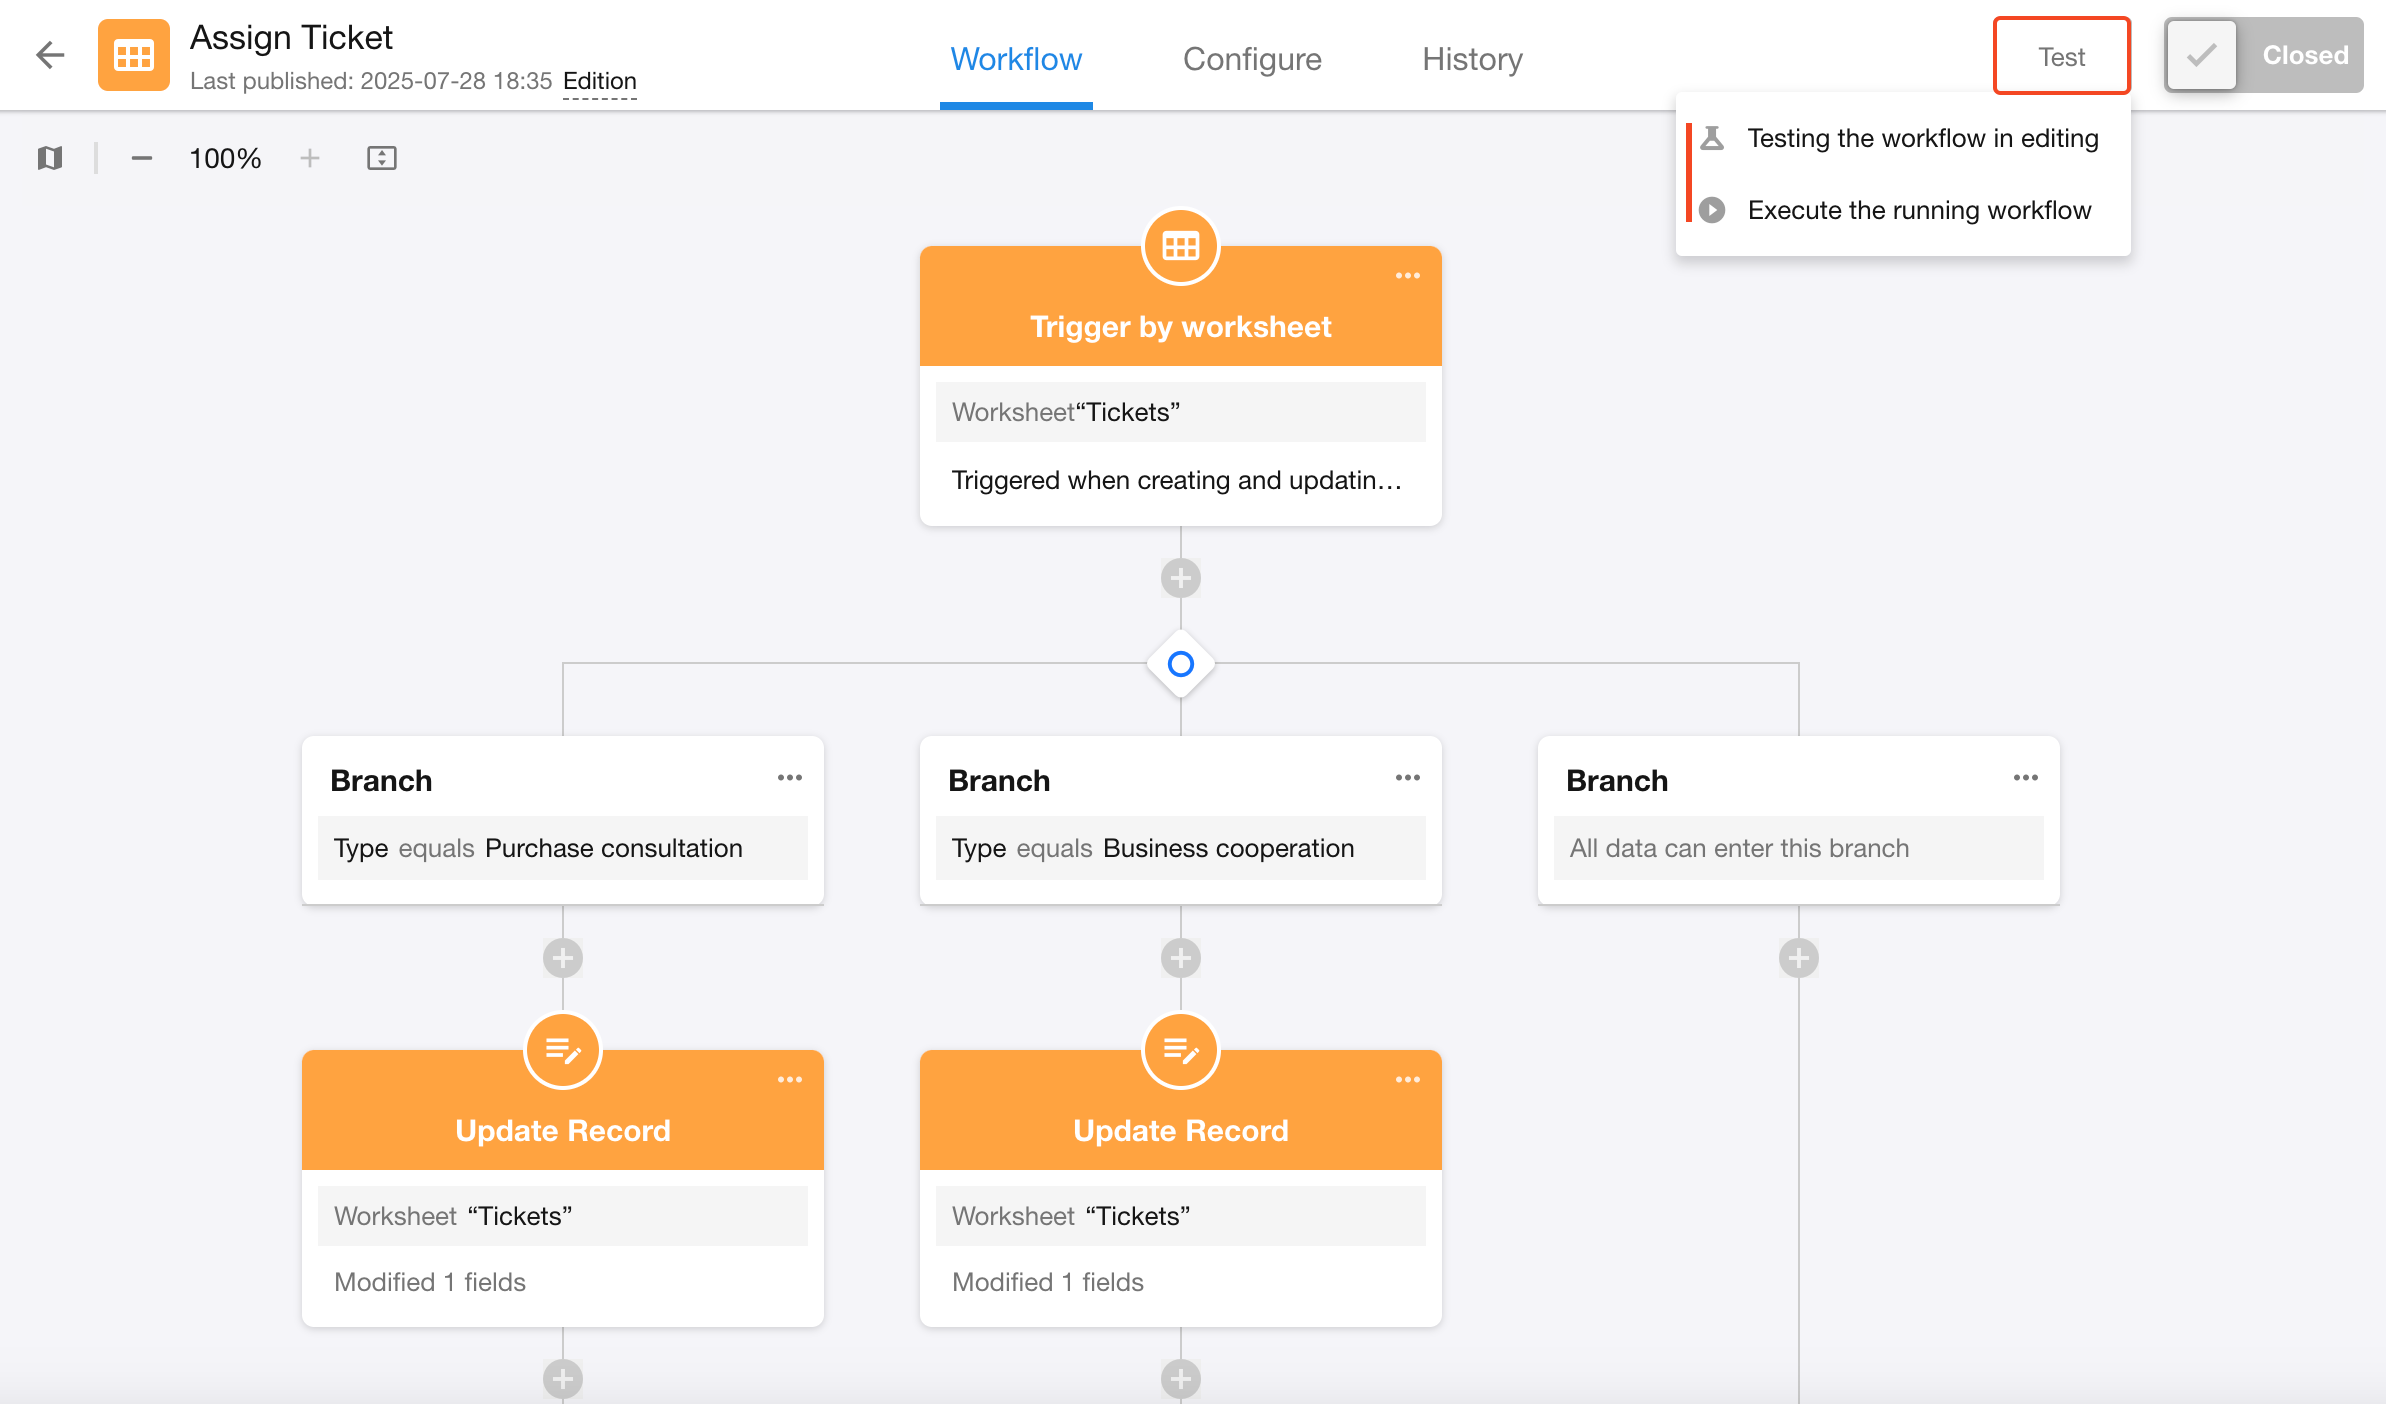
4. Test Workflow
After designing and configuring a workflow, it’s important to test its execution effects. You can test both published workflows that are currently running and workflows that are in editing and not yet published.
-
Test an edited workflow: After a workflow is modified, it needs to be tested before being updated. Select a record and test the workflow with the latest edits.
-
Execute a running workflow (run now): For a published workflow that is running, select a record to execute the workflow.
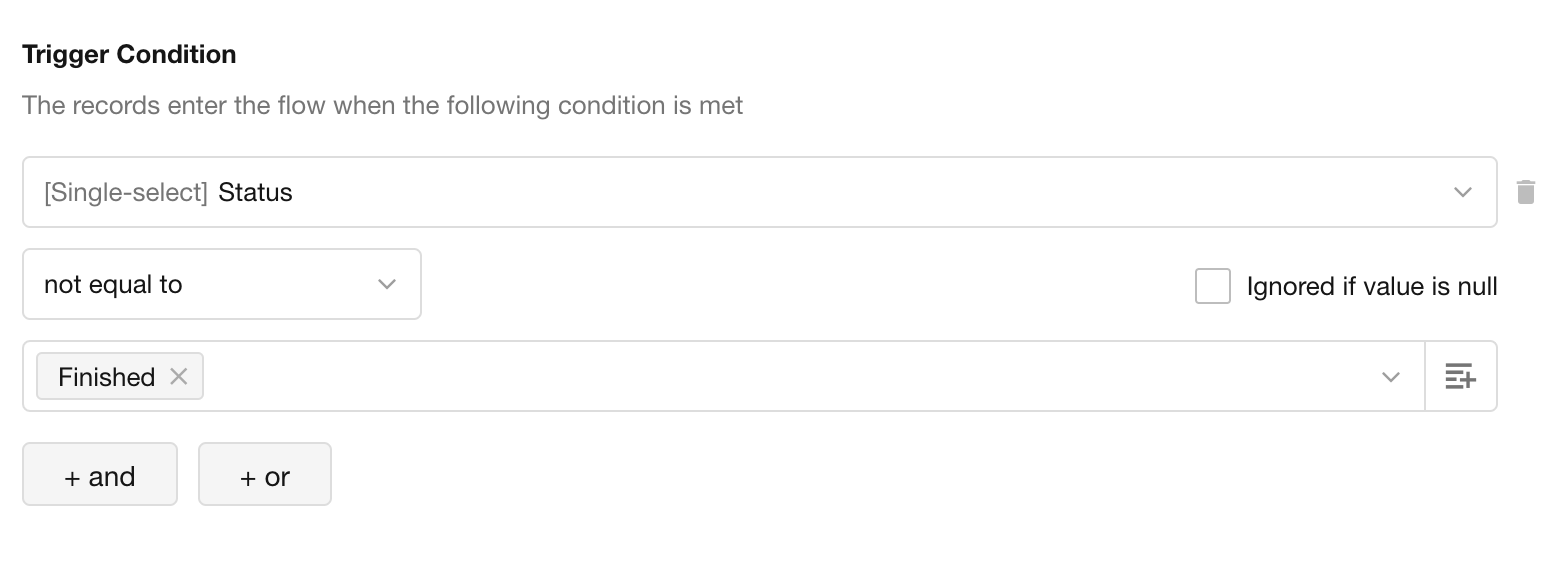
Note: If a record filter is configured in the trigger node, the selected record must meet the trigger conditions to execute the workflow.
Supported Workflow Types for Quick Testing:
- Workflows triggered by worksheet events
- Scheduled workflows
- Workflows triggered by date fields
- Workflows triggered by custom buttons
- Subprocesses, packaged business processes (PBP)
Workflow Testing Notes:
-
For workflows triggered by record deletion, the selected record will not be deleted during testing.
-
In workflow testing, operations such as field updates are actually executed.
-
In workflow testing, the person who triggers the workflow is considered the workflow initiator, and the trigger time is the time of testing.
Who Receives Workflow Messages During Testing
During workflow testing, the recipients of workflow messages may differ.
-
Test an edited workflow
-
If the workflow contains nodes like CC, send internal notification, send SMS, or send email, the notification messages will be sent to the tester, and not to the actual recipients configured in the nodes.
-
If the workflow contains approval or fill-in nodes, no action is needed, and they will automatically be approved.
-
Subprocesses, PBPs, and approval processes will be skipped, and you can test them separately.
-
-
Execute a running workflow
- If the tested workflow includes approval, fill-in, CC, send internal notification, send SMS, or send email nodes, during testing, you can choose to send the messages to yourself or to the recipients configured in the nodes.
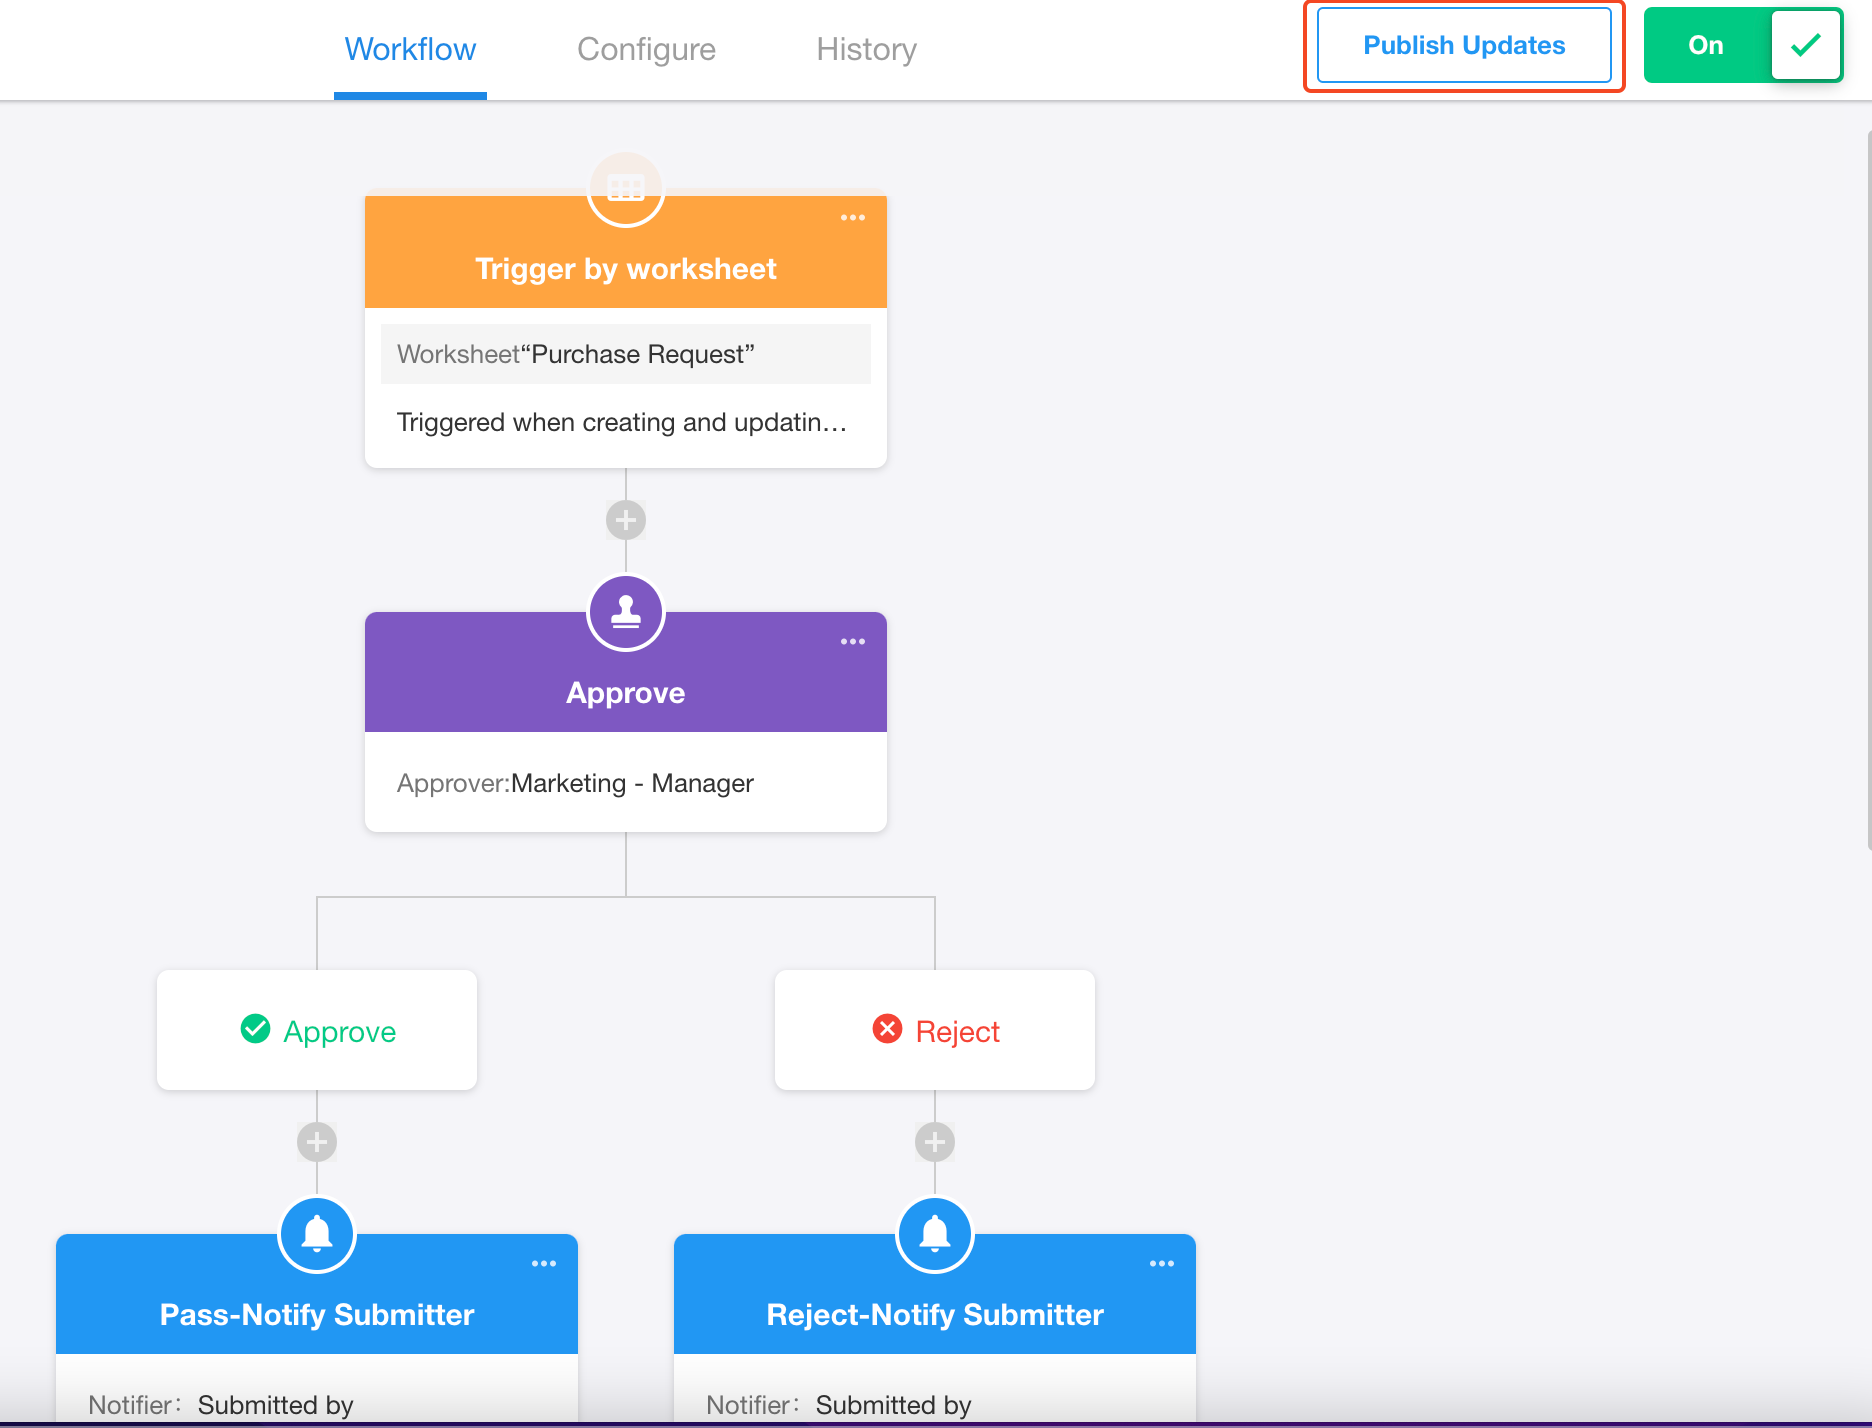
5. Publish Updates
After completing modifications, be sure to click "Publish updates" to apply the new changes to the workflow.
Before publishing the update, if the workflow is triggered, it will continue to run according to the configuration it had when triggered.
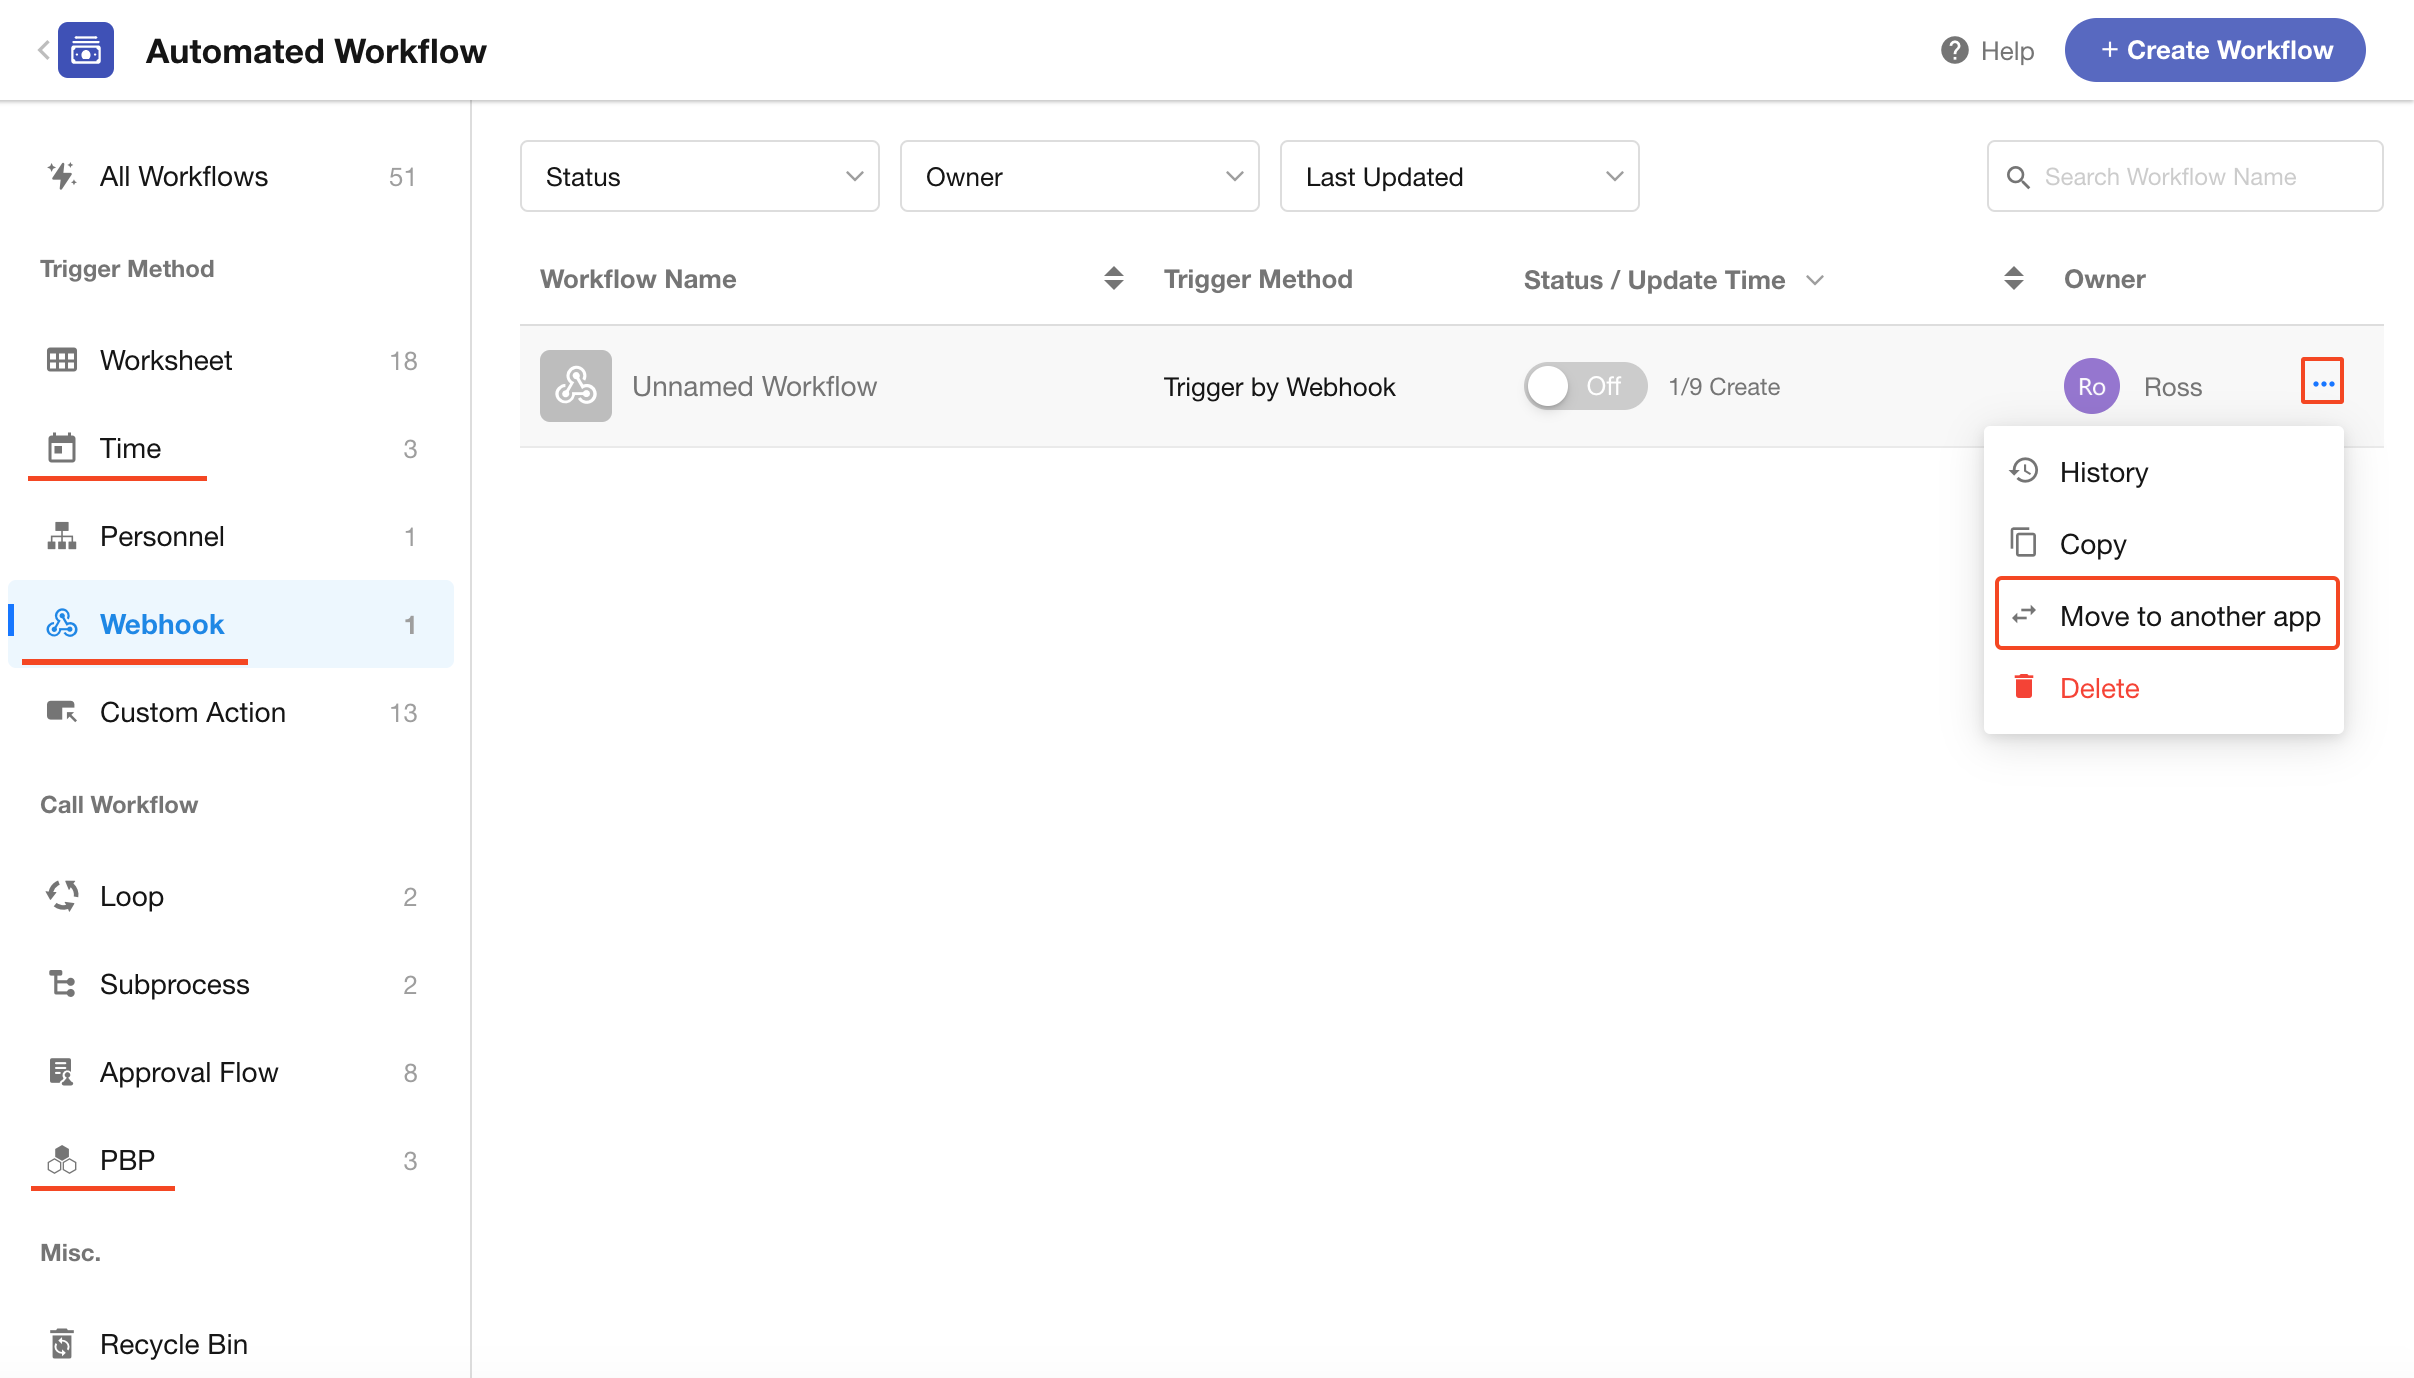
6. Move Workflow to Another Application
Workflows that are not triggered by worksheet data can be moved to other applications. The following workflow types can be moved:
-
Workflows triggered by webhook
-
Scheduled workflows (excluding workflows triggered by date fields)
-
Workflows triggered by organizational user events (non-external users)
-
Packaged business processes (PBP)
7. Convert to Subprocess/PBP
Workflows triggered by worksheet events, custom buttons, or date fields can be converted to subprocesses.
Subprocesses with object arrays as the data source can be converted into packaged business processes.
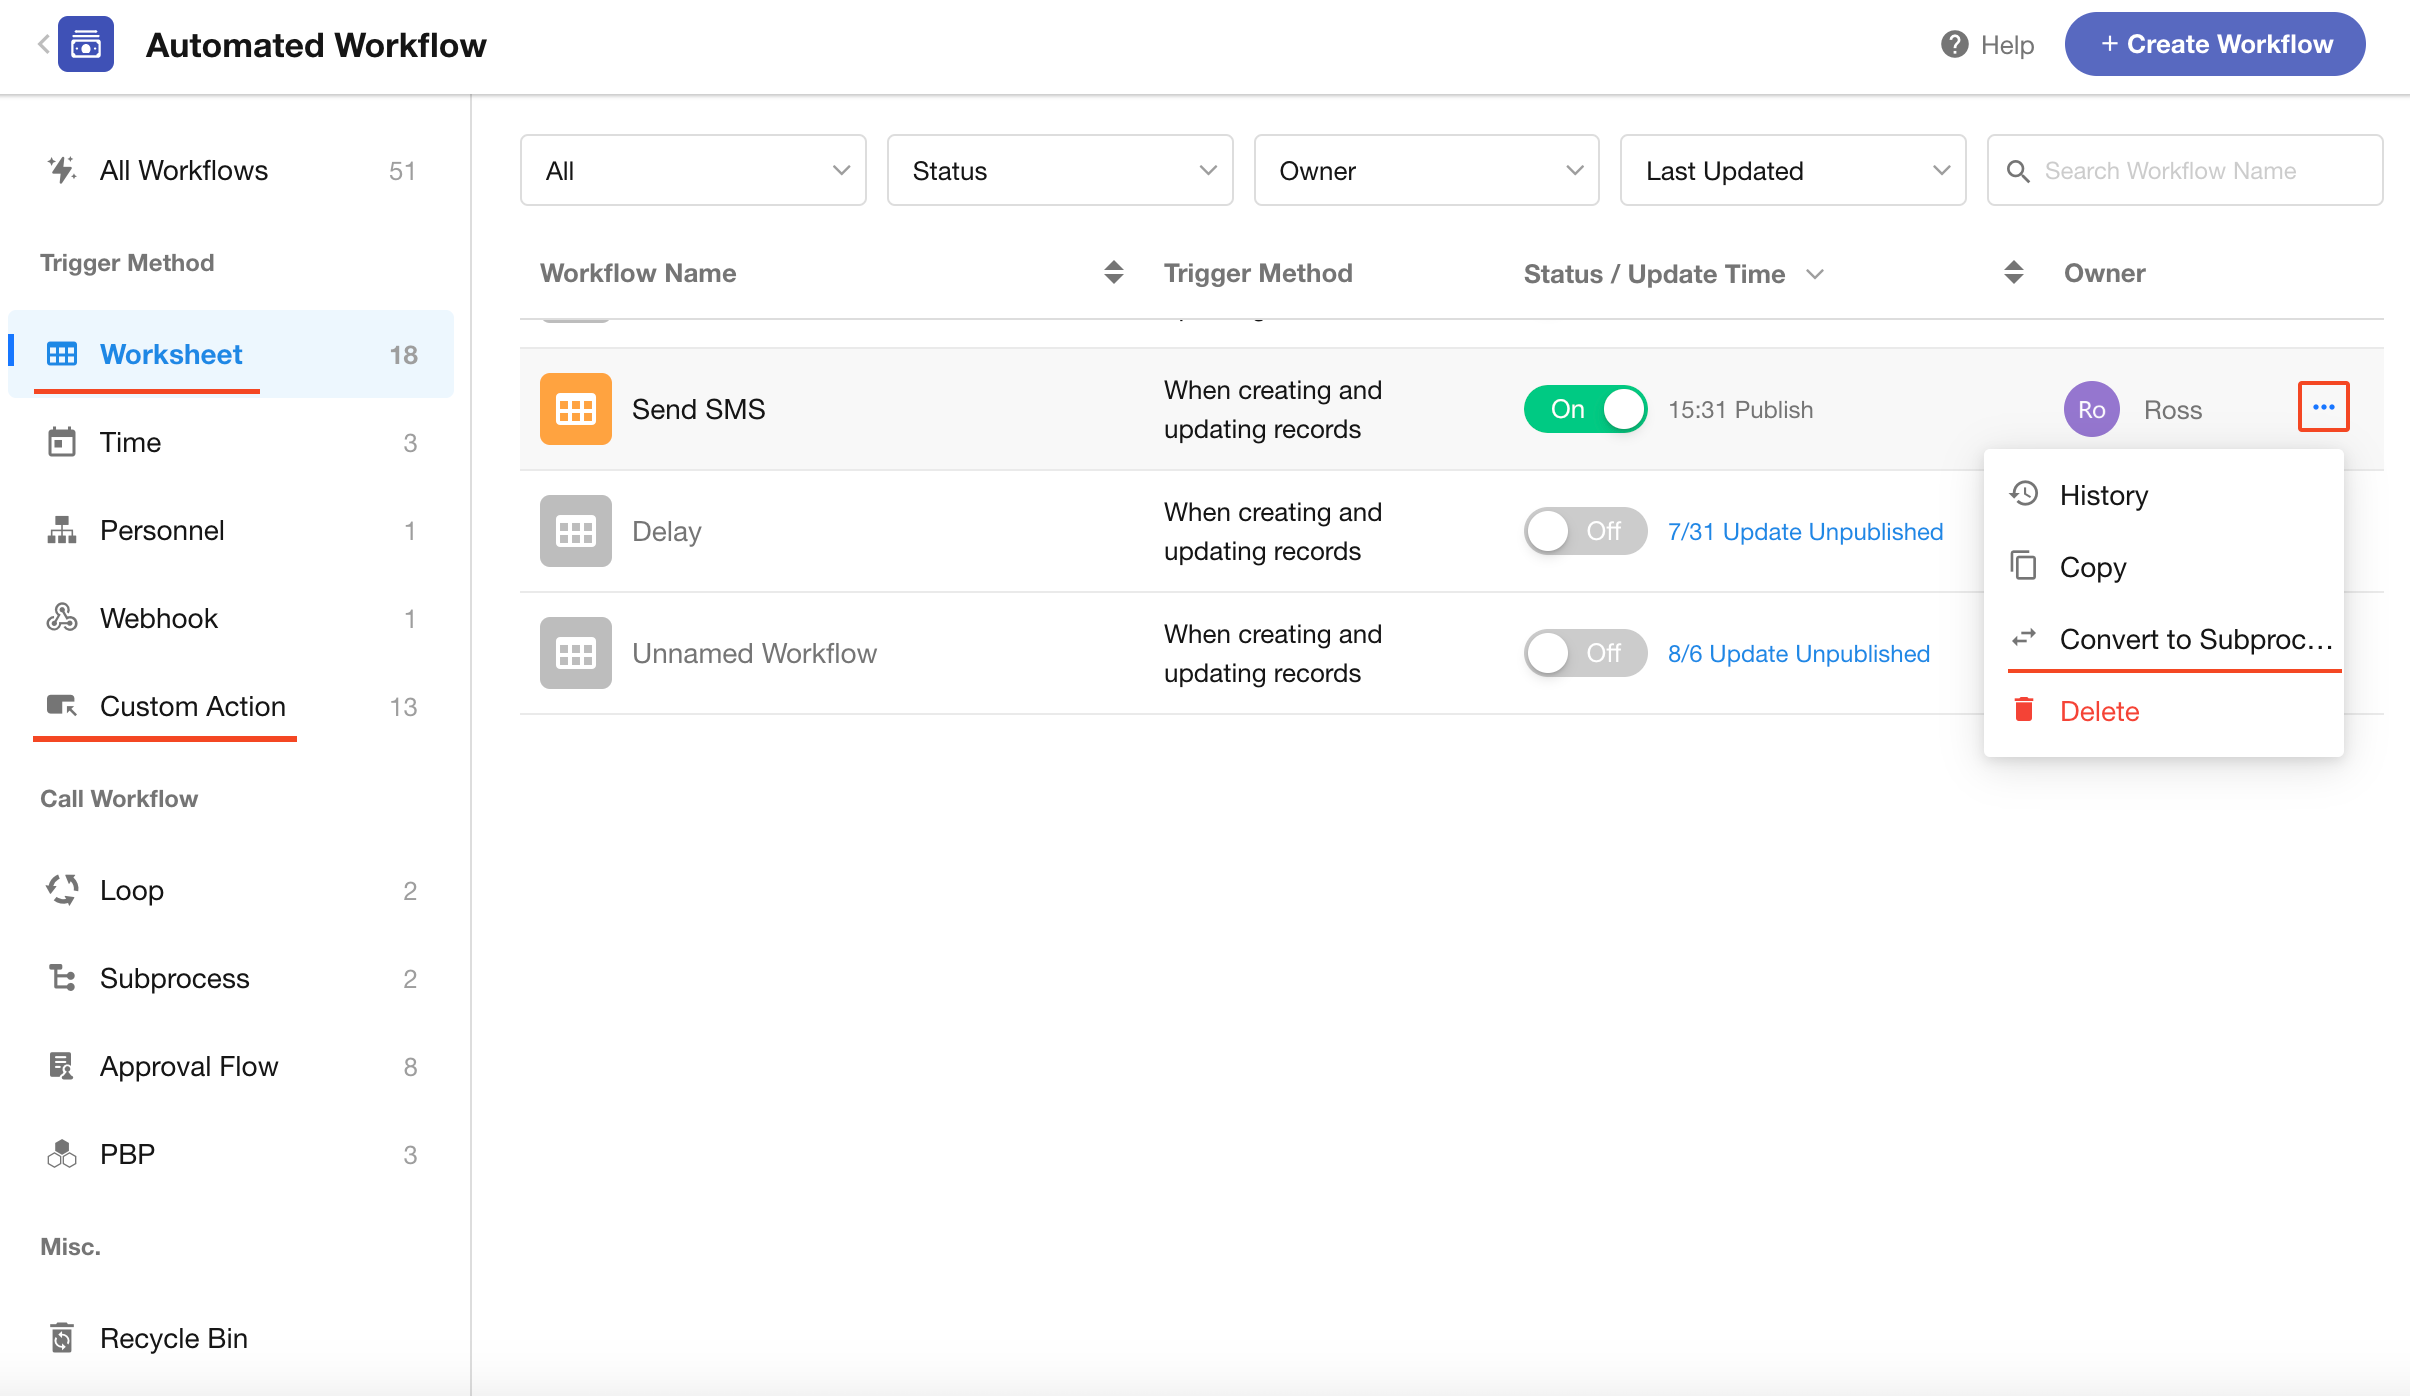
8. Delete/Restore Workflow
Deprecated workflows can be deleted, after which they will enter the recycle bin. If you need to restore them, simply go to the recycle bin and restore them.
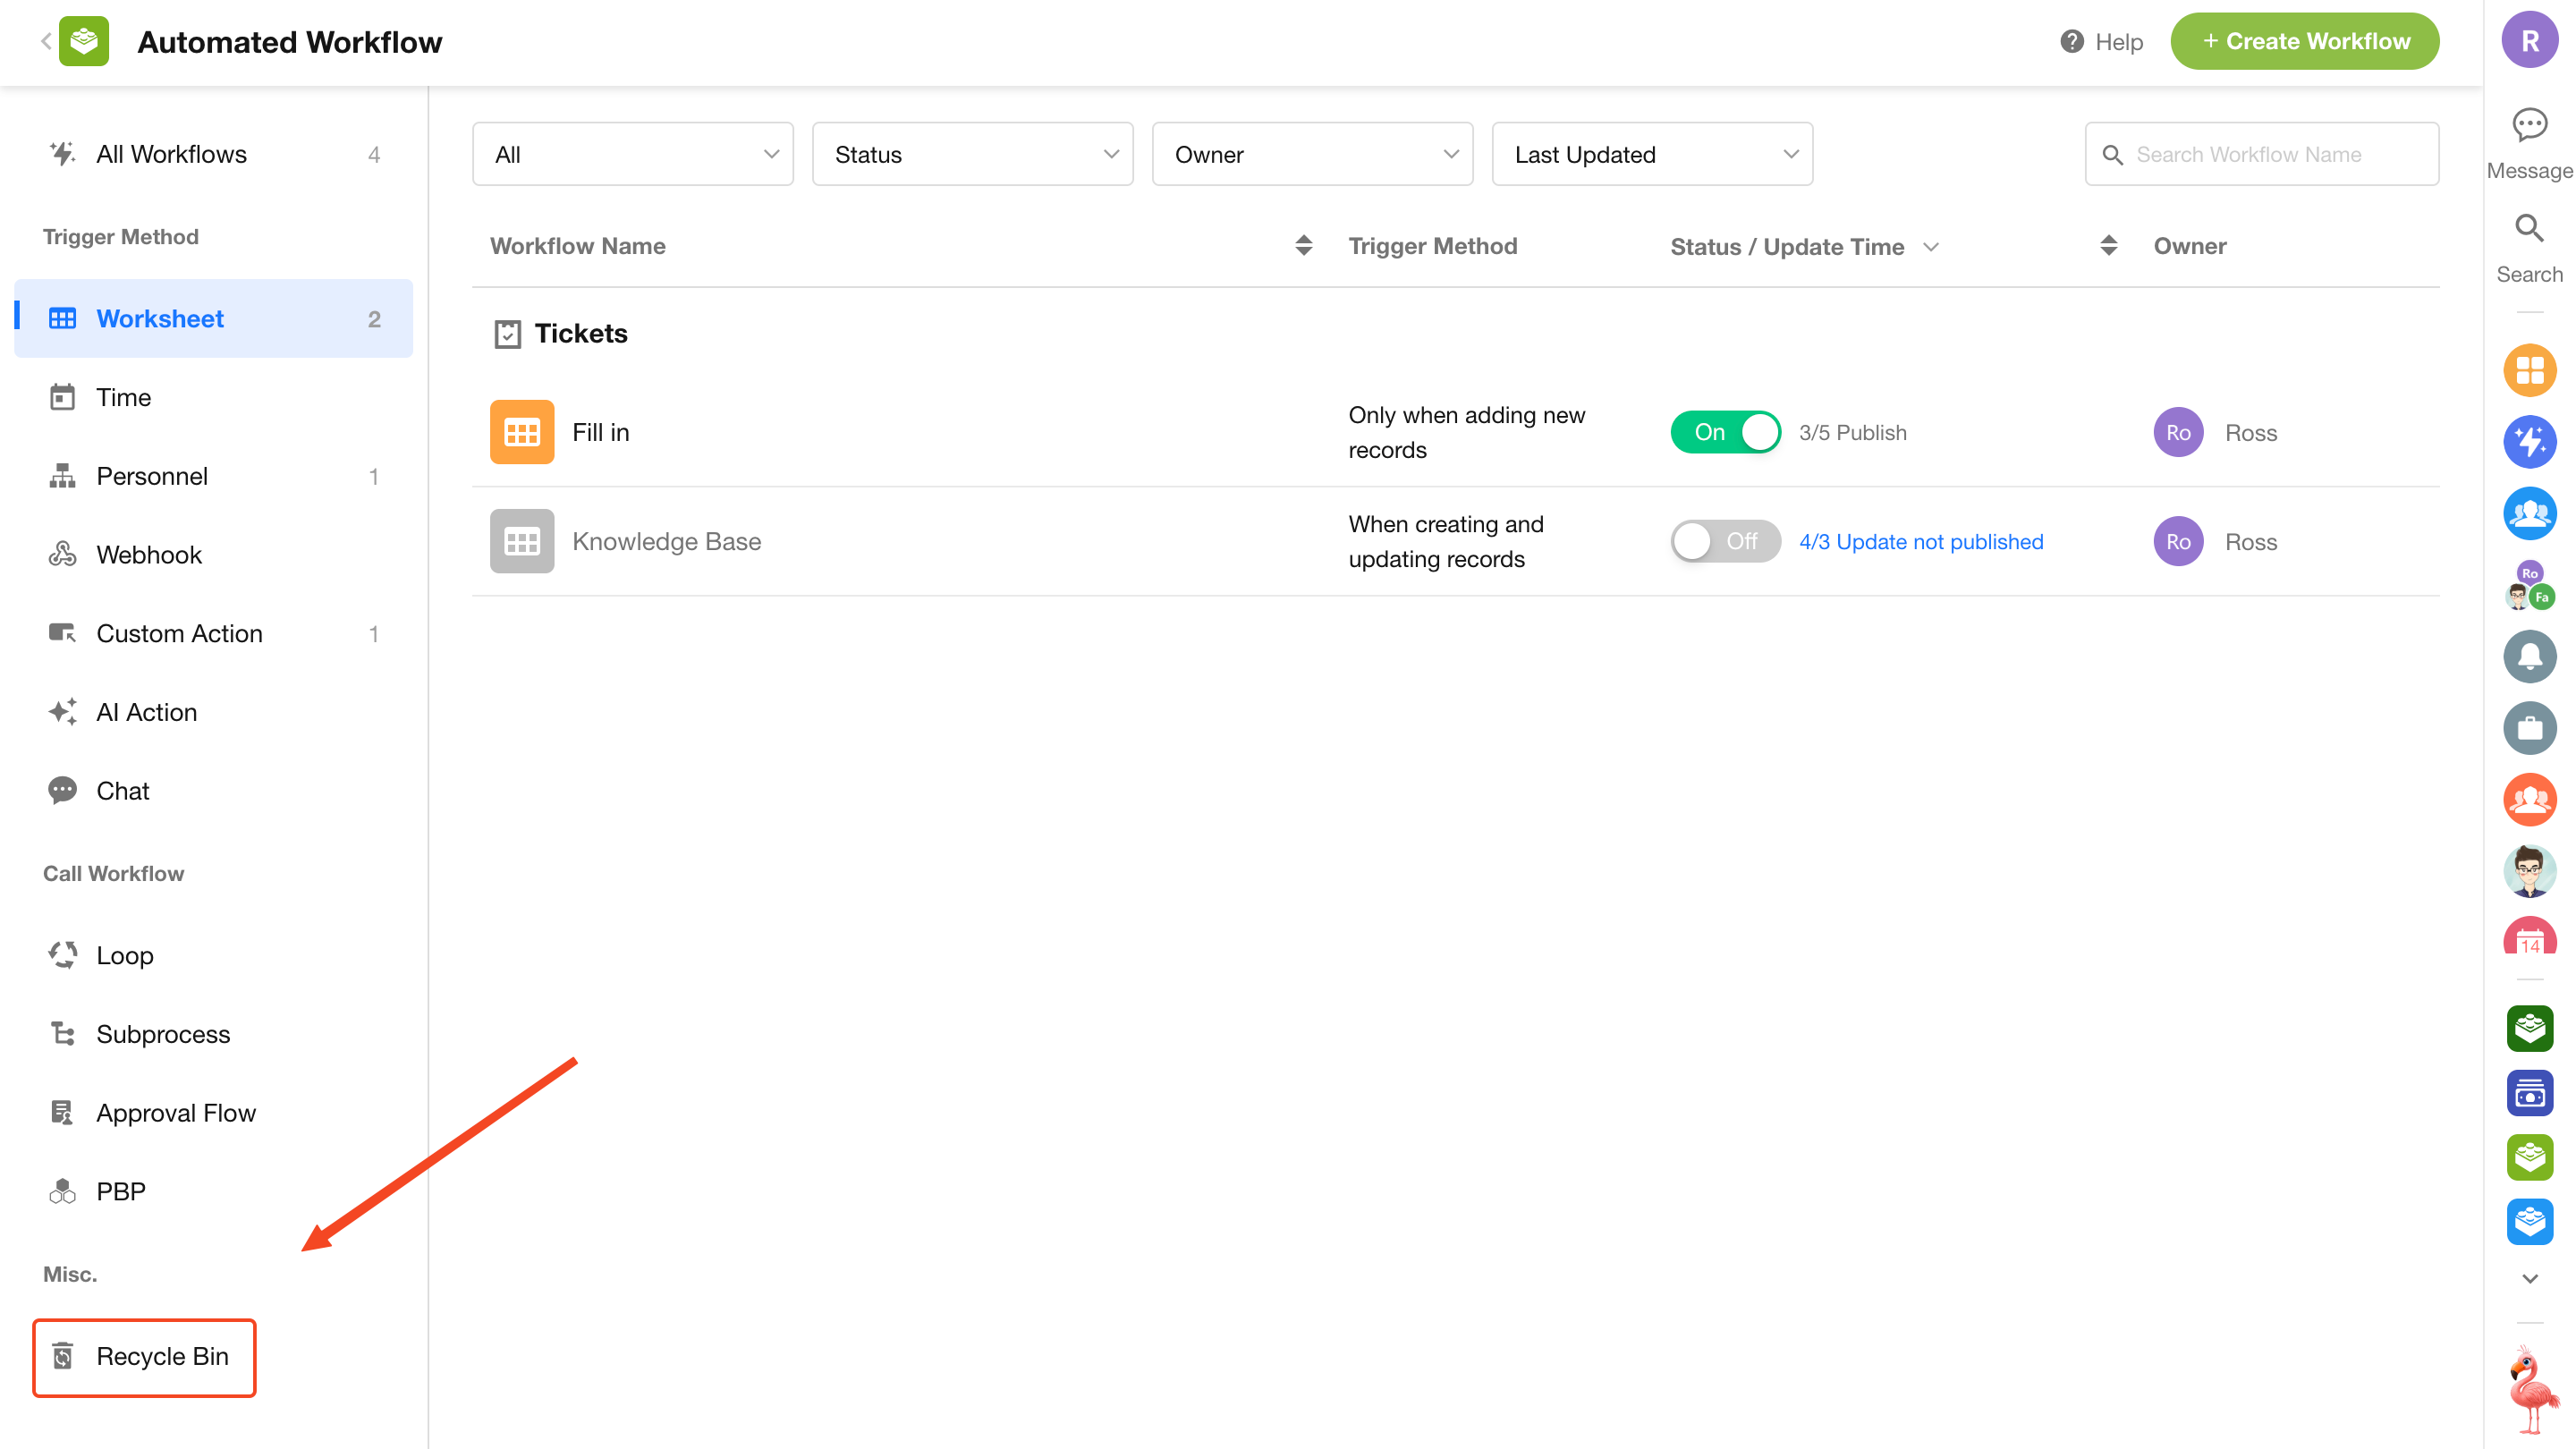
-
The workflow recycle bin is only available in the paid editions.
-
Workflows in the recycle bin will be permanently deleted after 60 days and cannot be restored.
-
When a workflow is restored, it is set to disabled by default and must be manually enabled.
-
Only application administrators and developers can delete or restore workflows.
Was this document helpful?