Departments and Positions
Departments and positions serve as two crucial role identifiers for employees. Within our platform, these identifiers are not only used in the Contacts but are also frequently utilized in applications, such as assigning department heads as approvers or notifying personnel in specific positions.
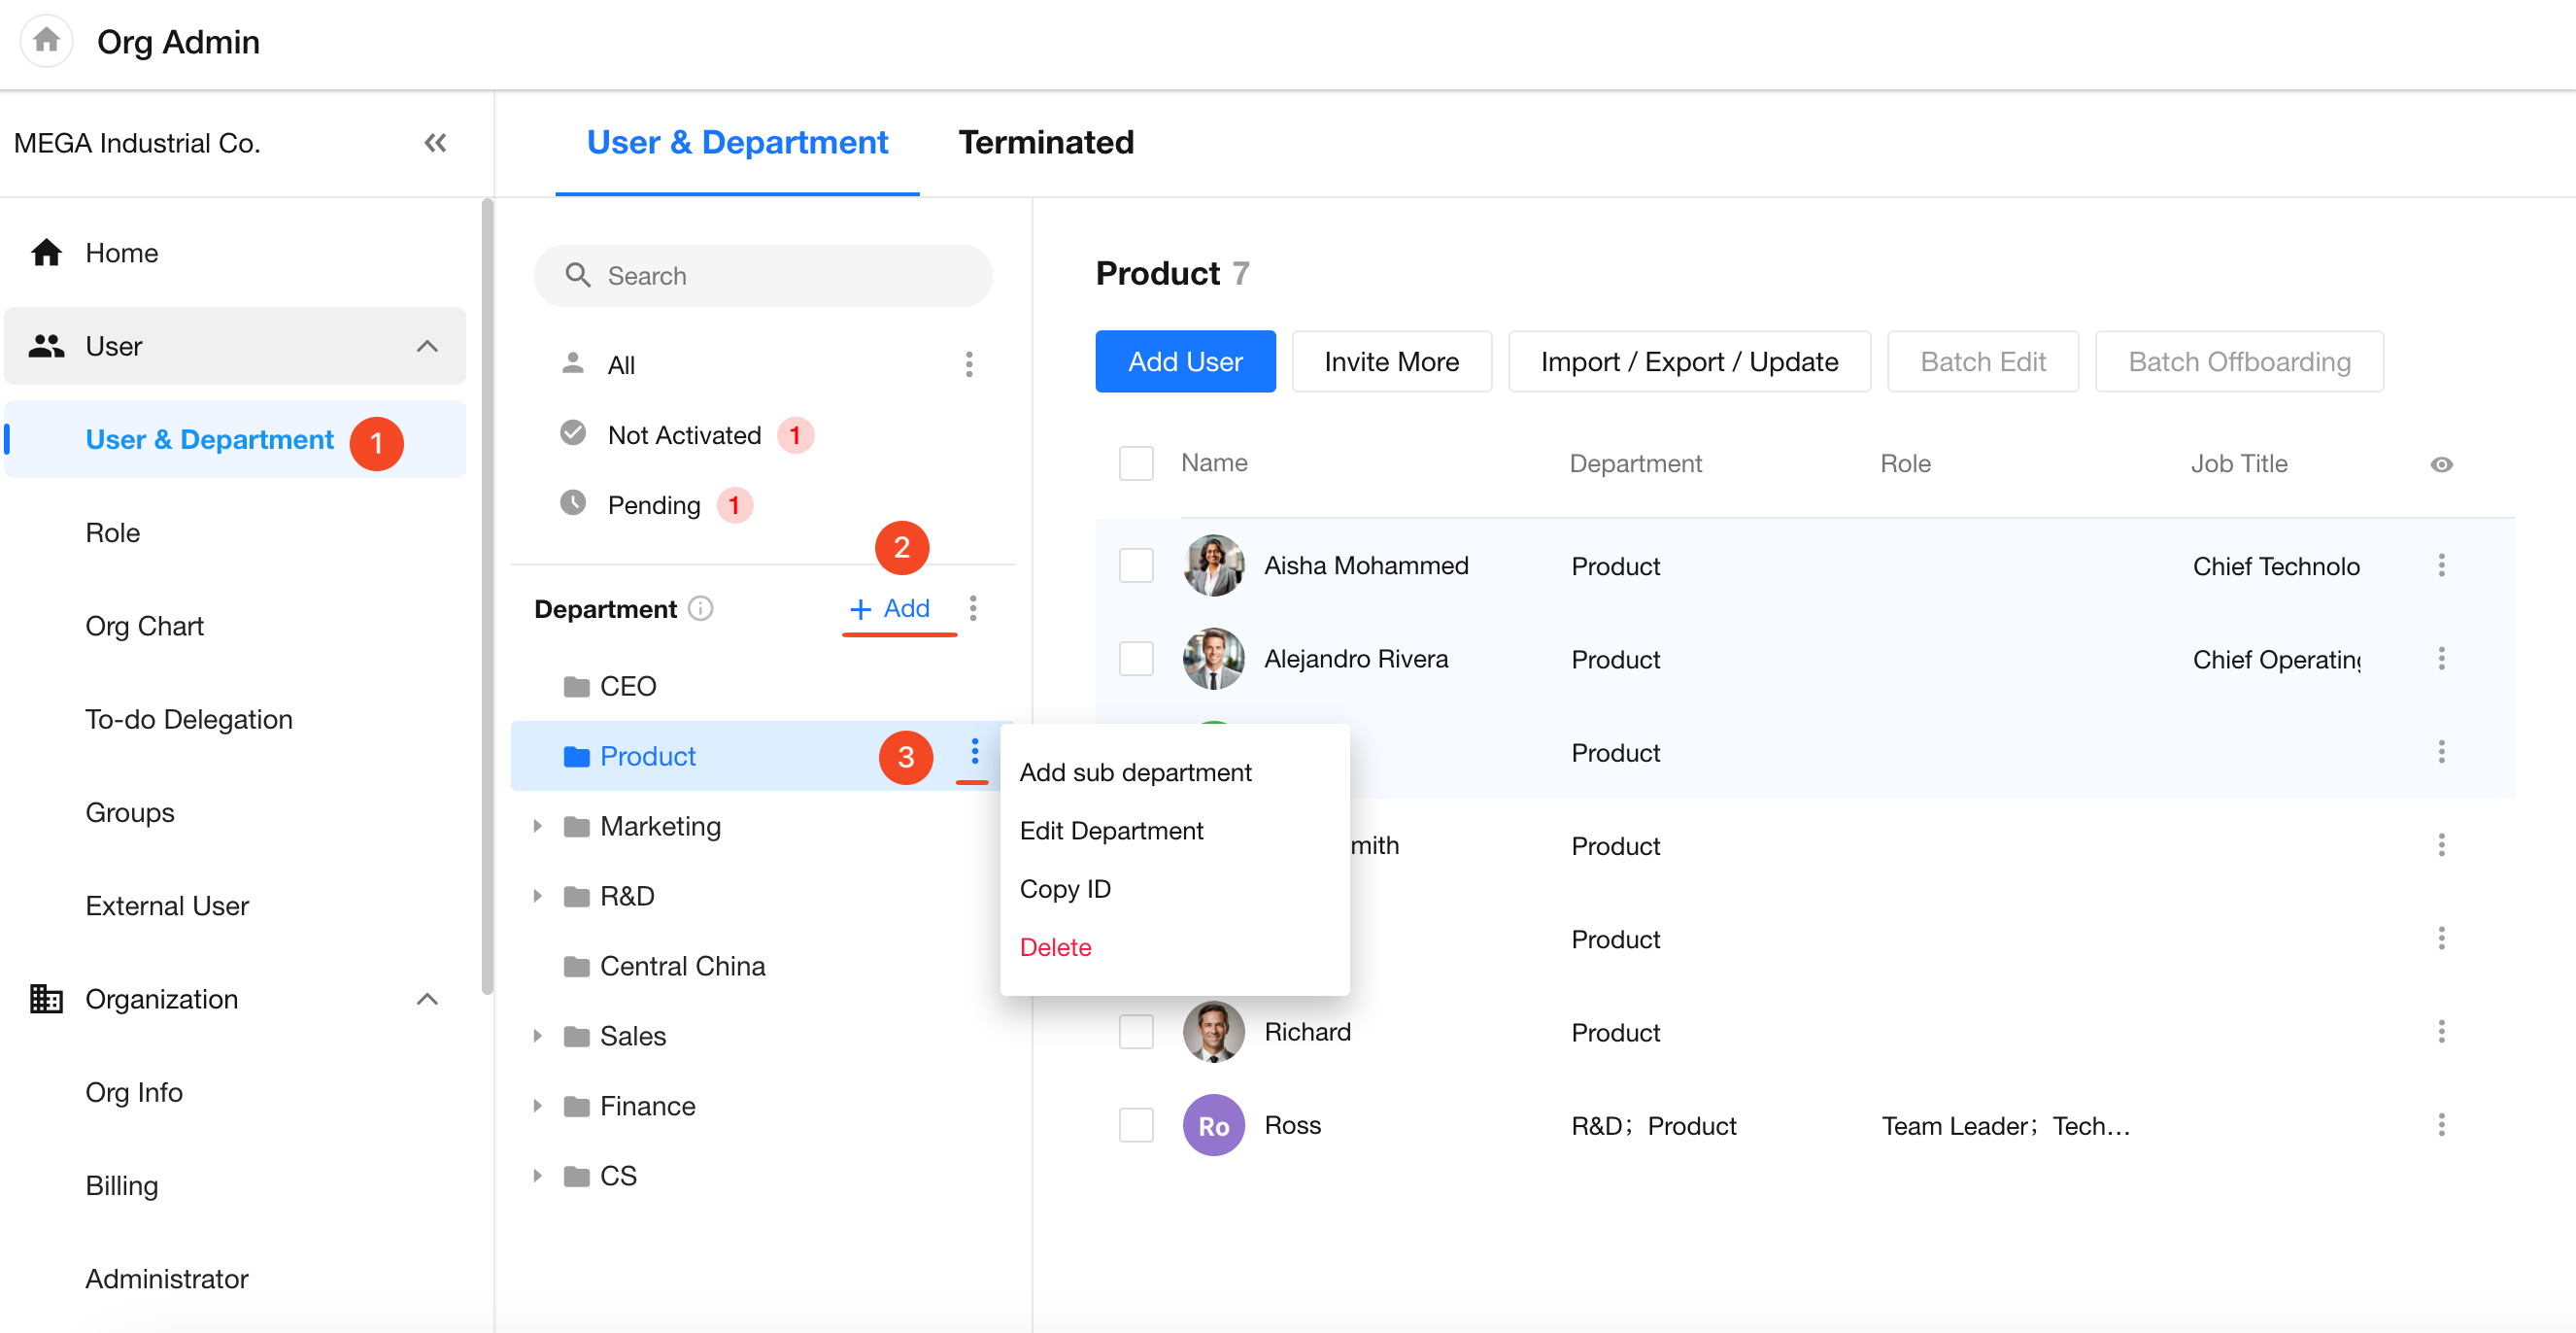
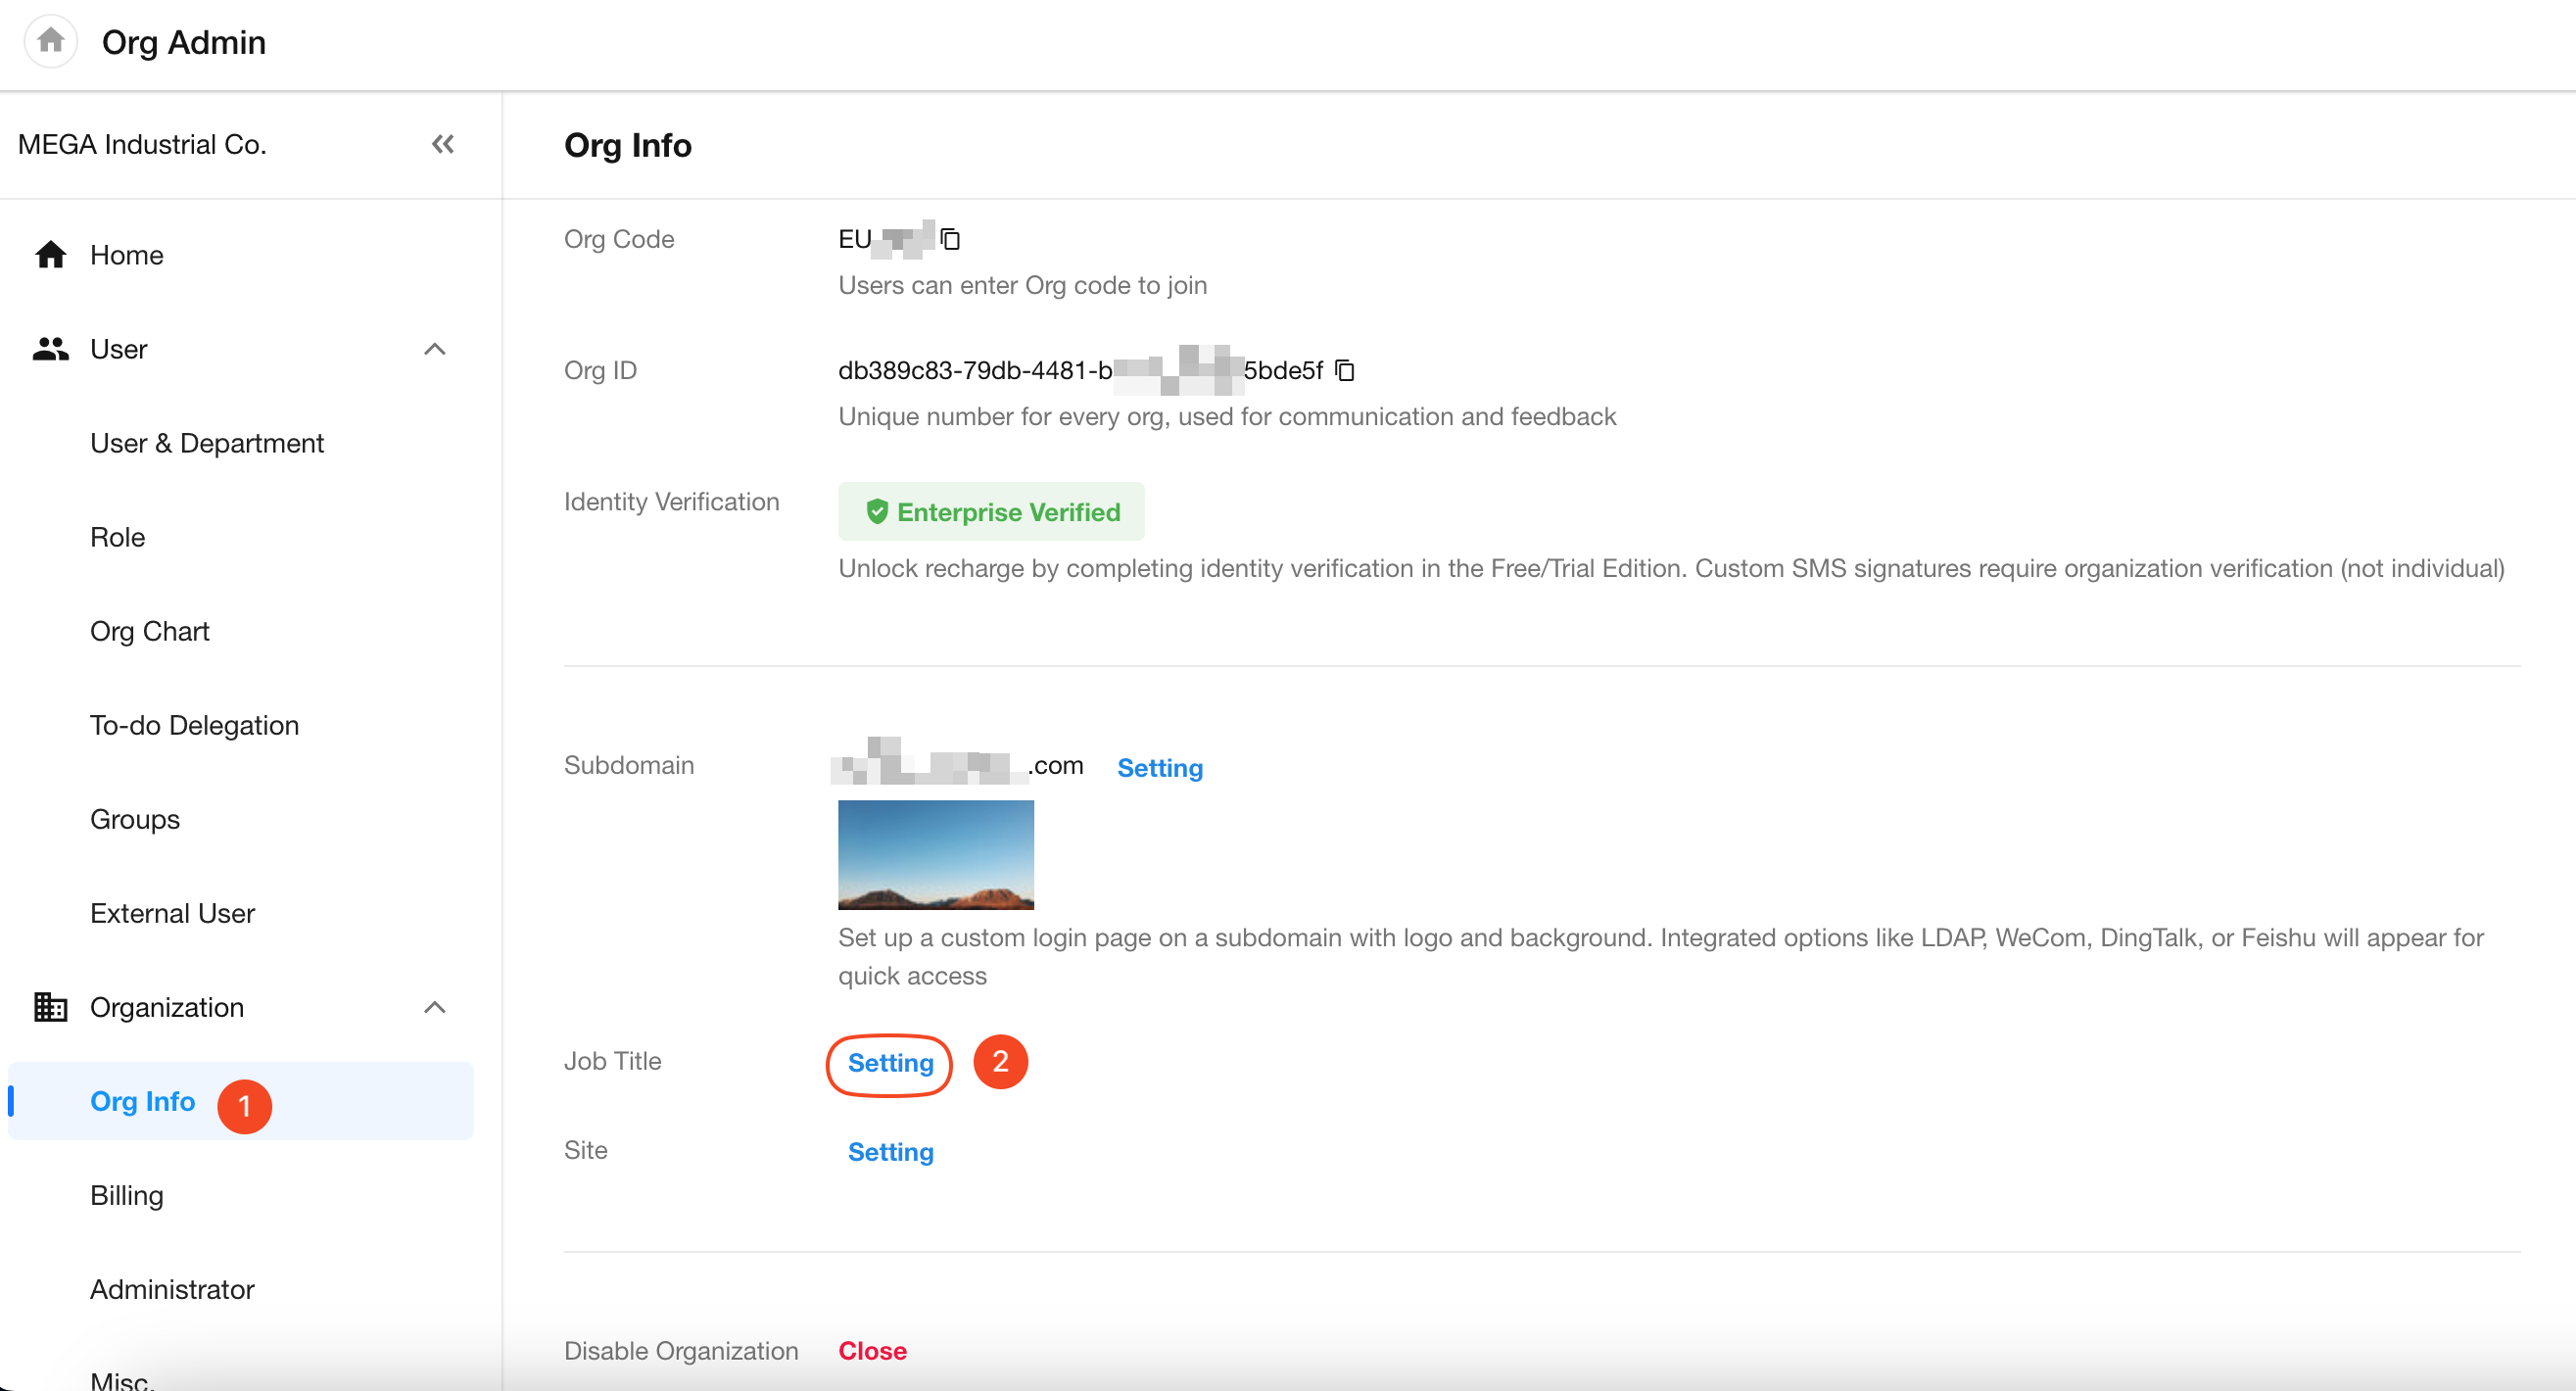
Department information can only be maintained by organization administrators in the "User & Department" section of the organization management page. Organization administrators can manage position information in the Org Info > Job Title module.
I. Department
Department management includes creating new departments, importing or exporting members, editing department details, assigning a member as the department head, deleting departments, adding sub-departments, adding department members, and adjusting the order of departments.
1. Create a department
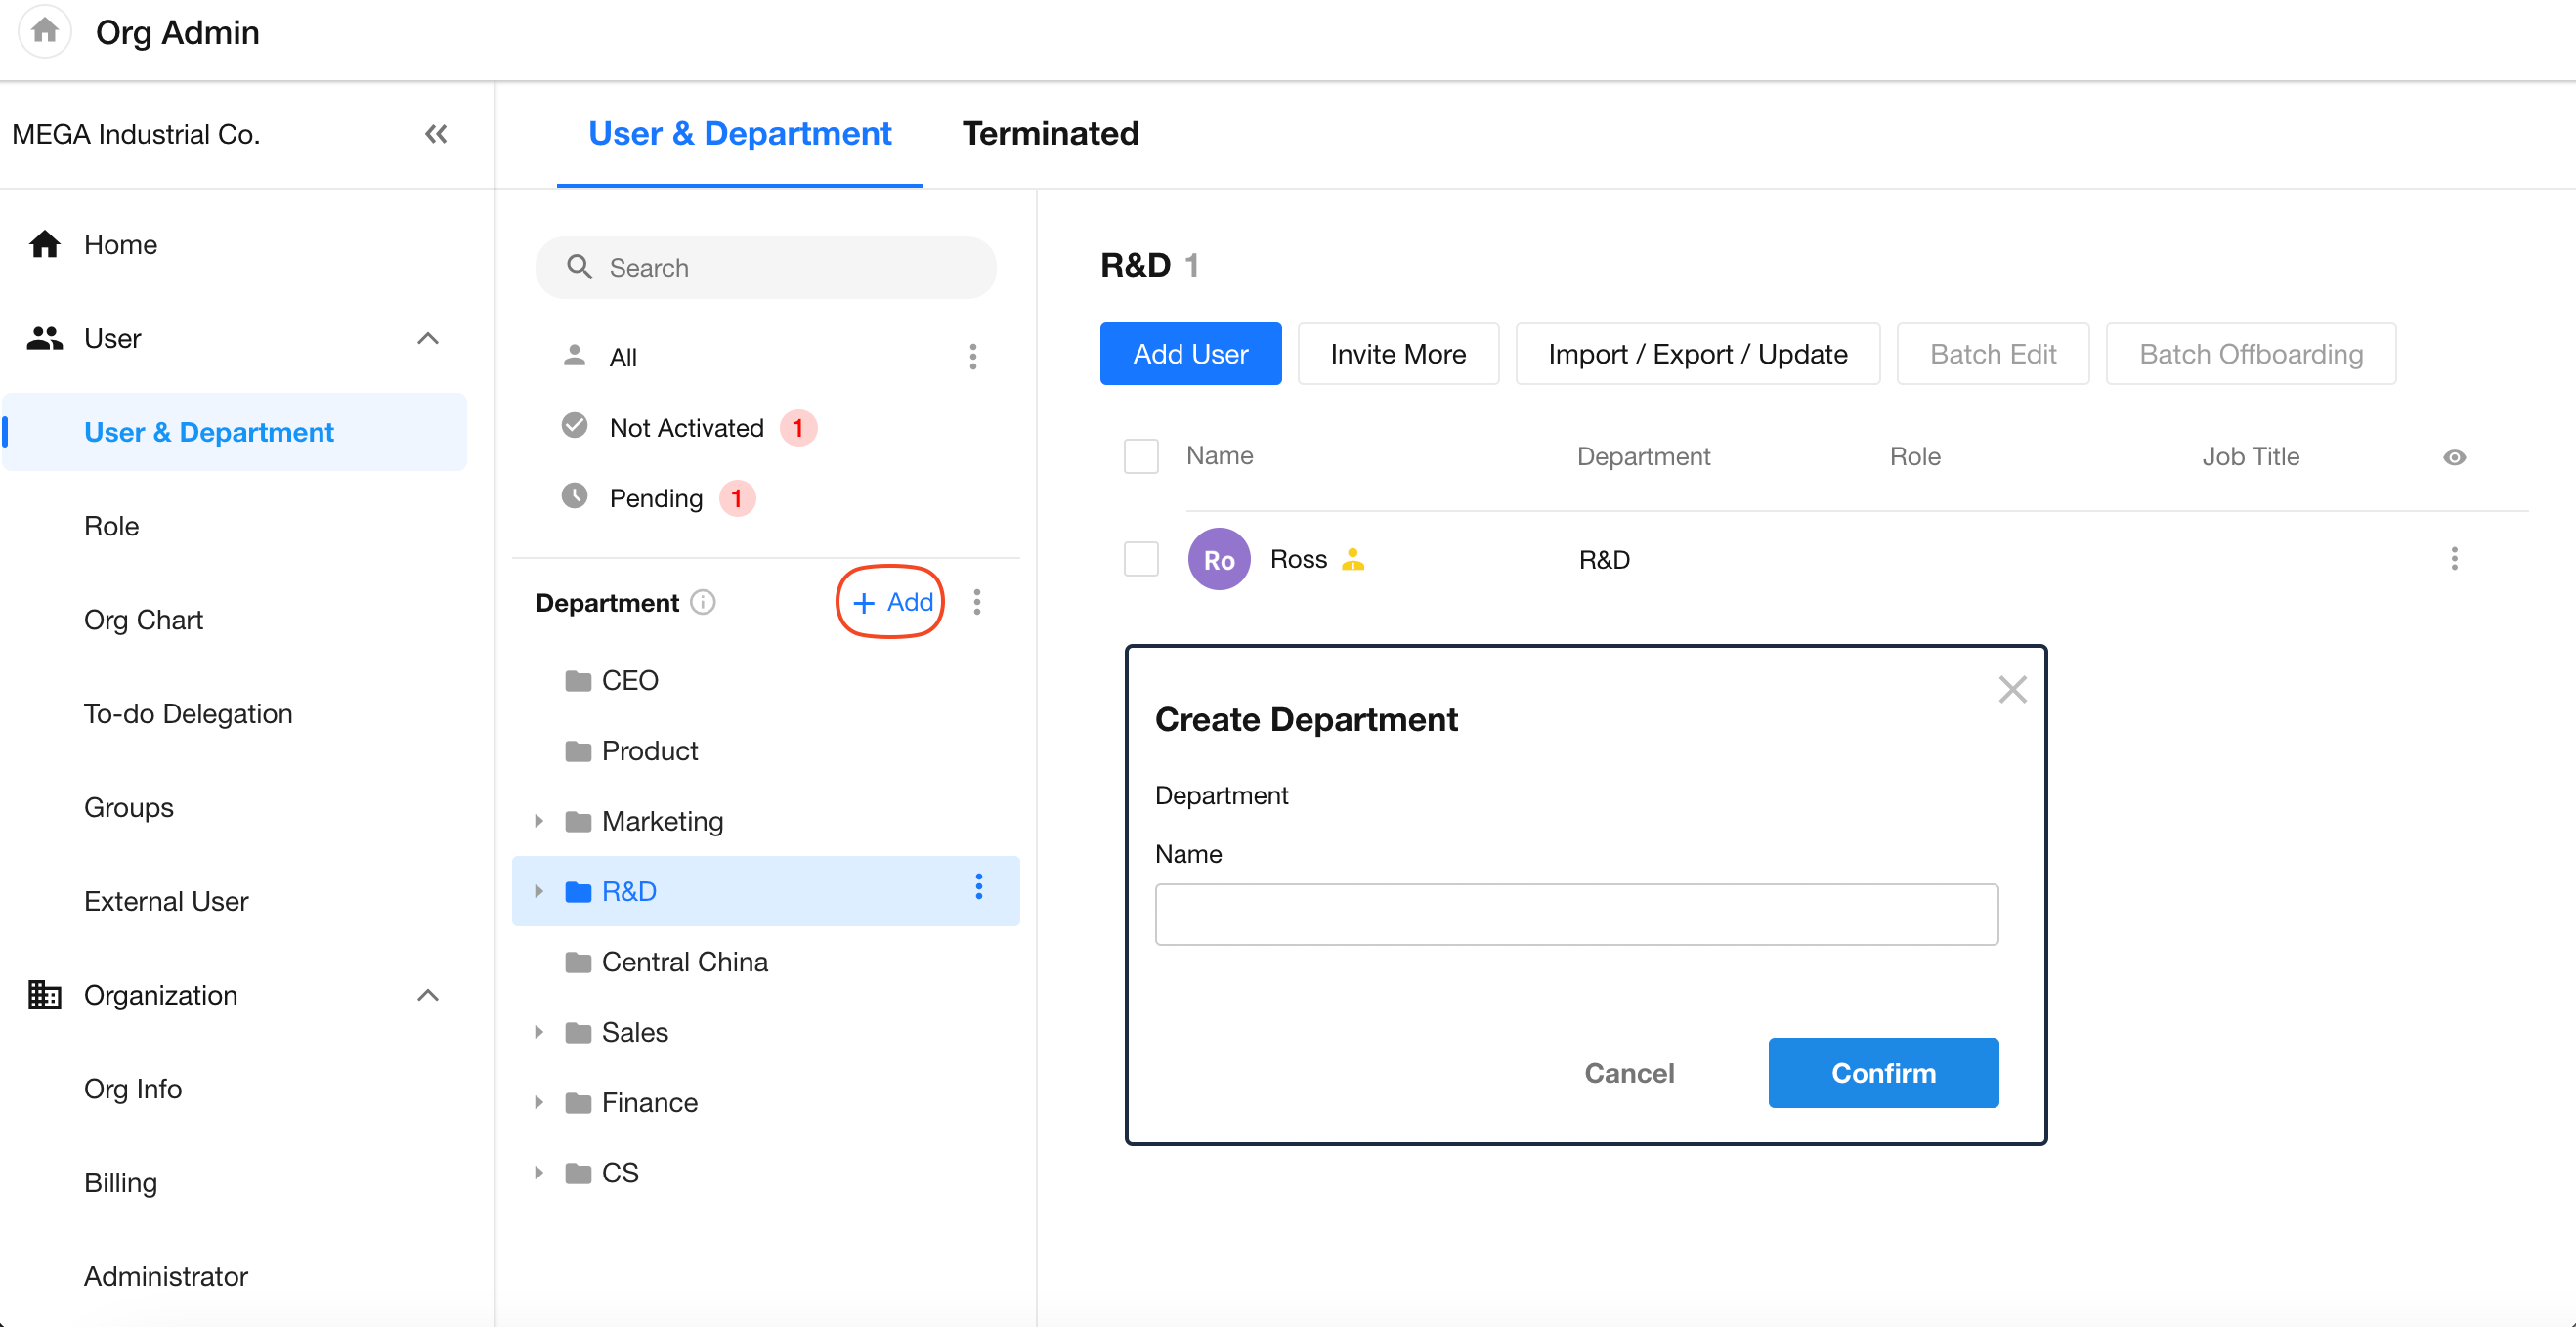
Go to Org Admin > User & Department > Add to create departments.
Set the department name and select the parent department.
2. Edit department name/Set department head
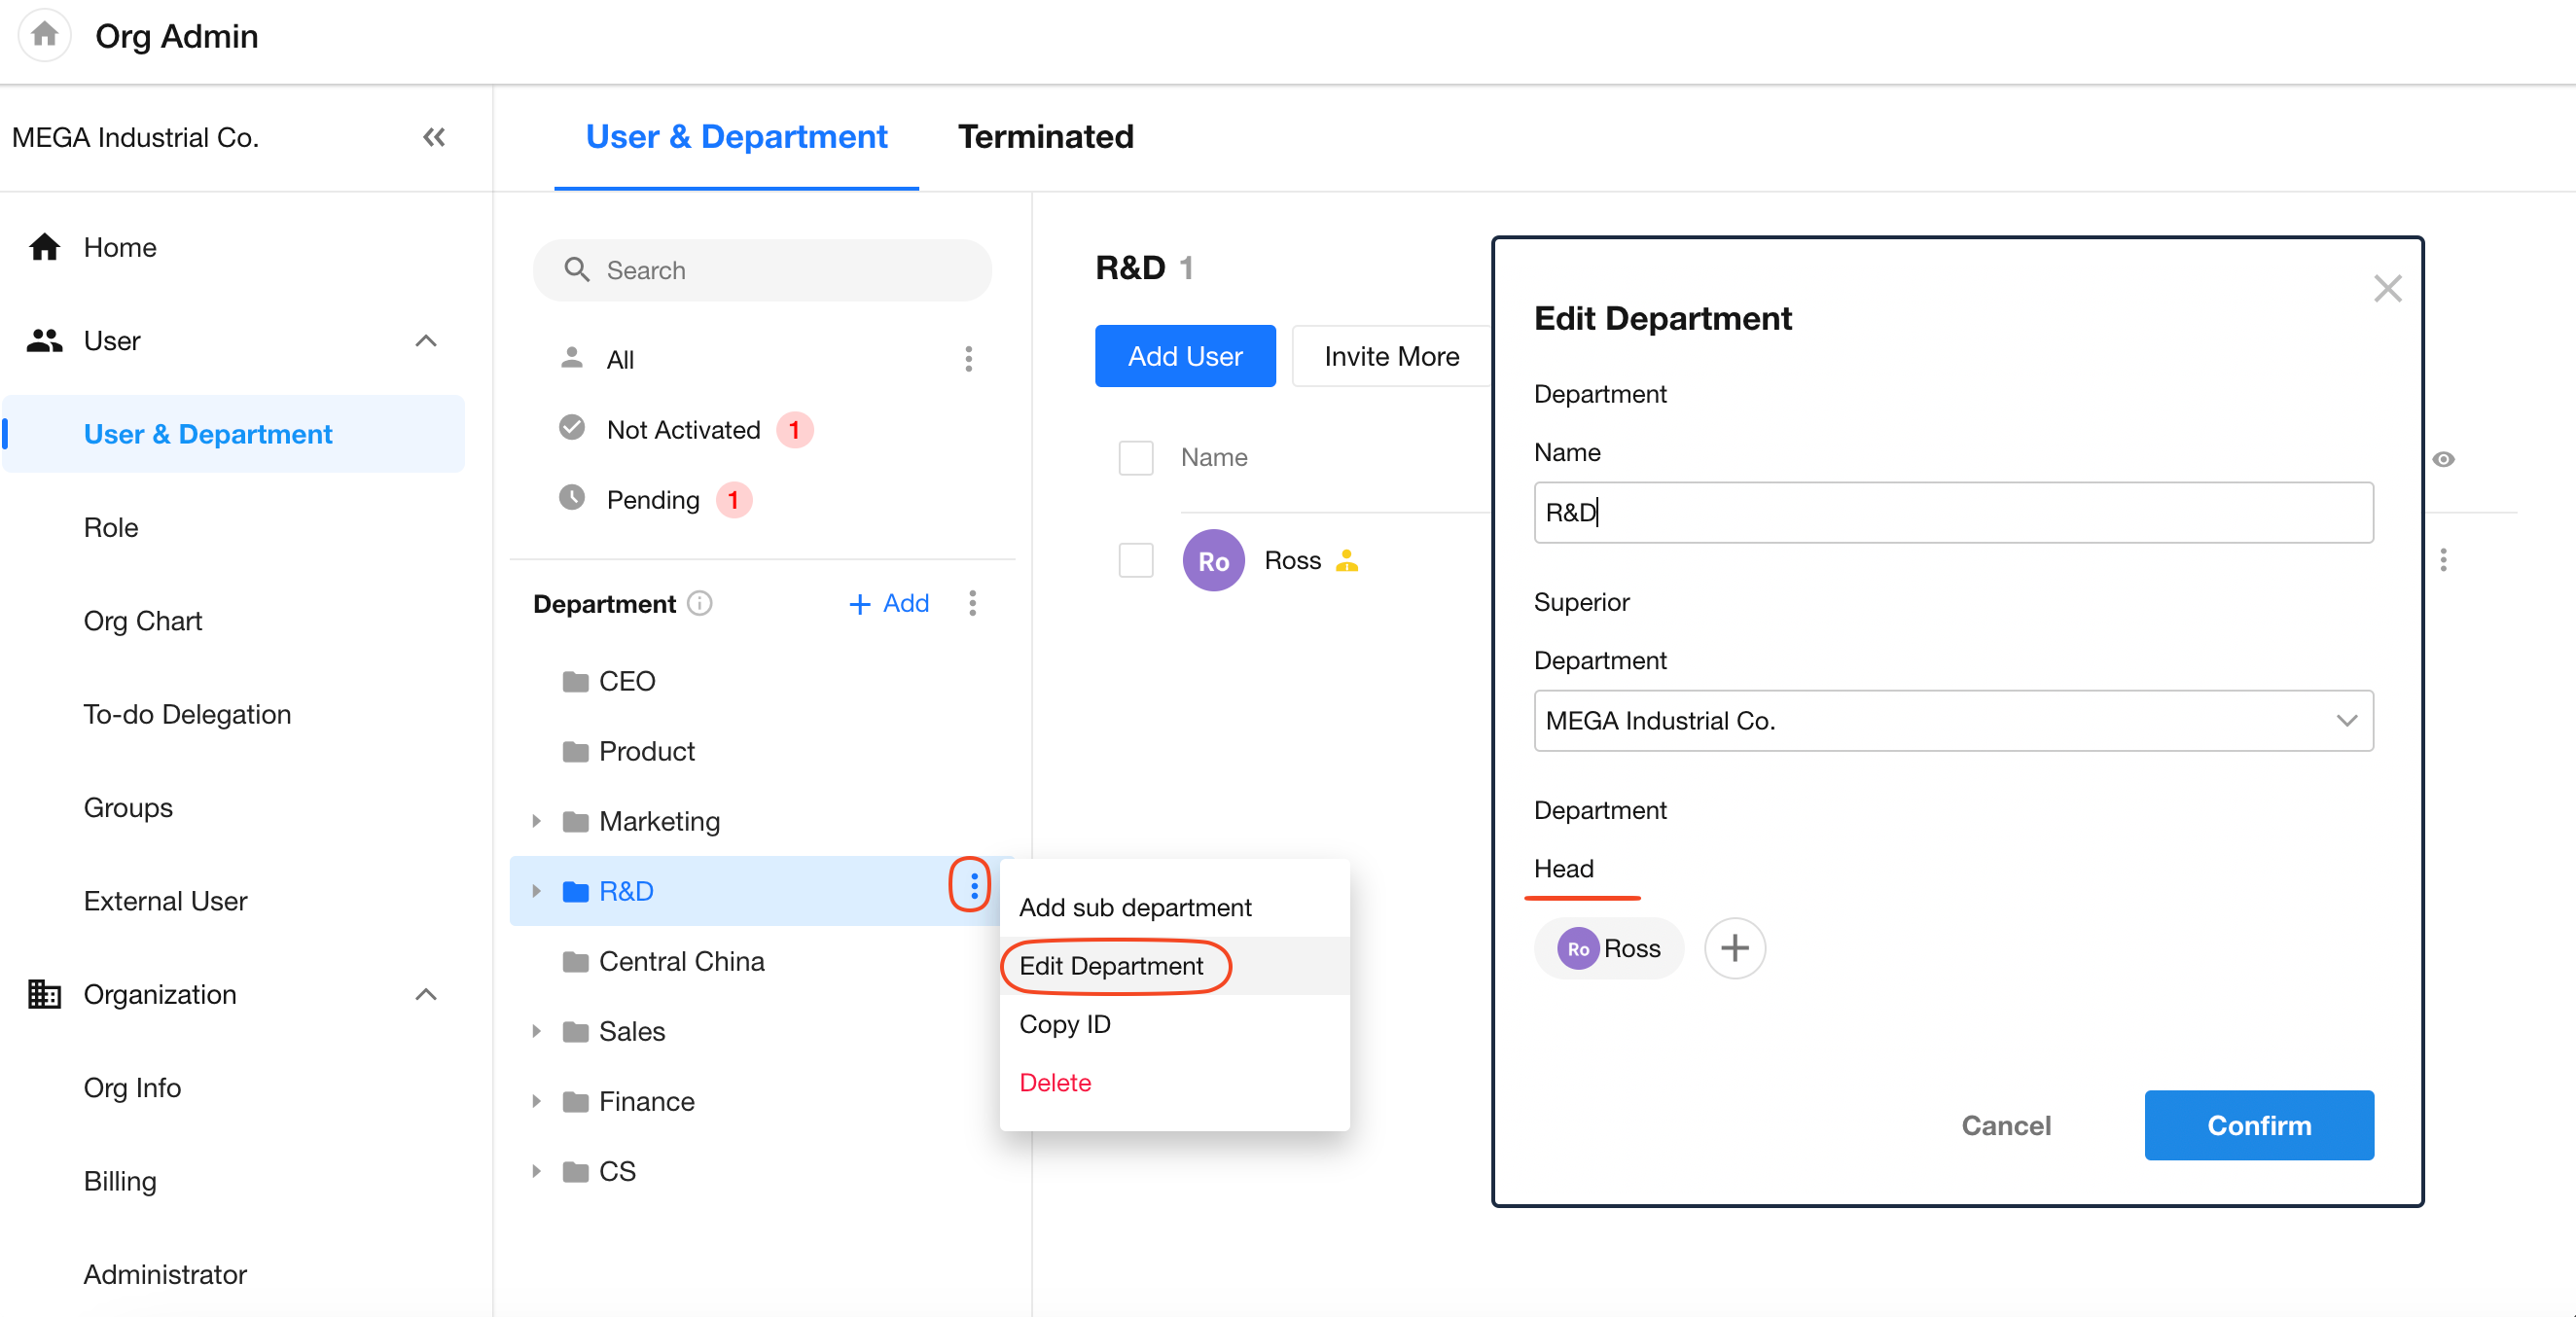
In the department list, select the department you want to modify and click the Set button to edit the department information.
- Only members of the department can be selected as the department head, and multiple department heads can be set up.
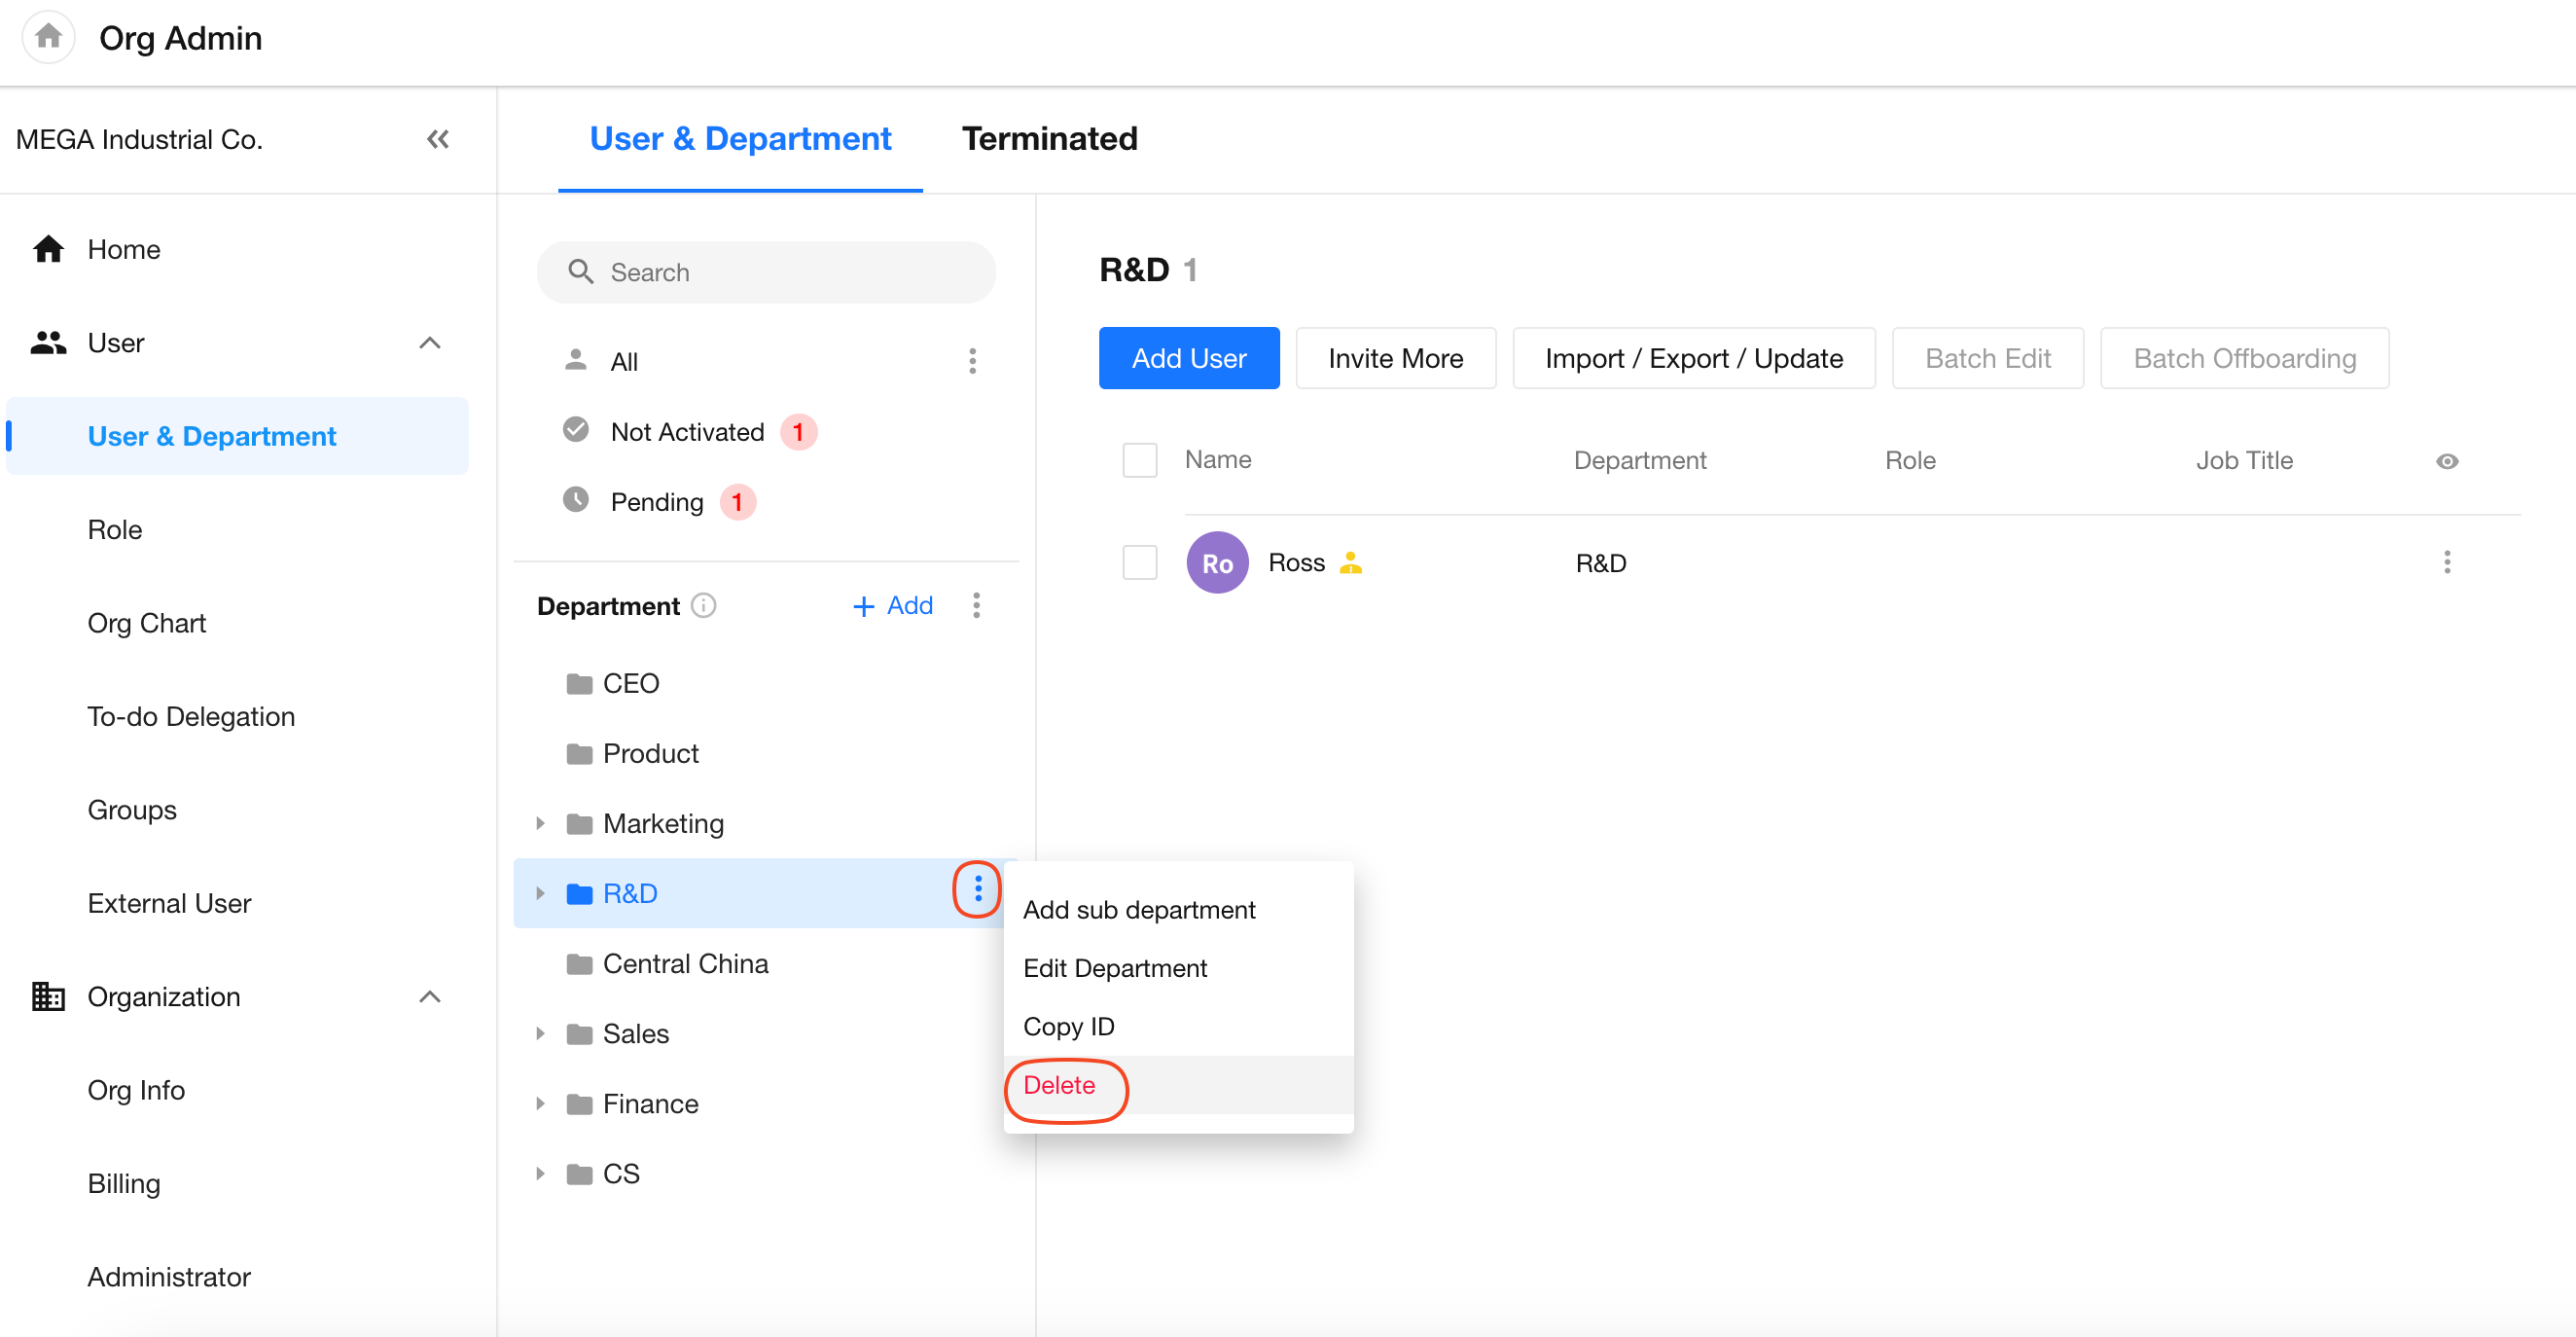
3. Delete a department
When deleting a department, if there are members in the current department, they must be moved to other departments before the department can be deleted.
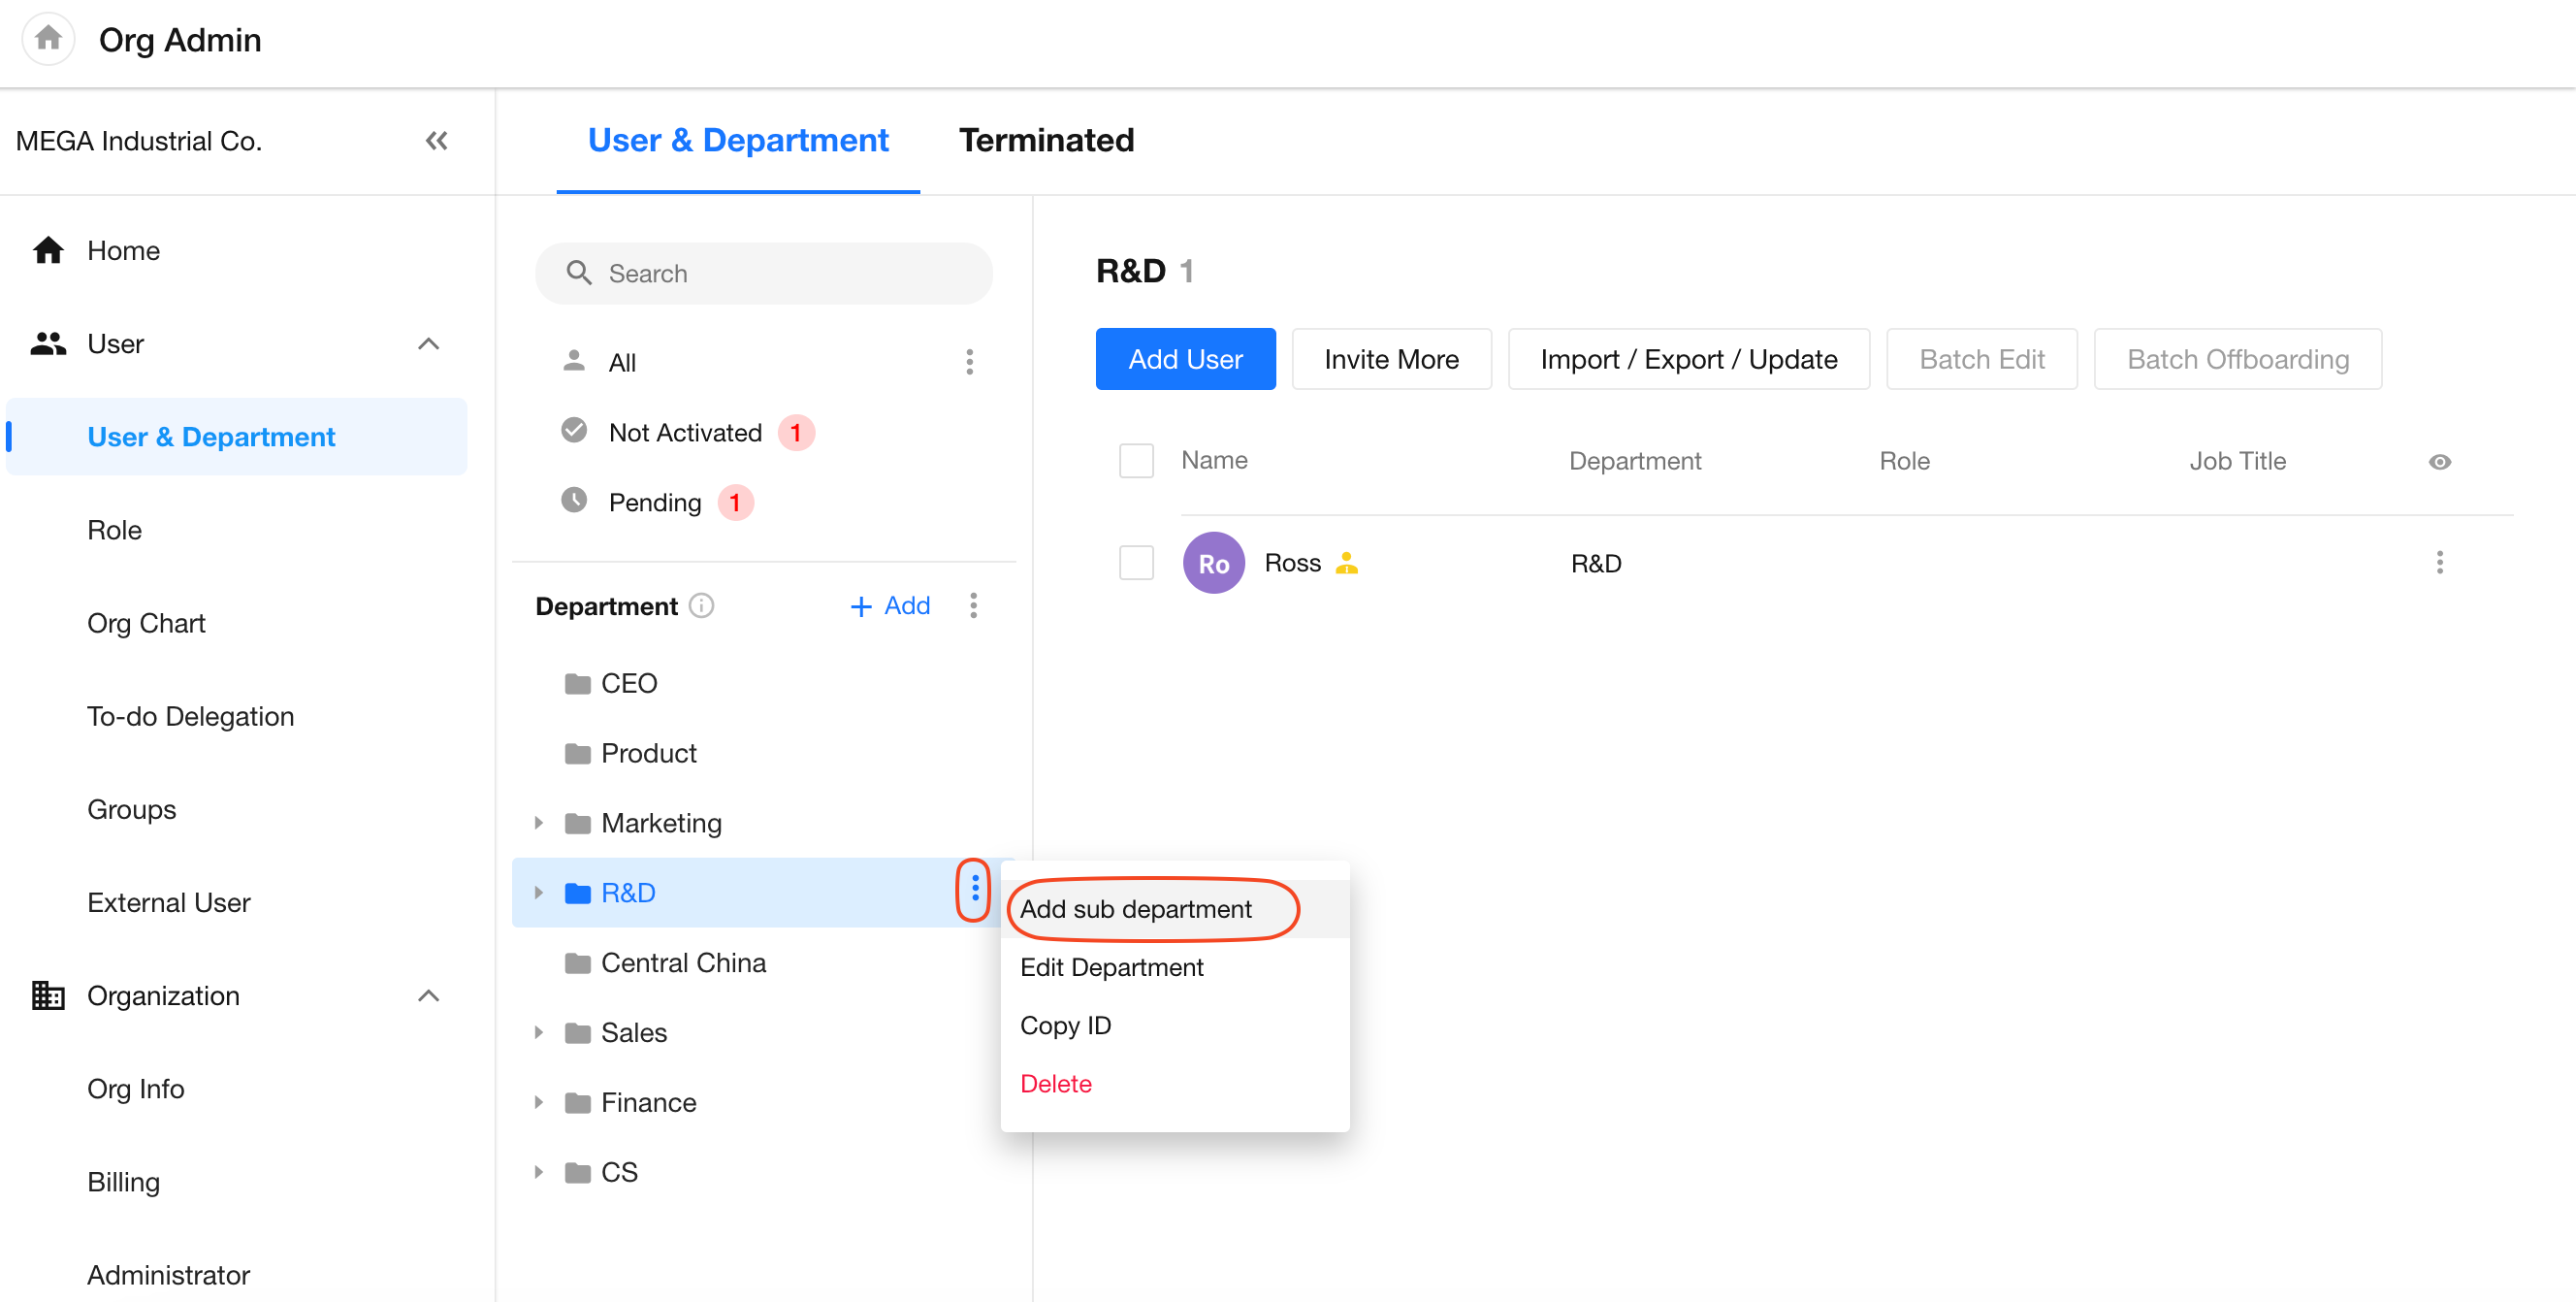
4. Add a sub-department
In the department list, select a department and then click [Add Sub-department].
There are two methods to set a department as a sub-department:
-
When editing a department, select a parent department for it;
-
Directly drag and drop the department under a parent department.
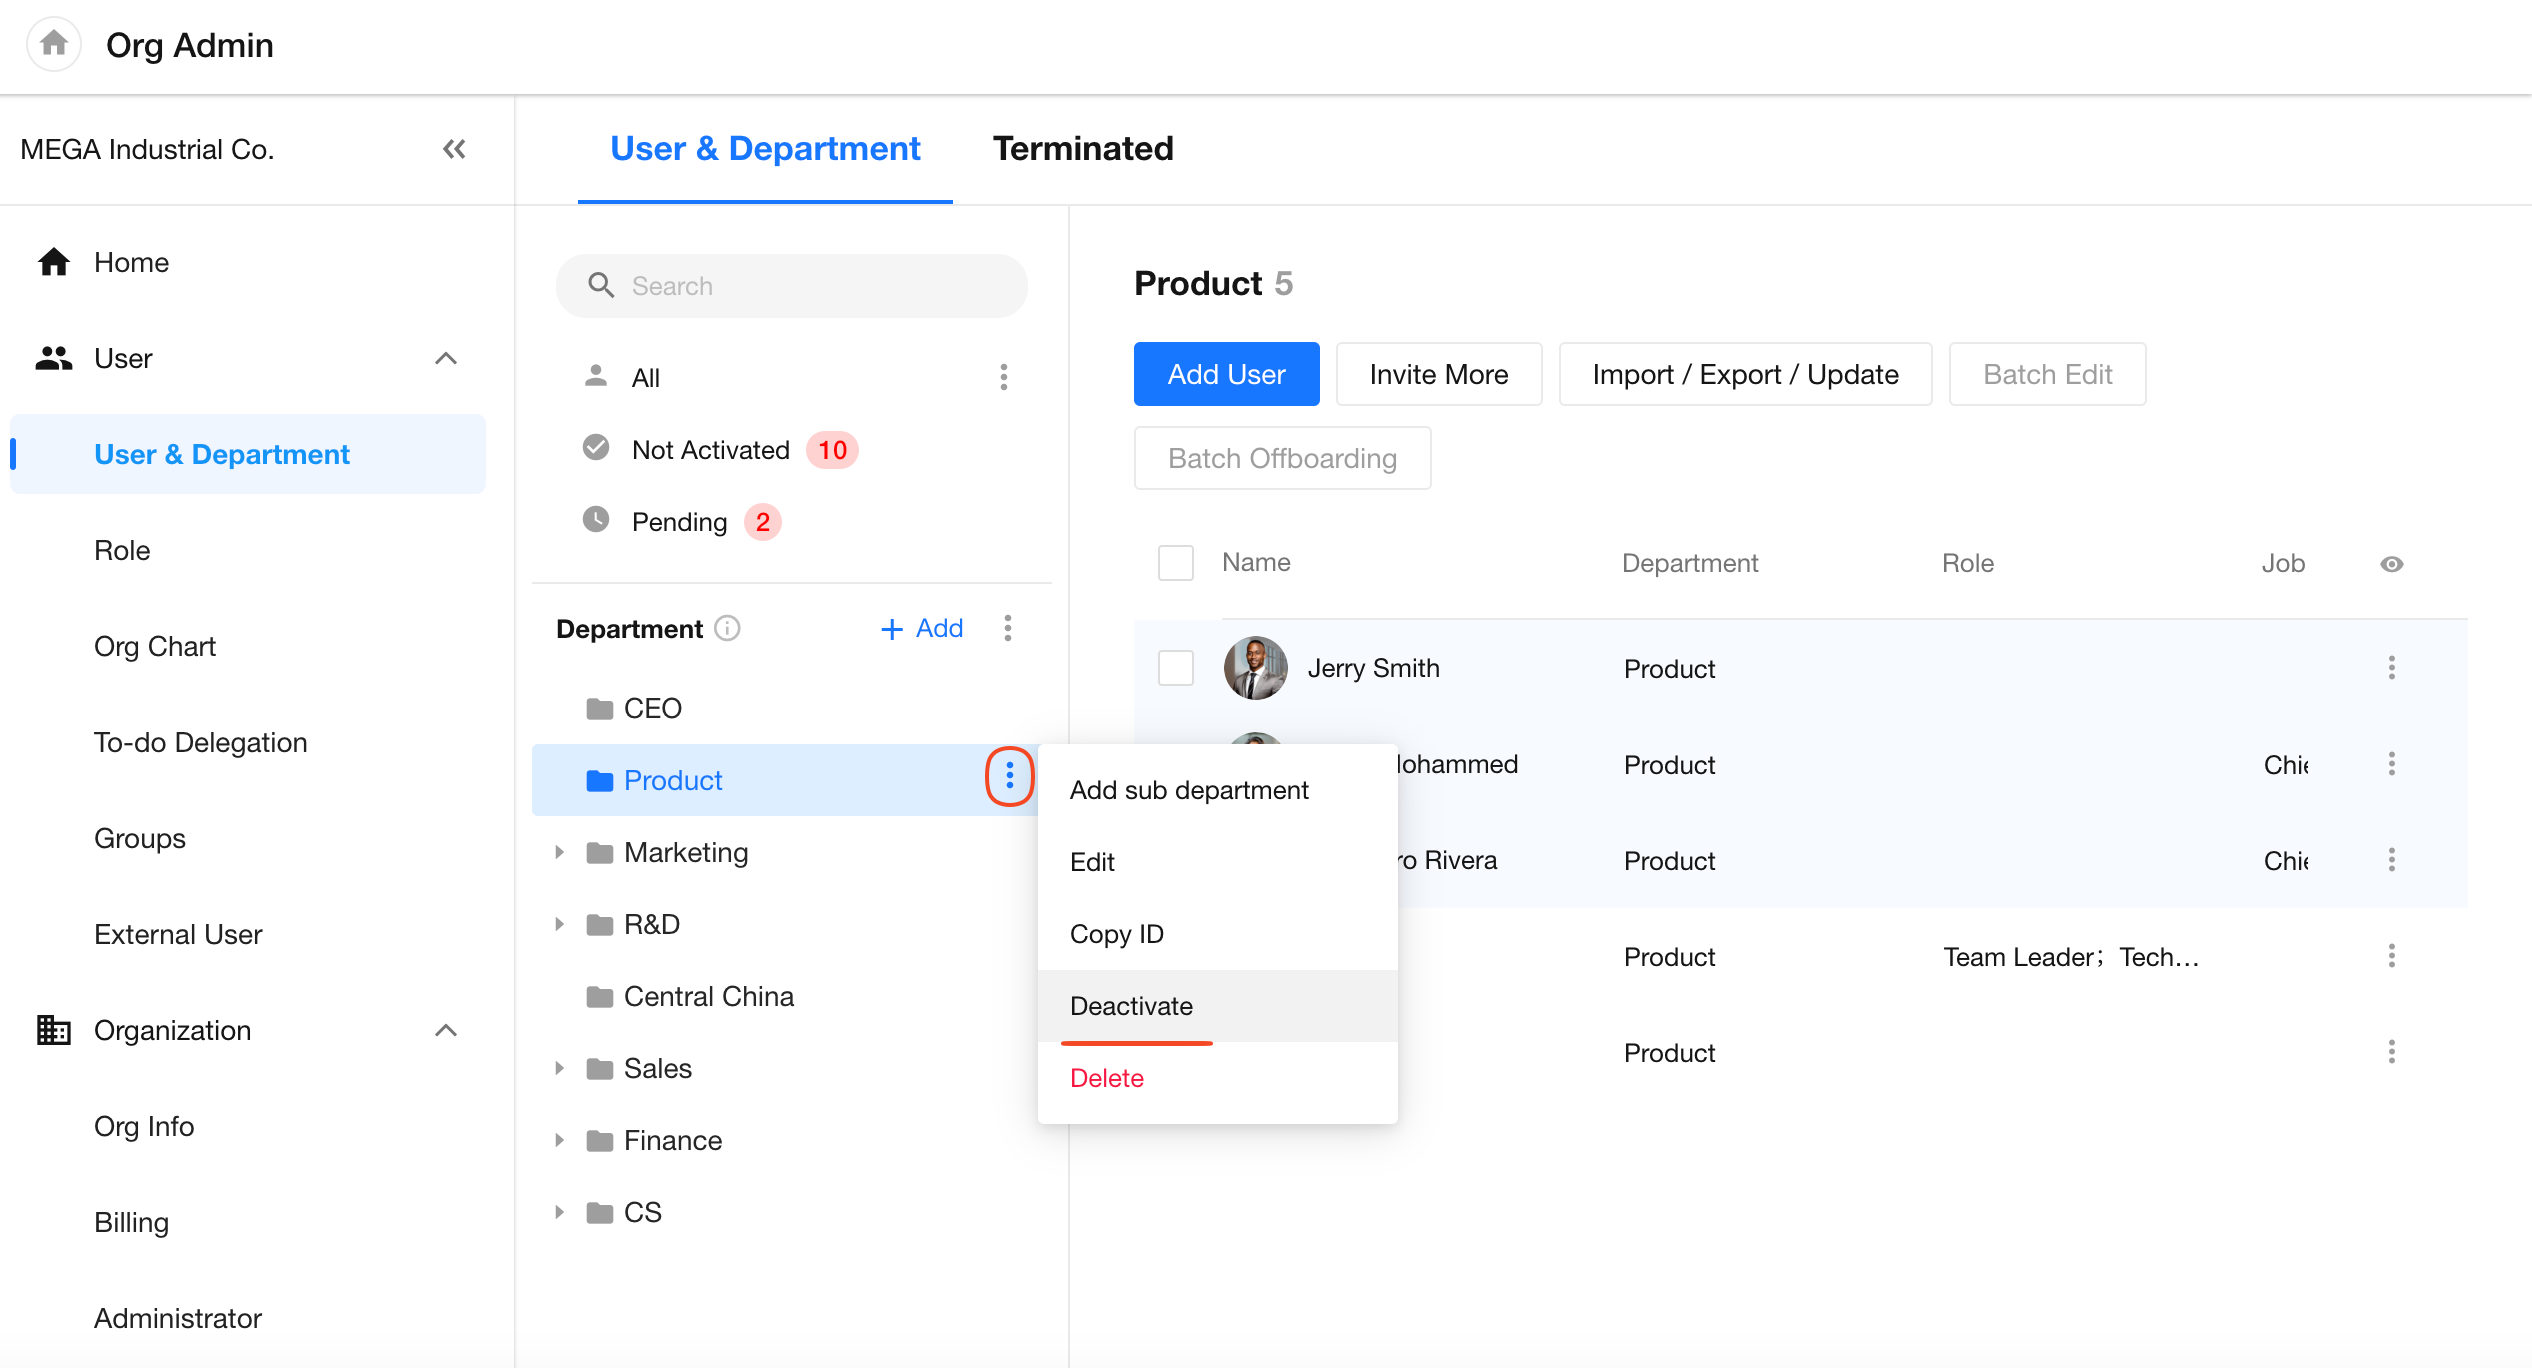
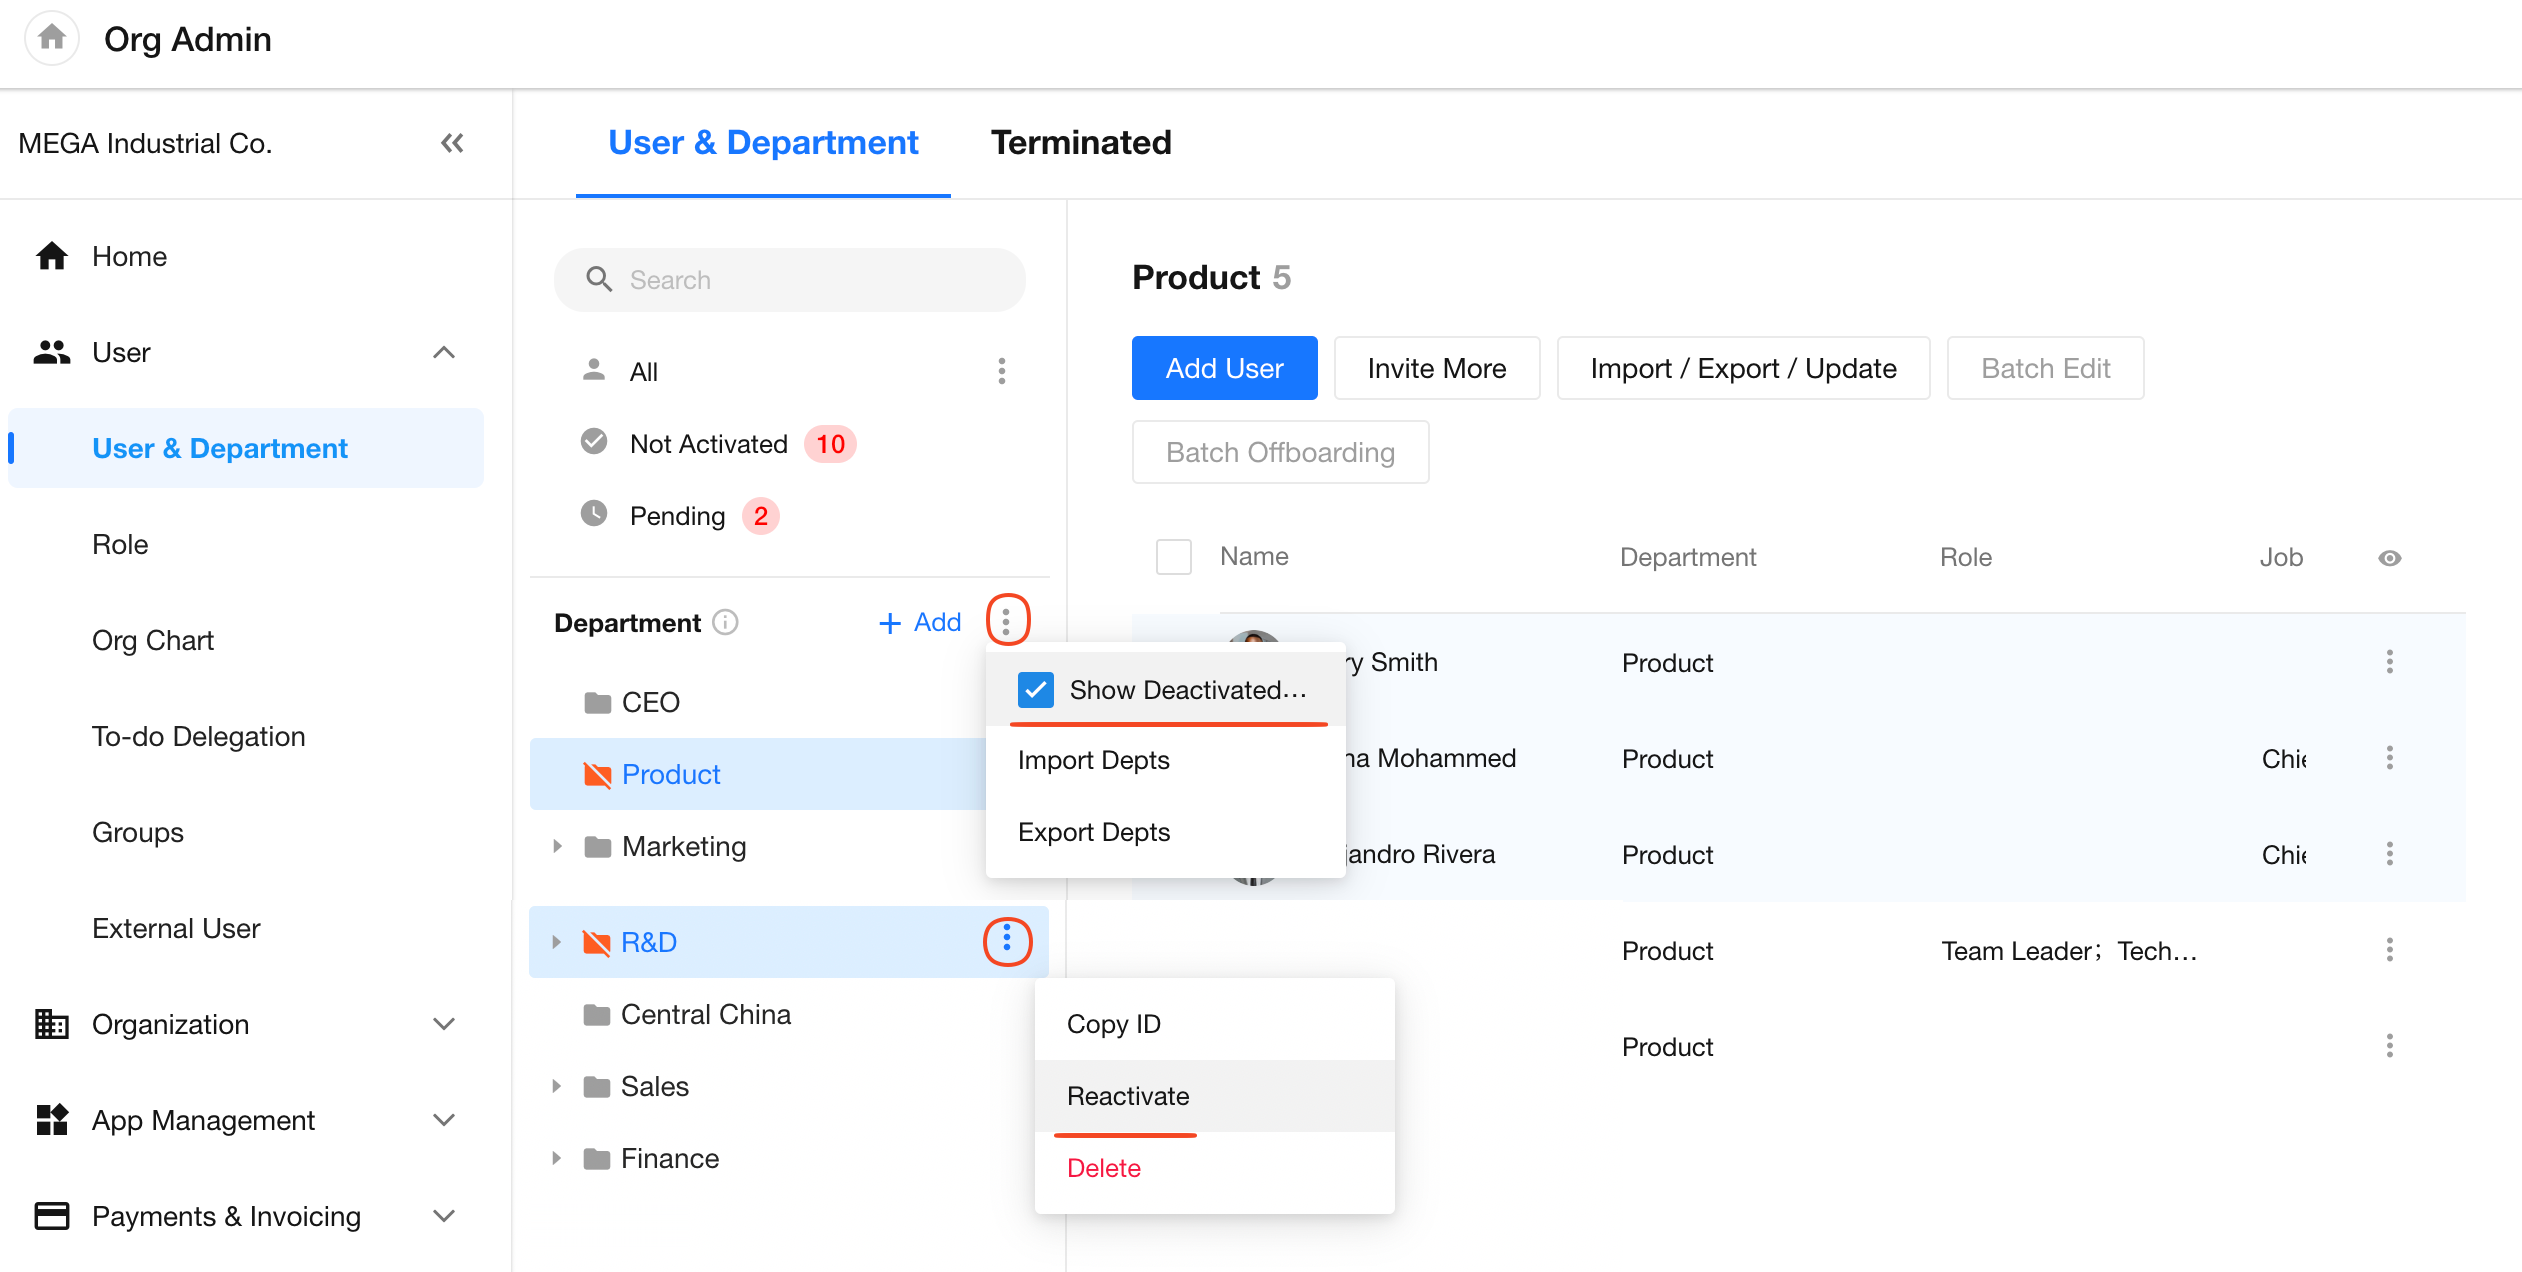
5. Deactivate a department
In the department list, click the action button next to a department name to set the department as Deactivated.
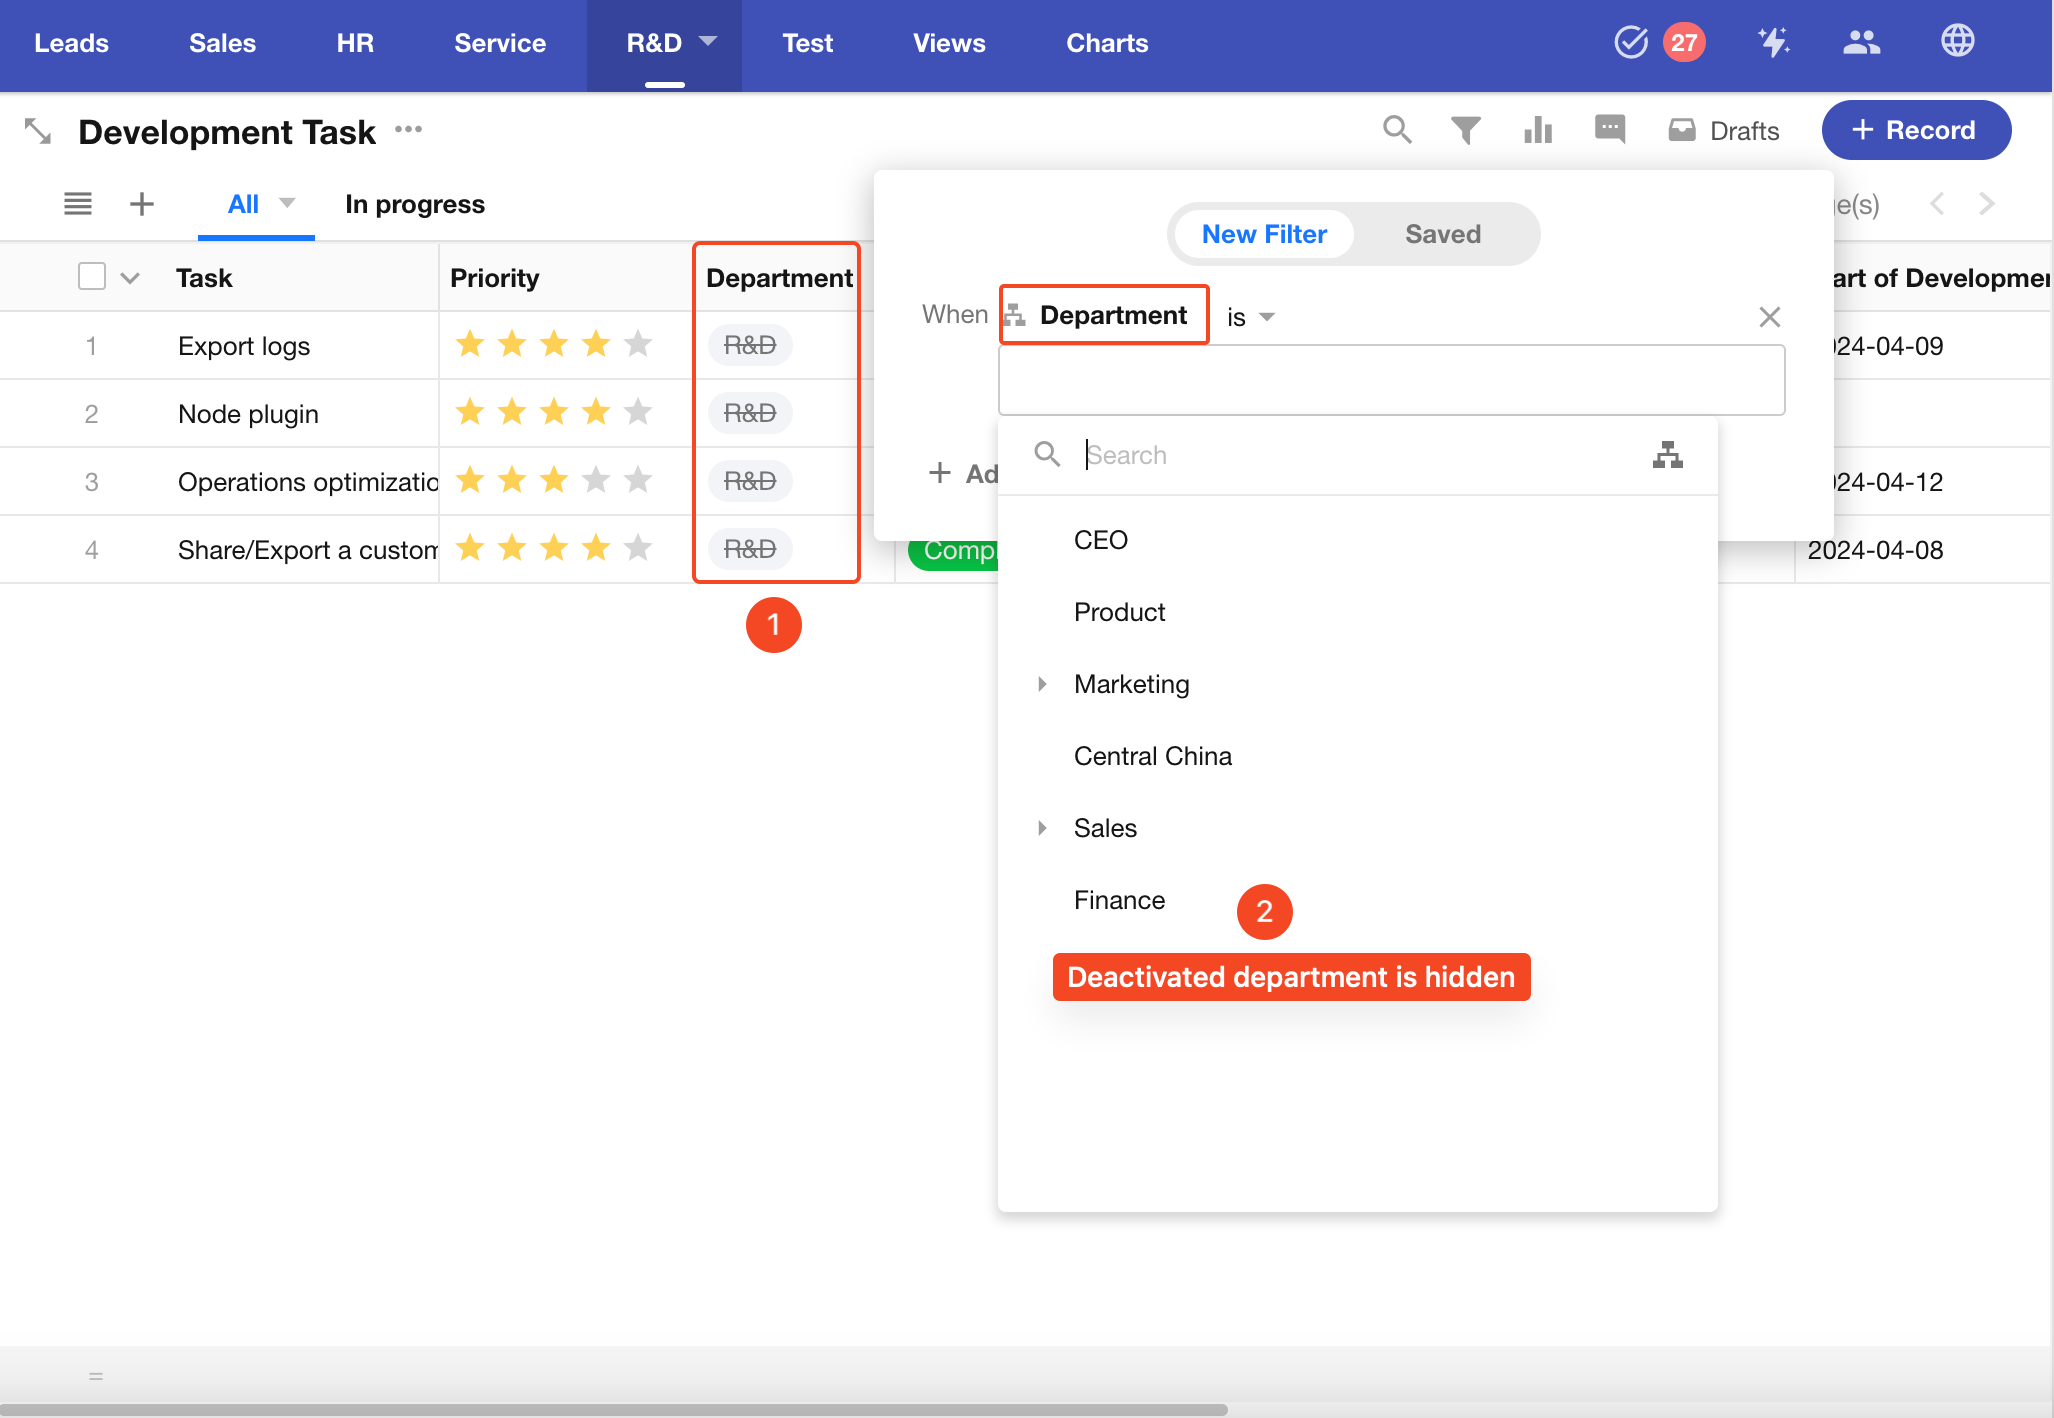
What Happens After a Department Is Deactivated
-
The inactive department will be hidden from department selection lists (e.g. in Contacts and department fields).
-
In records, the name of the deactivated department will appear with strikethrough formatting, e.g.,
Marketing Department -
Organization admins can still view and manage inactive departments and their members on the organization management page.
-
Synchronization and data import are not affected — you can still import or sync members into inactive departments.
-
When exporting the department list, the “Status” column will display Deactivated for deactivated departments.
Manage Deactivated Departments
Organization admins can manage deactivated departments and their members in the department list.
- You can toggle whether to display deactivated departments in the list.
- Inactive departments can be reactivated when needed.
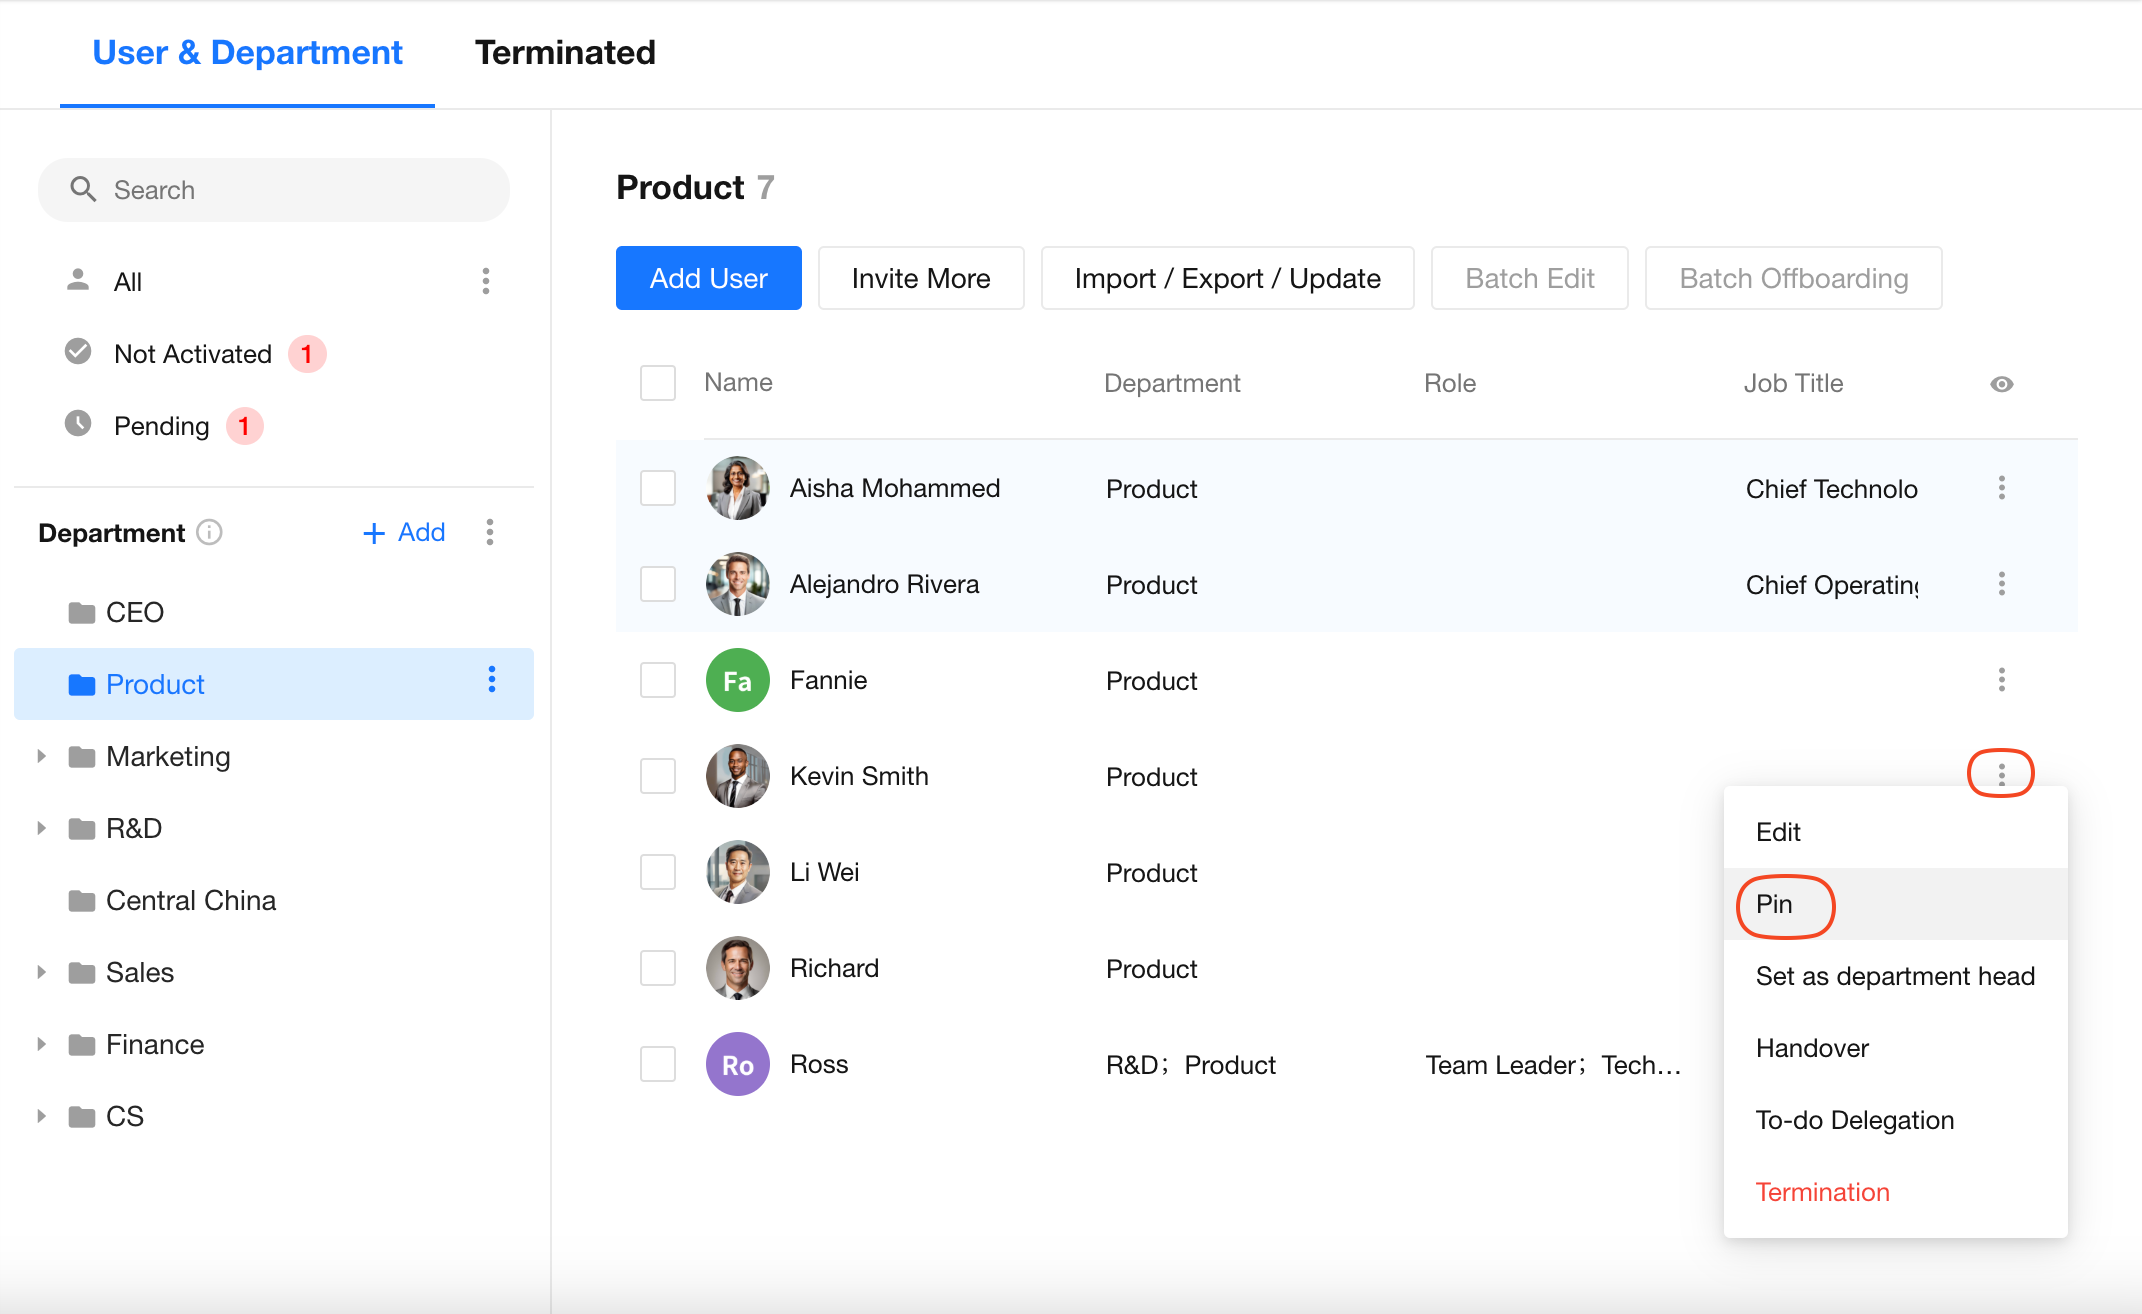
6. Pin department members
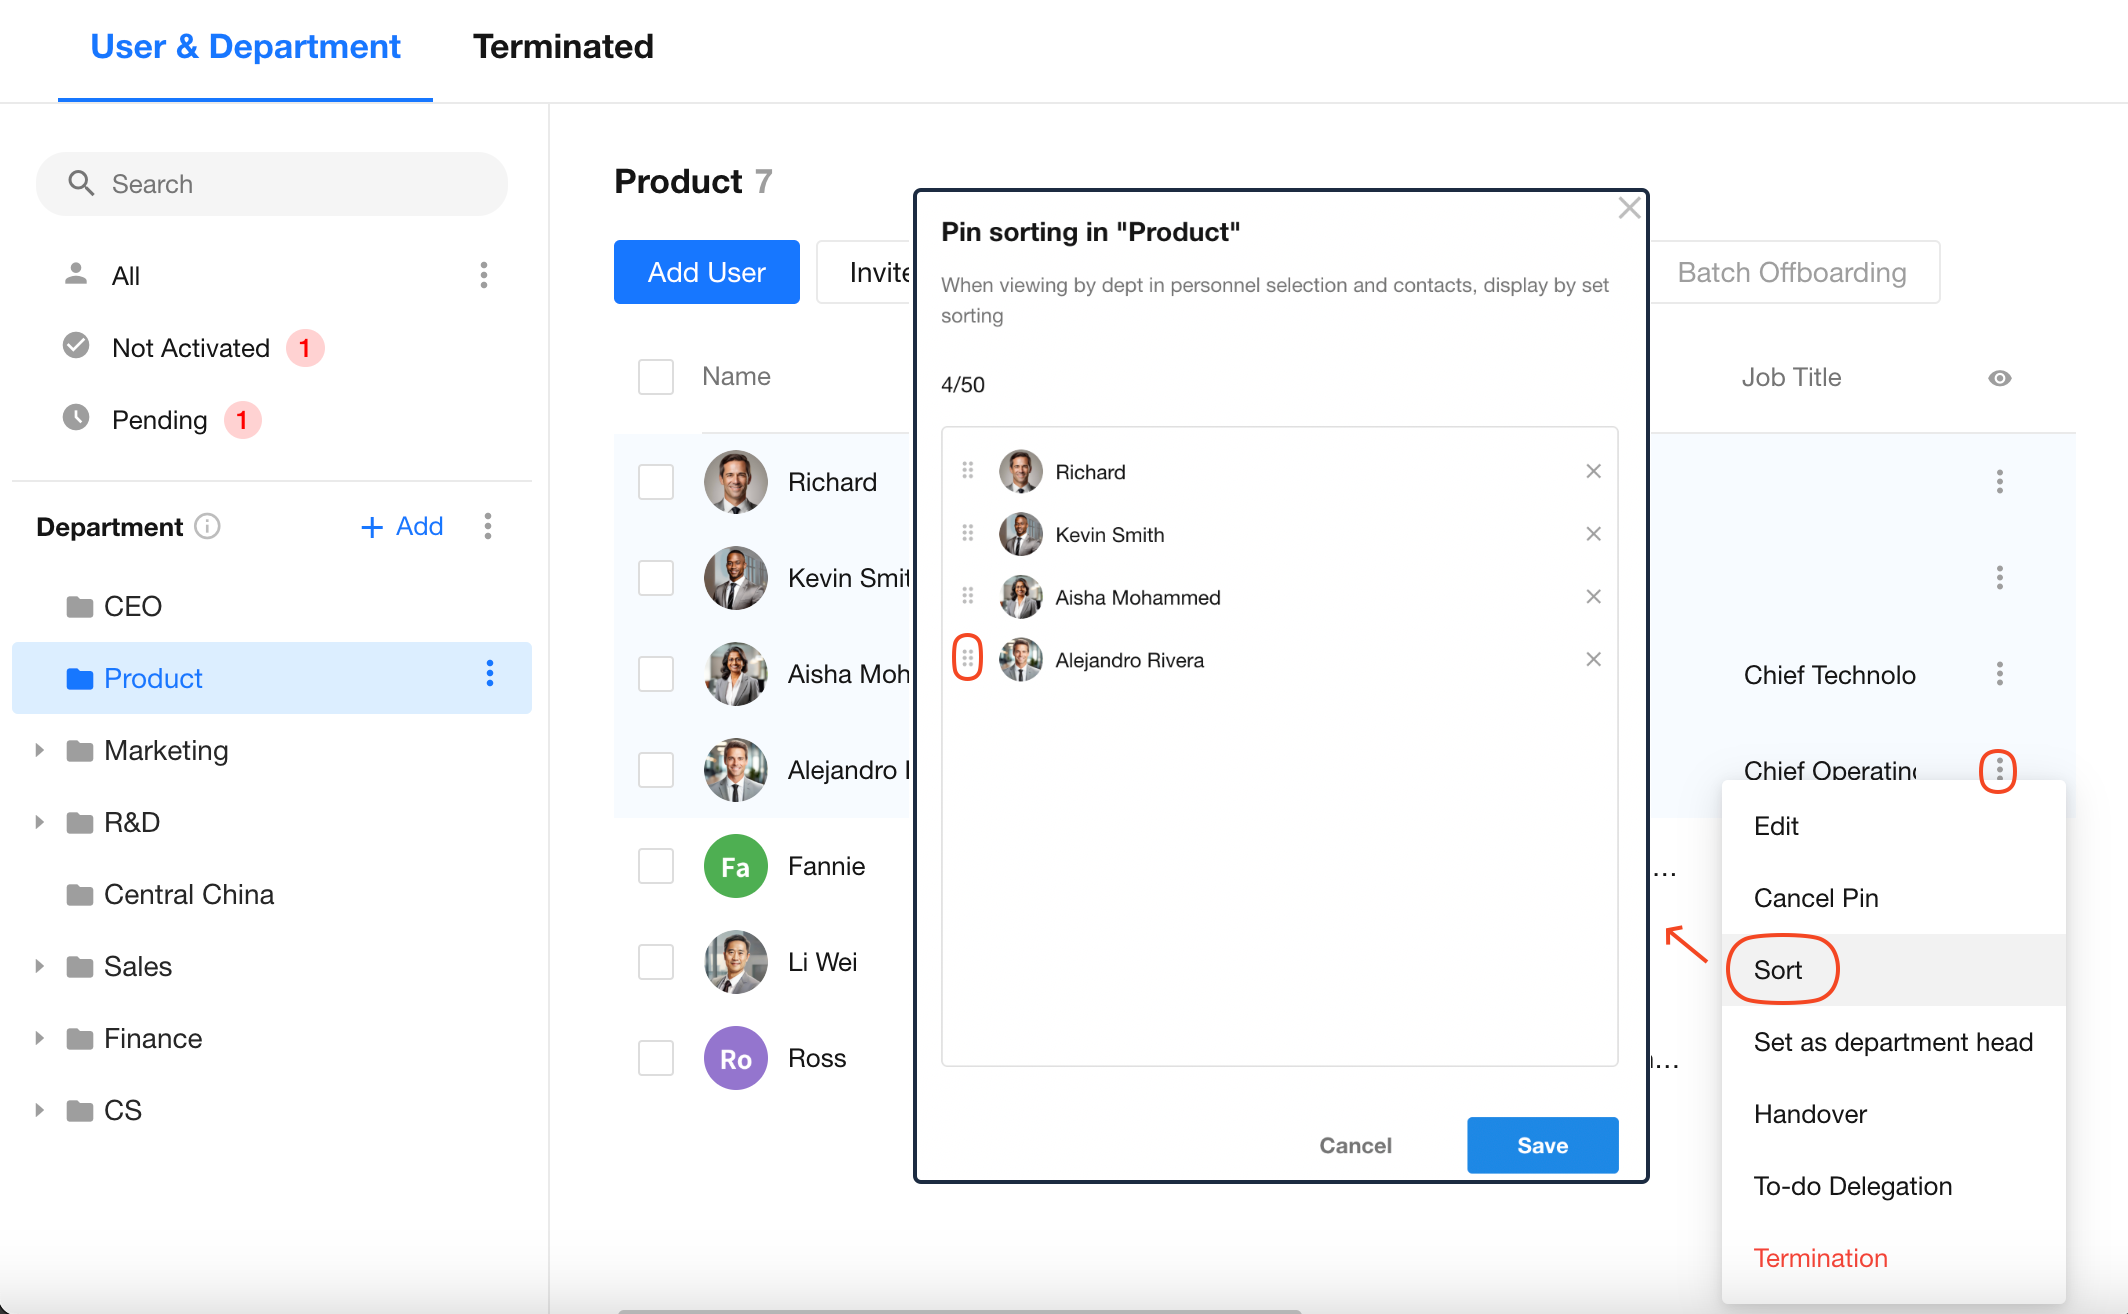
Department members can be pinned for display and reordered by dragging. Pinned members will also appear when viewing the Contacts, or browsing members by department in personnel selection pop-ups.
Pinned members:
Reorder pinned members:
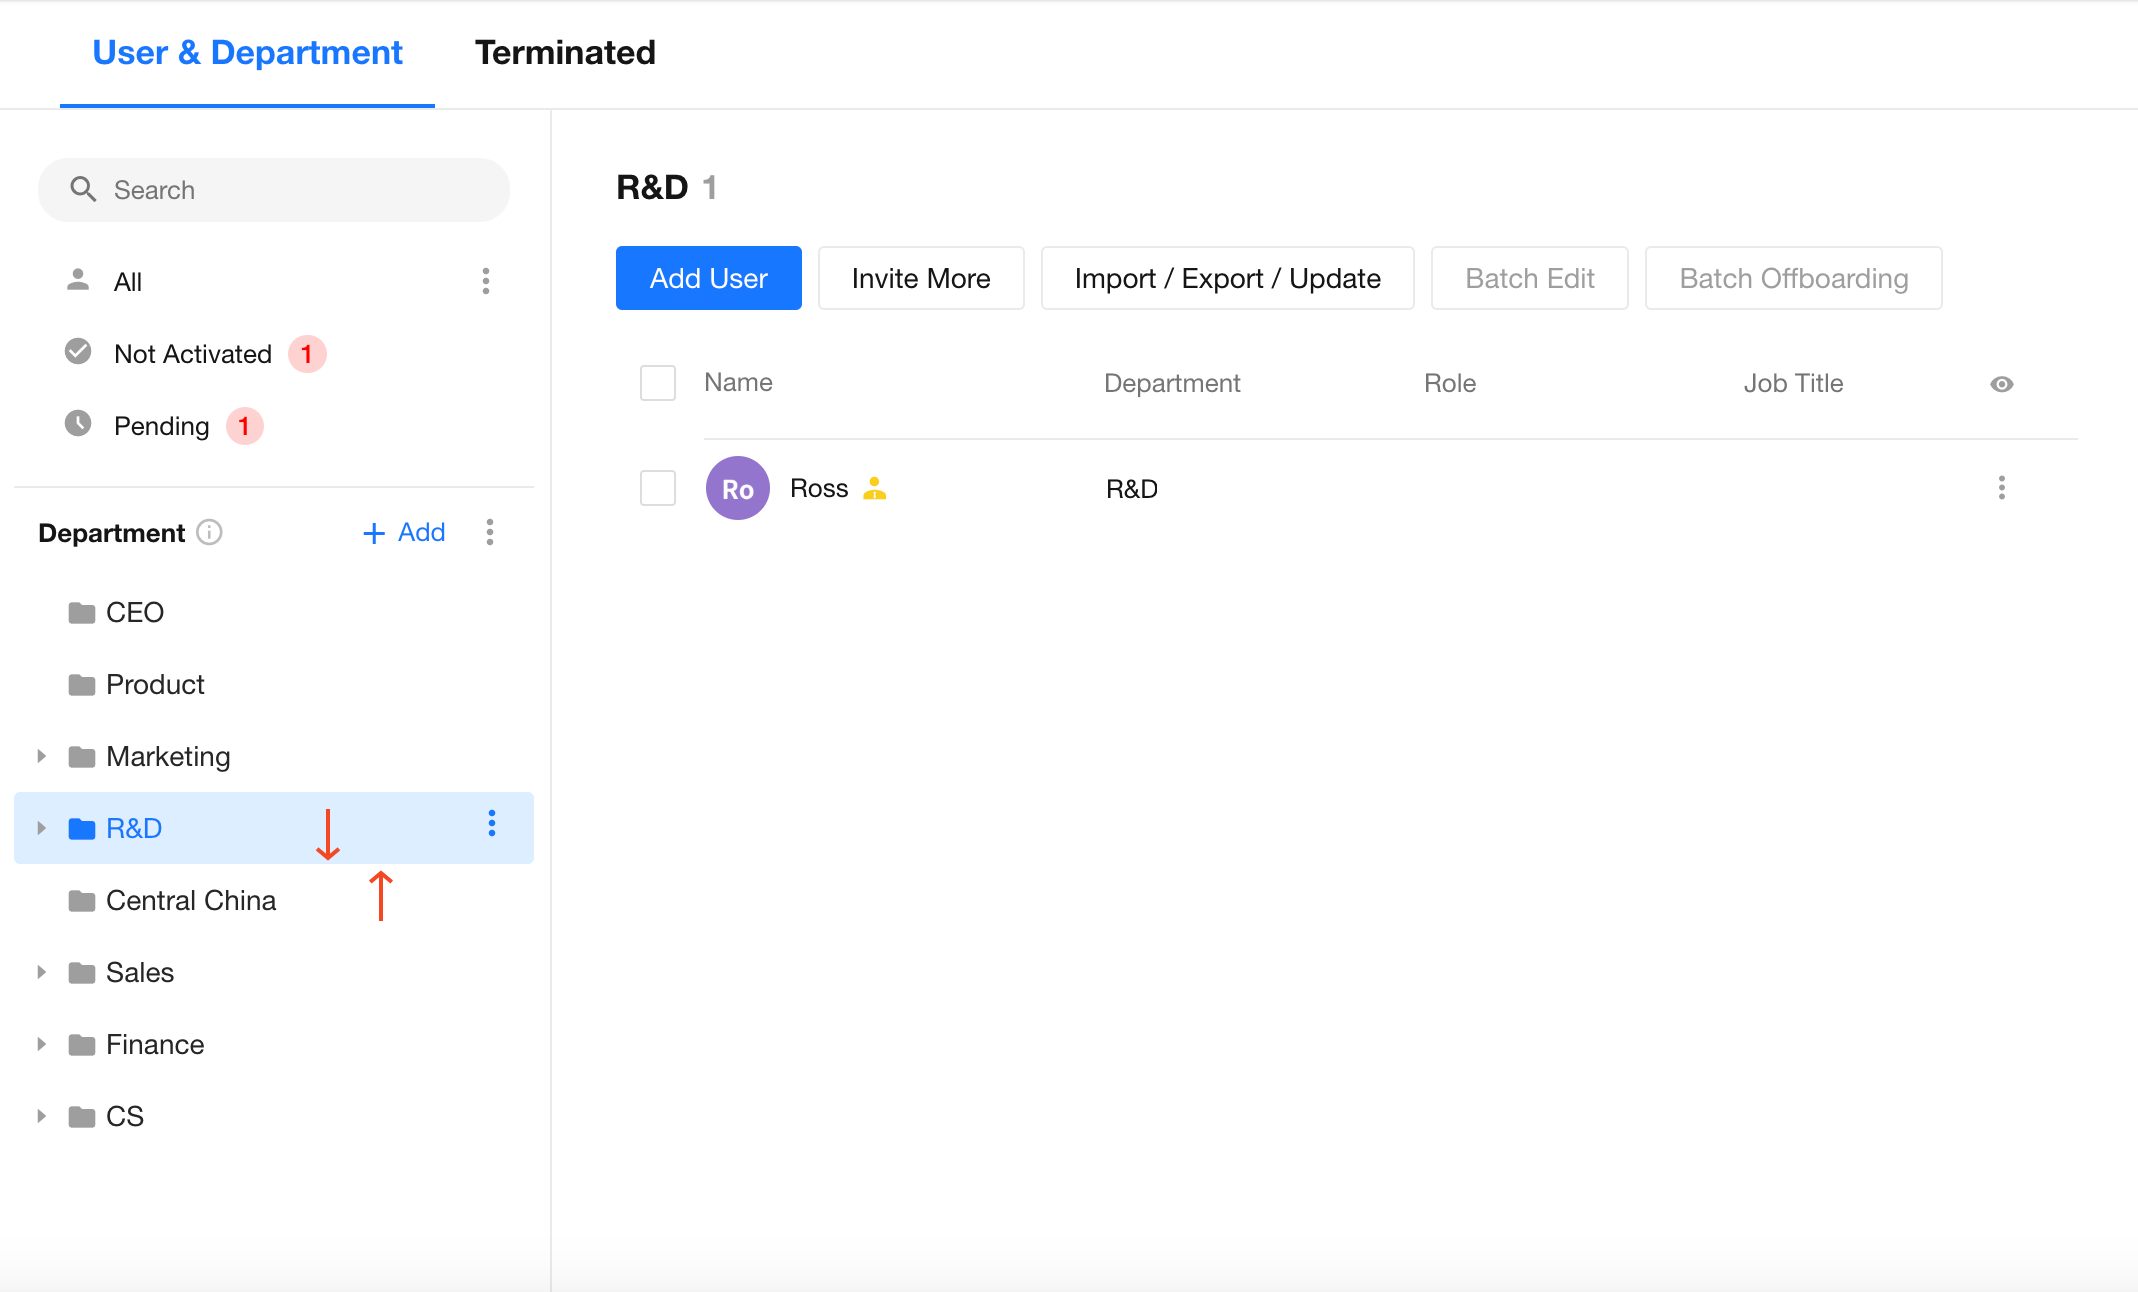
7. Adjust department order
Click and drag department names vertically to reorganize. Departments can also be dragged under other departments.
8. Import/Export departments
Rather than manually adding departments one by one, you have the flexibility to import pre-prepared department data or export your existing departmental structure to Excel.
How to Import and Export
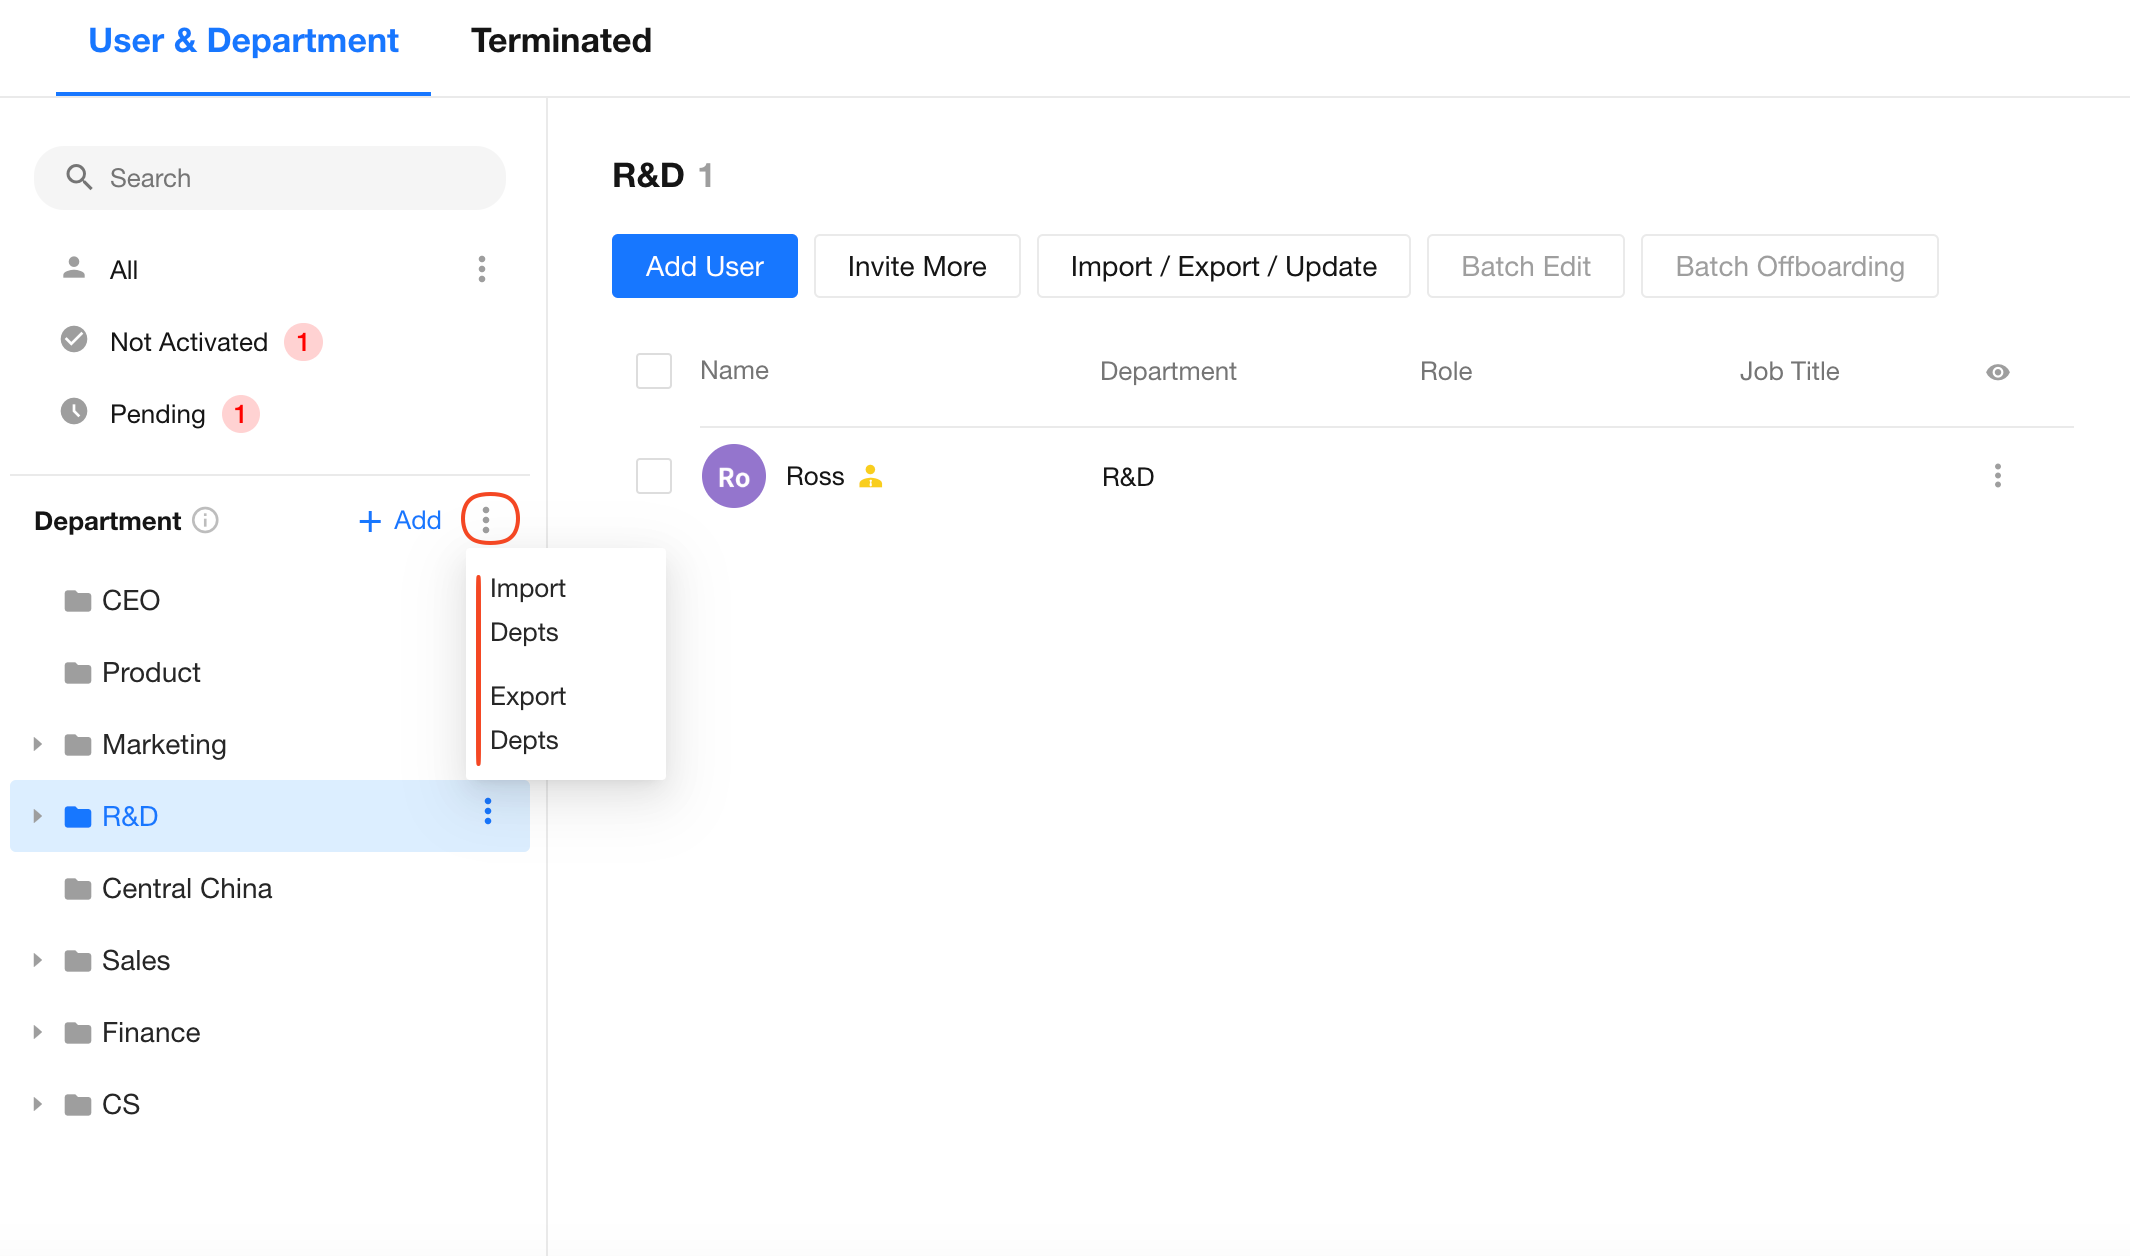
To import departments, first download the template provided by the system. Fill in your data according to the designated format and upload the template.

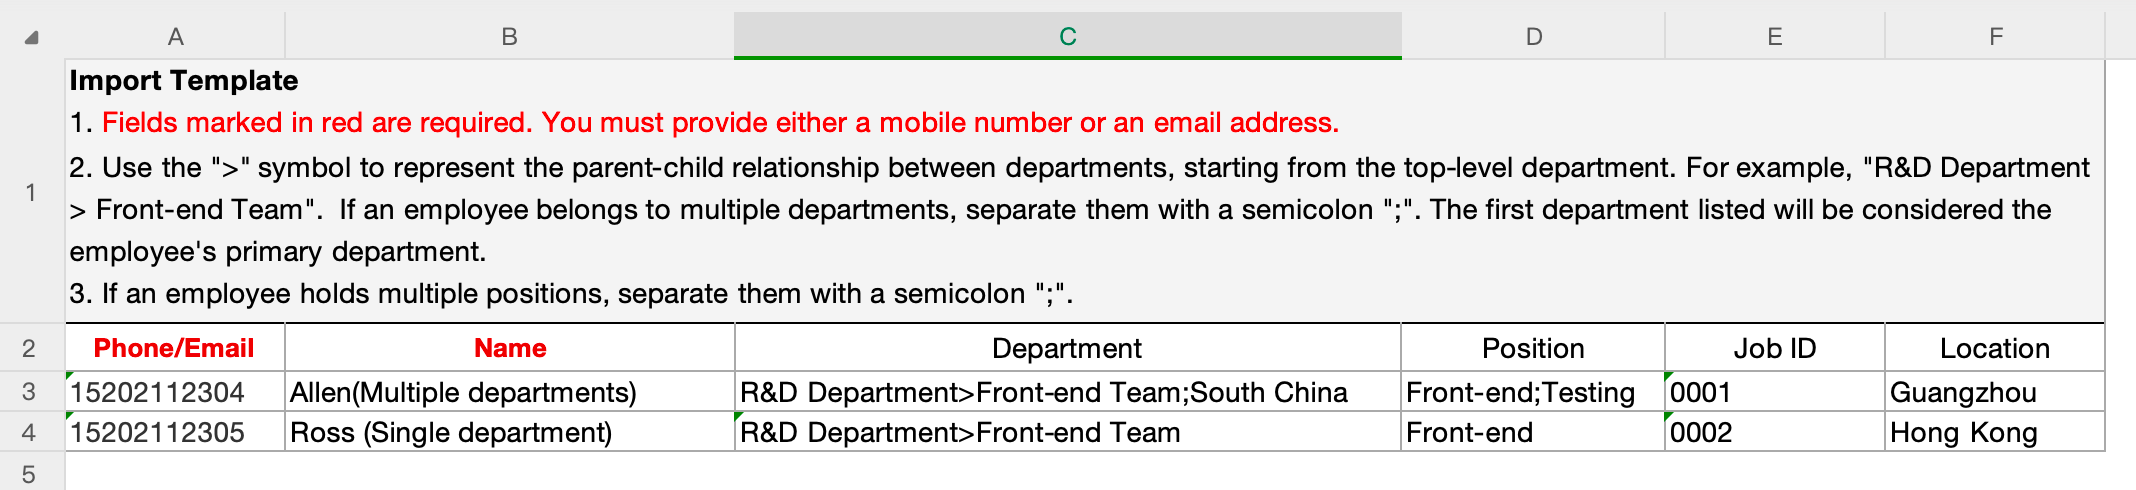
About Template:
-
In the Excel template, column names must begin from the second row. Alternatively, you can download the template, enter your data, and import the completed template file back into the system.
-
The path refers to the hierarchical structure from the top-level department down to the current department, with parent and child departments separated by a slash "/".
-
Parent departments specified in the path must already exist in the system, or else the import will fail. If the department path and name are identical, it indicates a department with no parent above it.
II. Position
Position management includes creating, importing, exporting, editing, deleting positions, and managing members under positions.
1. Create/Edit a position
Organization Admins can go to Org Admin > Organization > Org Info to manage positions.
2. Delete a position
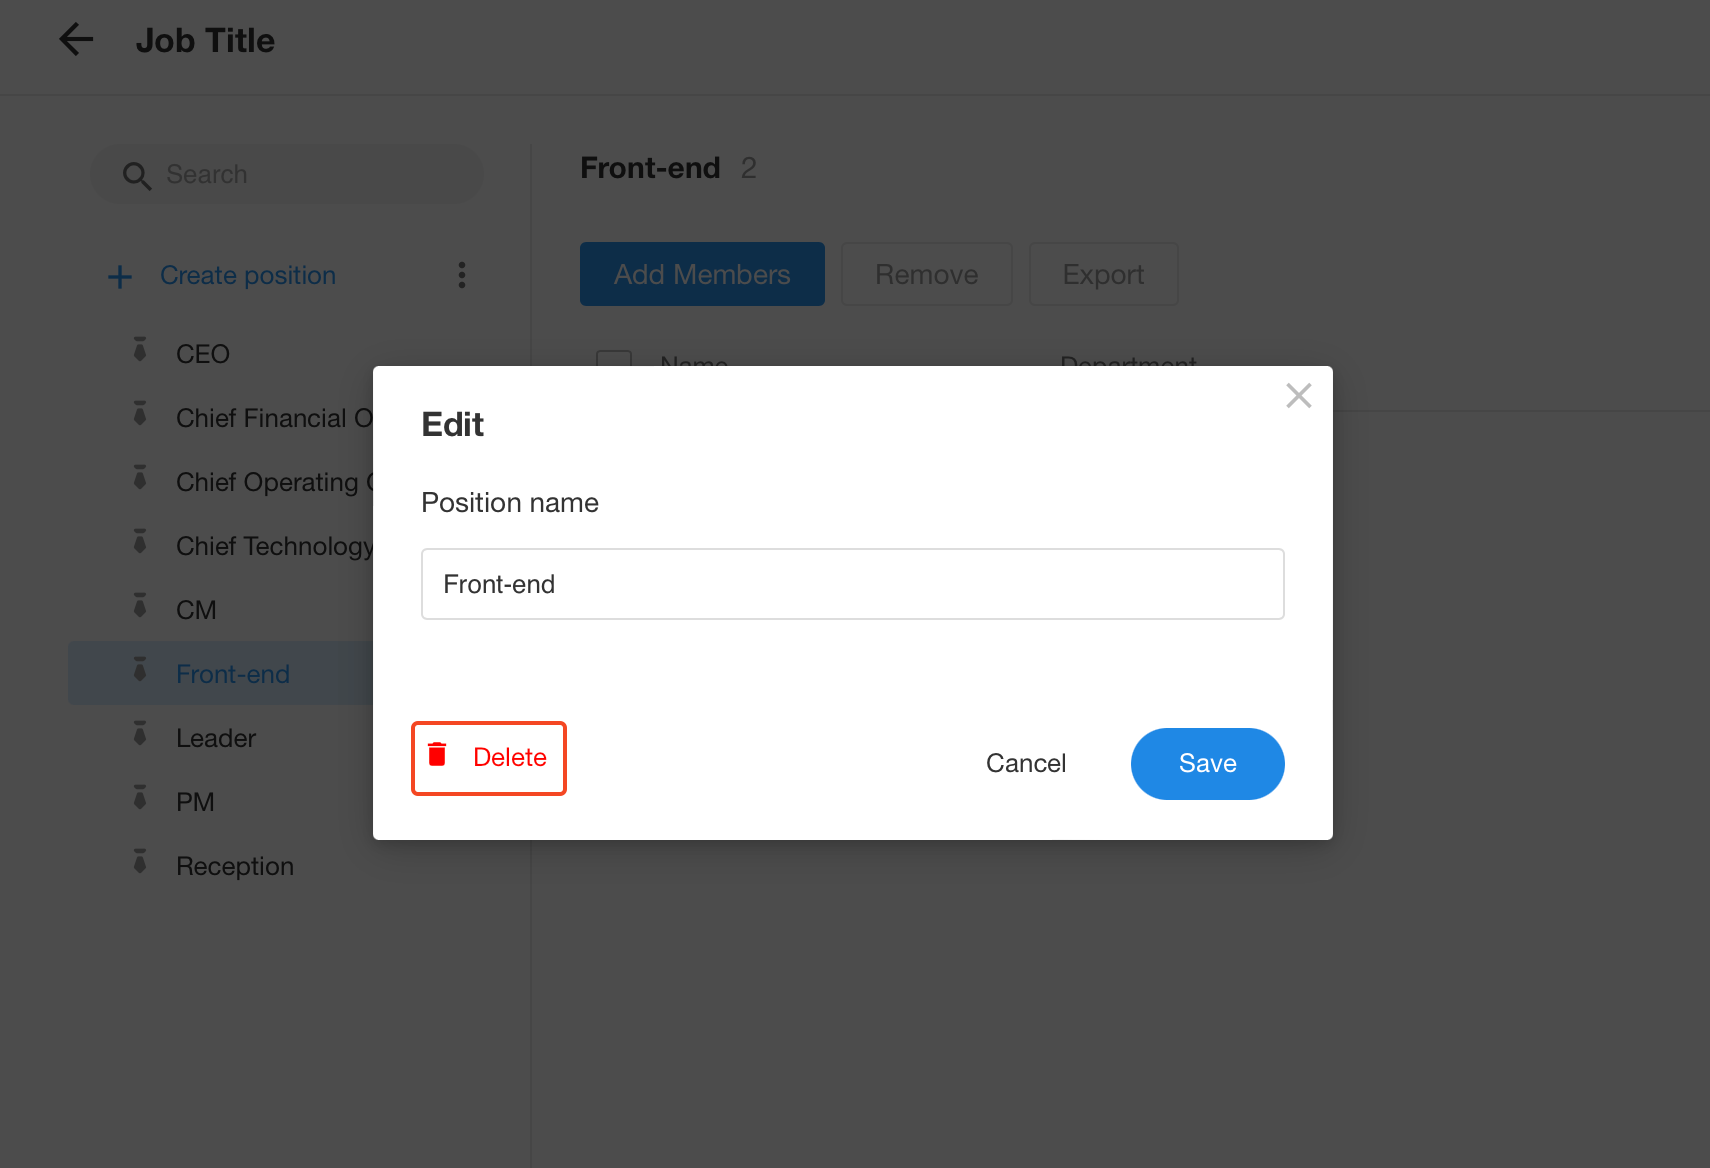
If there are members under a position, you need to remove all members before deleting the position.
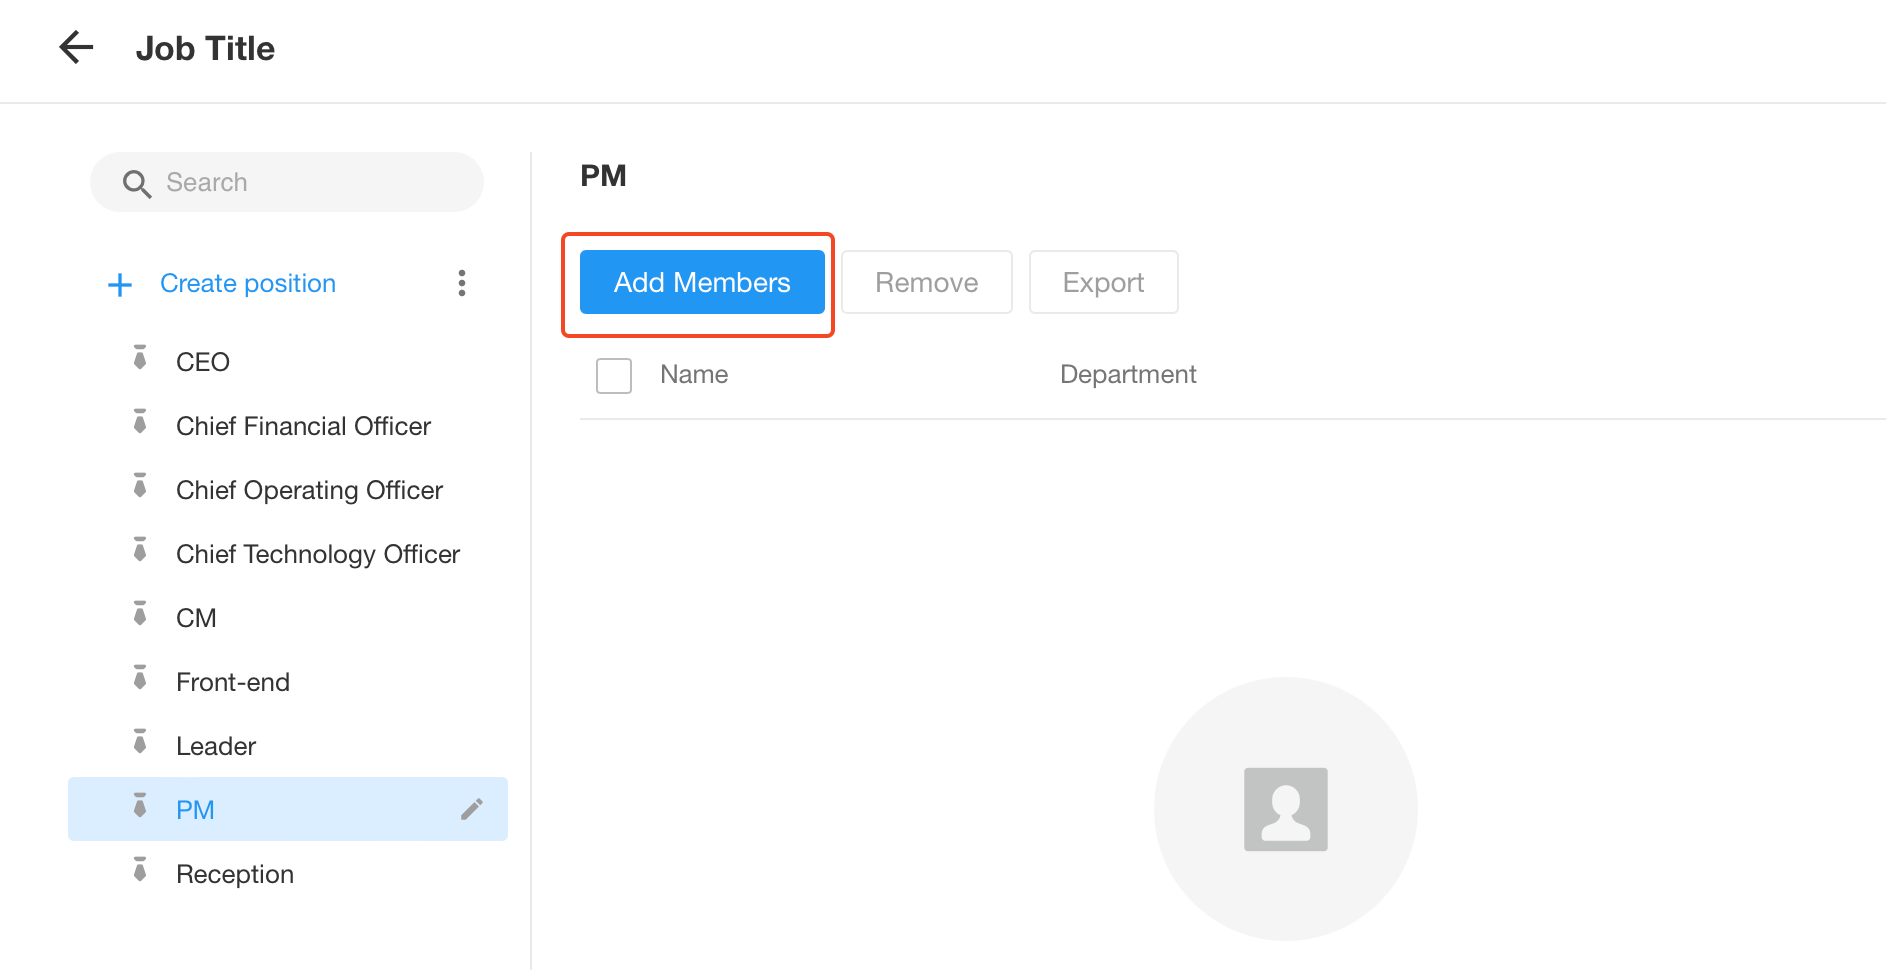
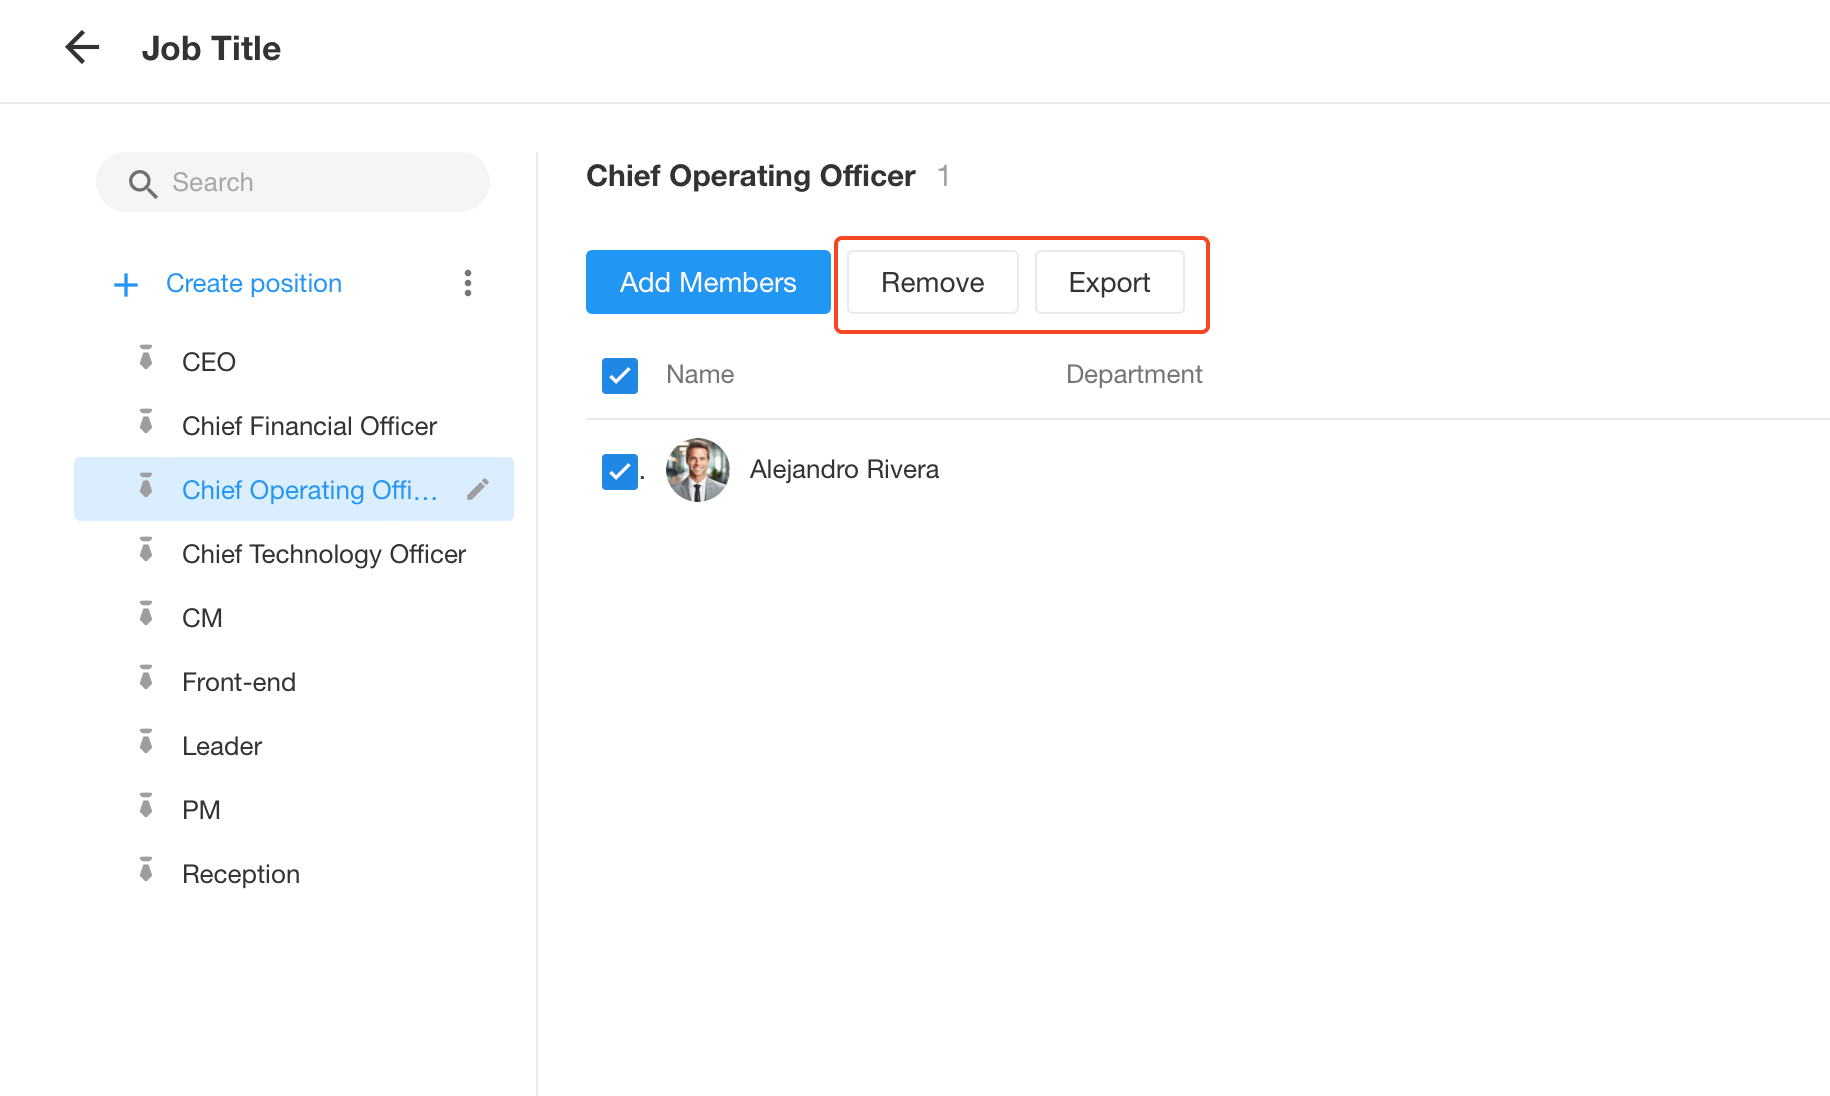
3. Add/Remove/Export members
-
Add
Select a position first, then add members.
-
Remove/Export
Select the target members under a position, the Remove and Export button appear.
4. Import/Export Position
How to Import or Export Position
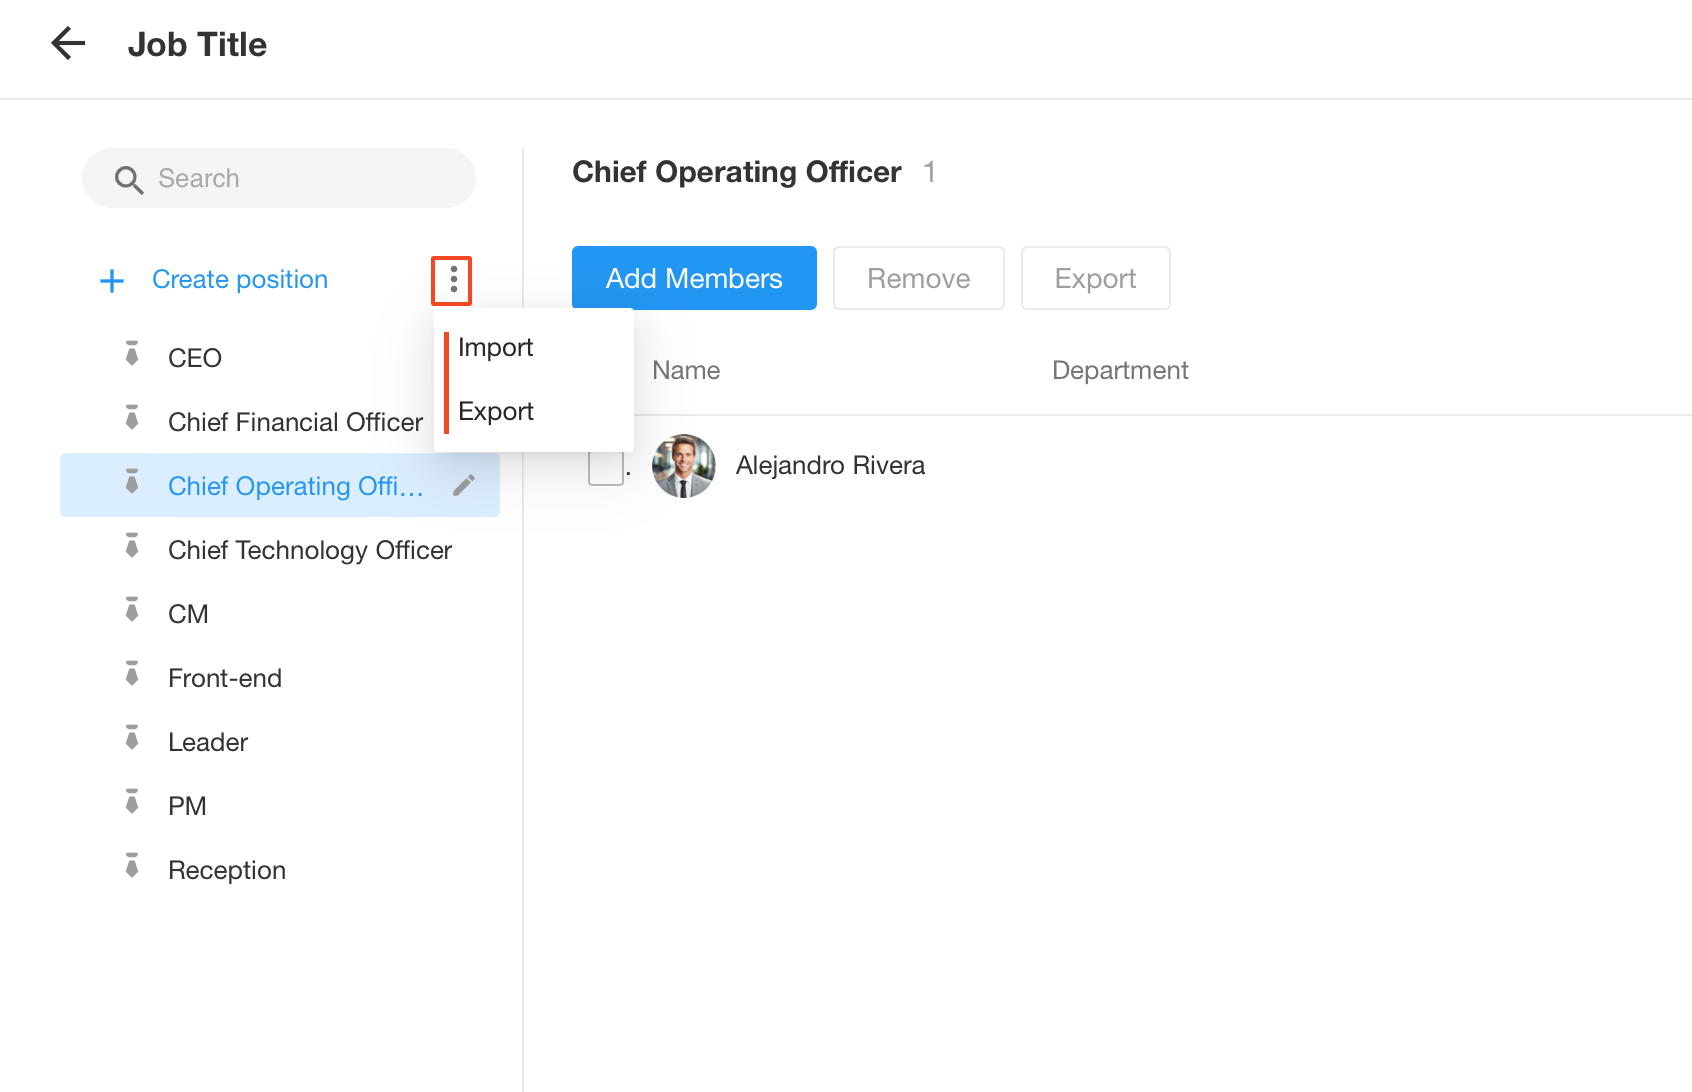
If you want to import positions, you need to download the template first, enter the data and upload the template file.
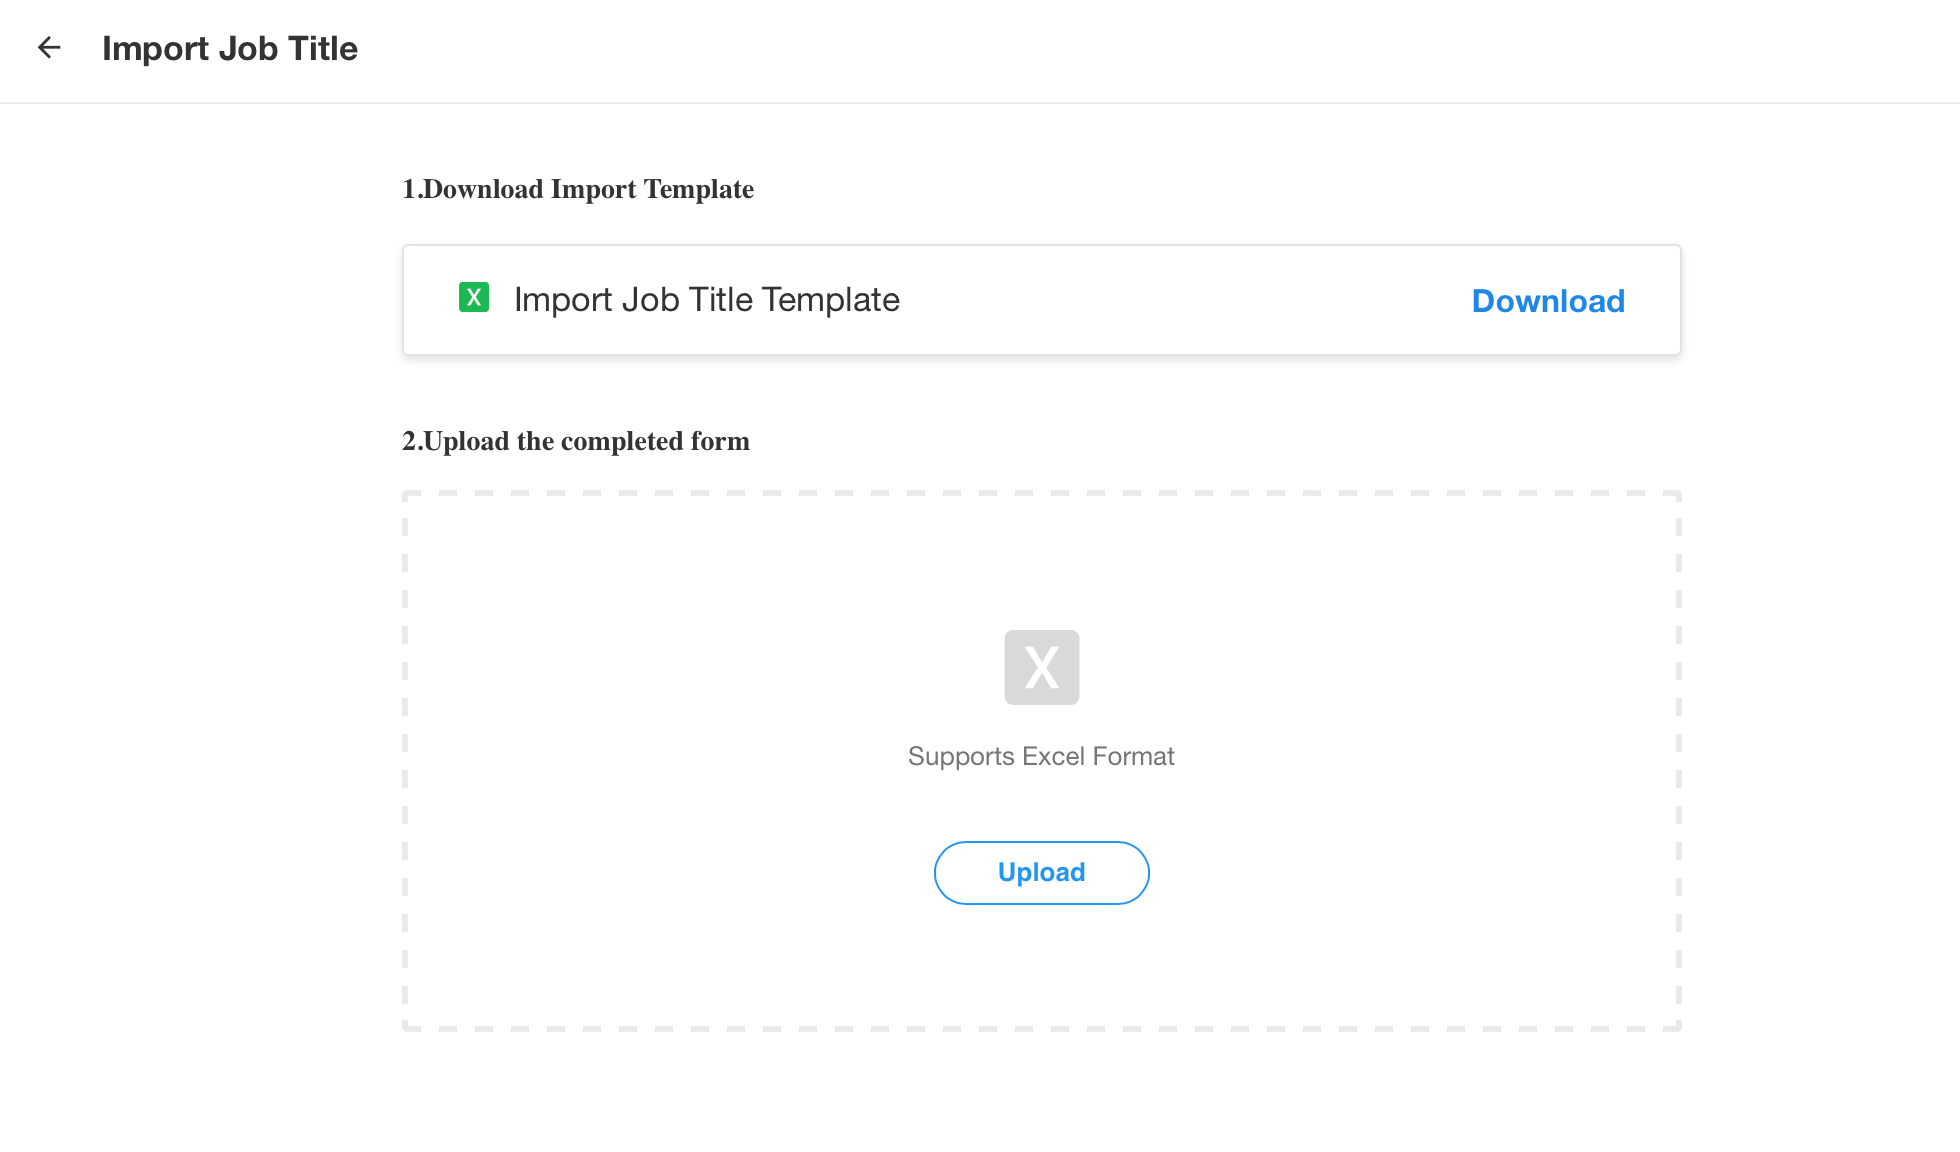
About Template:
-
In the Excel template, column names must begin from the second row. Alternatively, you can download the template, enter your data, and import the completed template file back into the system.
-
If the job title in Excel already exists in the system, the import will fail. It will prompt which row is duplicated, please delete it and import it again.
Was this document helpful?