Basic Attributes of Fields
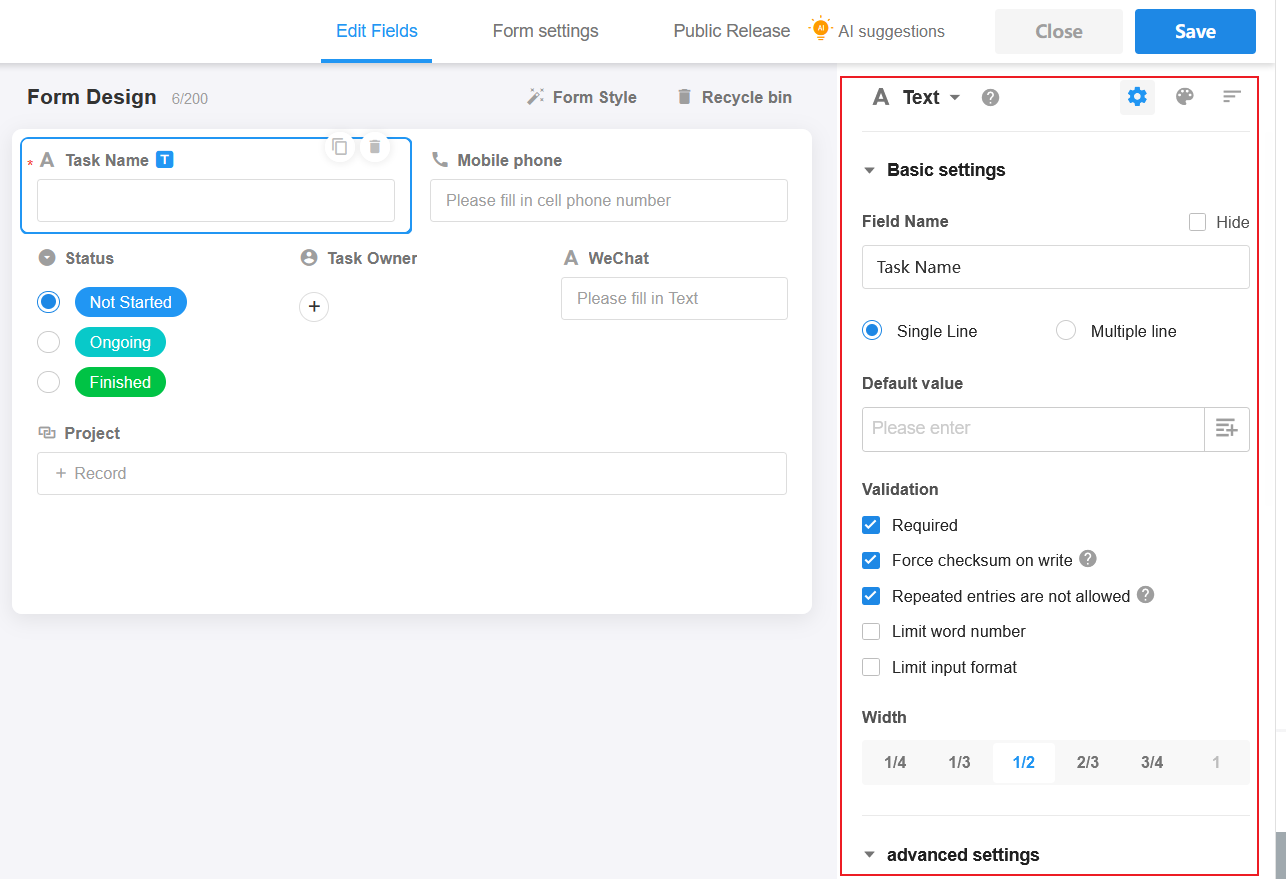
After selecting the appropriate control based on the data type of the field, it is necessary to configure the basic attributes of the field. Each field has the following basic attributes.
- Field name (hide or not)
- Required
- No duplicate value allowed
- Default value
- Read-only
- Hide
- Hide when adding reocrds
- Width
- Color and style of field name
- Hint text
- Field description
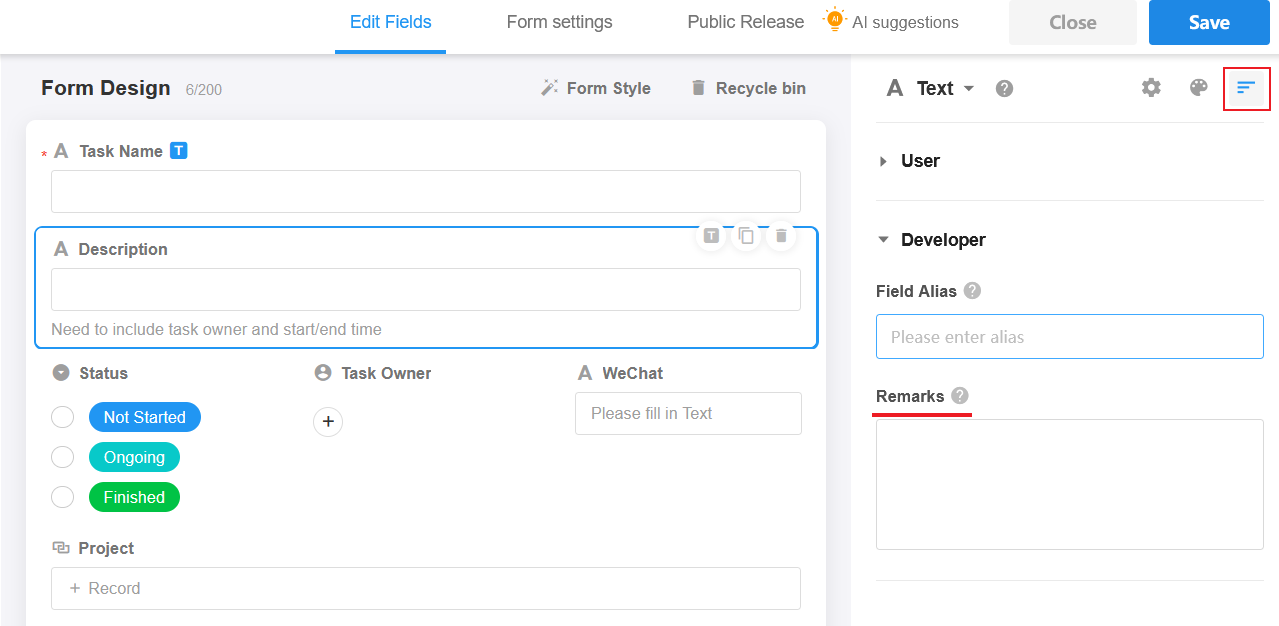
- Field alias
- Field remarks
Field Name (Hide or not)
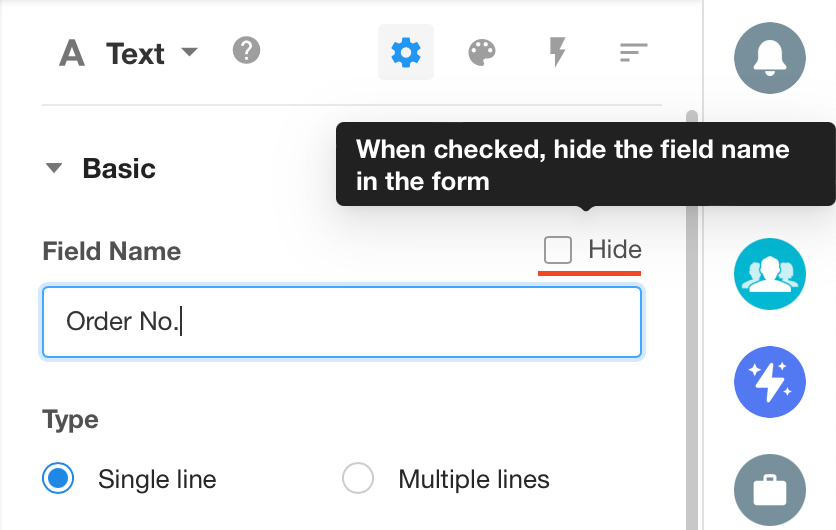
An appropriate field name helps to better identify the field content. Sometimes it is not necessary to show the field name when displaying, only the content, so you can hide the name.

Default Value
When adding a new record, you can set the default value of the field to auto fill it into the field, either the static default value or the dynamic default value.
More details about default value
Required
If a field is set as required, when editing a record, if the field is empty, it cannot be saved and there will be a prompt. When editing in a sheet, or when writing data through workflow and API, or when importing Excel file, there is no requirement checking, and the field can be written normally if it is empty.
Force checksum on write
If only [Required] is checked, there is no requirement checking when importing data or writing data through workflow. If you also check [Force checksum on write], there will be checking when writing data through workflow and API, and importing Excel file, and if the field is empty, the record can't be written. The specific rules are as follows:
- Workflow: the workflow stops and report the error.
- Import Excel file: Skip the data that does not pass the check, and import the other data normally.
- API: Failed to write, and return an error message.
- Data integration and sync: Skip data that does not pass validation, and synchronize other data normally. Data that has been skipped will not be counted towards the write.
No duplicate value
Some field values, such as job numbers, are often unique, so when adding or editing records, if you enter duplicate data, there will be a prompt and cannot be saved.
This setting only checks whether the field values are duplicated when editing records; it does not perform validation when importing data or writing data through the API. You can create unique indexes to ensure the absolute uniqueness of the field content.
If [No duplicate value] is checked in the members fields and relationship fields, any members or records that have already been selected in other records of the current worksheet will no longer be available for selection.
Read-only
If read-only is checked, the field cannot be filled directly when adding or editing records. However, it can be modified to editable through workflows or business rules.
Hide
If [Hide] is checked, the field is always not displayed when adding or editing records. Such fields can be used as bridge fields, which are only involved in calculations and do not have to be displayed to users.
Hide when adding record
If checked, the field will not be displayed when adding records, but will be displayed when viewing and editing records. For example, in an Employee worksheet, there is a termination field, but when adding an employee, this field is not needed, then you can check [Hide adding record].
Width
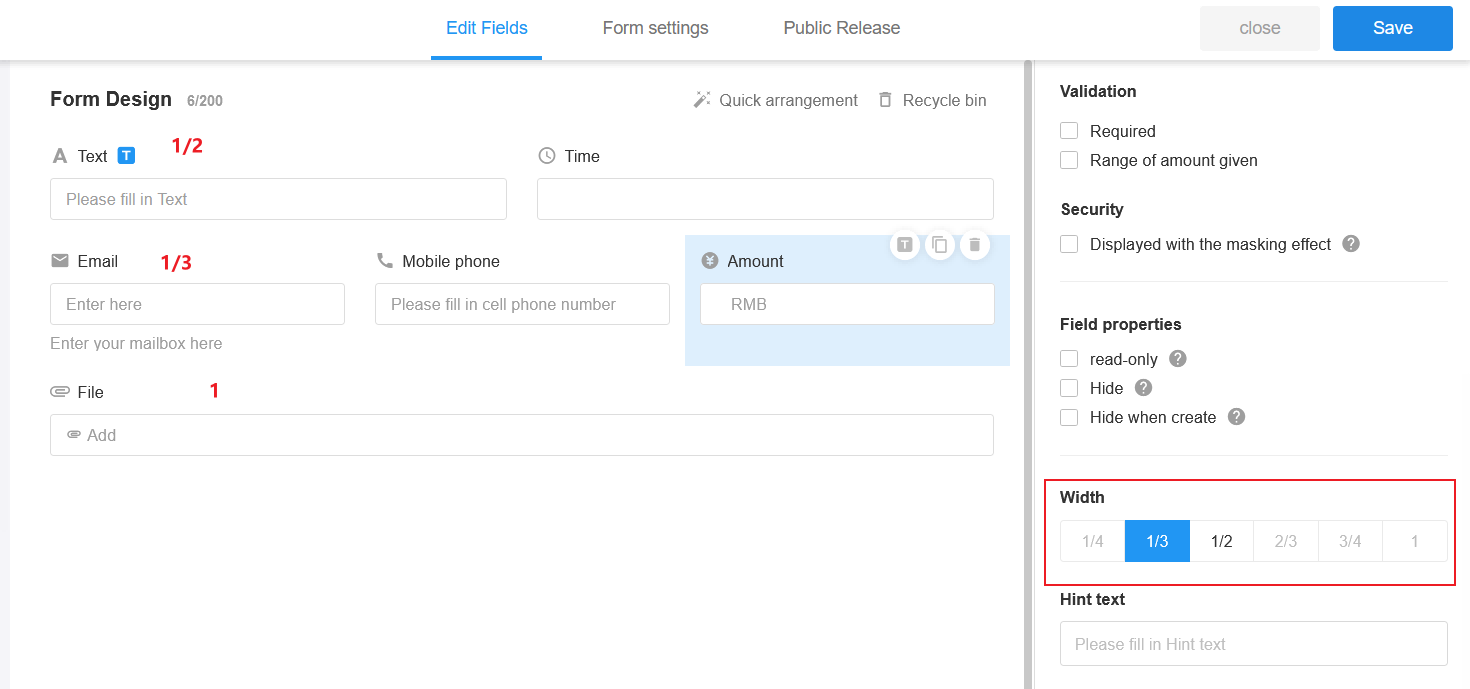
In the form, you can put up to 4 fields each line. The shortest field can be set to 1/4 the width of the entire line, and the longest can be the width of the line.
Color and Style
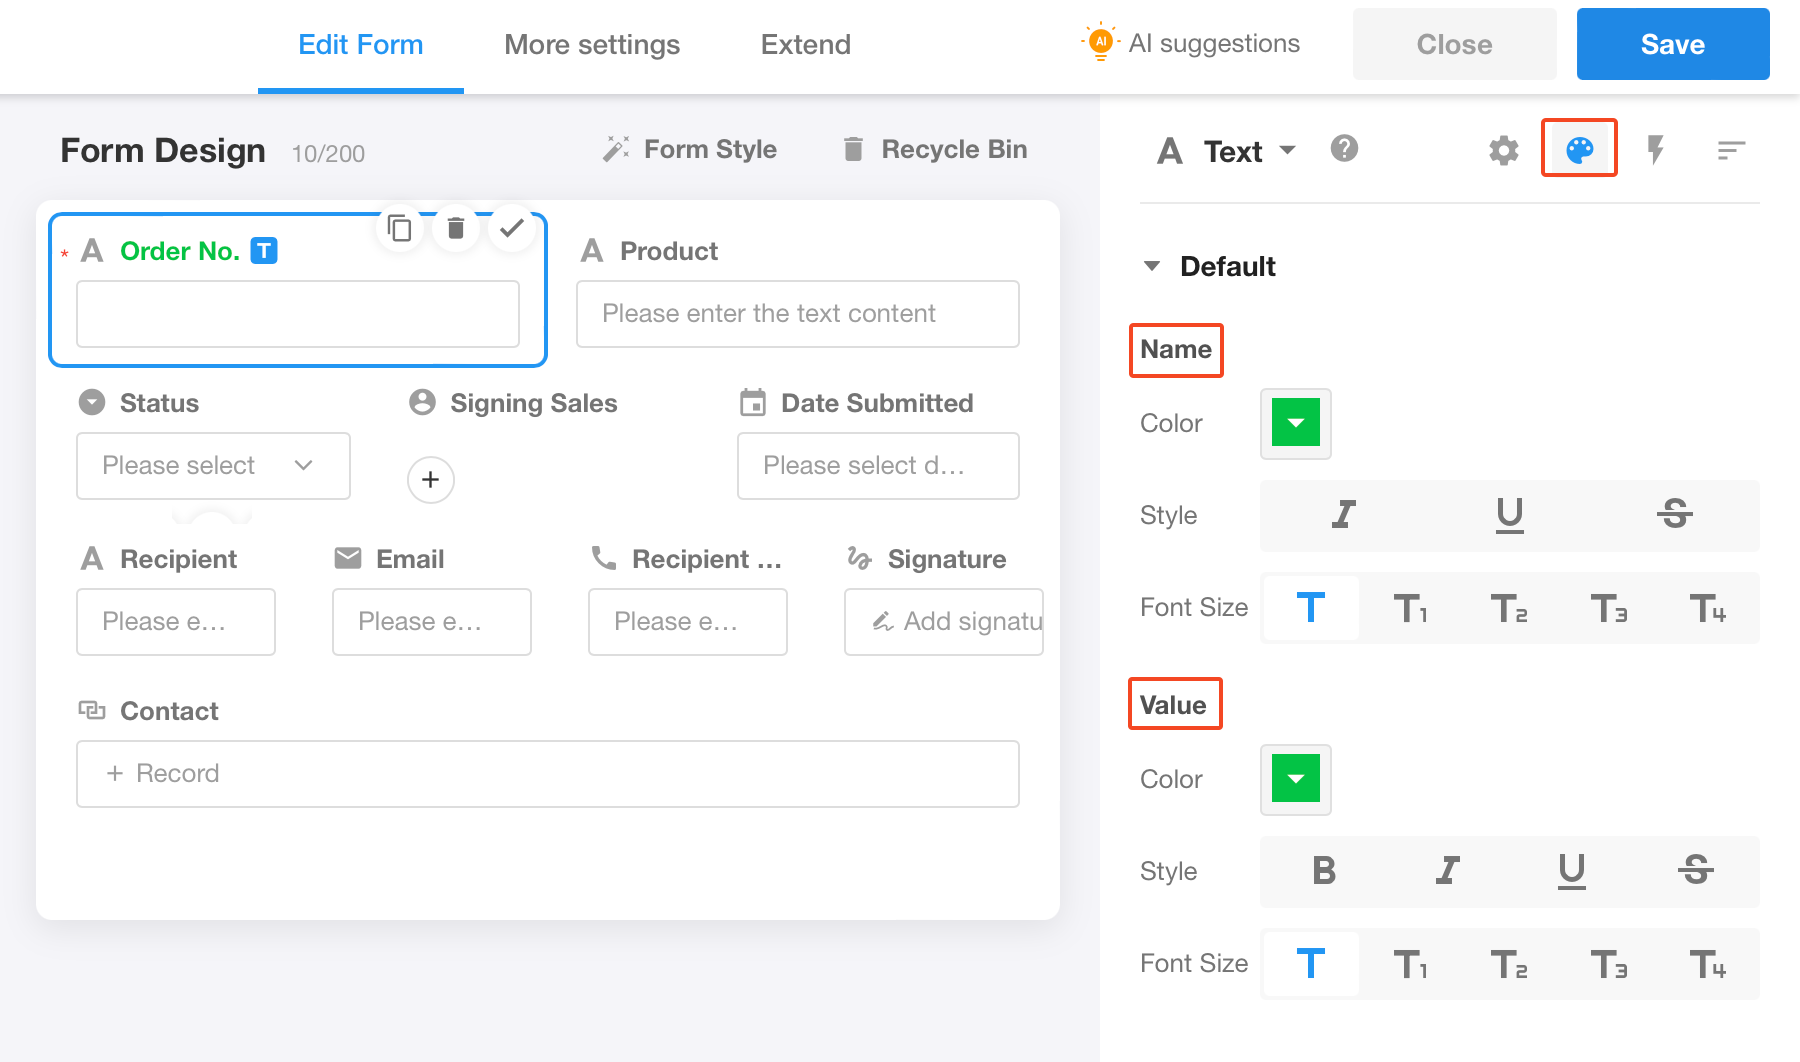
You can set the color, font size, and font style for field titles.

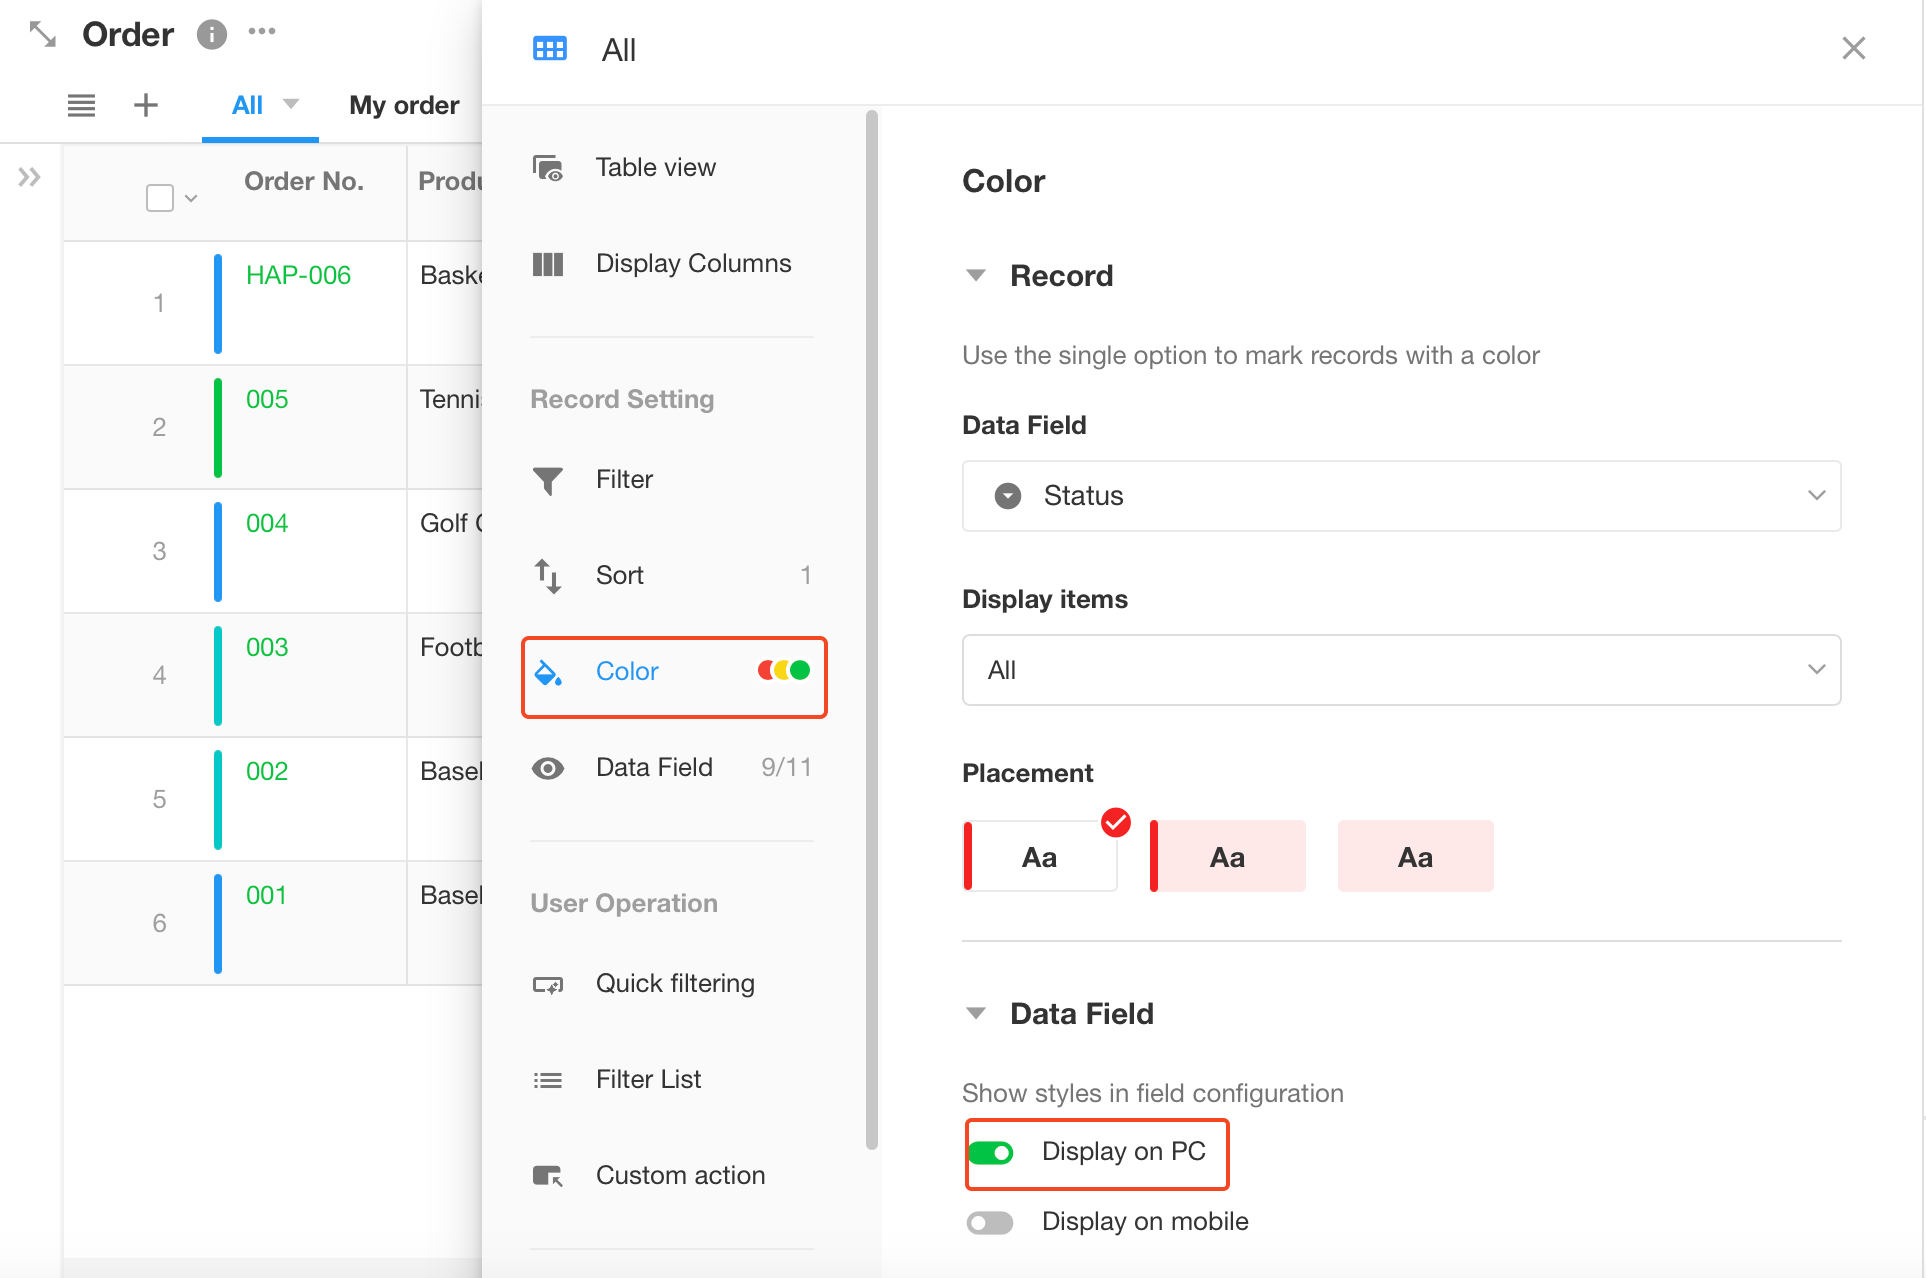
If you need to display field styles and colors in the view, go to [Configure View] > [Color] and enable [Display on PC].
Hint Text/Field Description
They can help users understand what needs to be filled in the field.
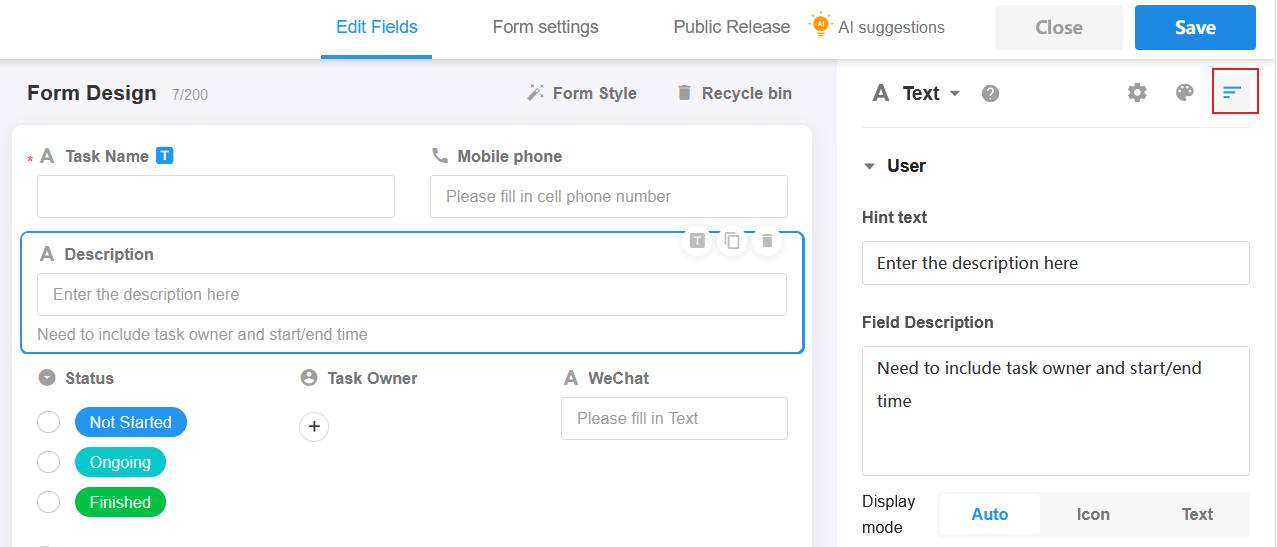
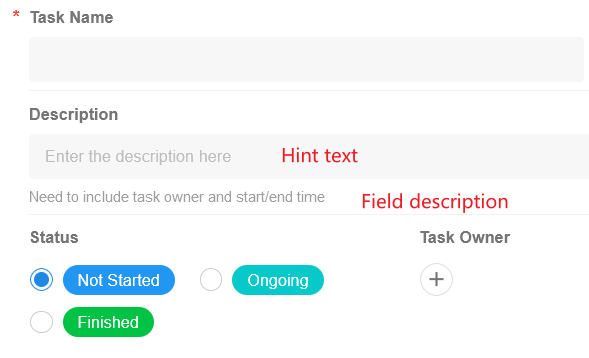
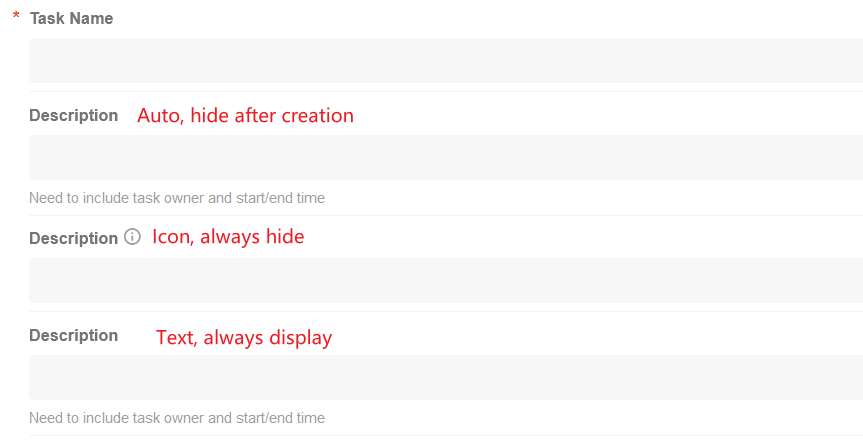
Three ways to display field description
-
Auto
The description text is displayed below the field when creating a record and in the icon when viewing a record.
-
Icon
The description is always hidden in the icon and is displayed when the cursor is moved over the icon.
-
Text
The description is always displayed below the field.
Field Alias
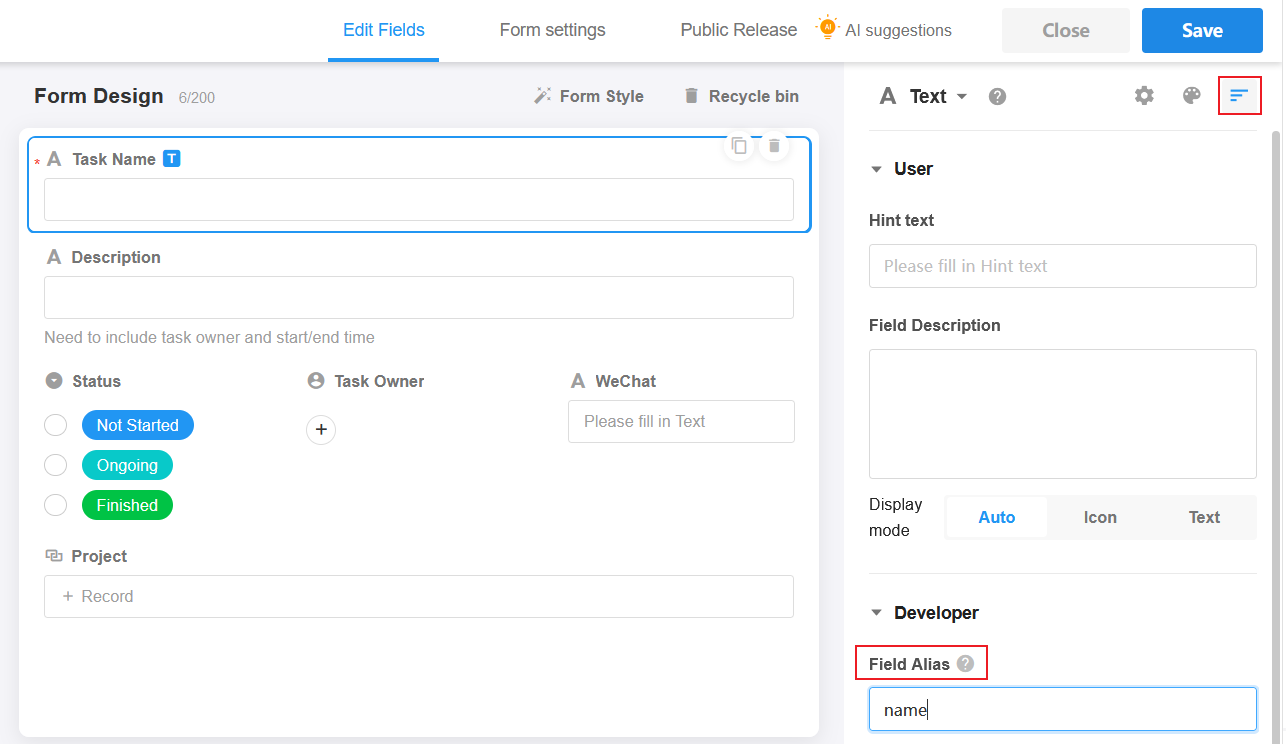
The system automatically generates a field ID (24 letters and numbers) for each field, which is mainly used for API interfacing and development, and for unique identification of fields in Word and Excel printing templates.
Since the field IDs are not readable, users cannot quickly understand the meaning of the fields. Moreover, after copying the application, the field IDs will also be changed, so you need to reconfigure them when interfacing and development.
You can replace the role of the field ID by setting an alias for the field, which will be much easier for interfacing and development.
After creating a field and saving it, the field alias is automatically generated and can be modified.
Rules for Automatically Generating Field Aliases
-
If the field name has 3 characters or fewer (including Chinese characters, numbers, and letters), Chinese characters are converted to Pinyin. If the name has more than 3 characters, Chinese characters are converted to initials.
-
Letters and numbers in the name remain unchanged.
-
If the field name consists solely of numbers, it is converted to the English equivalent of the field type.
-
If the alias is duplicated, an automatic suffix number is added.
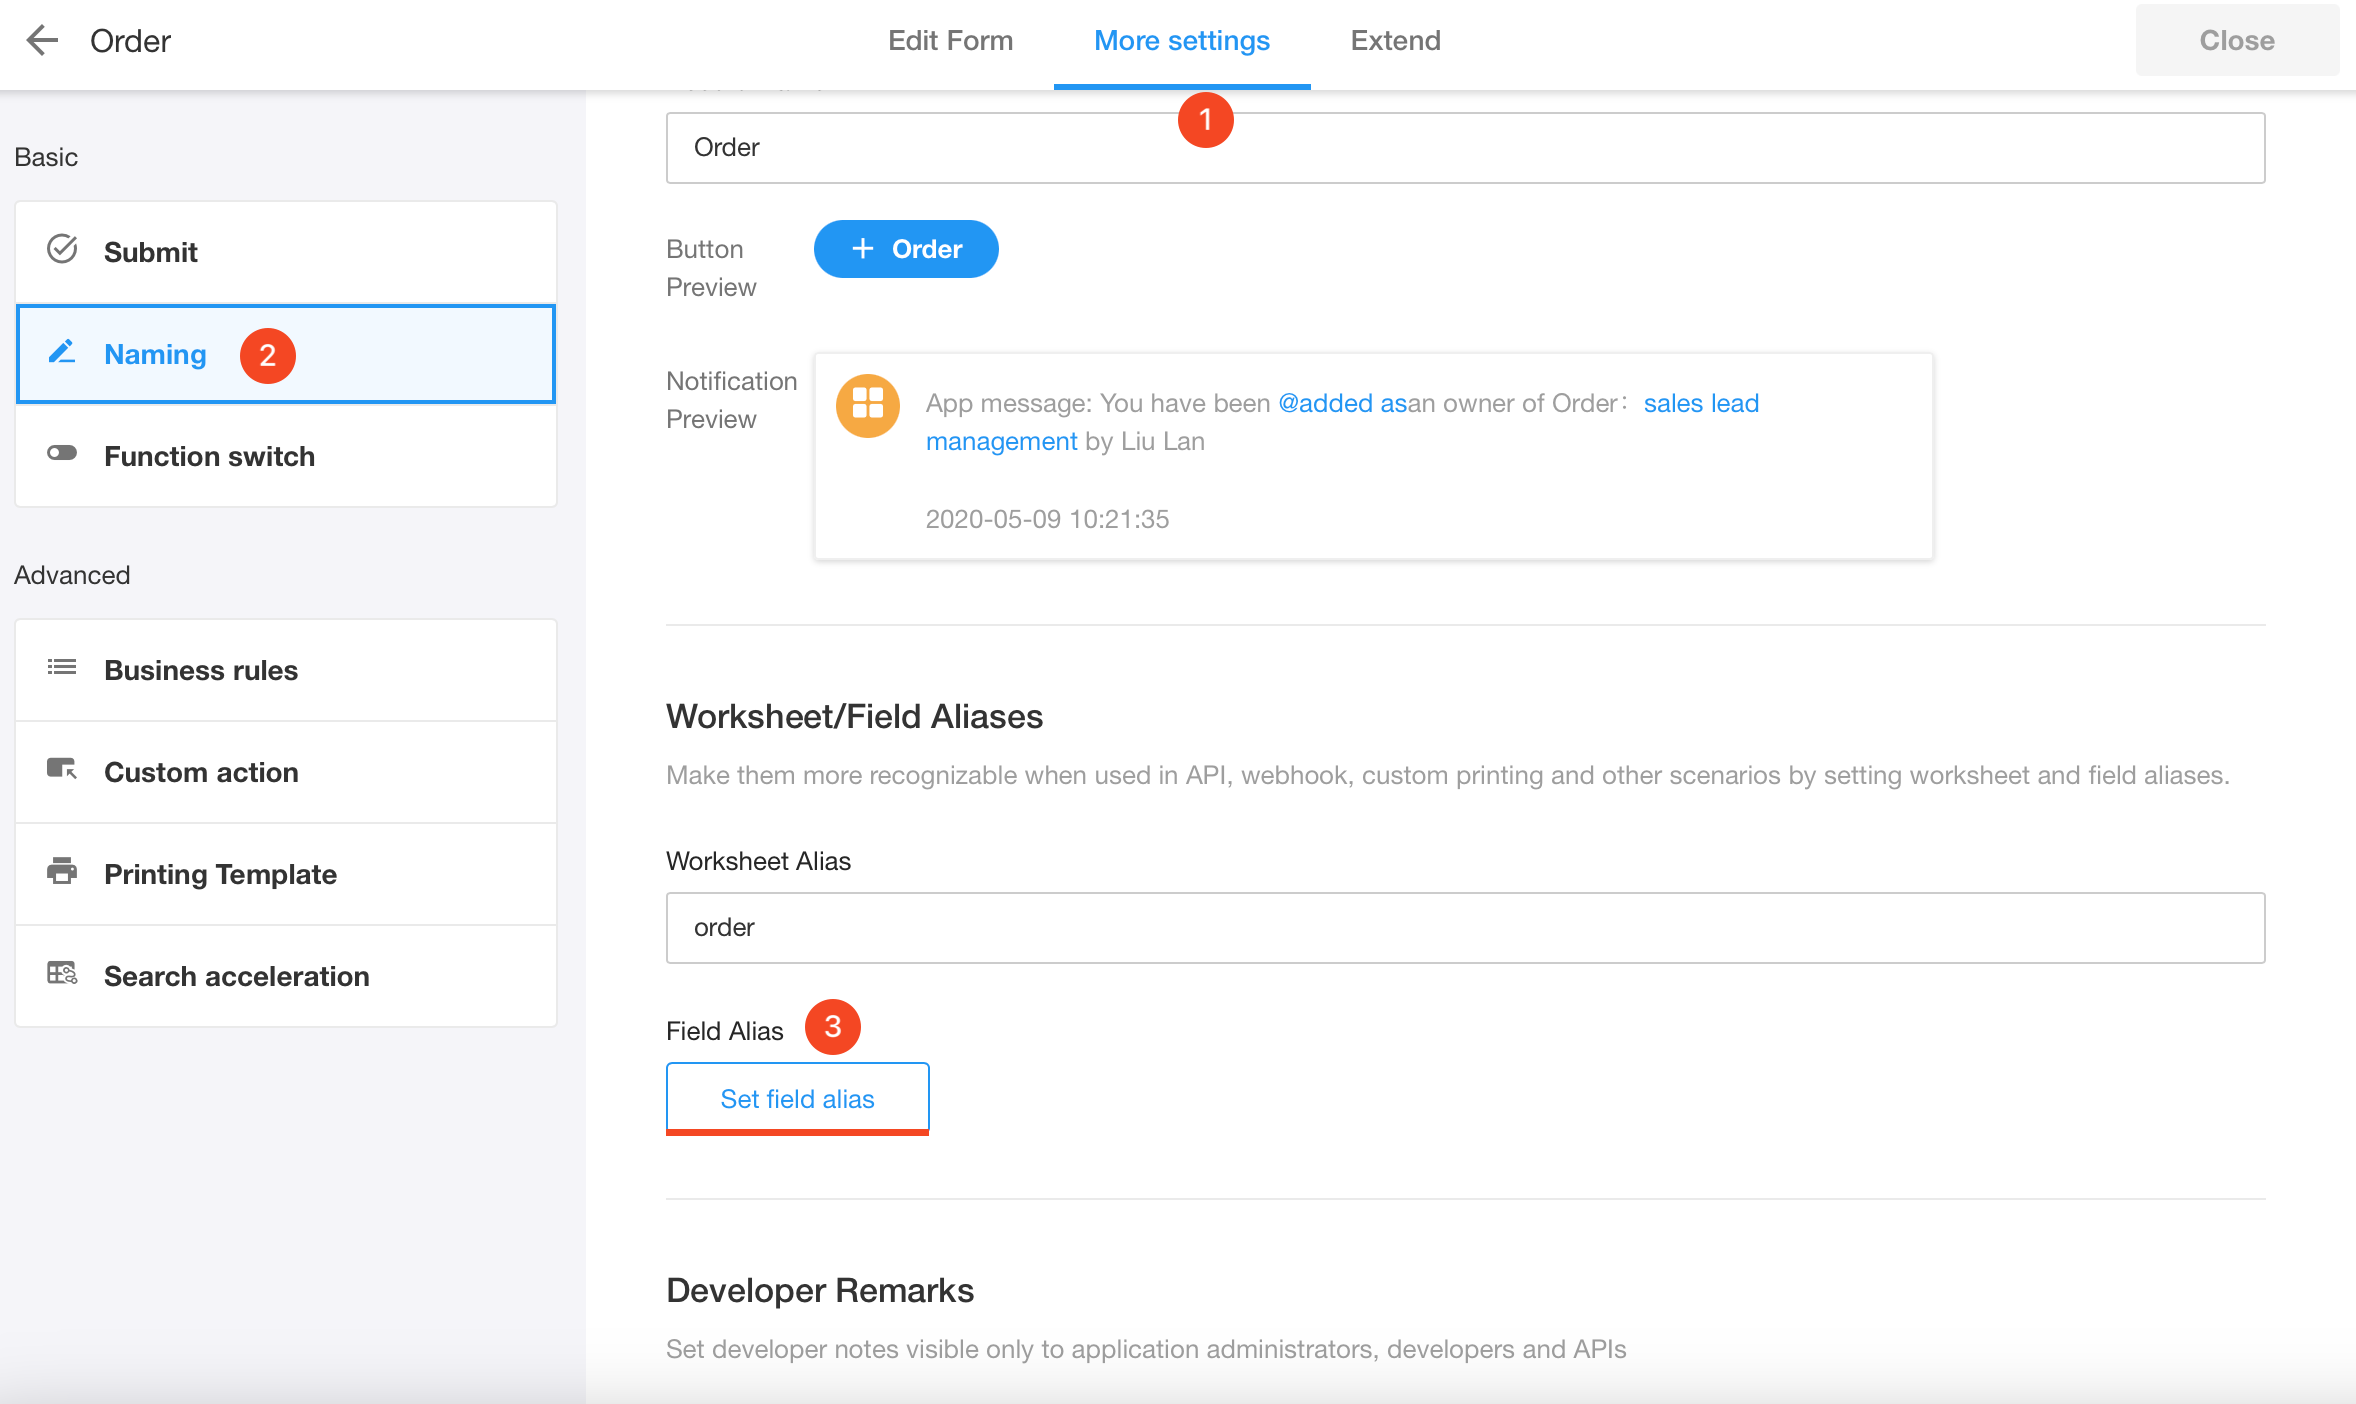
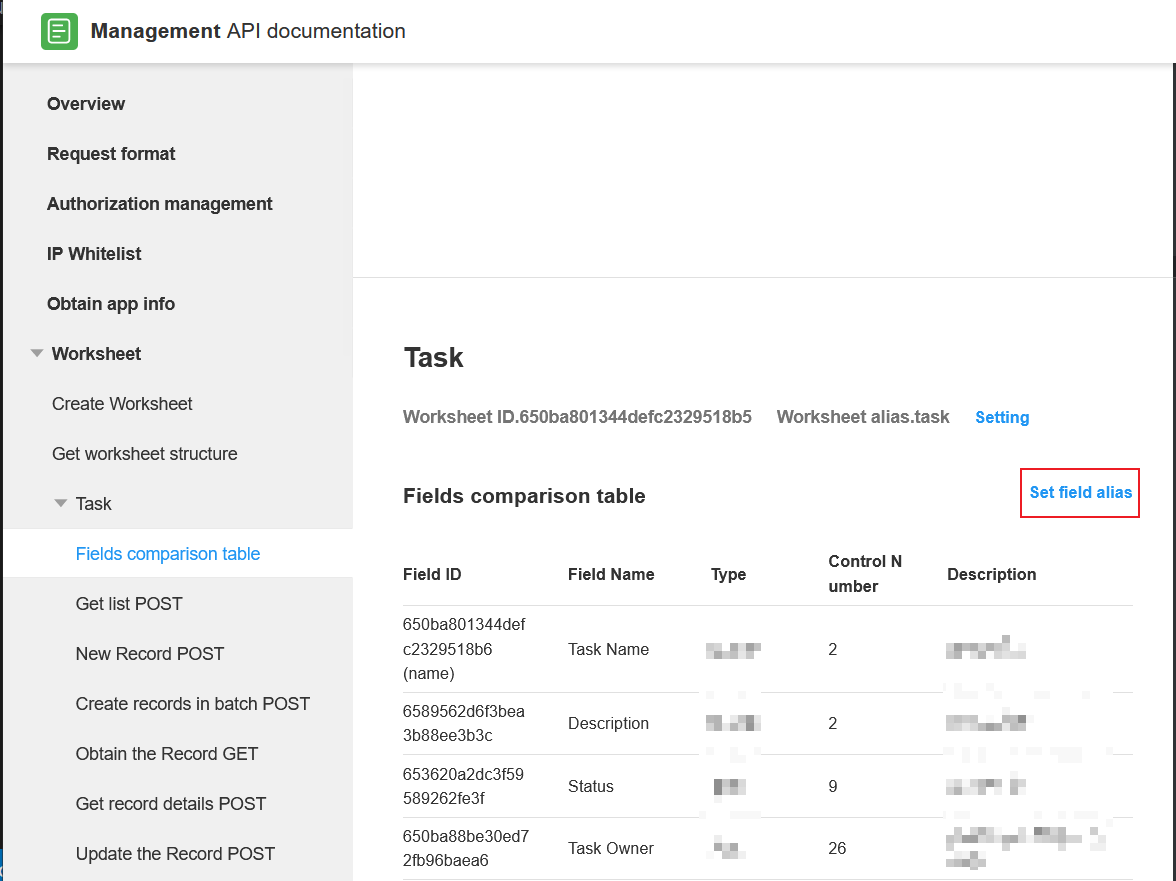
Entrance to Set Field Alias:
-
Form Settings
-
API Documentation
Reserved Aliases
Field aliases cannot be duplicated. The following are the aliases already reserved by the system:
- ownerid
- caid
- ctime
- utime
- uaid
- daid
- rowid
- wfstatus
- wfname
- wfcuaids
- wfrtime
- wfftime
- wfcaid
- wfctime
- wsid
- status
- sharerange
- discussunreads
- relations
- unreads
- keywords
- users
- owners
- portal_status
- portal_mobile
- portal_email
- portal_name
- portal_avatar
- portal_role
- partal_regtime
- portal_openid
- partal_id
Field Remarks
Just as the code needs notes, the notes are primarily for the developer's convenience in maintaining the application and are not displayed when the user creates and views the record.
Batch Operations on Fields
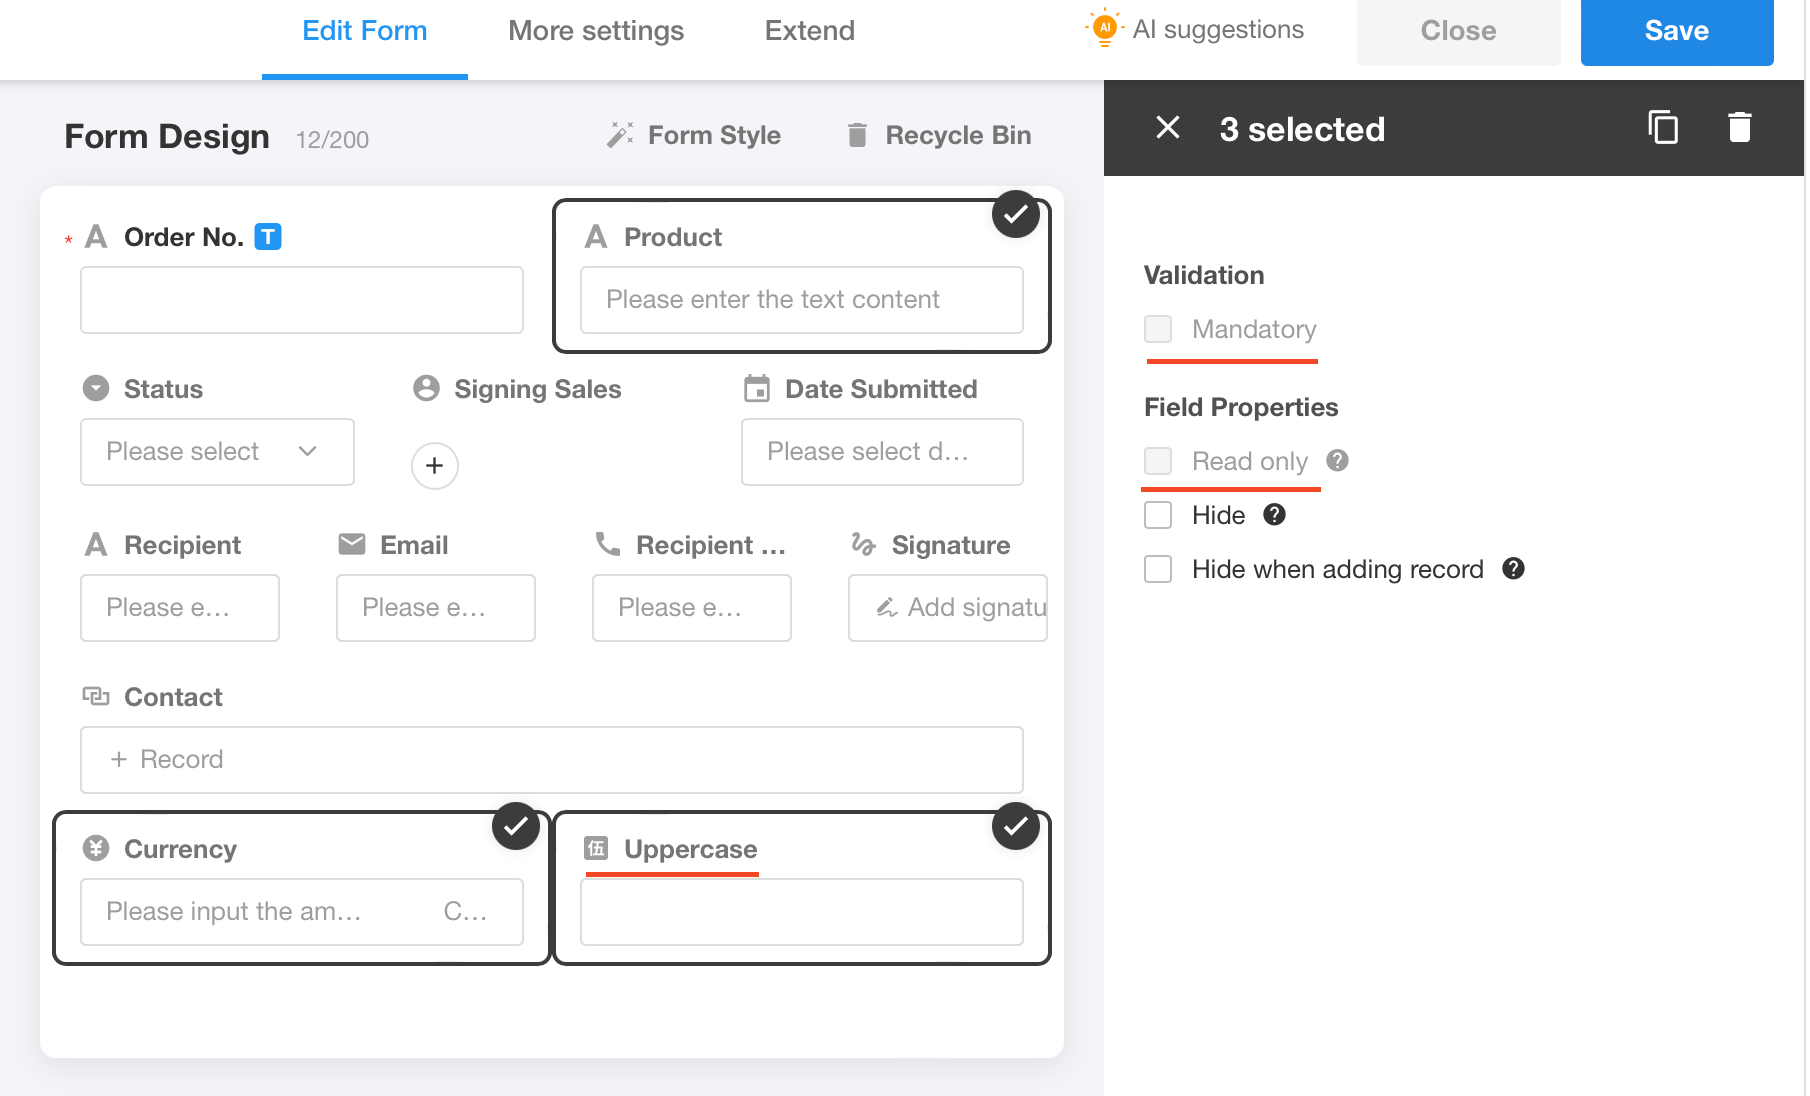
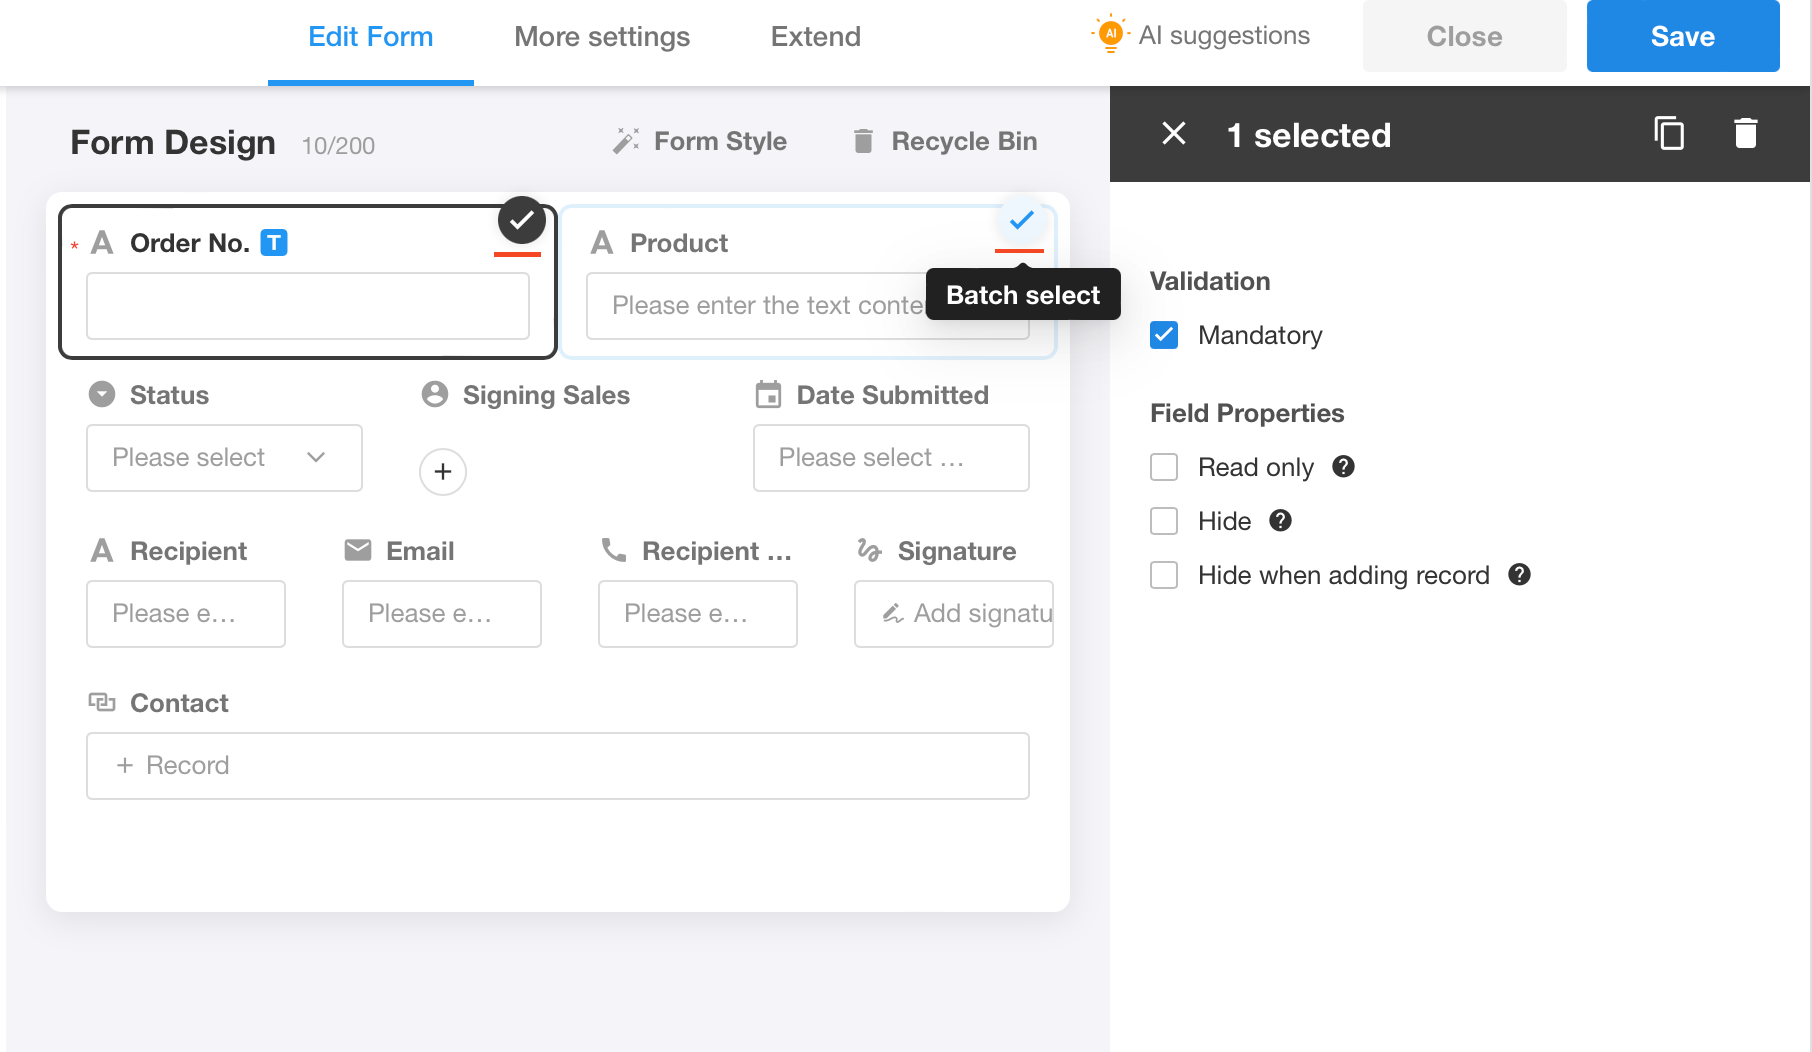
After selecting multiple fields, you can perform the following batch operations:
- Delete and copy the fields
- Move the fields to a tab
- Adjust the position of the fields
- Set fields as required, read-only, hidden, hidden when adding record, etc.
As shown below, check the batch operation button for each field, and click save to apply the settings. Before saving, clicking the cancel button will exit the batch operation mode.
Why are some field attributes not supported for batch setting?
As shown below, for the uppercase field that cannot be edited and is read-only by design, when selecting fields in batch, the options for required and read-only cannot be selected for batch setting.
