Node - CC and Send Internal Notification
Both the CC node and Send Internal Notification node can send message notifications to specified members. The difference is:
CC node:
- Messages include a record link
- Appears in the To-Do List
- Notification number disappears only after the recipient clicks to view the record
Send Internal Notification node:
- Only sends messages
- Does not appear in the To-Do List
- Notification number decreases immediately when the message is viewed
I. CC Node
The CC node supports sending internal messages with record links. These messages appear in the "CC" section of the "To-Do" list, where the notification count only decreases after the recipient manually clicks to view the message.
Configure CC node
Example: When a new lead enters the worksheet, notify sales personnel to follow up promptly. When viewing the message, sales personnel can:
-
See notification content
-
Click the link to quickly view lead record details
-
Click custom buttons to quickly assign leads
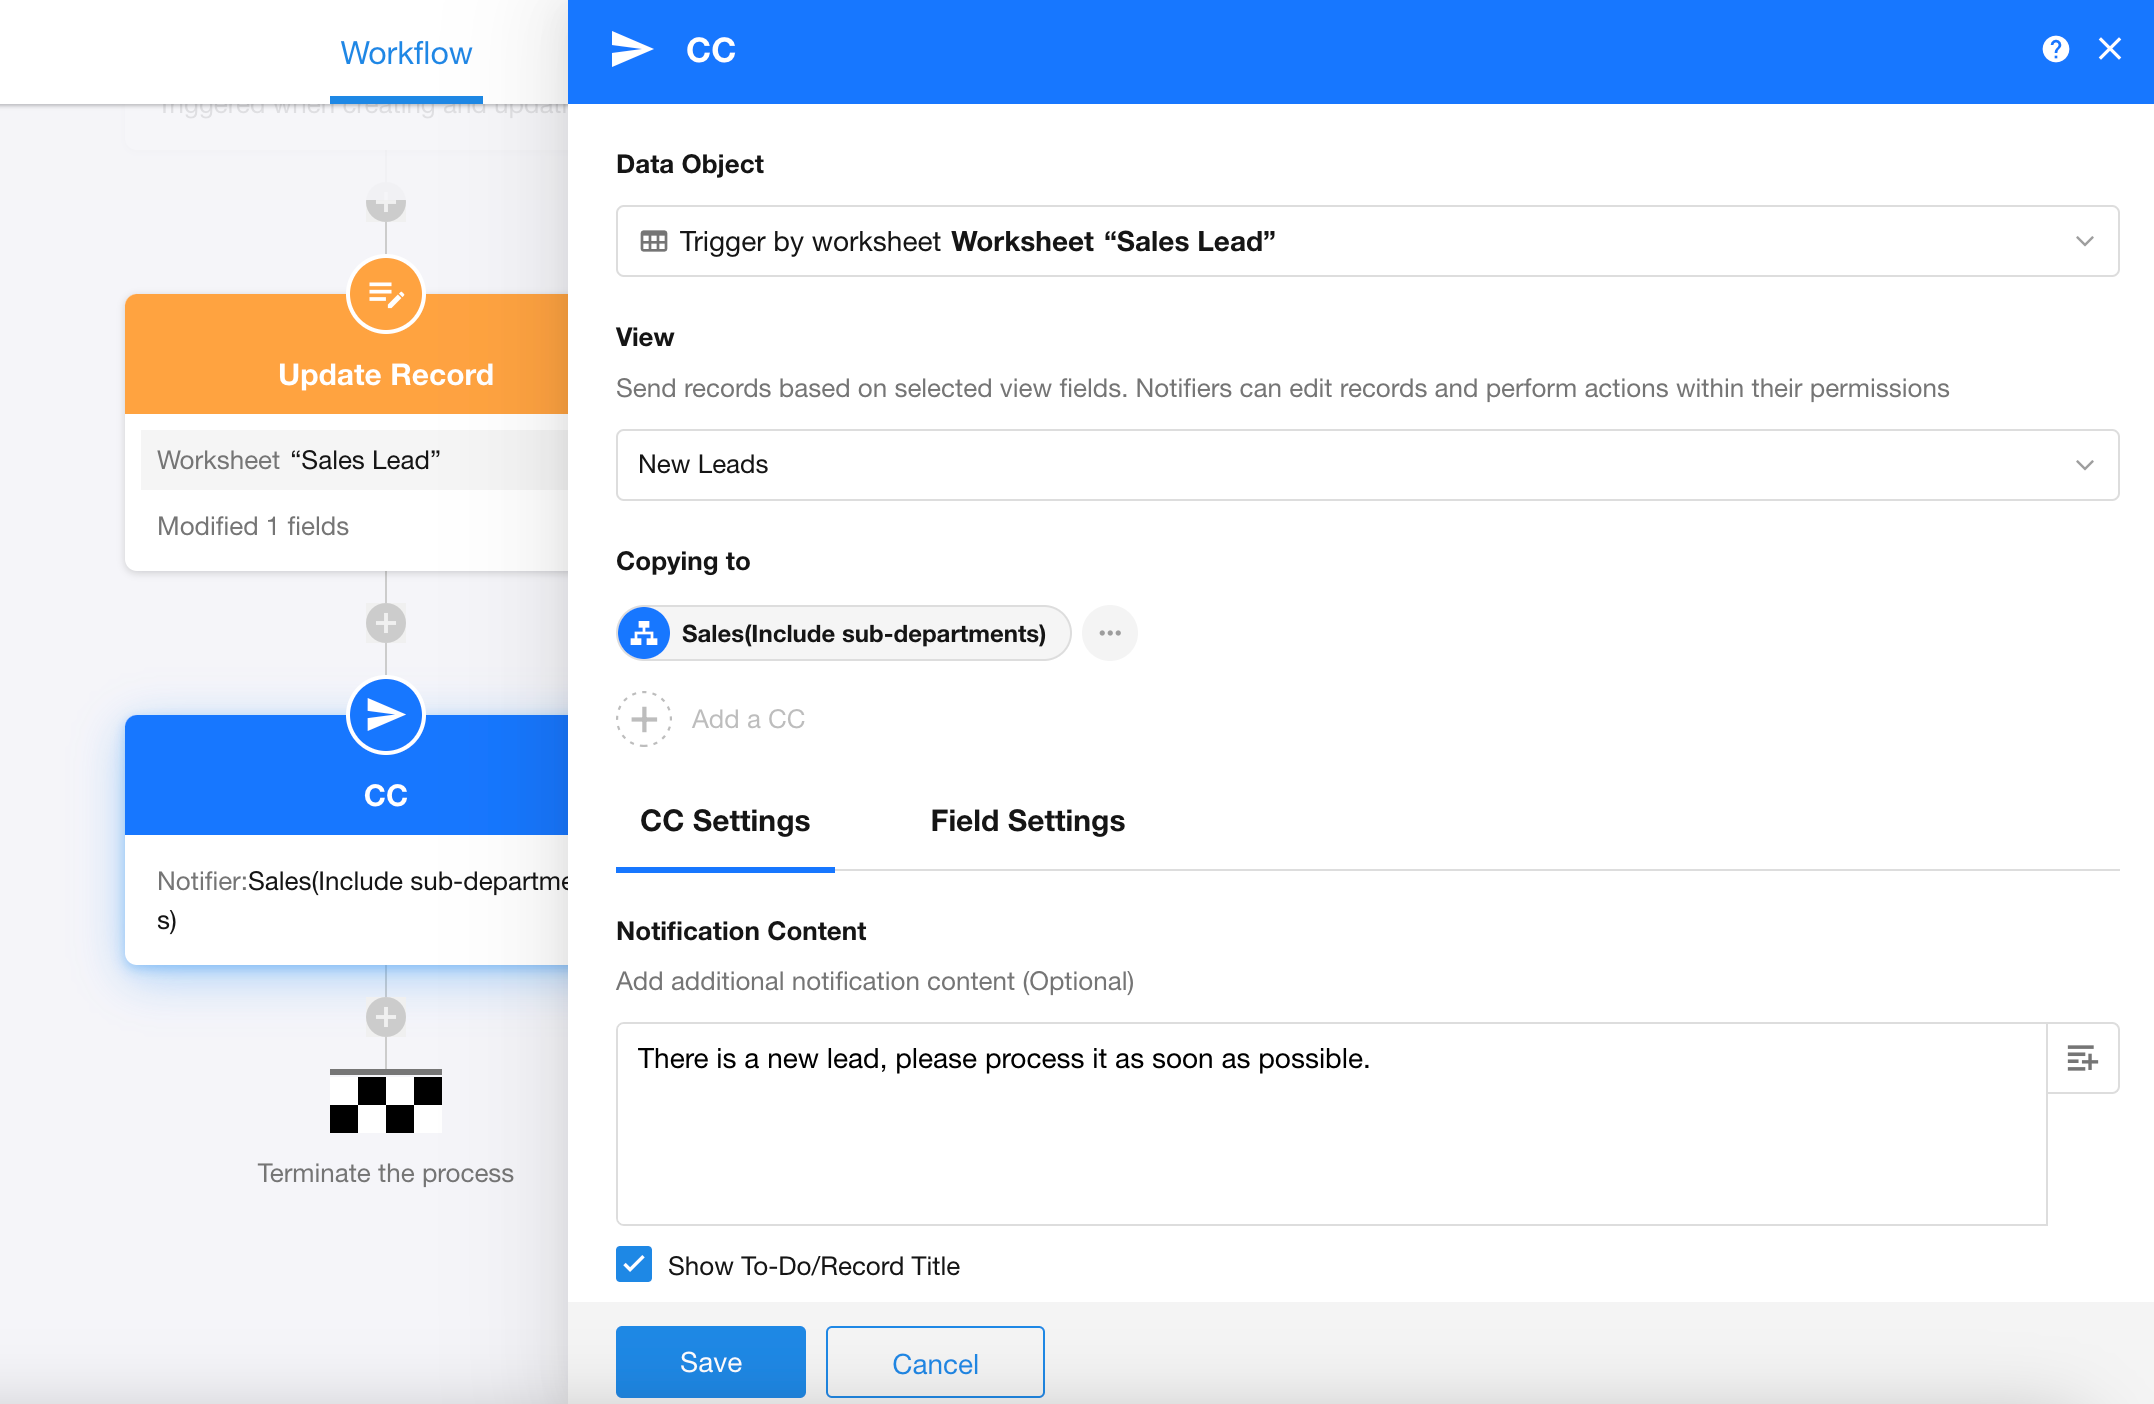
Data object
Select the record to send - in this example, the newly added lead record that triggered the workflow.
View
Since views are pre-configured with field visibility and custom buttons, you can directly select a view. Record display will follow both the view configuration and user permissions.
a. When CC recipients have permission to access the view:
If recipients can access the view directly through the worksheet, opening records from CC messages displays them exactly as in the view (based on user roles/permissions), allowing direct field editing and custom button clicking.
Even if the message-attached record isn't in the selected view, it's still processed as a view record.
b. When CC recipients do not have permission to access the view:
If recipients cannot access the view directly, records opened from CC messages show:
-
All fields as read-only
-
Field visibility following the view's "Display Fields" configuration
-
No custom buttons
CC recipients
Recipients of CC notifications can be selected either as fixed members from the Contacts or by role.
Notifications can be sent to:
-
A single person
-
Multiple people (e.g., if selecting a department field, it sends to all department members)
When CC'ing multiple people, notifications appear in each recipient's "To-Do" list; each recipient must personally click to view before the notification count decreases.
Notification content
Notification messages can be:
-
Fixed text (same for every send)
-
Dynamic by incorporating node fields
If "Show To-Do/Record Title" is unchecked, in the notification it displays as a "View Details" link.
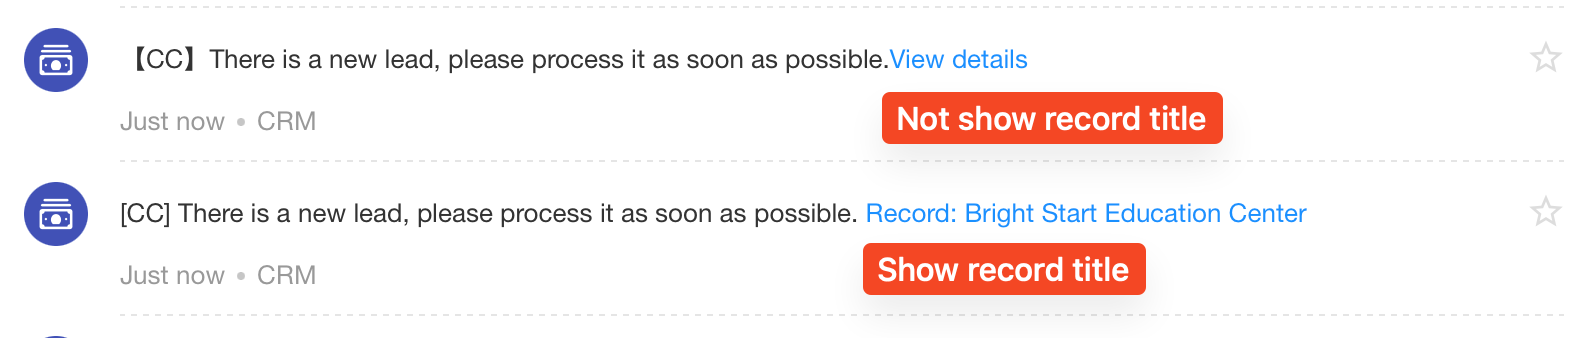
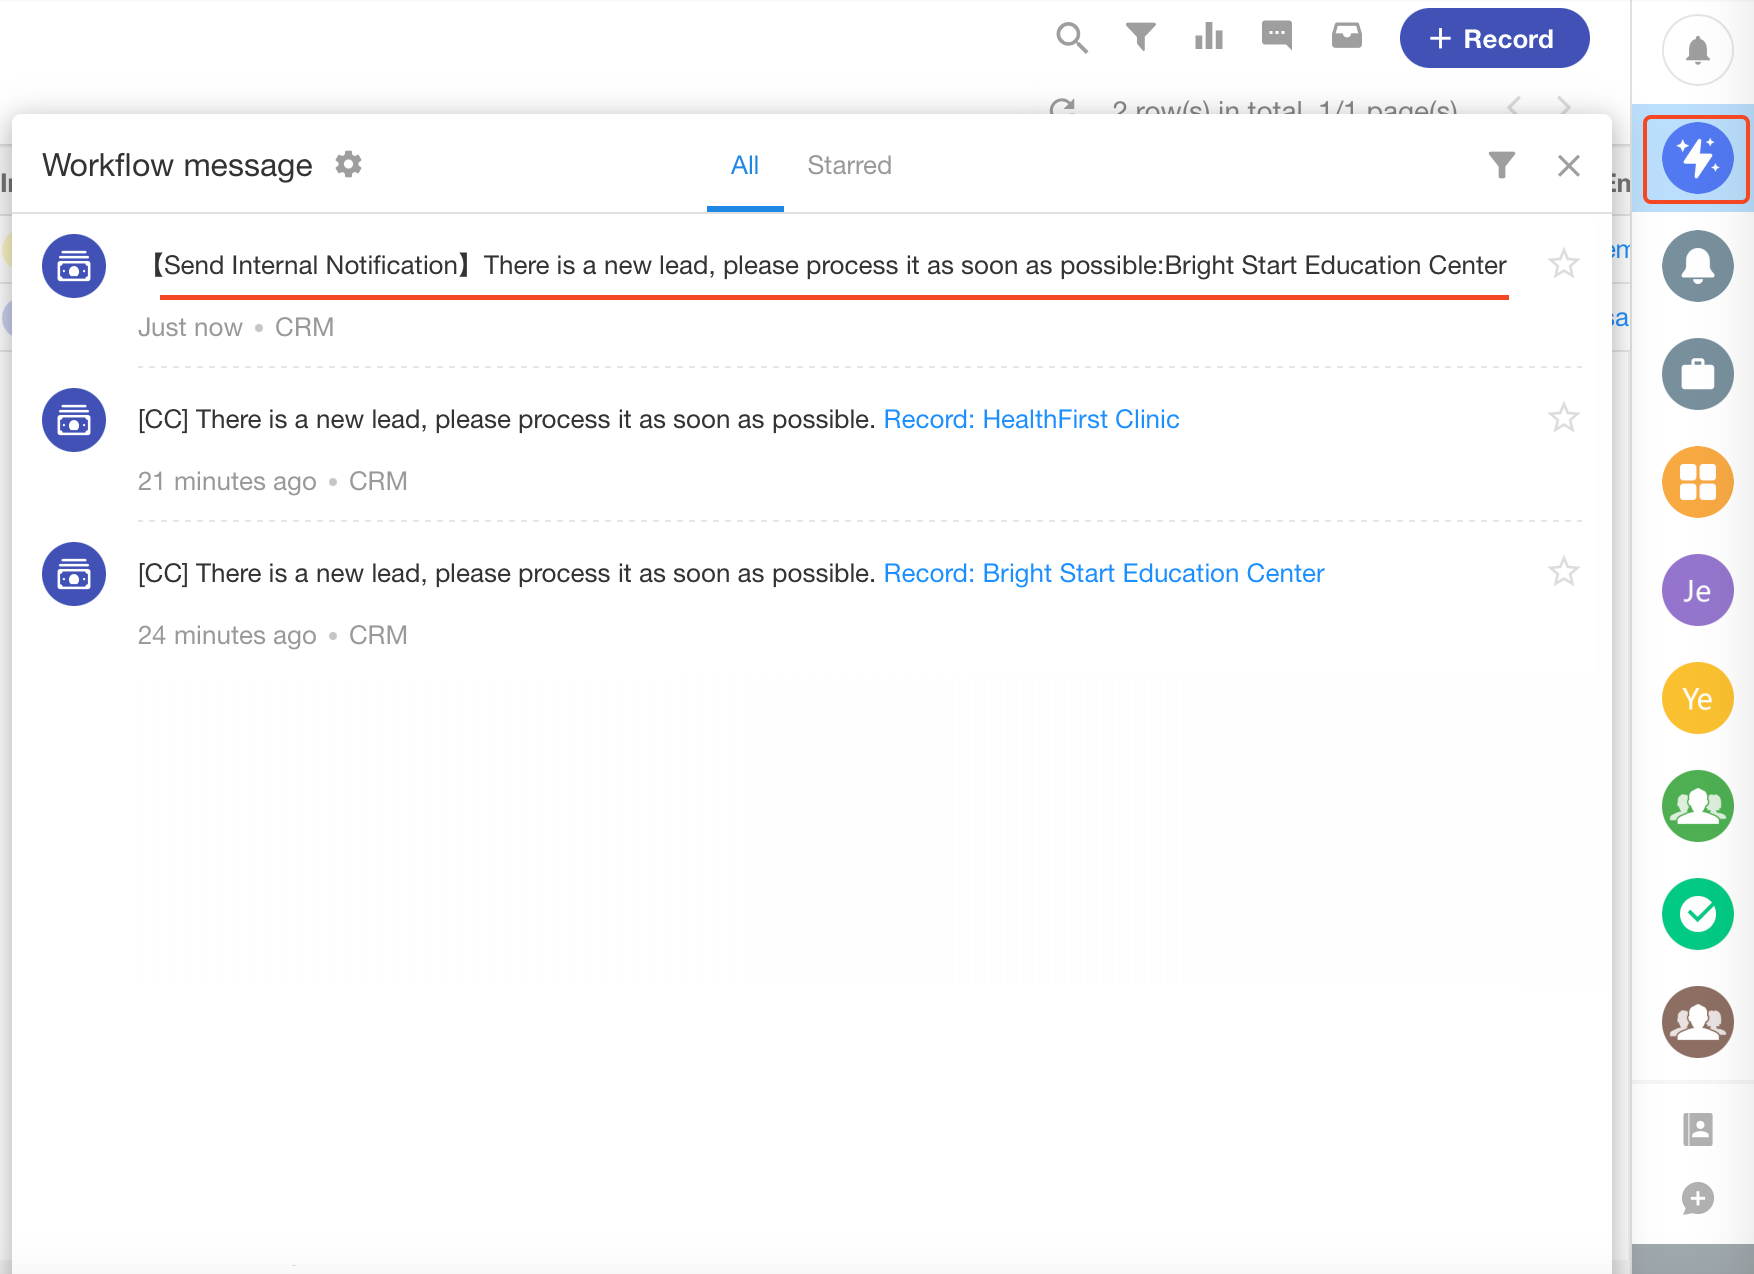
The [CC] at the message beginning shows the CC node name, which updates automatically if the node name is modified.
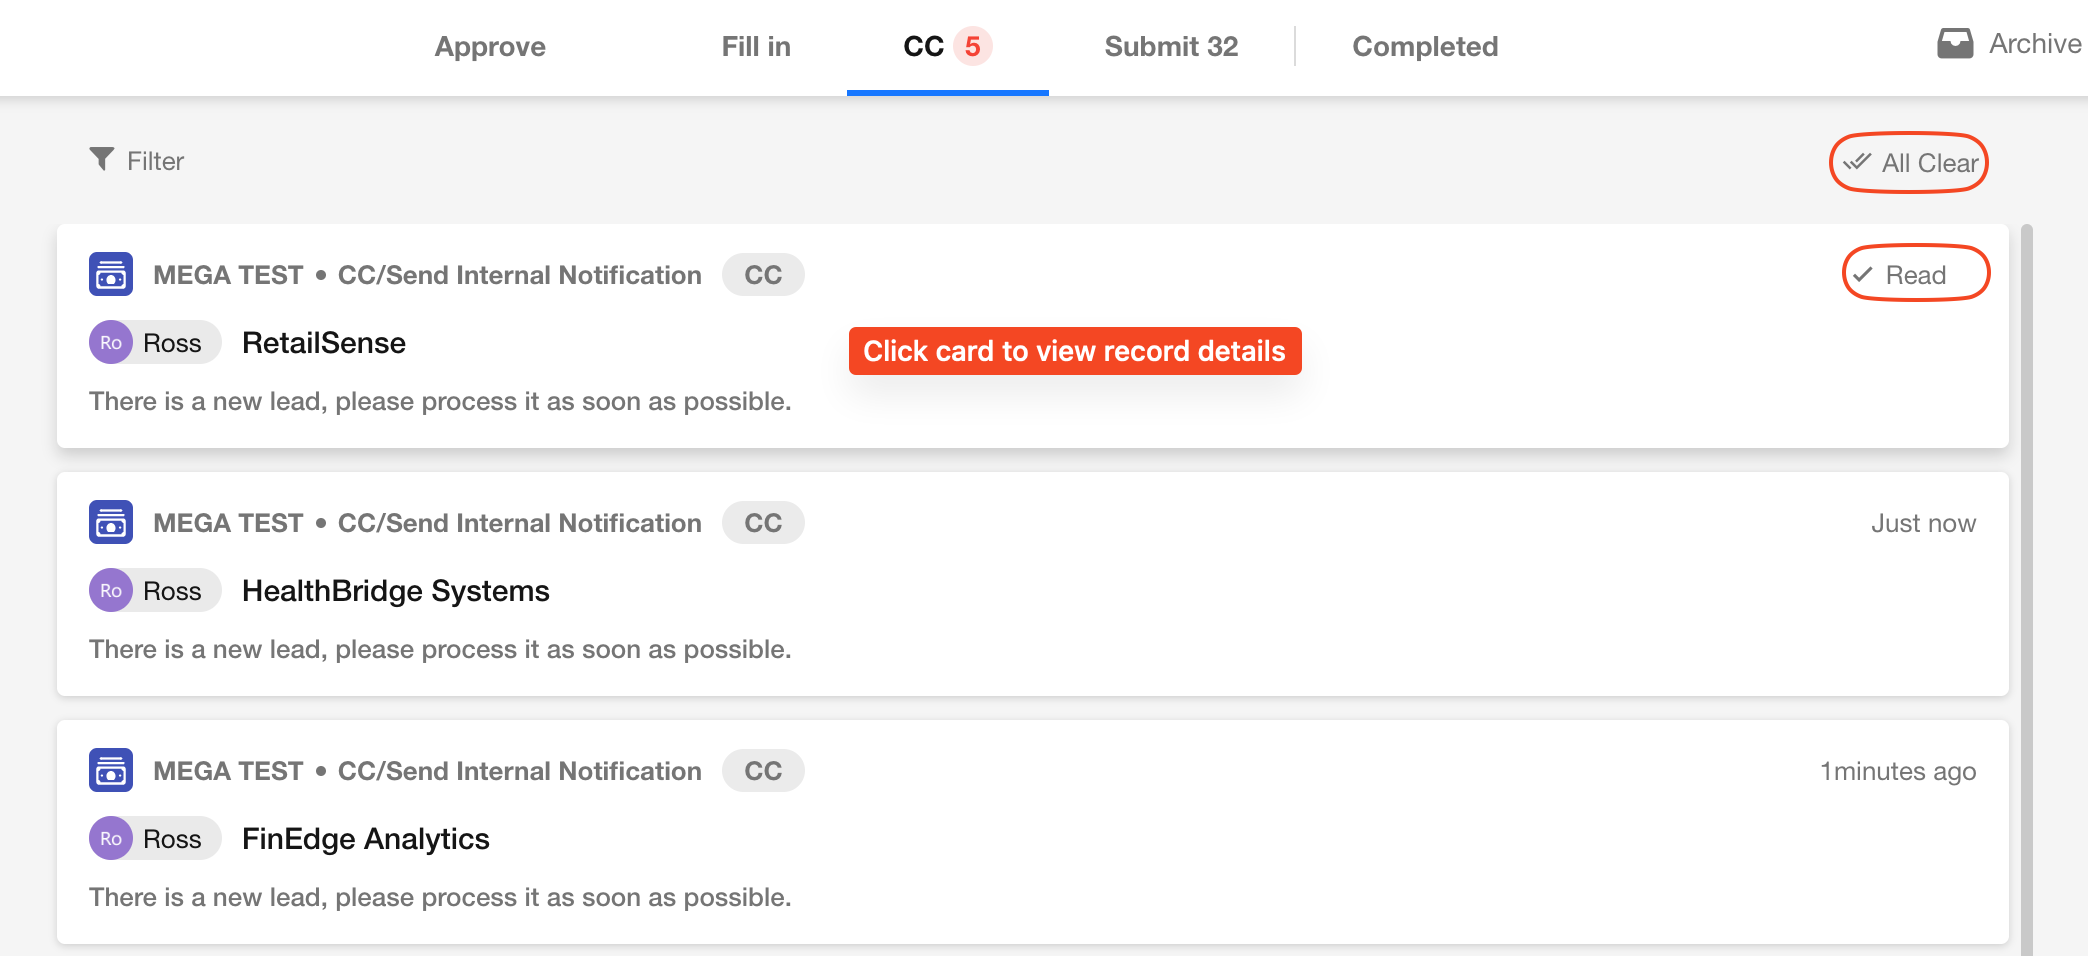
2. View CC messages
CC messages appear in both the chat sidebar, and the To-Do list. The to-do count only decreases after clicking to view record details.
-
Record details can be accessed by clicking links in workflow messages.
-
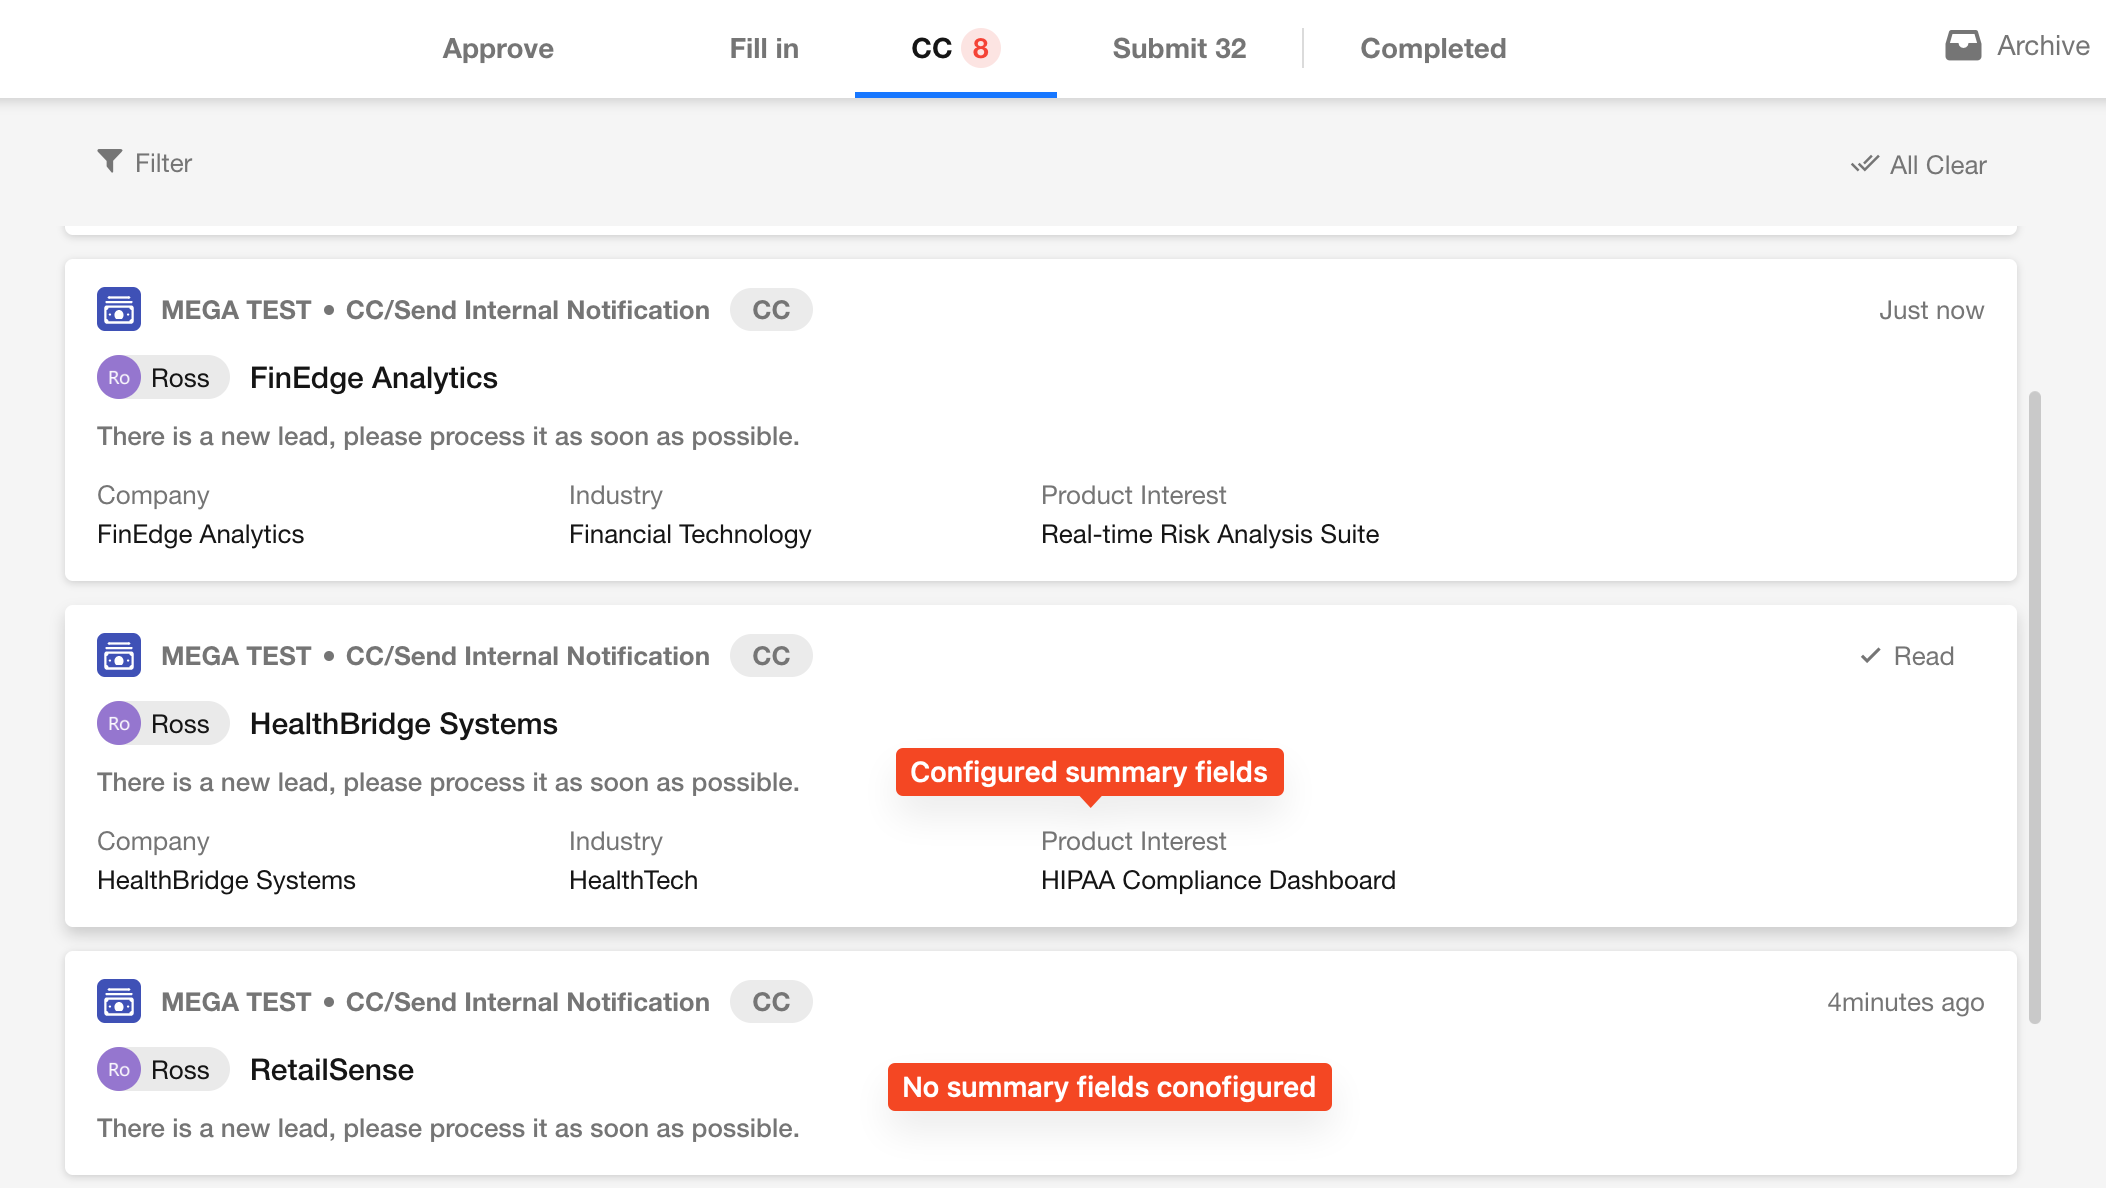
In the To-Do list, click "Read" or "All Clear" to quickly process CC messages, or click cards to view record details.
Summary fields
When summary fields are selected:
-
The "CC" section in "To-Do" displays these fields
-
Enables quick preview of key information
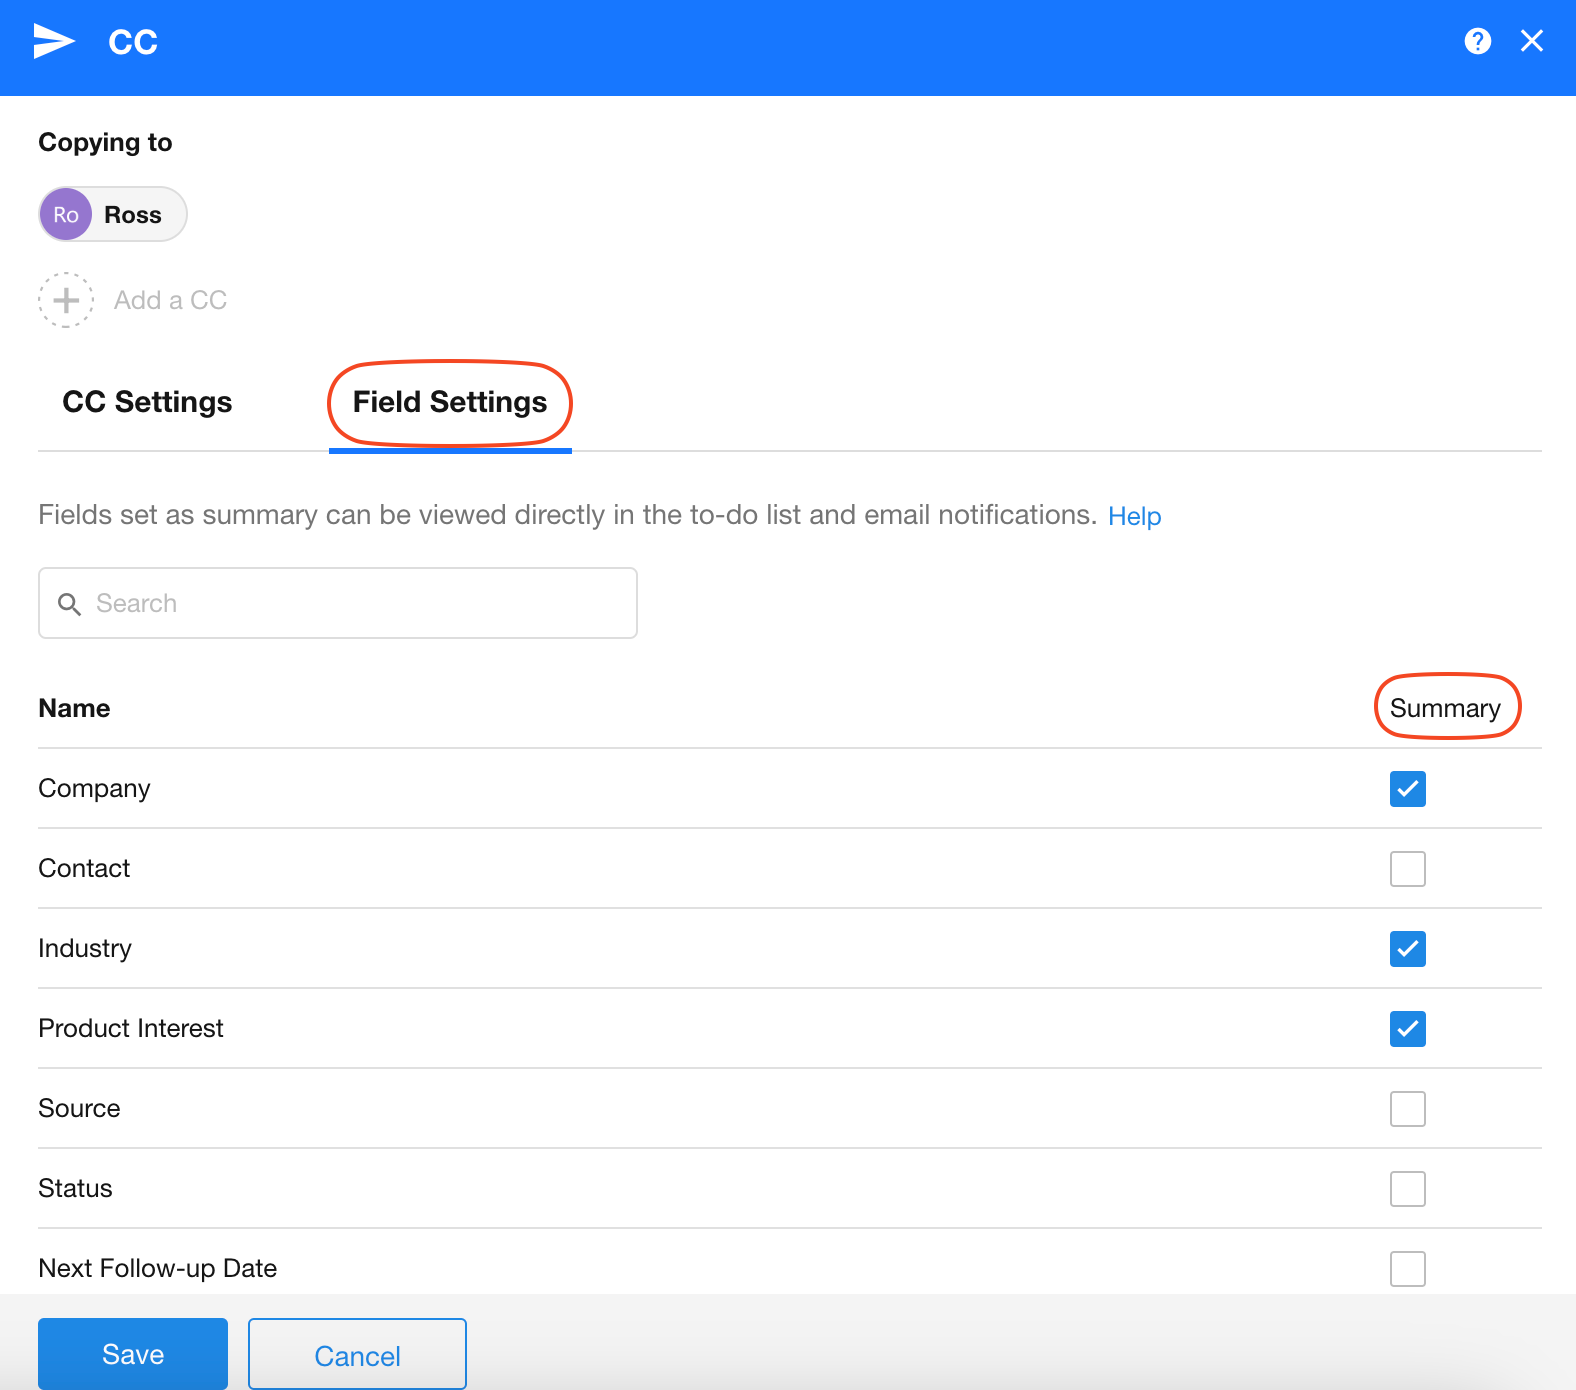
Effect:
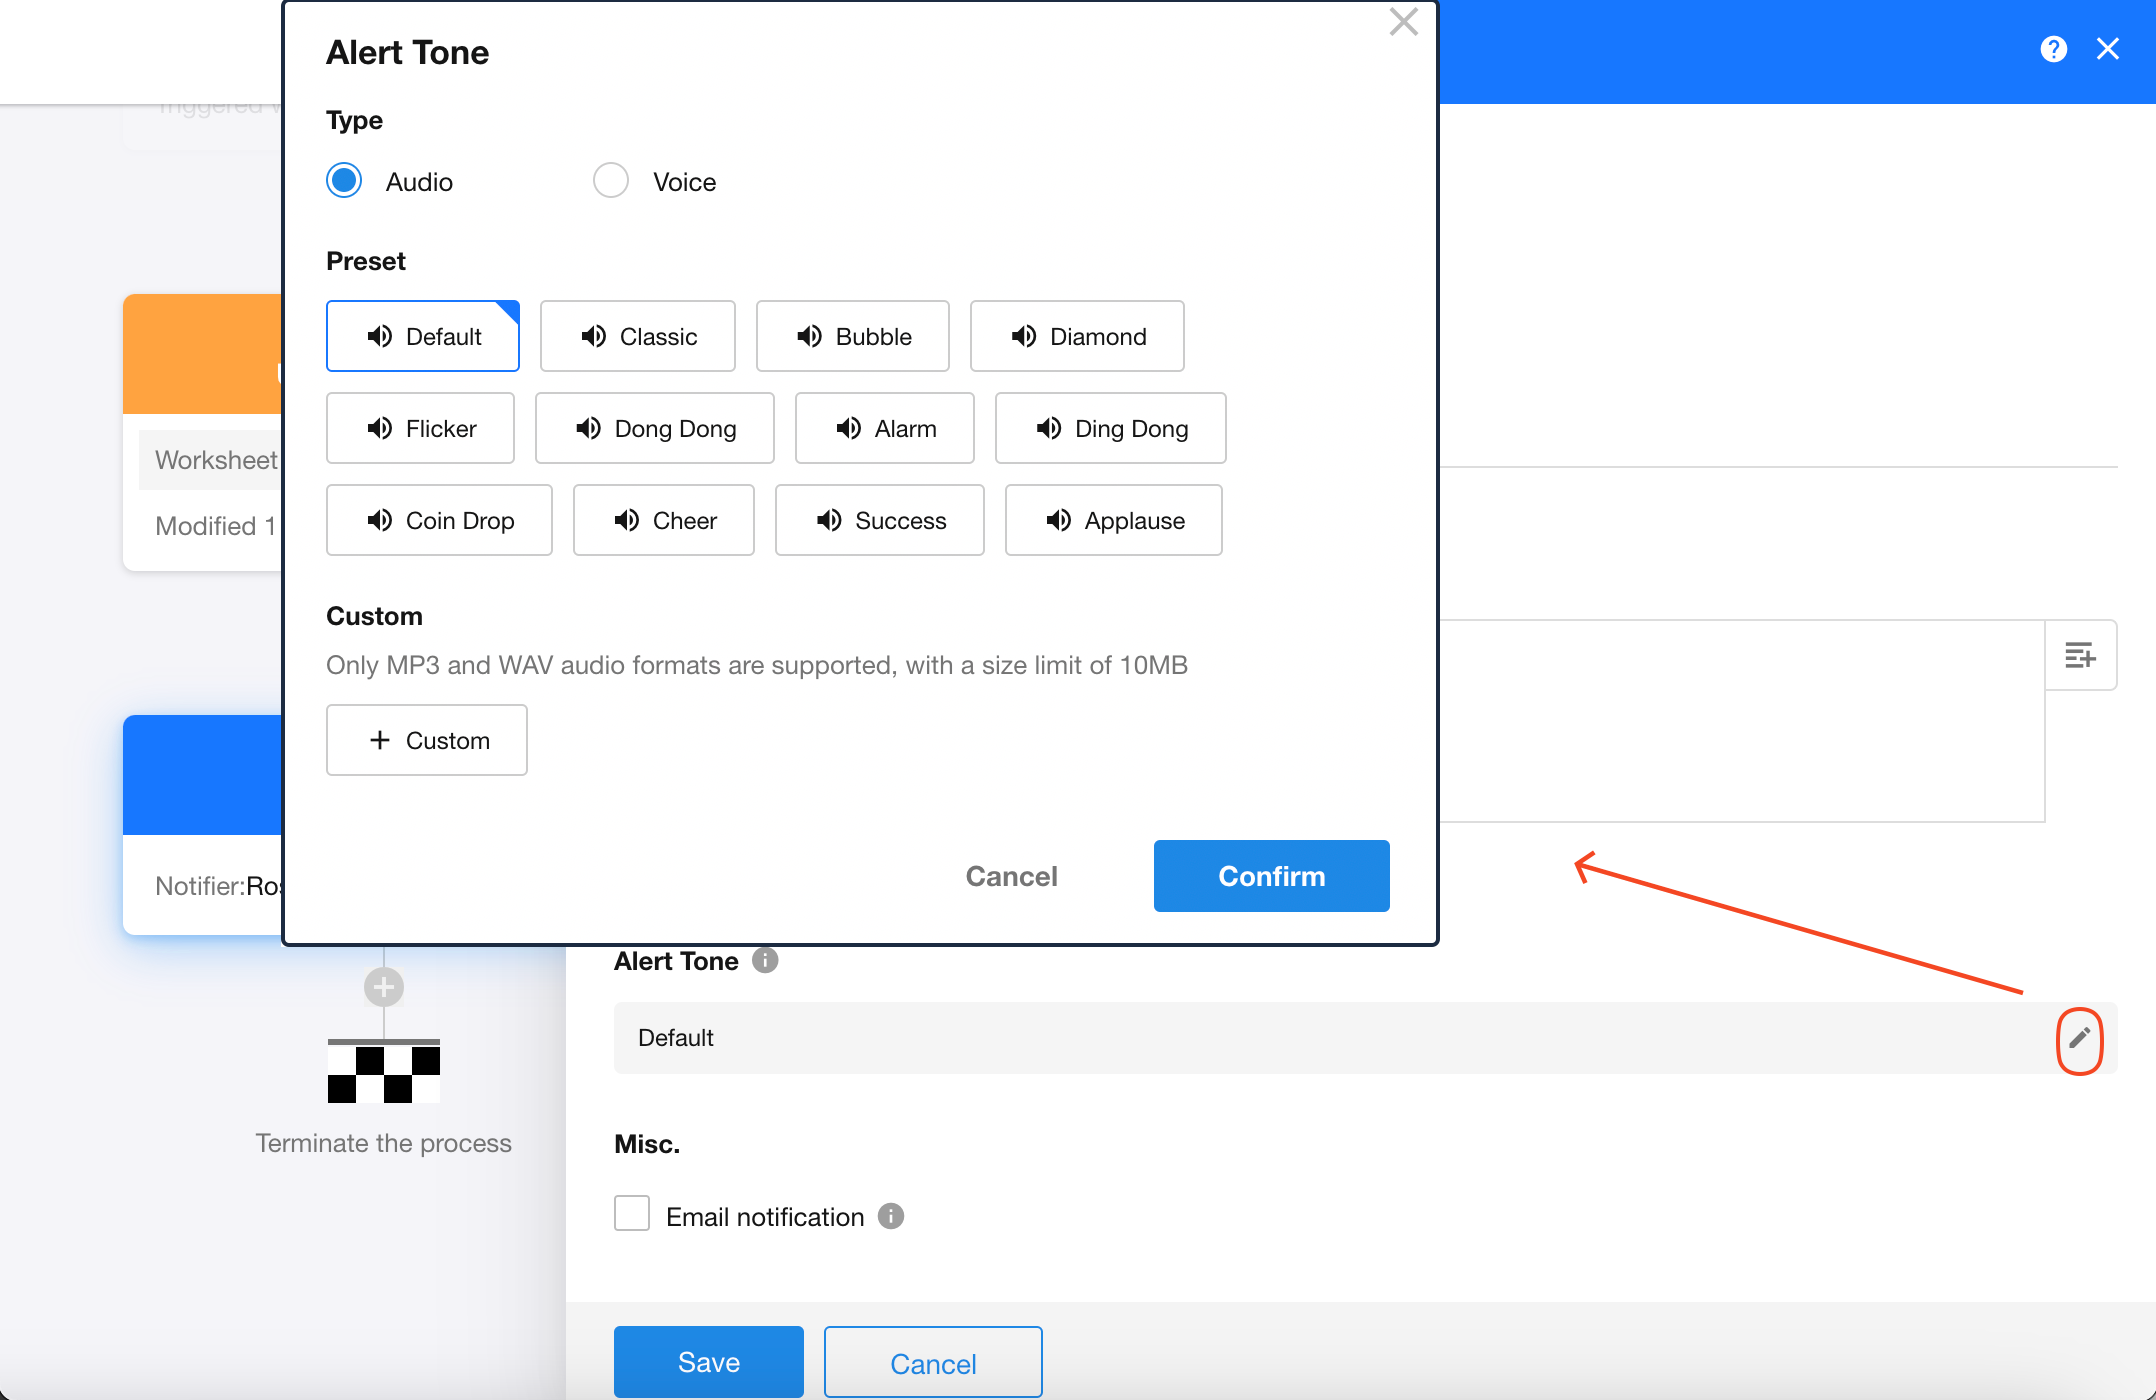
Alert tone
When CC recipients are logged in and receive notification messages:
-
A specified sound will play
-
Can be either a fixed audio file
-
Or text converted to audio
When both PC and App are online, sound only plays on PC.
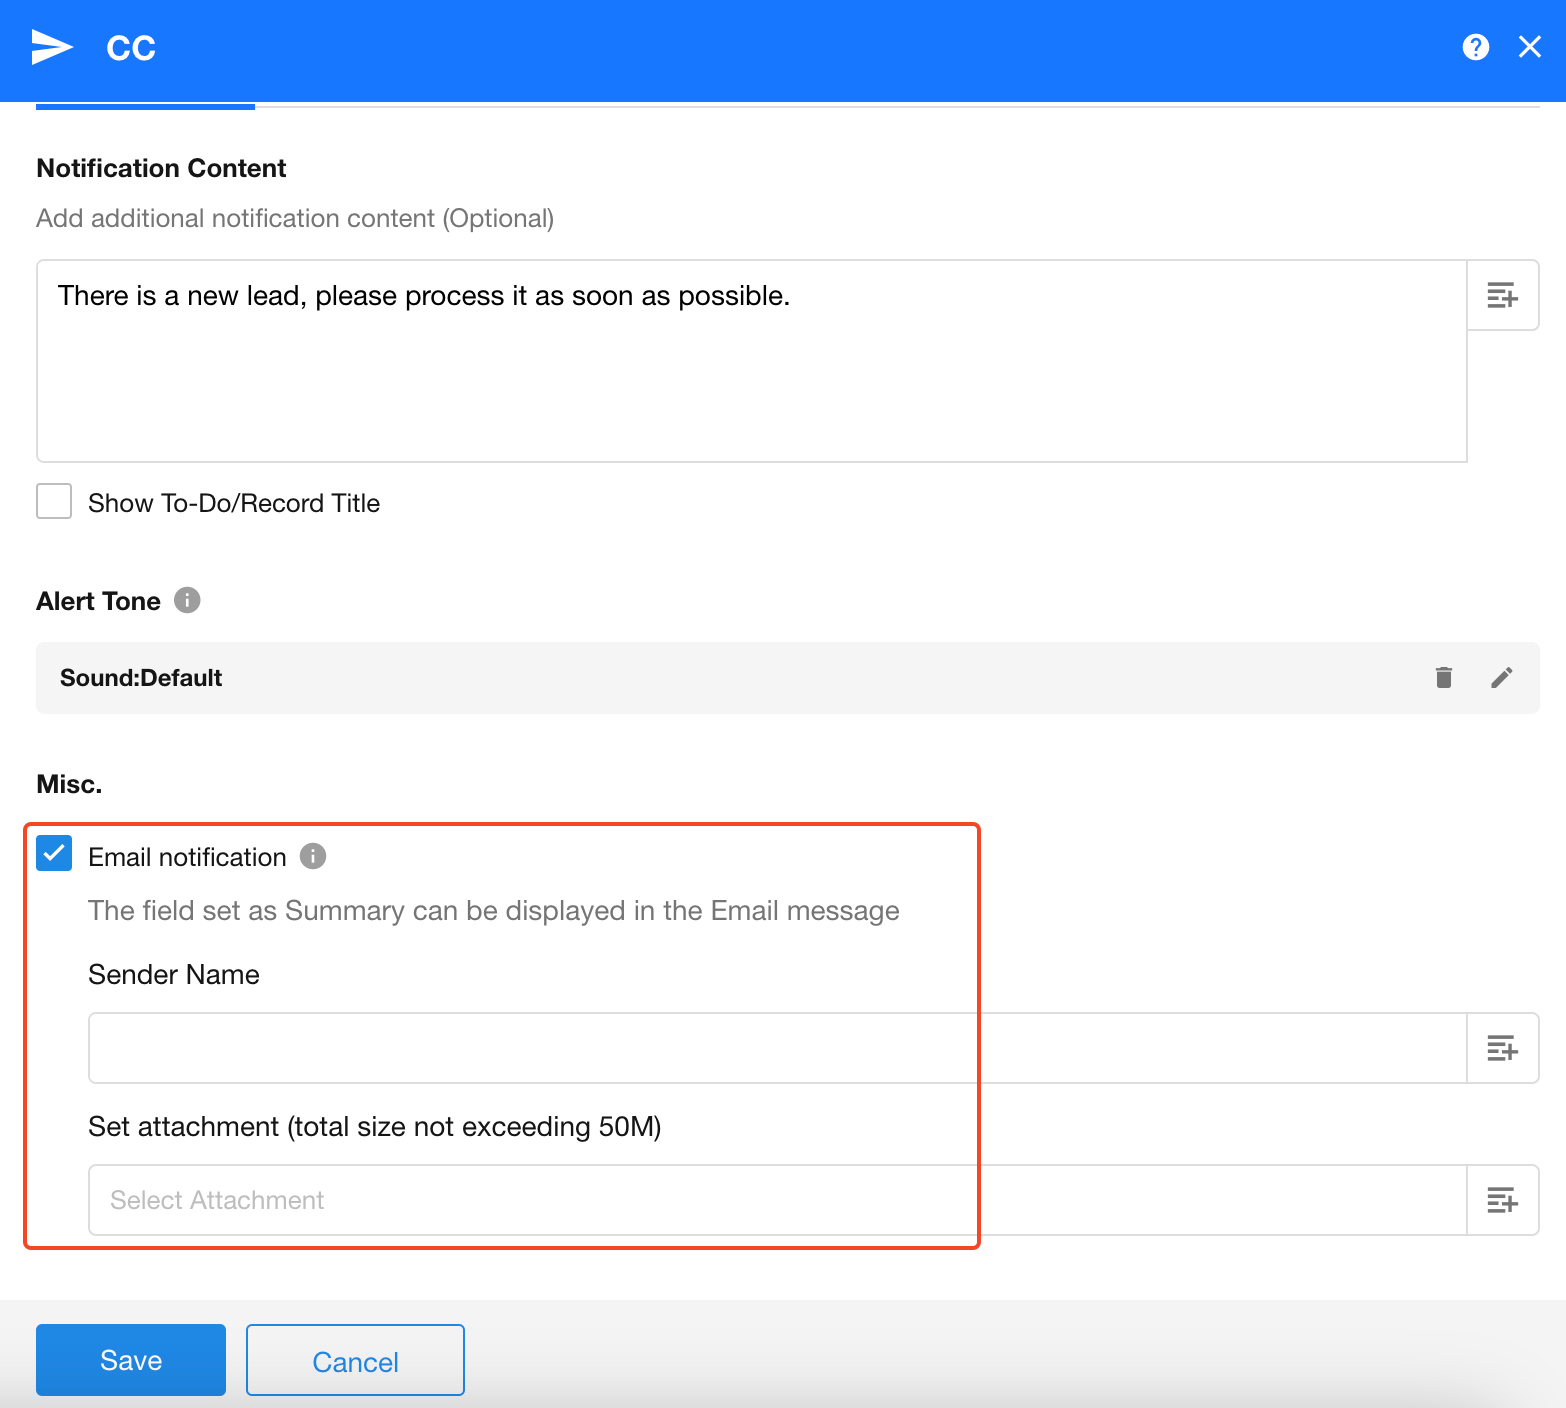
Email notification
When "Email Notification" is enabled:
- New CC messages will notify recipients via their bound email accounts
Email supports attachments:
-
Fixed files
-
Or all files from file fields
II. Send Internal Notification node
This node sends plain text notifications as system messages, with the sender displayed as "Workflow Message". This type of notification does not appear in the To-Do list.
Example: When a new lead enters the worksheet, notify sales personnel to follow up promptly.
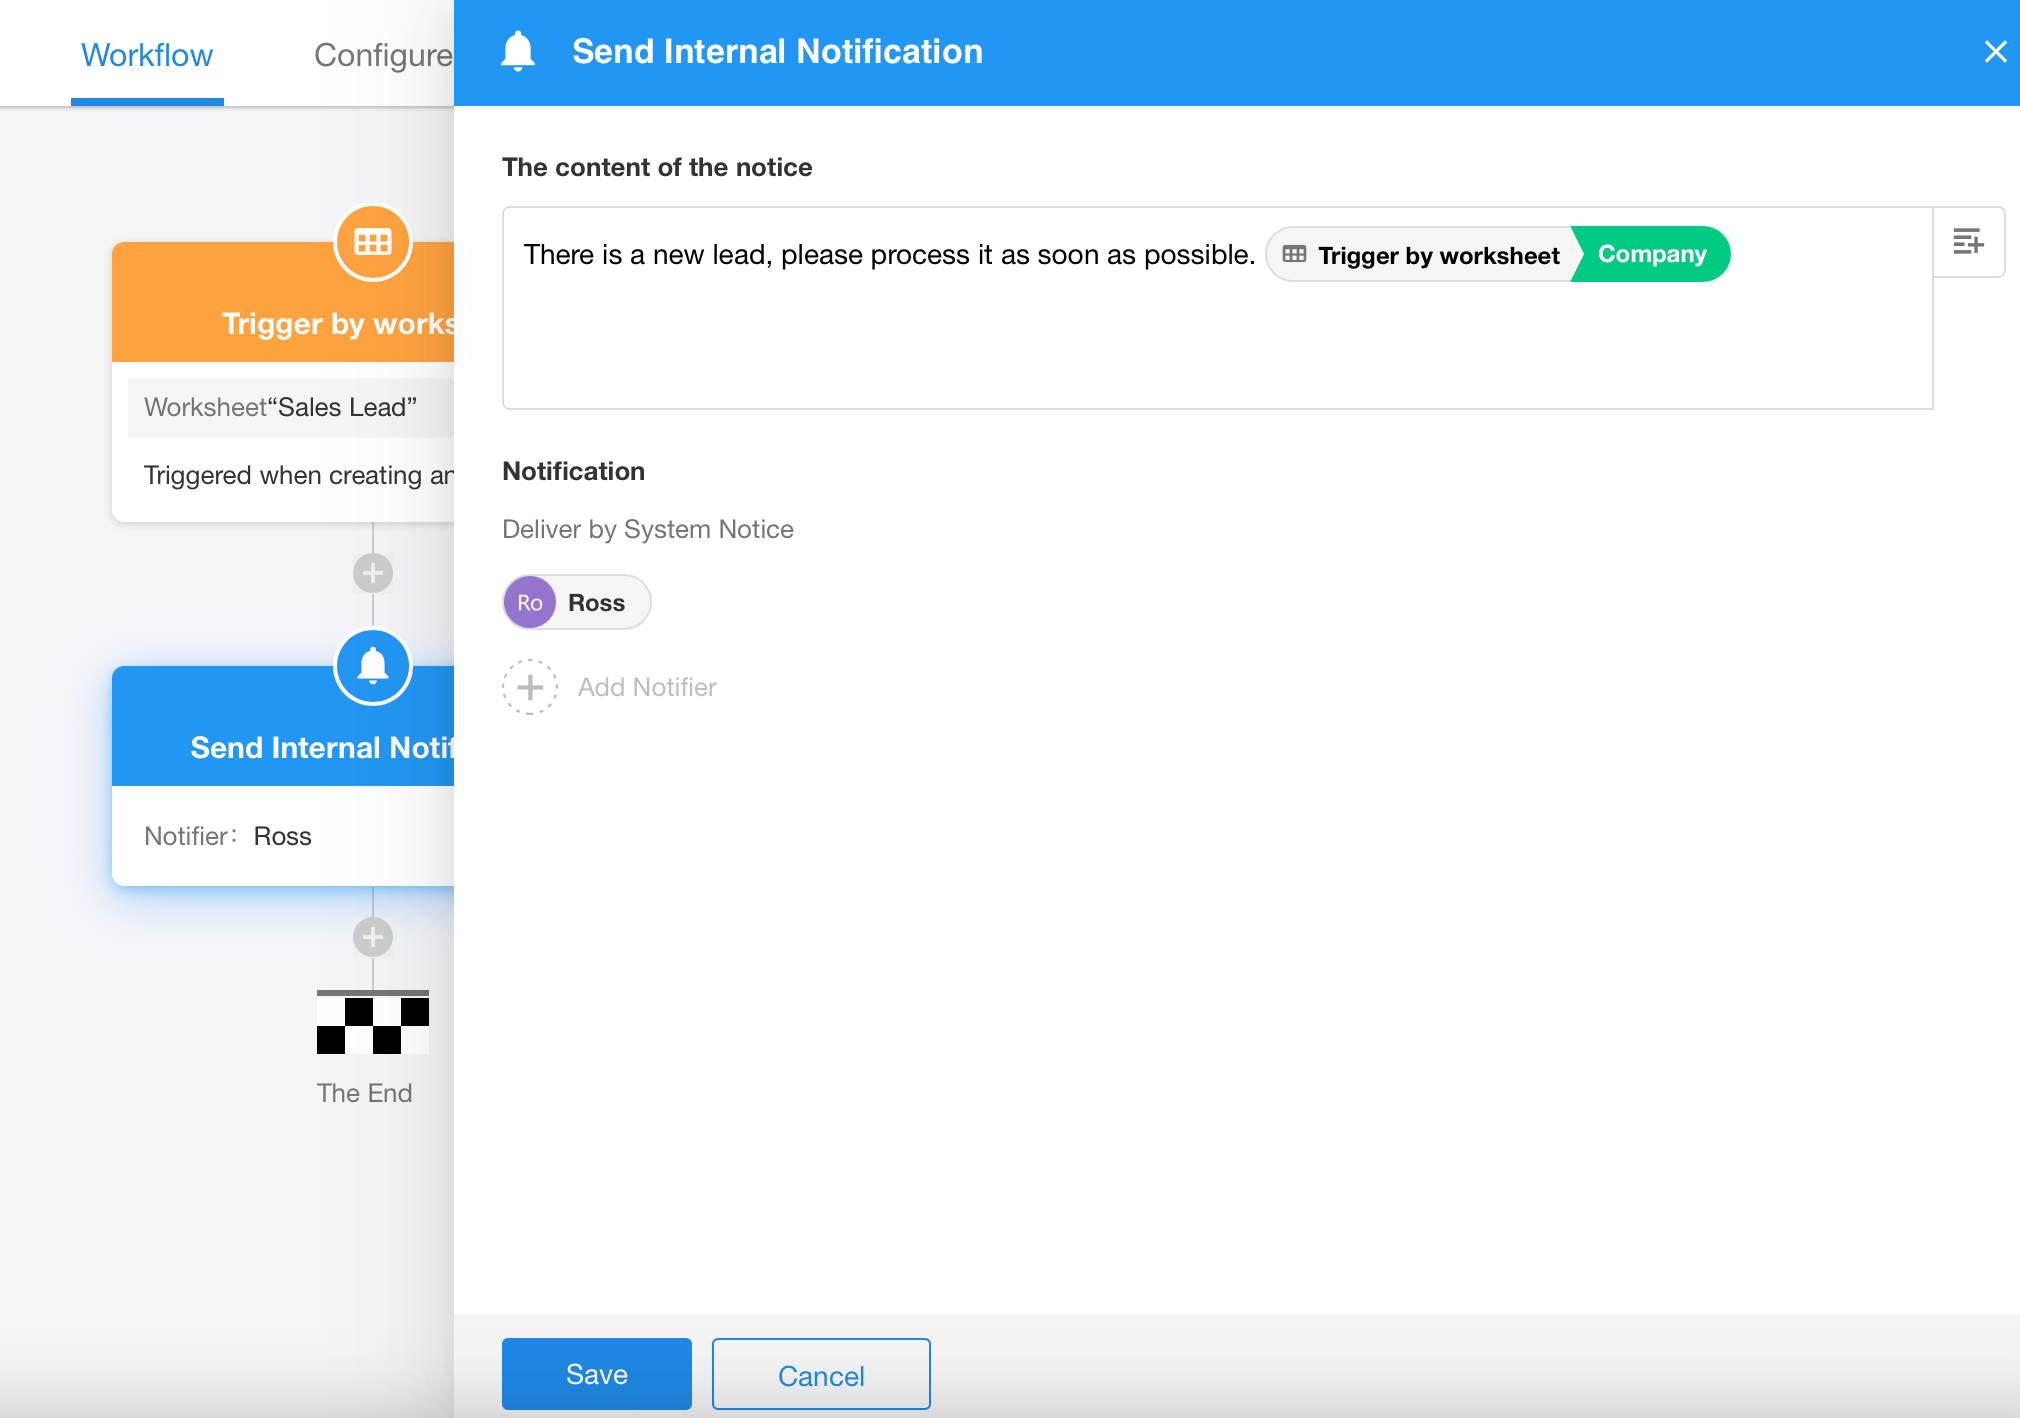
Notification content
-
Fixed text (same content for all sends)
-
Or dynamic notifications incorporating field values
Recipients
- Can notify multiple people
Alert tone
Refer to relevant introduction in the CC node section above
Effect:
-
Displays only text
-
Contains clickable links if included in the notification message
Was this document helpful?