Node - Fill in
Node Function: In a business process, if a member needs to provide information in order to move the workflow forward, you can use a Fill in node to notify them to complete the required information. Once the information is submitted, the workflow continues to the next nodes.
During the fill-in process, you can configure field permissions such as hidden, optional, required, and read-only. You can also configure time limits, after which the system can automatically submit the form or send reminder notifications.
Scenario Example:
When a new ticket record is submitted, notify the customer service staff to assign a technician for follow-up.
First, create a workflow triggered by a worksheet event, configured to trigger when a new record is created, and then add a Fill in node.
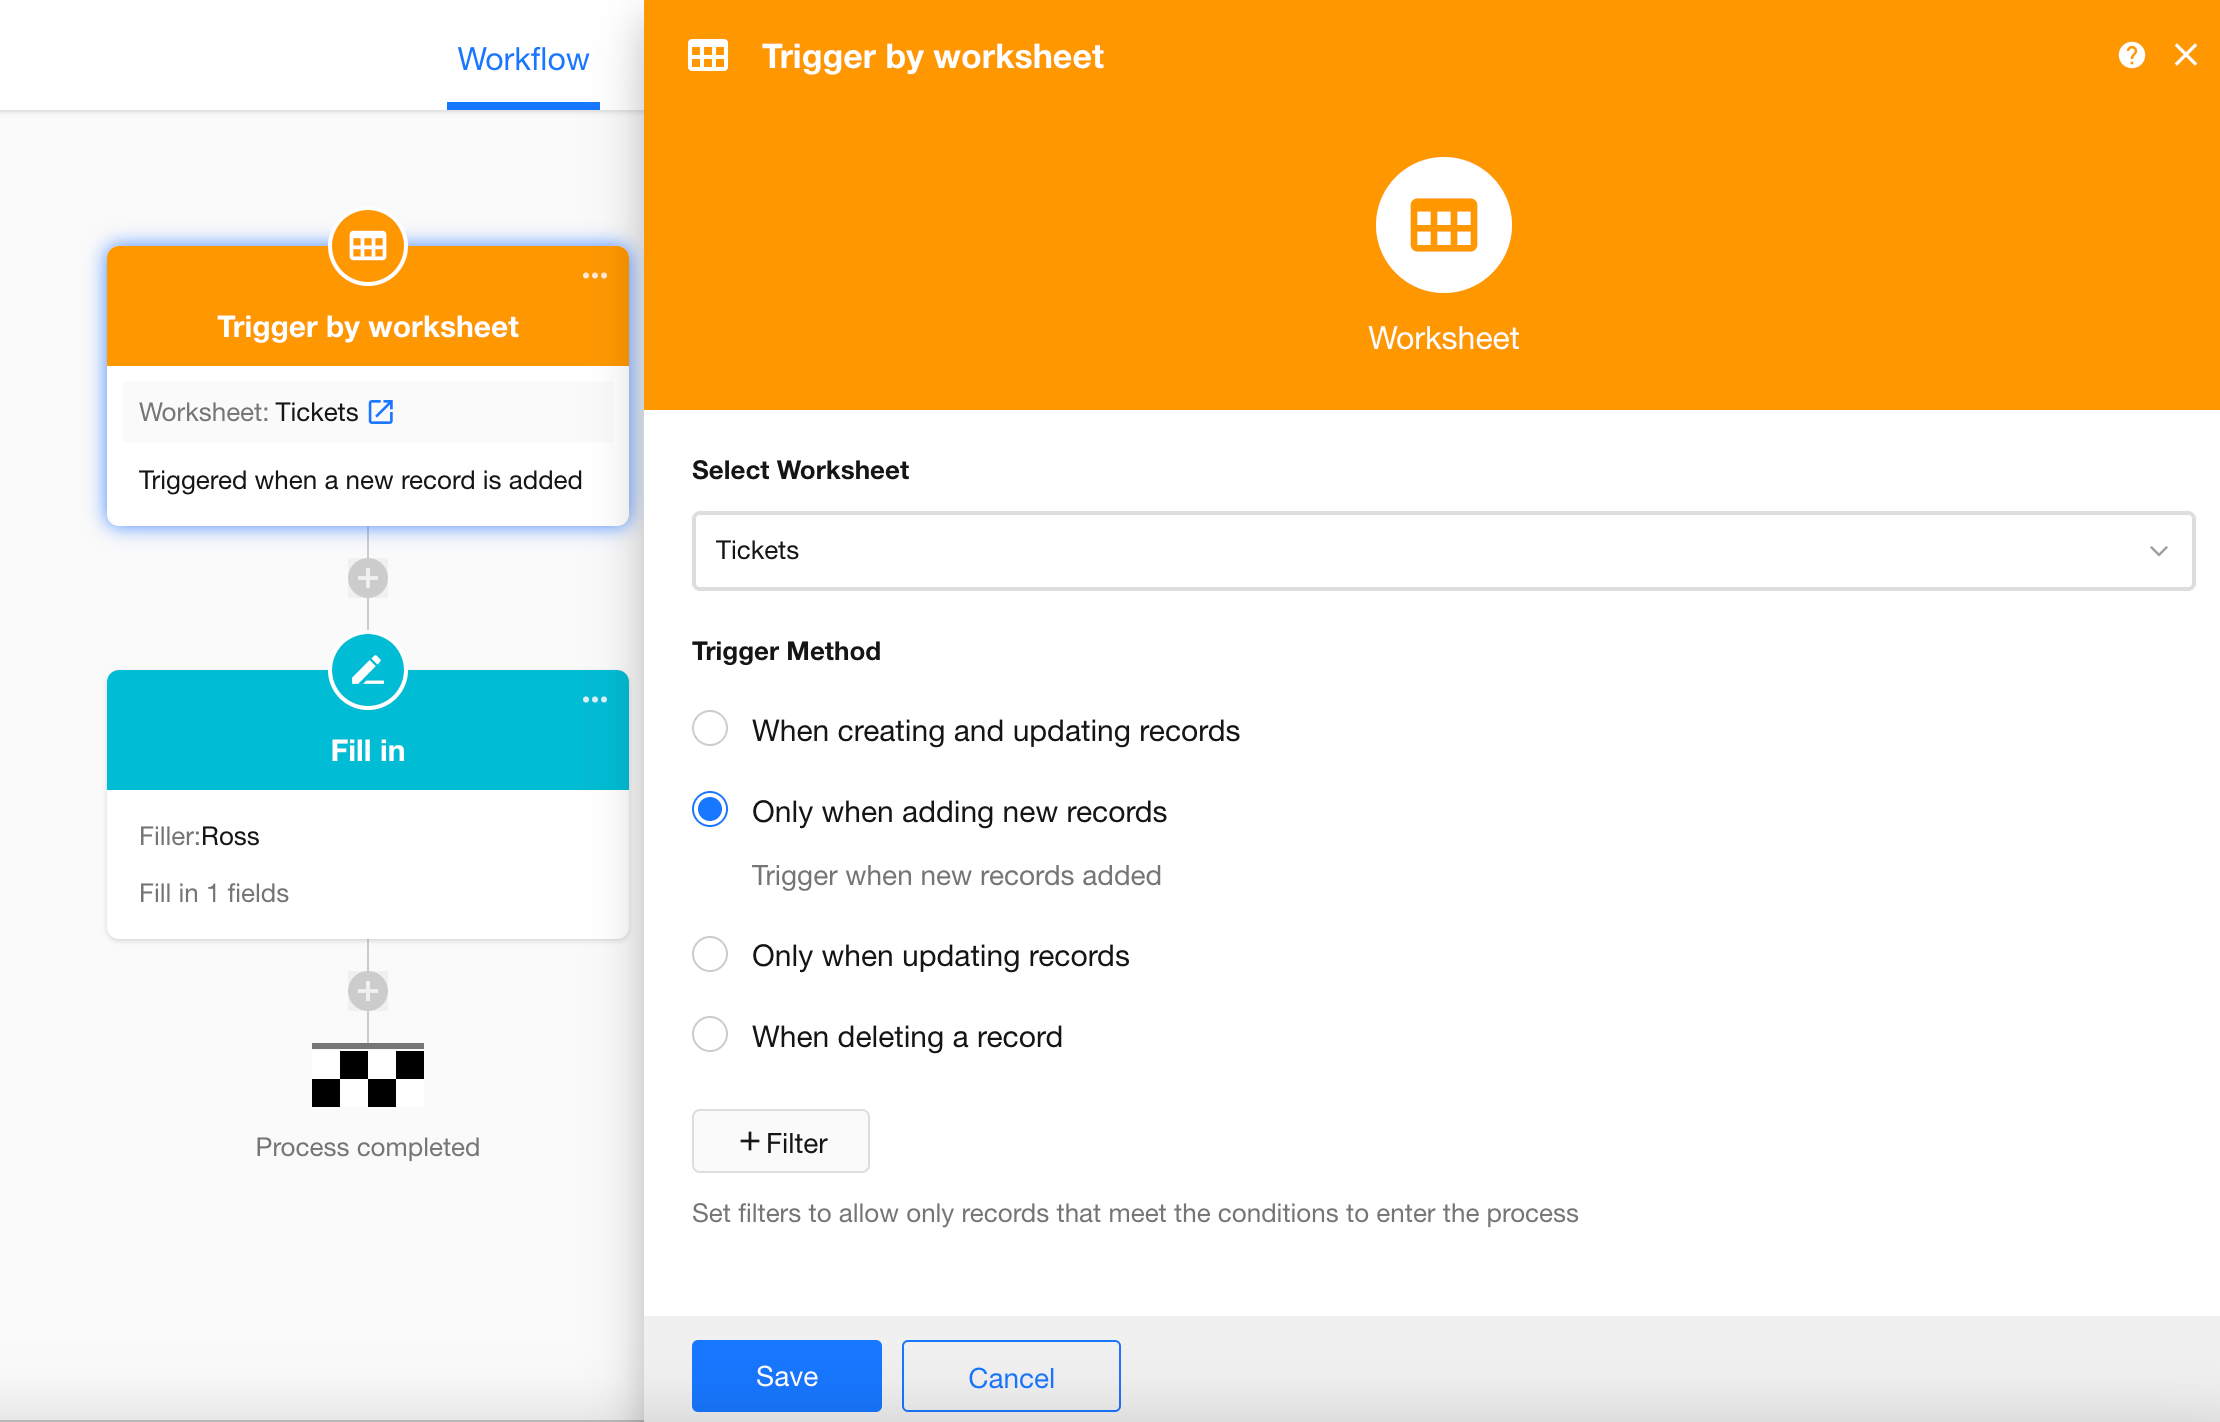
Node Configuration

1. Set the Node Name
Name the node according to its function. The name will appear in the fill-in notification message.
Example:
2. Select the Fill-in Target
Select the record represented by the trigger node, which is the newly created ticket record that triggered the workflow.
3. Select the Person Responsible for Filling In
You can select fixed users from Contacts, or choose members based on:
- Department
- Position
- Application role
If multiple members belong to the selected department, position, or role, all of them will receive the notification. However, only the first person who submits the form will be accepted, and the others will no longer be able to take action.
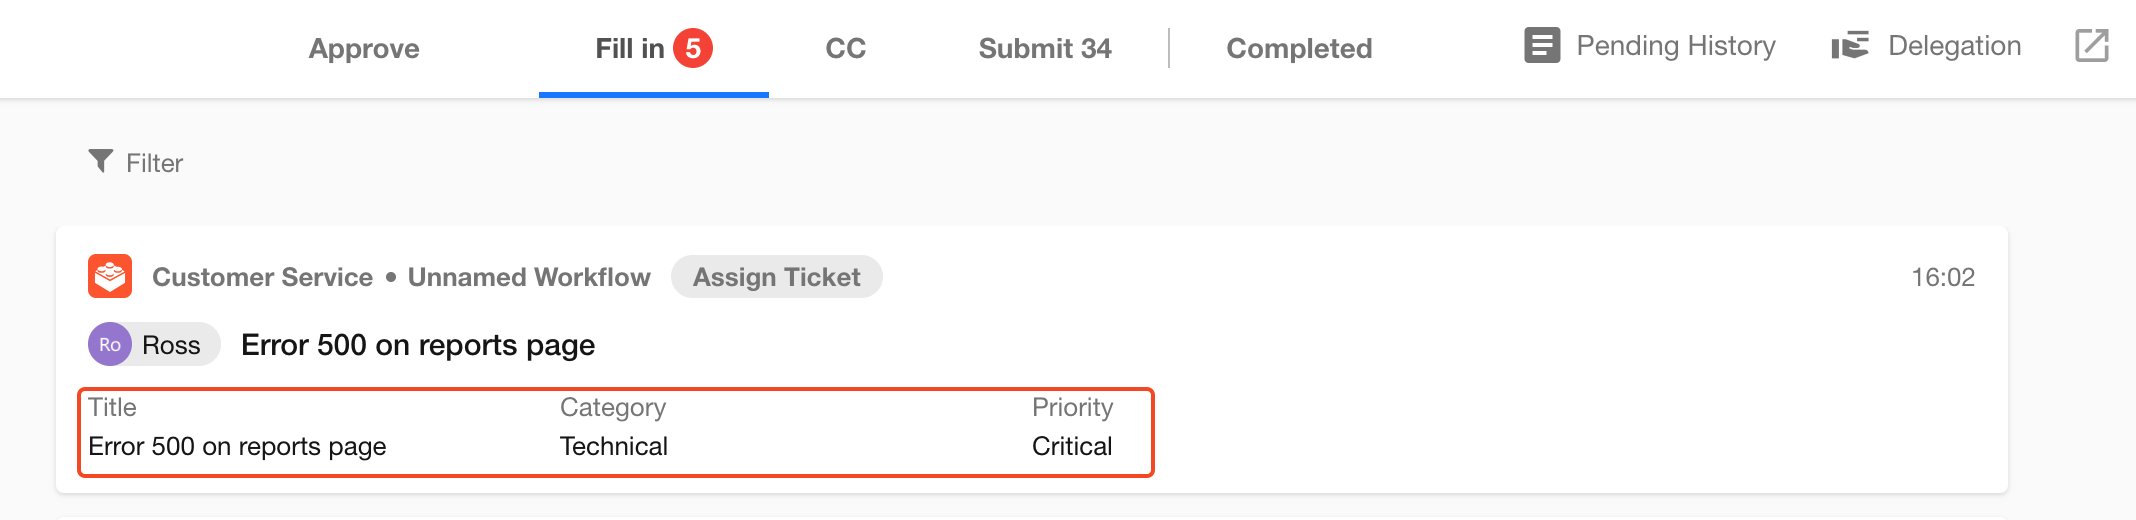
4. Configure Visible and Editable Fields for the Fill-in User
For example, customer service staff first perform a preliminary review of a new ticket and need to assign a follow-up technician. Therefore, the Follow-up Owner field should be set as required, while other fields can be configured as hidden, read-only, optional, or required as needed.
The fields available for filling are from the record selected as the Fill-in Target. Fields are displayed in the same order as in the form and are read-only by default.
-
New fields are visible by default
- If enabled, any new fields added to the worksheet later will automatically have the View permission selected.
- If disabled, newly added fields will not be visible by default. If visibility is needed, the fields must be reconfigured.
5. Set Summary Fields
The selected summary fields will appear in the workflow to-do list, allowing users to preview key information quickly.
Example:
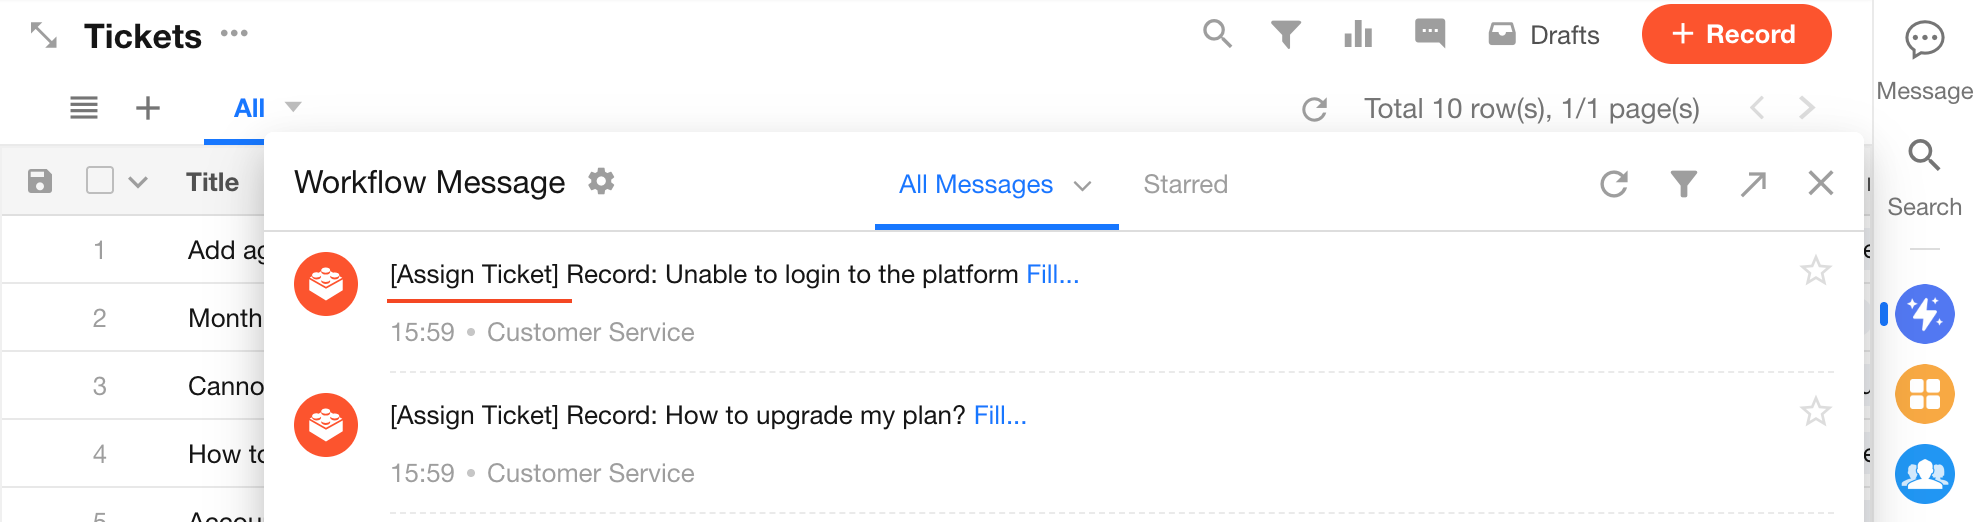
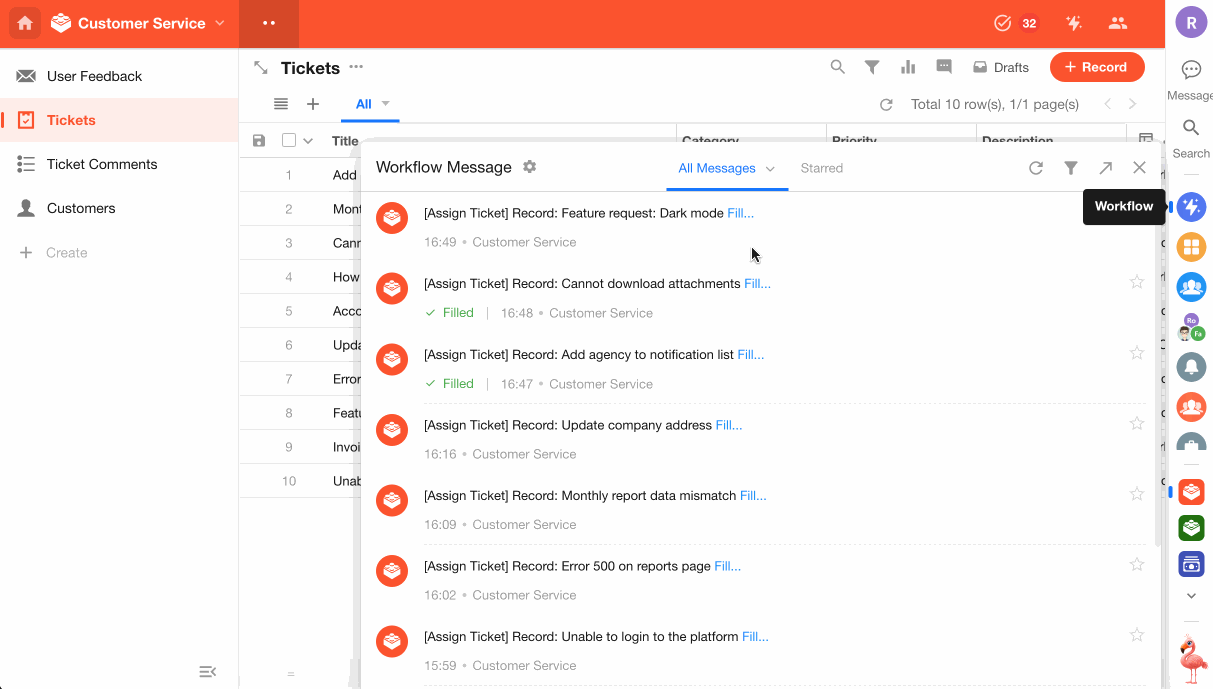
Fill-in Example
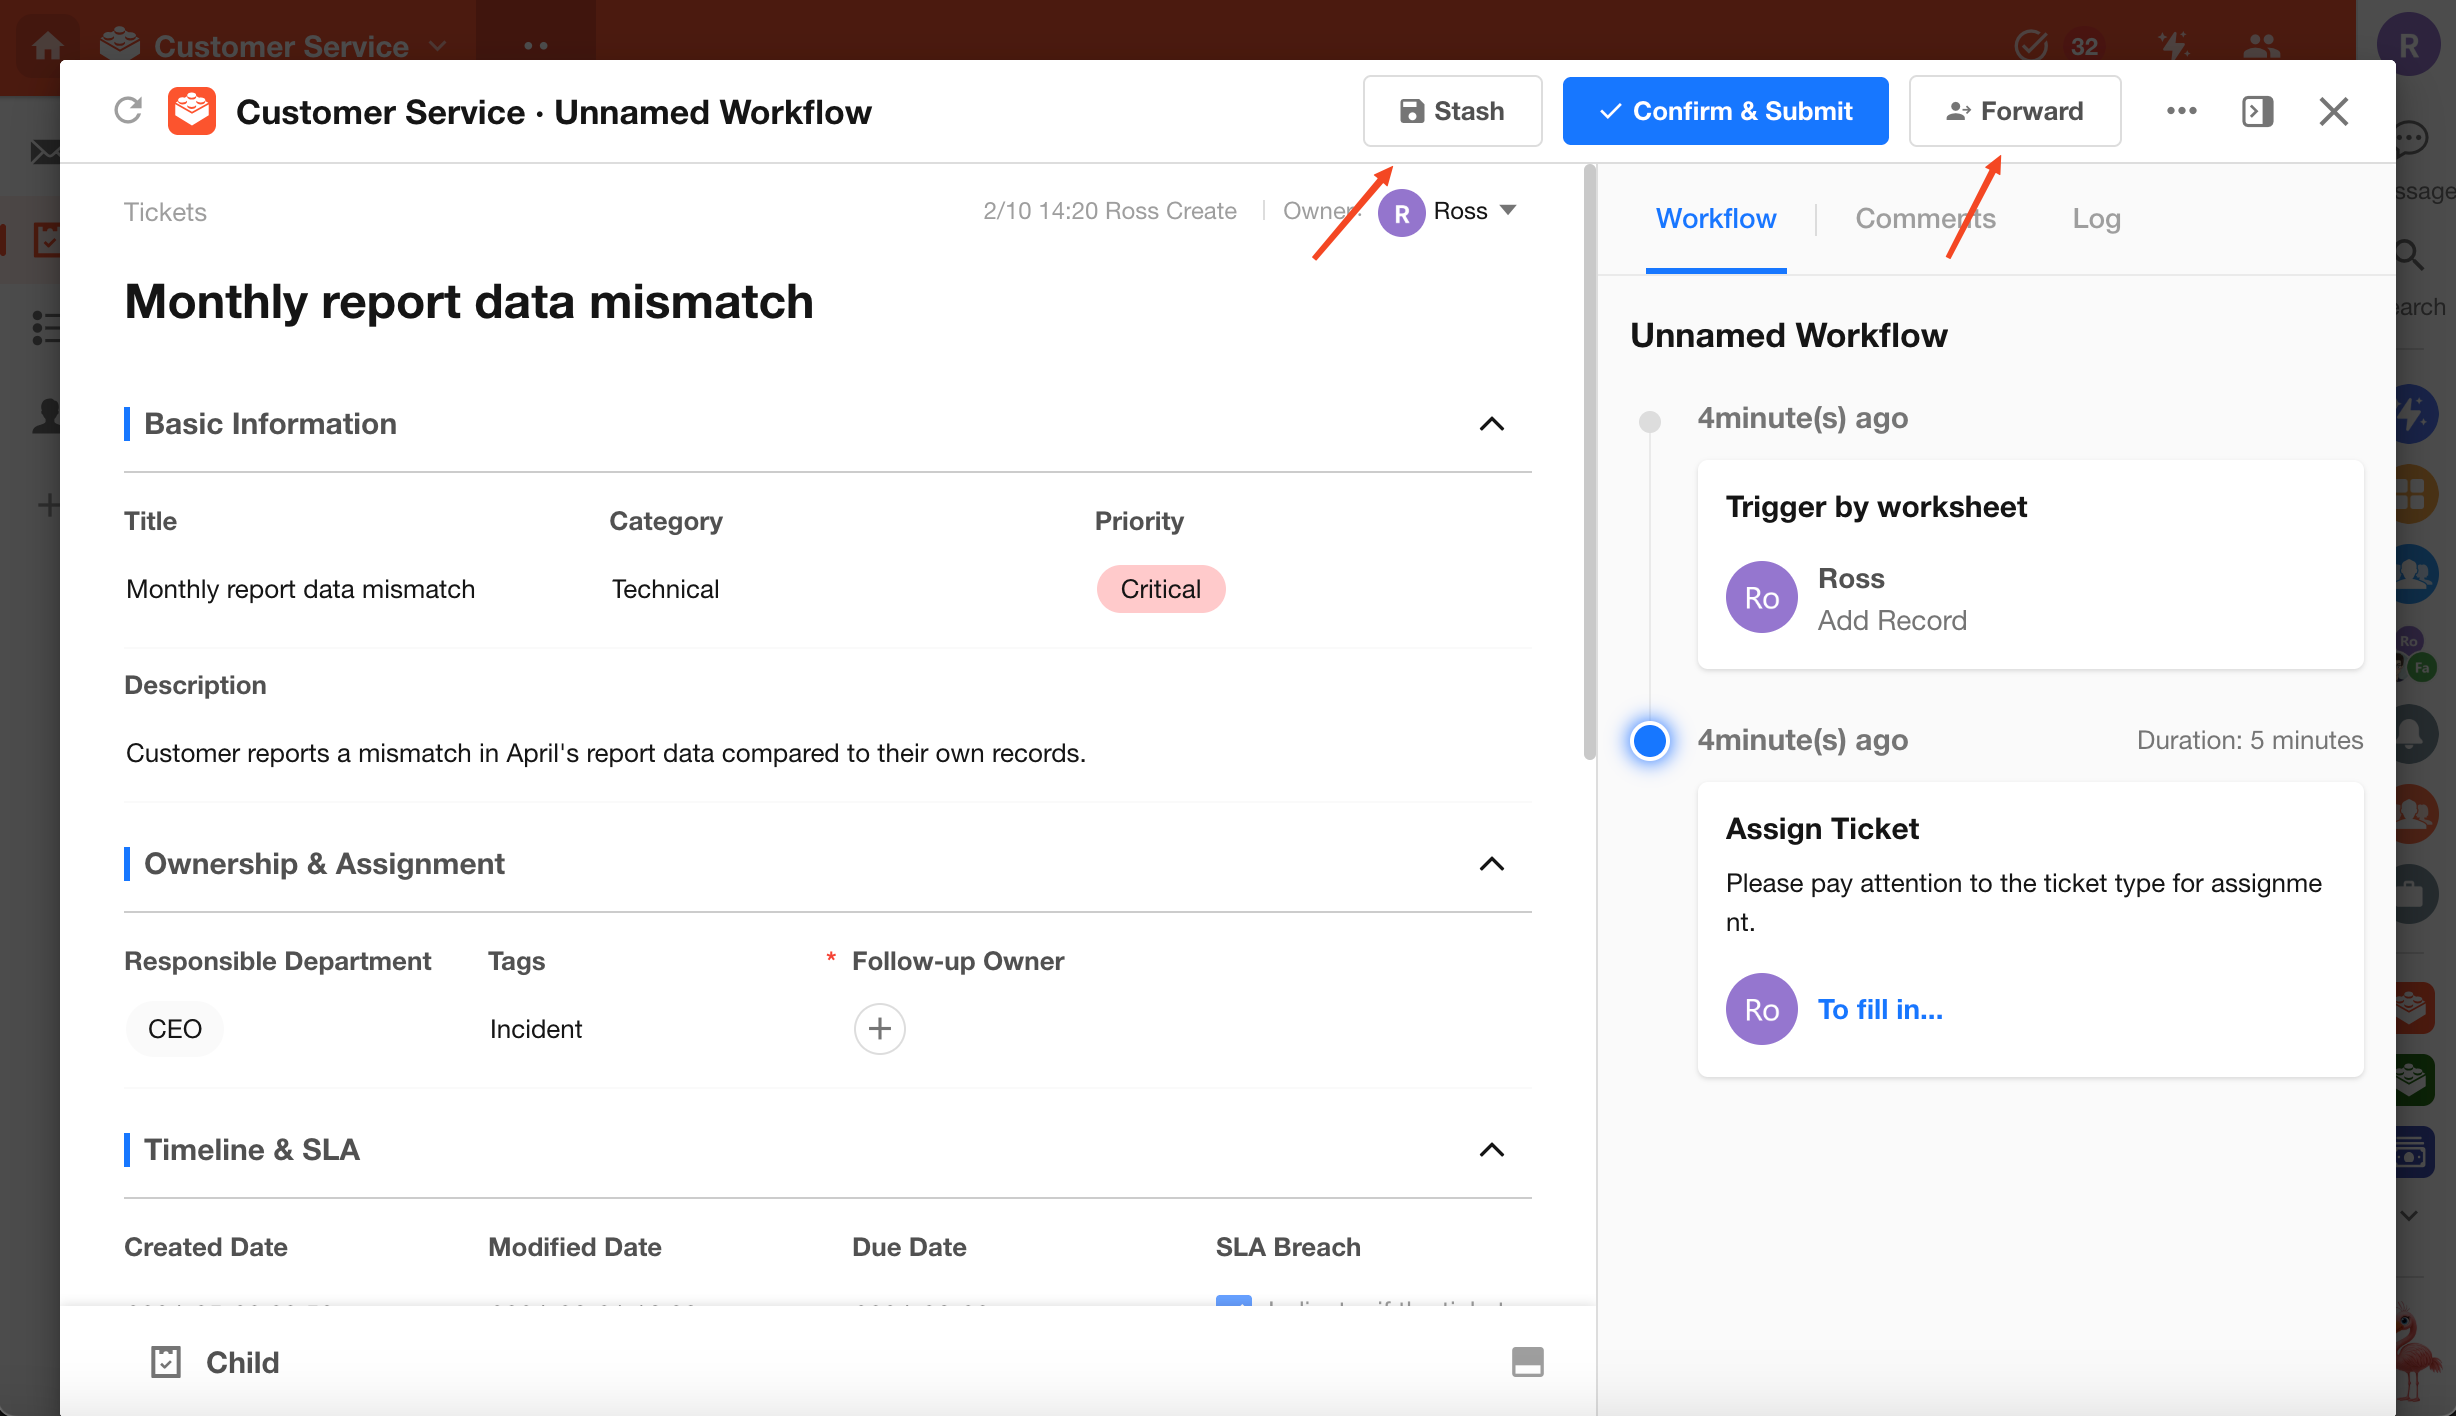
Below is an example of how the fill-in user performs the task.
Access through workflow message
Important Notes
-
The fill-in user must open the record through the workflow notification or the workflow to-do list, complete the form, and click Submit for the node to be completed.
Otherwise, the workflow will remain in progress, and subsequent nodes will not be executed.Editing the record directly in the worksheet does not count as completing the fill-in task. The Fill-in node will still remain pending.
-
The fill-in user is not restricted by the application's role permissions during this process. The Fill-in node temporarily grants the user permission to view and edit the record.
For example, a user who normally cannot access records in the worksheet may still view and edit the record through the Fill-in node (the same applies to approval nodes). However, editing must be performed through the fill-in workflow process.
More Settings
6. Customize Button Name
The default button name is “Submit” You can rename it according to your business scenario.
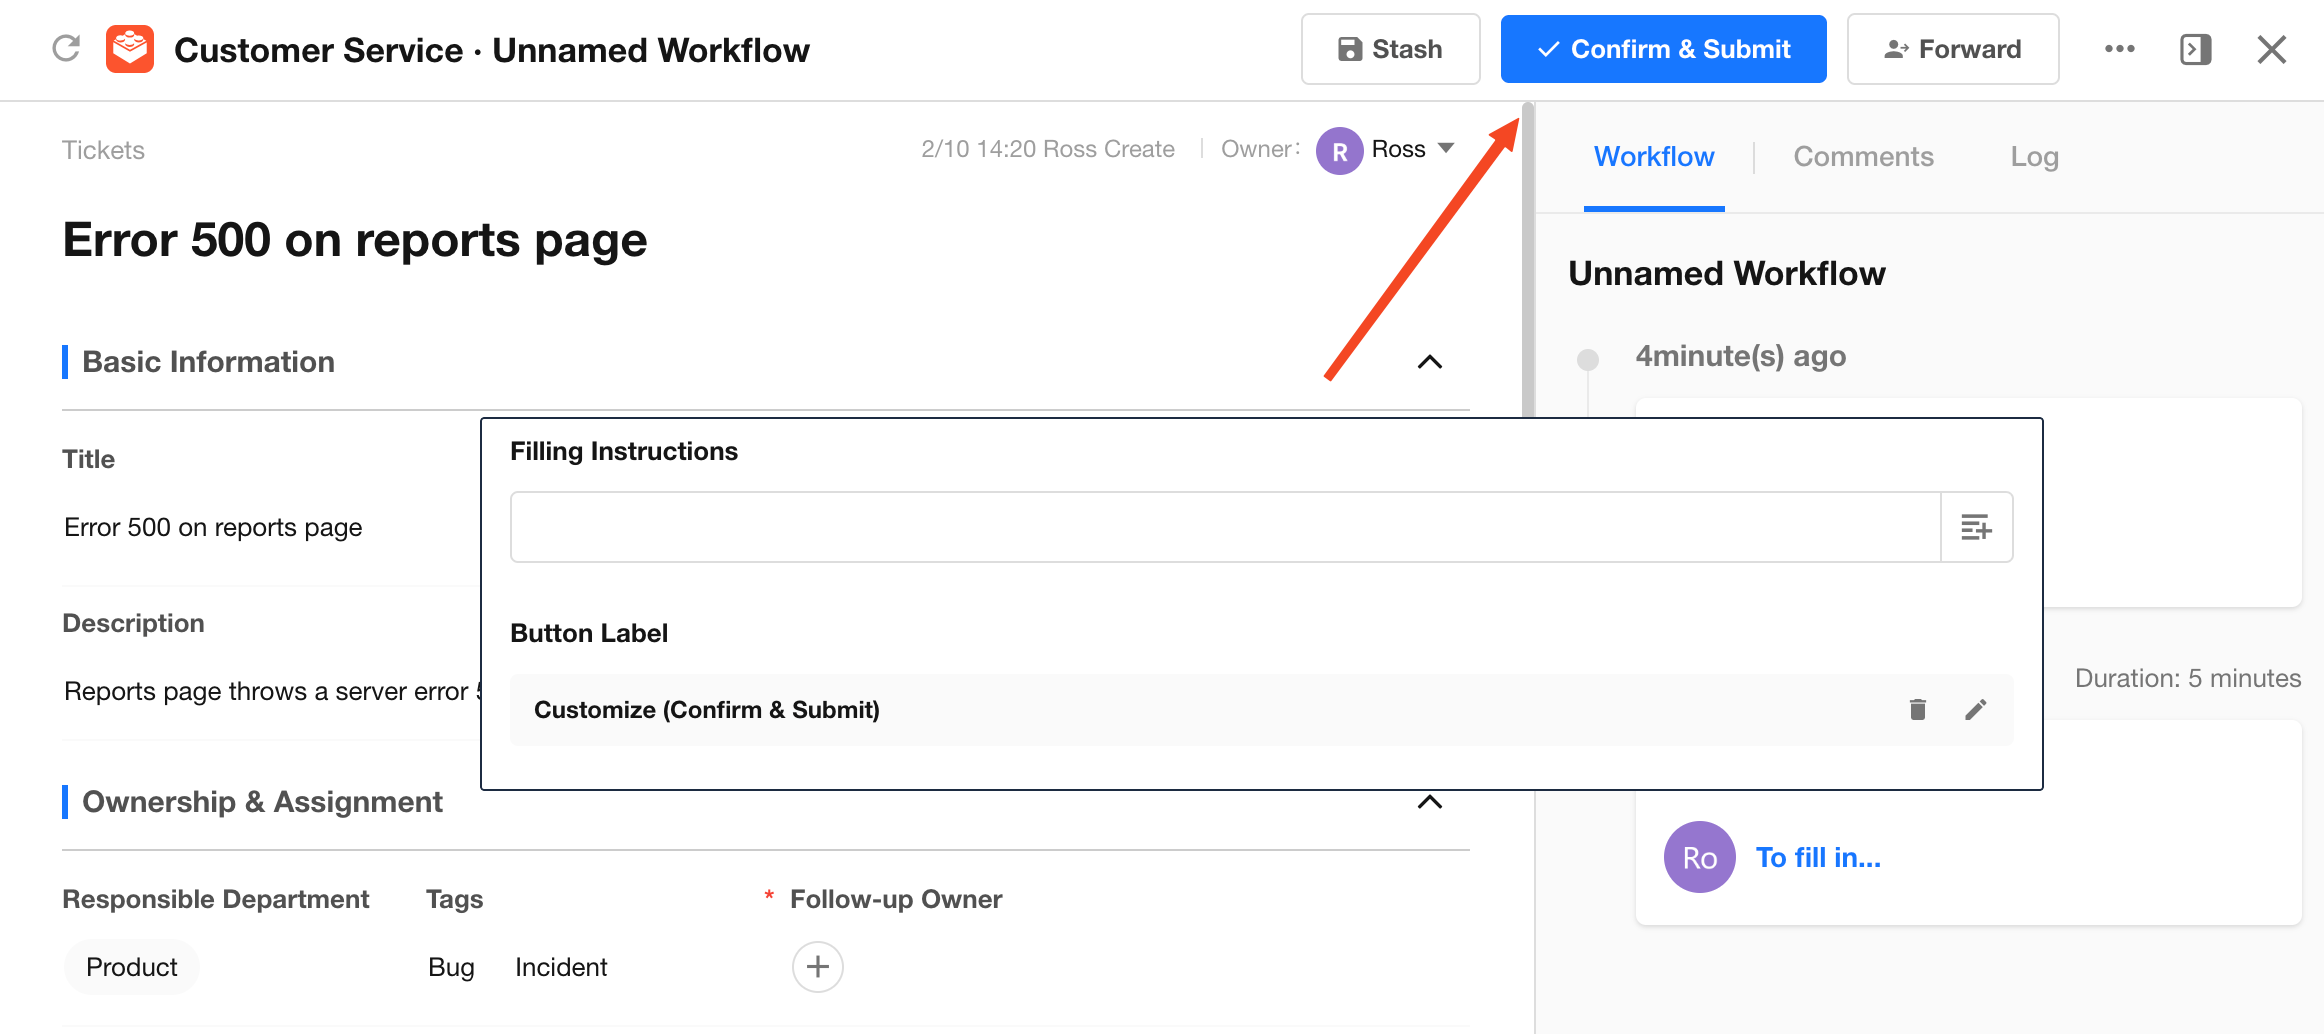
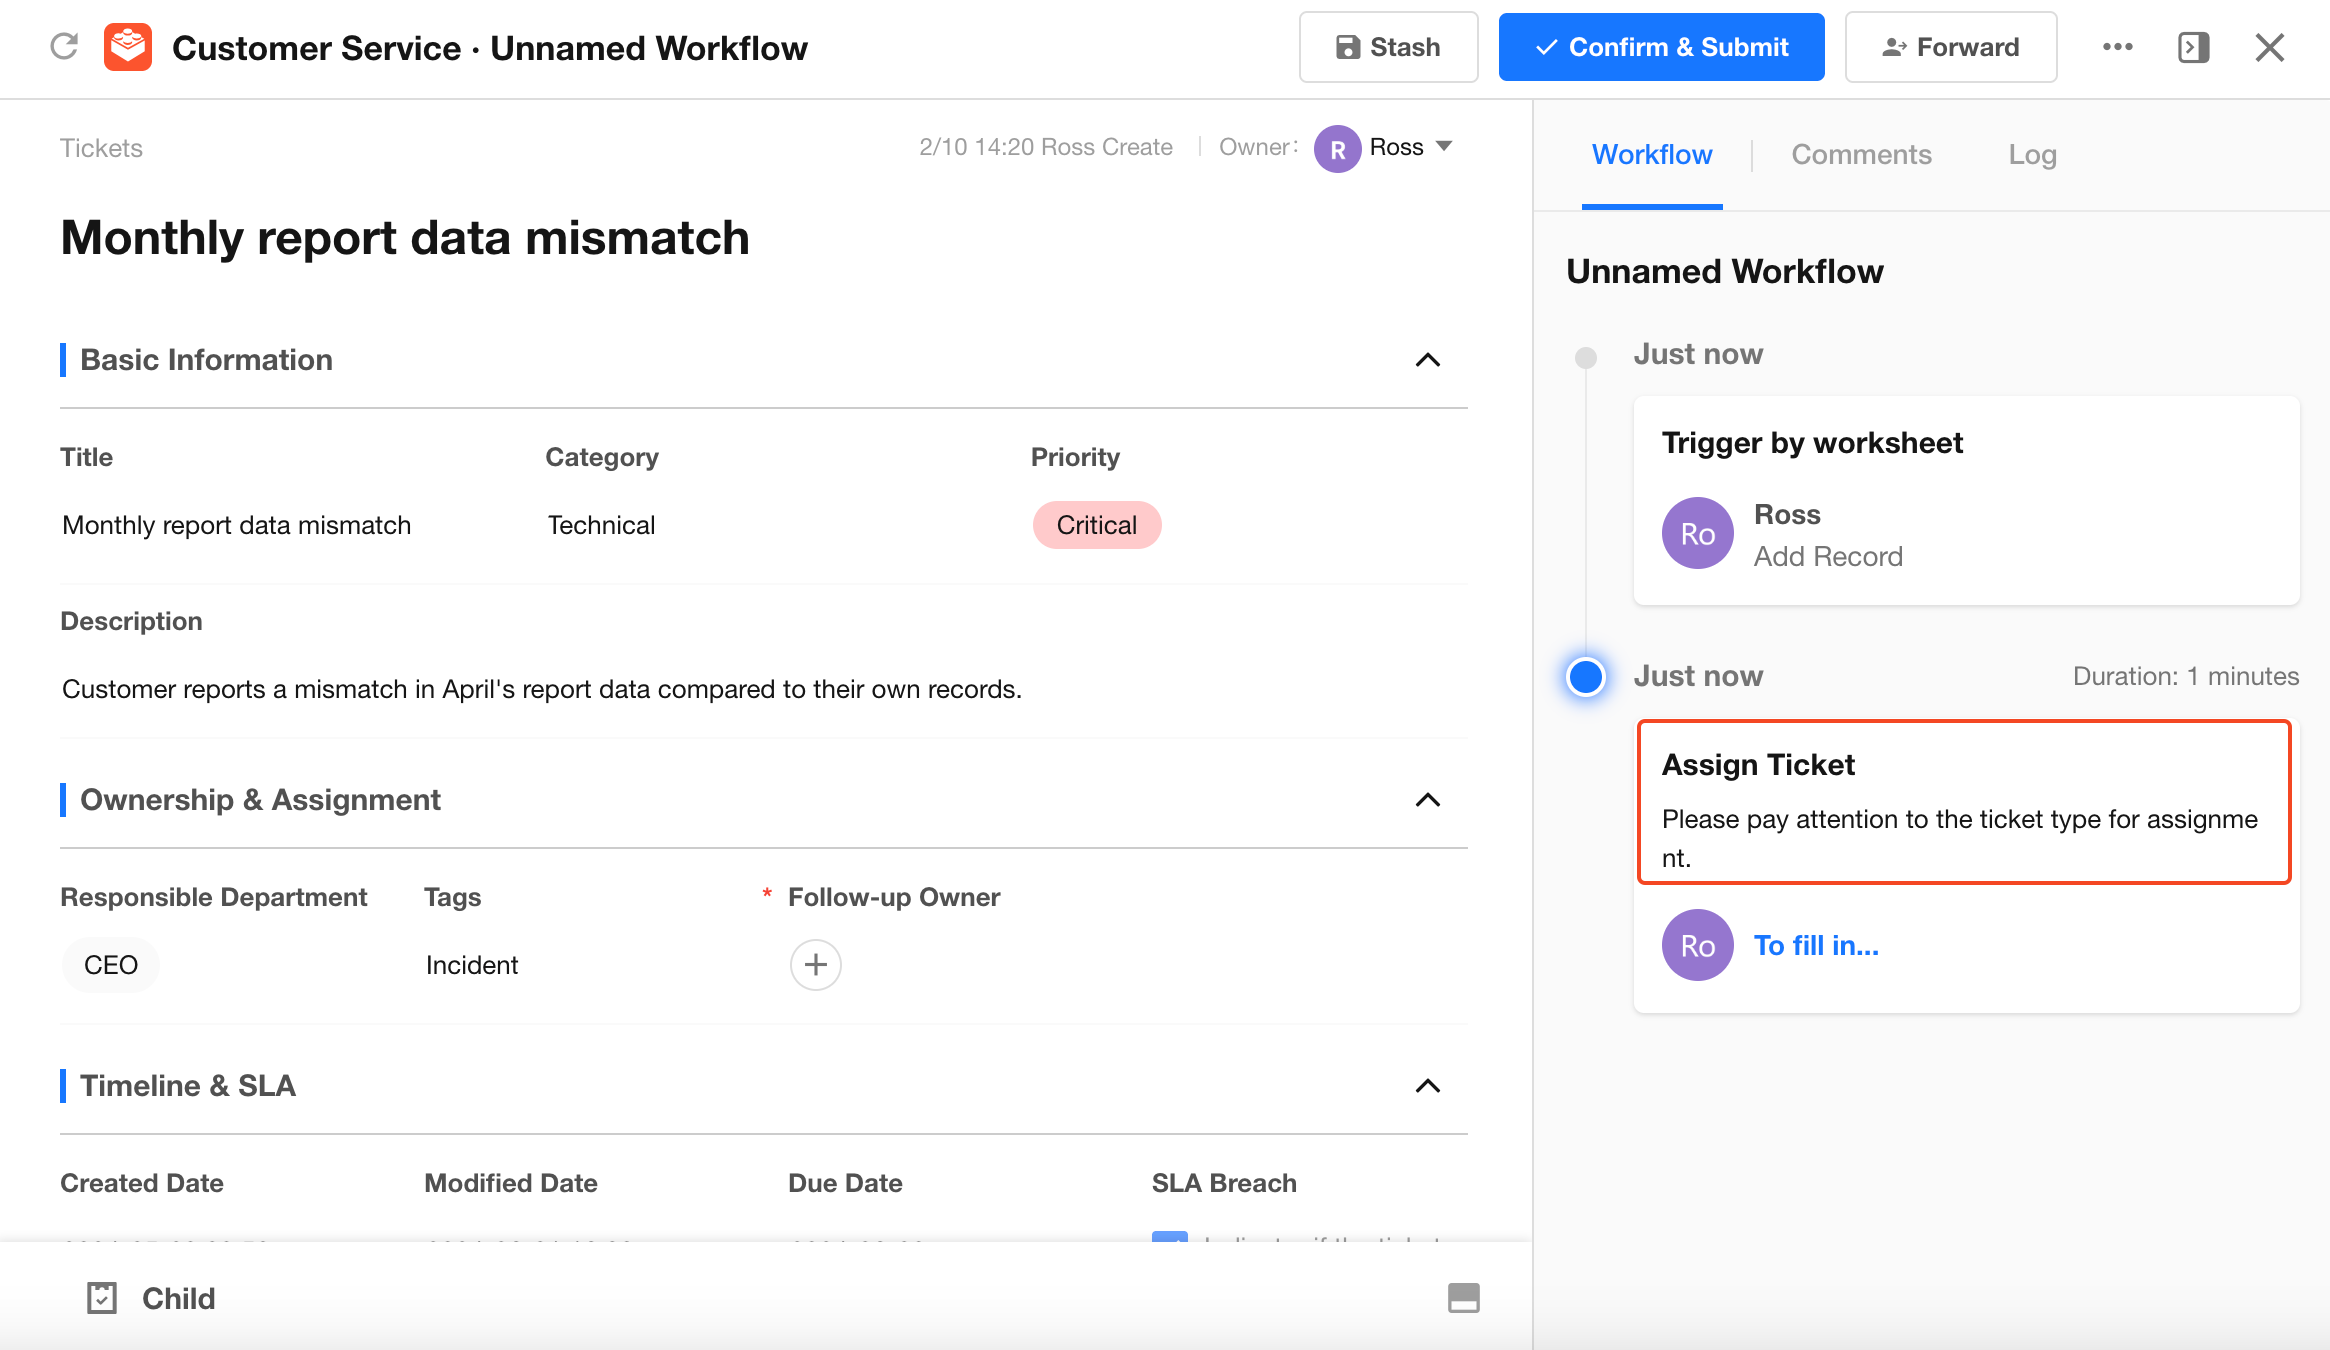
7. Fill-in Instructions
You can provide fill-in instructions to inform users about important notes or requirements when completing the form.
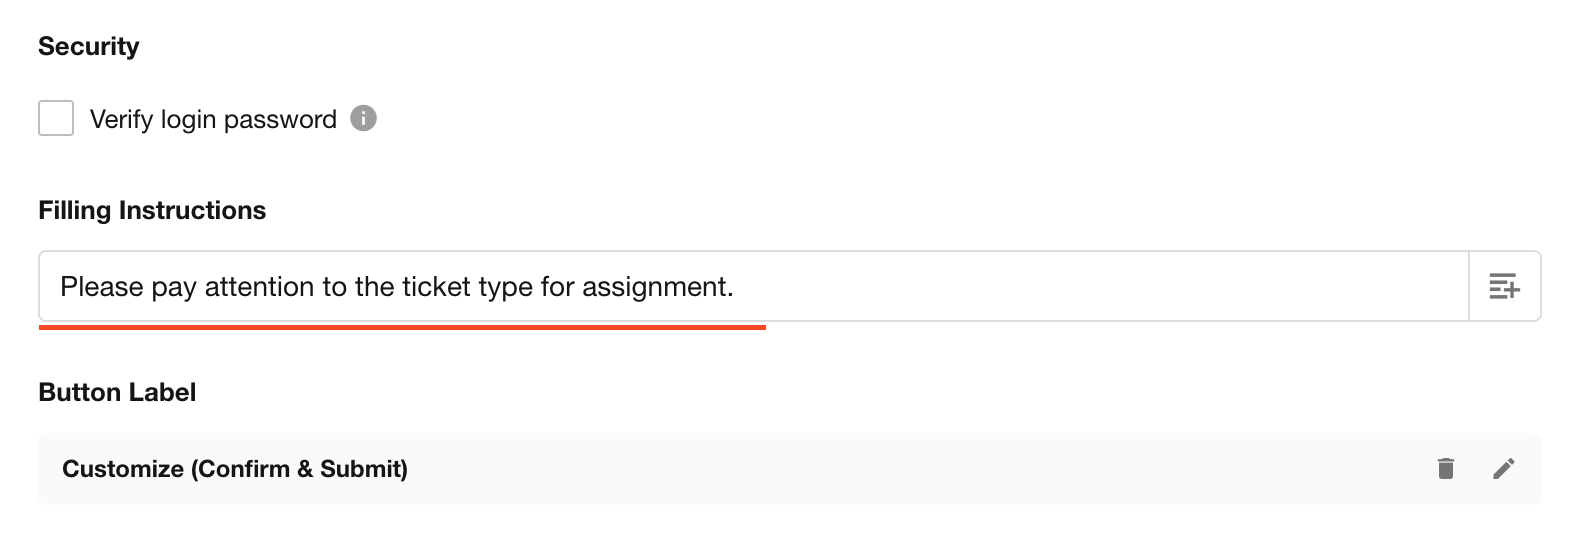
Example:
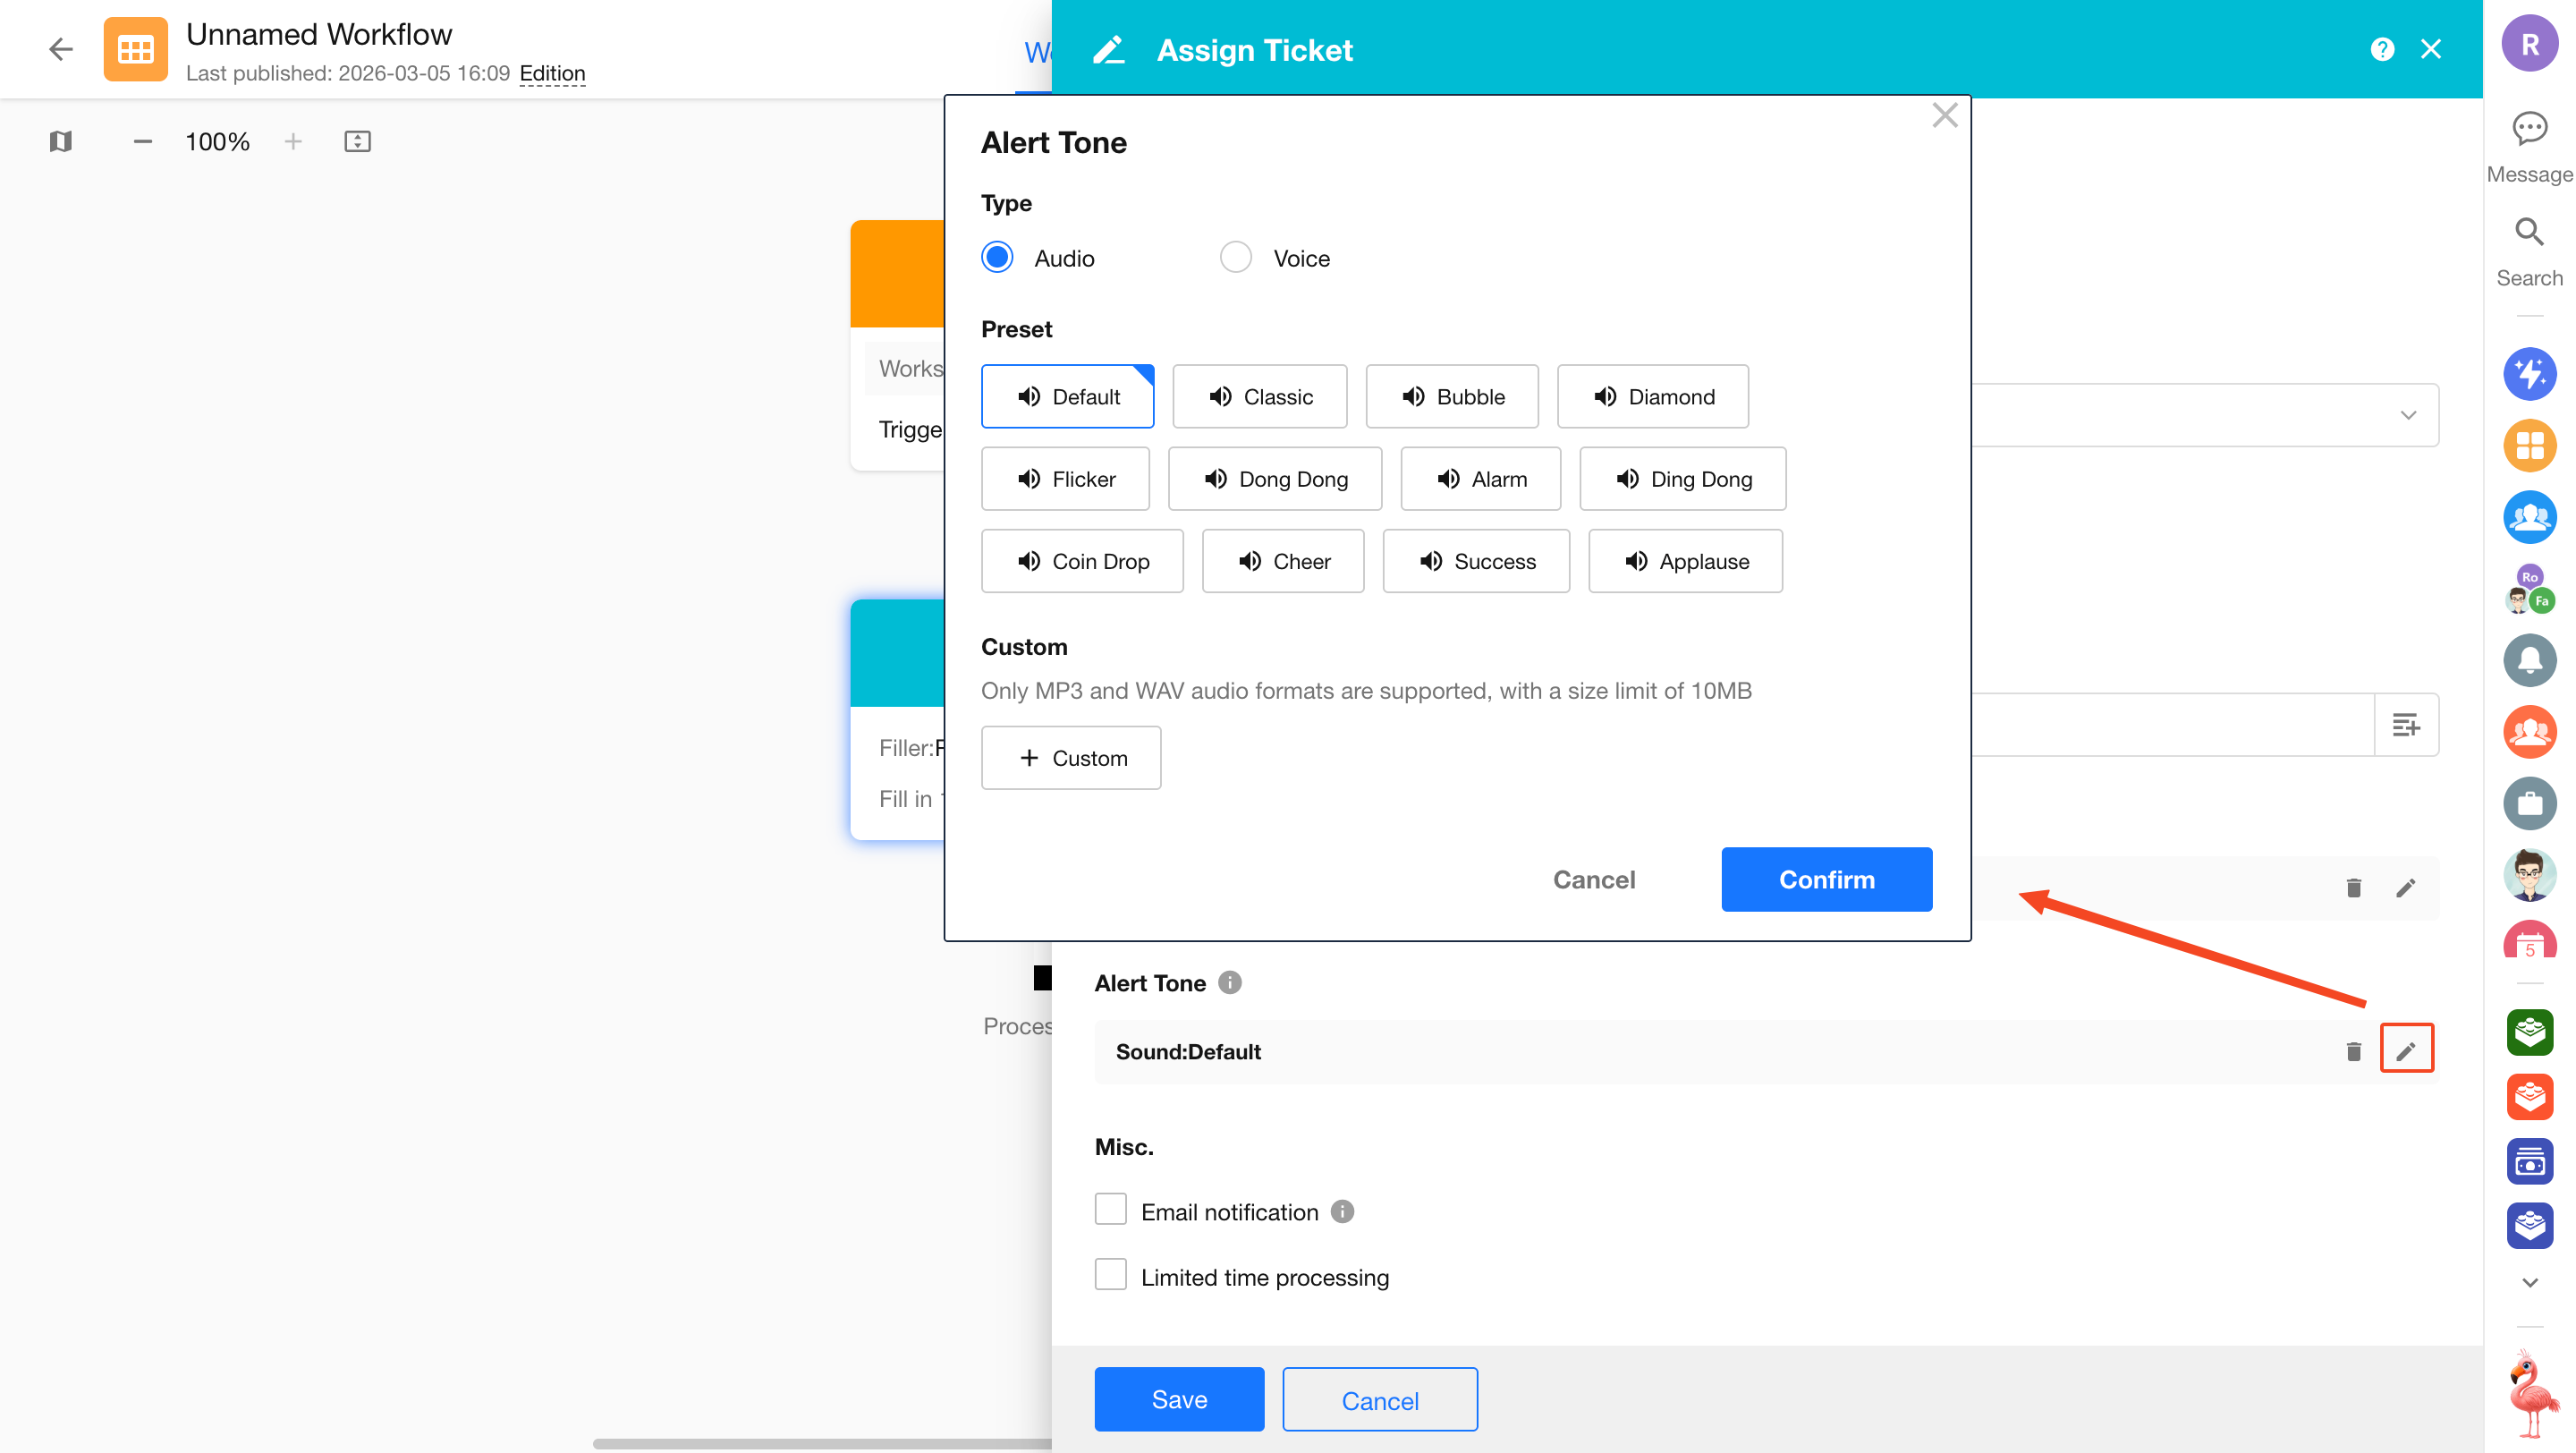
8. Notification Sound
When the fill-in user is logged in and receives a fill-in notification, a notification sound can be played.
The sound can be configured according to the scenario:
- Use a fixed audio
- Convert a text message into speech for playback
If the user is logged in on both PC and mobile app, the notification sound will only play on the PC.
9. Stash and Forward
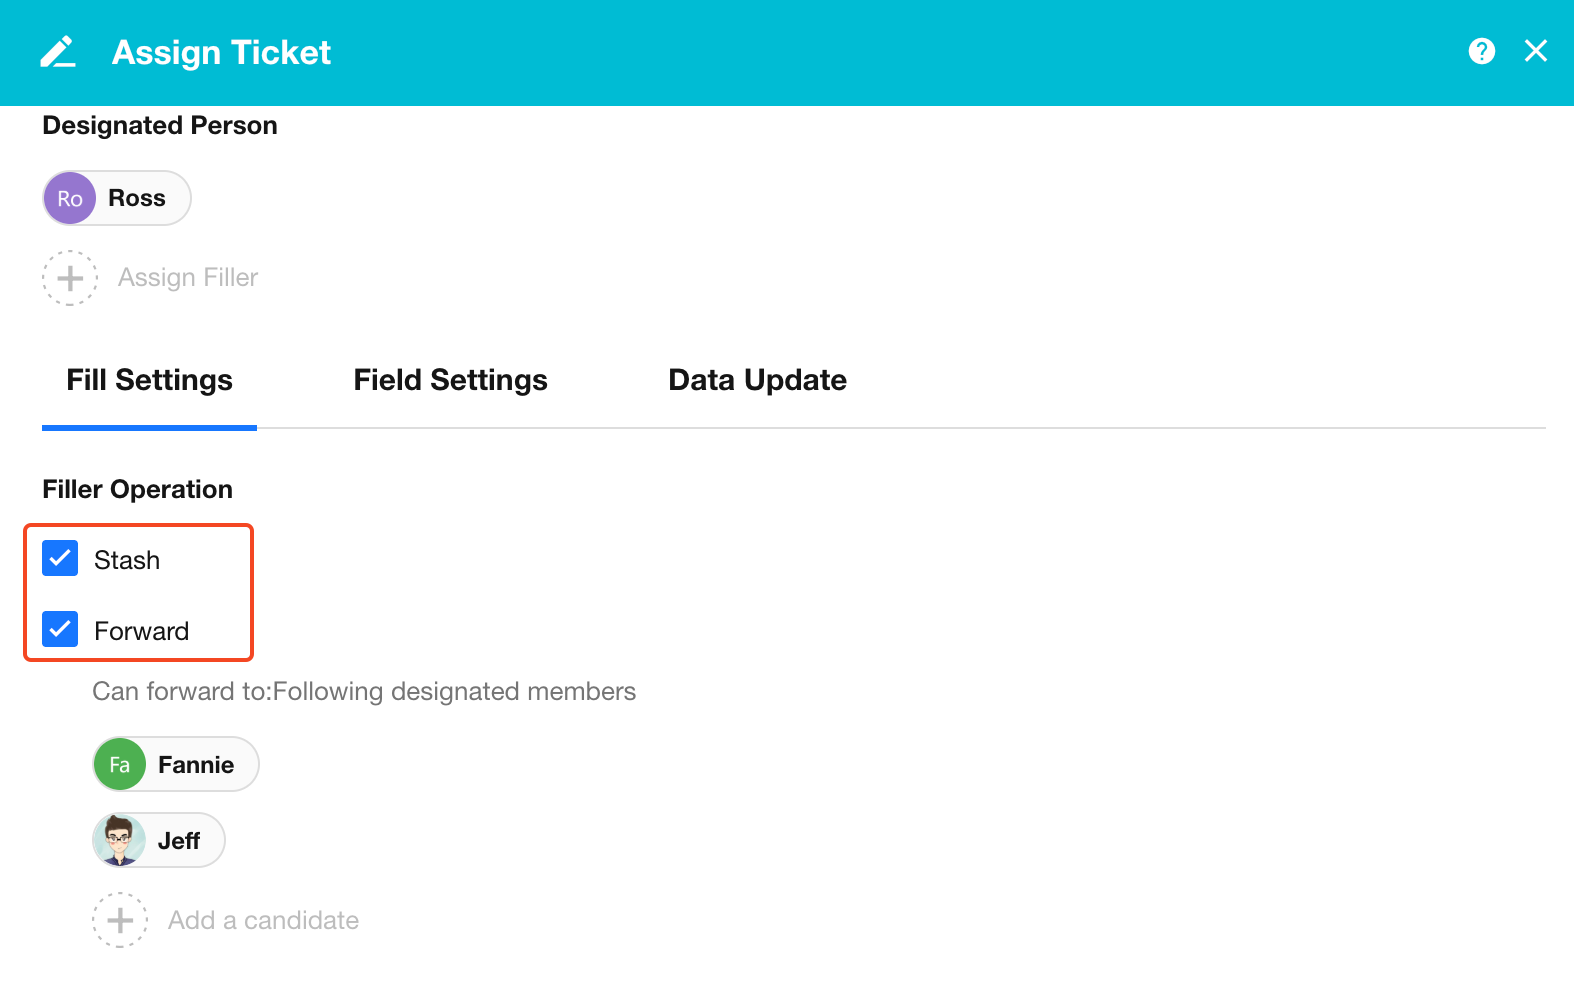
Stash:
When enabled, the fill-in user can edit fields and save the content without submitting it. The workflow will not proceed to the next node until the form is submitted.
Forward:
When enabled, the fill-in user can delegate the task to another person instead of completing it themselves.
- By default, reassignment can be made to any user.
- If candidates are specified, the user can only reassign the task to users within the candidate list.
Button location:
10. Login Password Verification
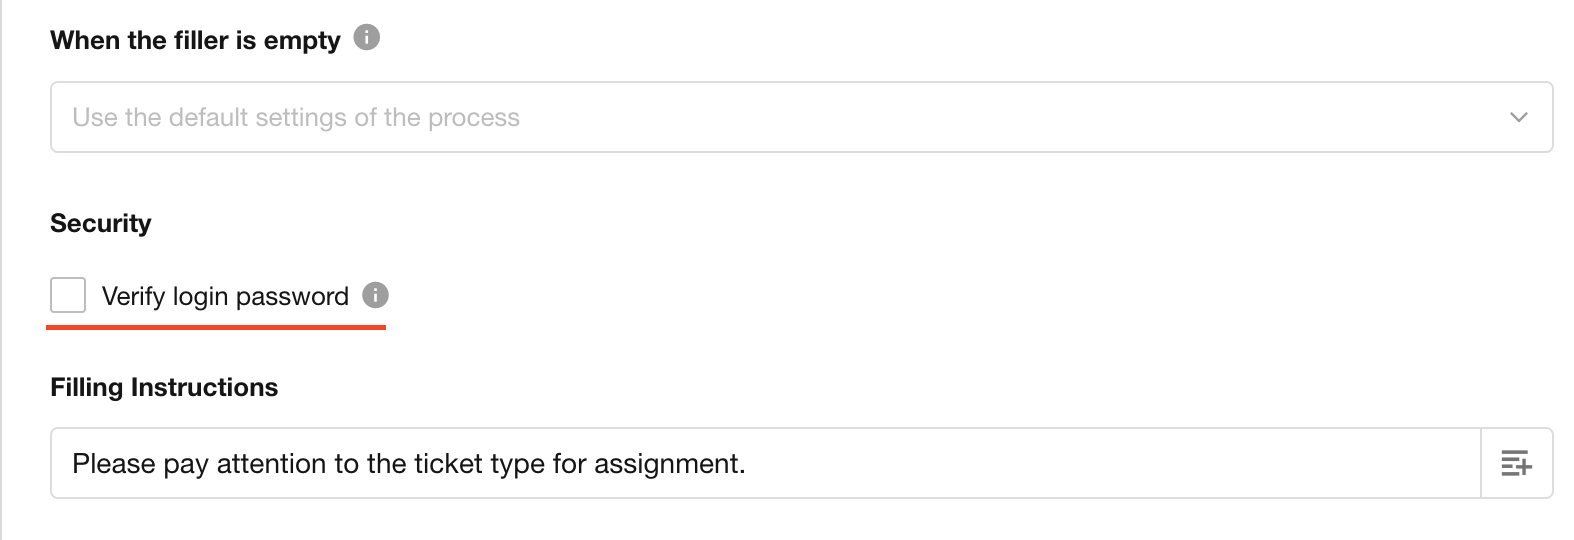
When enabled, the fill-in user must verify their login password before submitting the form.

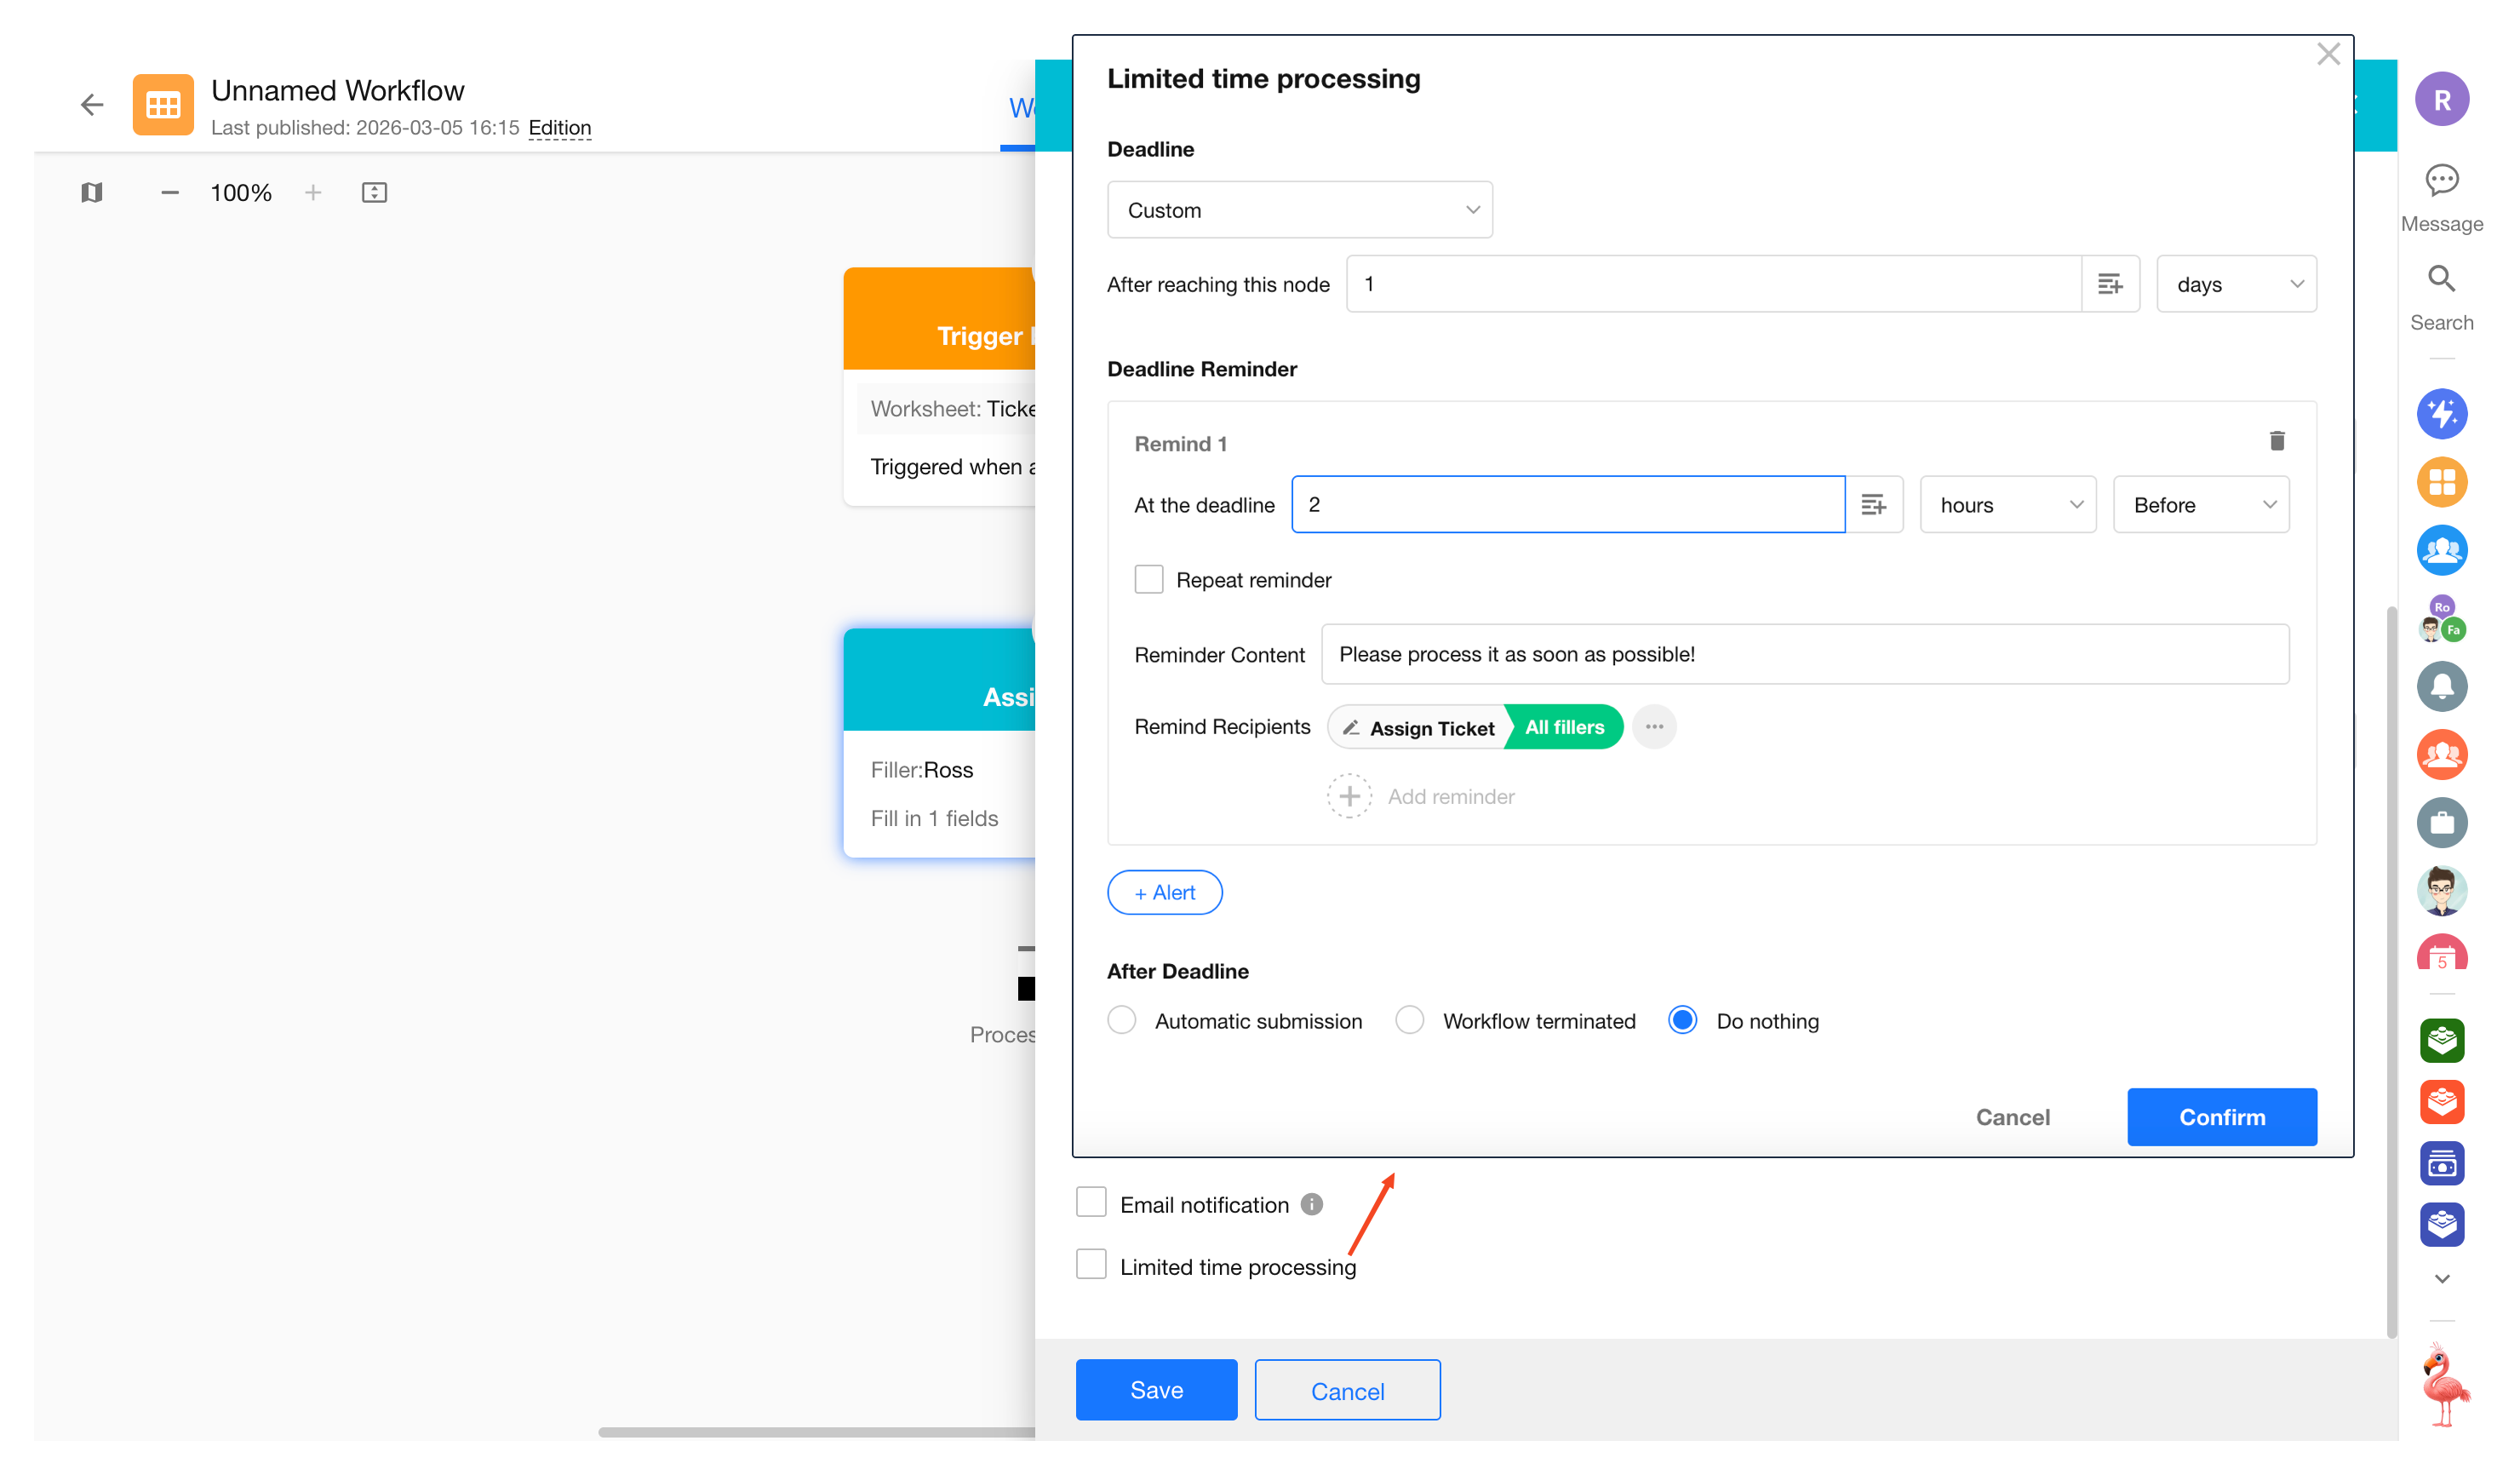
11. Enable Time Limit
You can set a deadline for the fill-in user at this node. If the task is not completed before the deadline, it will be treated as overdue.
Before the deadline, you can configure one or multiple reminders. You can also set the system to automatically submit the form after a certain time once it becomes overdue.
a. Set the Deadline
If the fill-in user does not complete the task before the deadline, the task will be marked as overdue.
There are two ways to set the deadline:
-
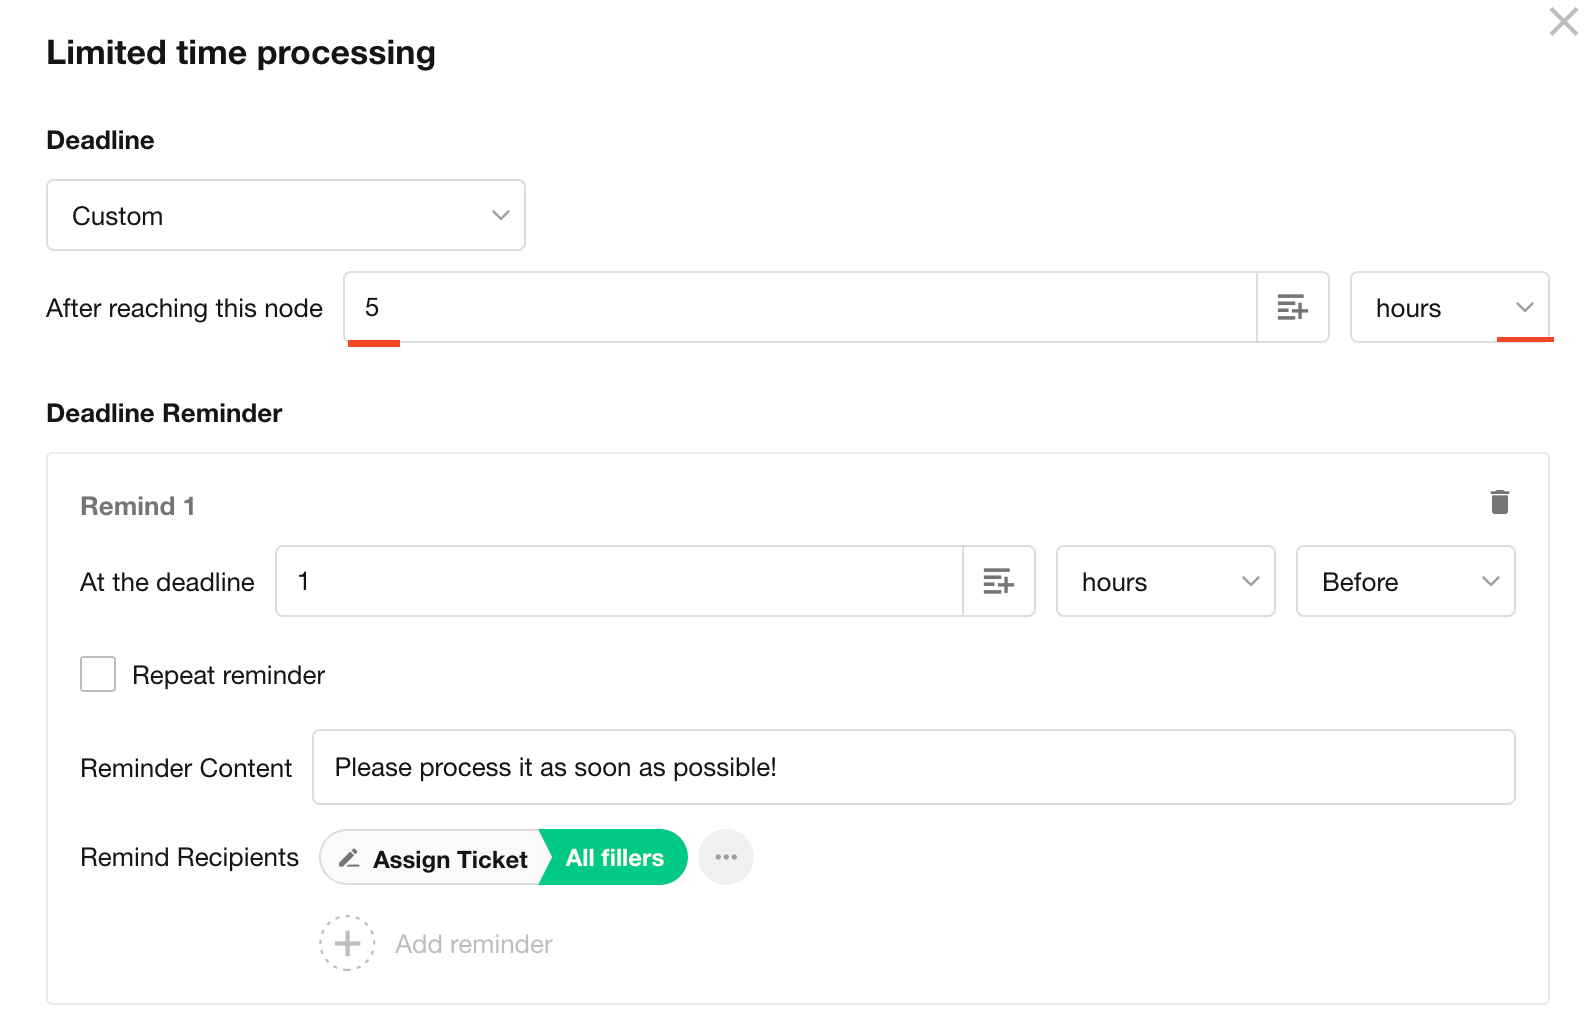
Custom Time
The task becomes overdue after X days (hours/minutes) from the moment the notification is sent.
For example, as shown below, the fill-in user has 8 hours to complete the task. If the task is not completed within 8 hours, it is considered overdue.
-
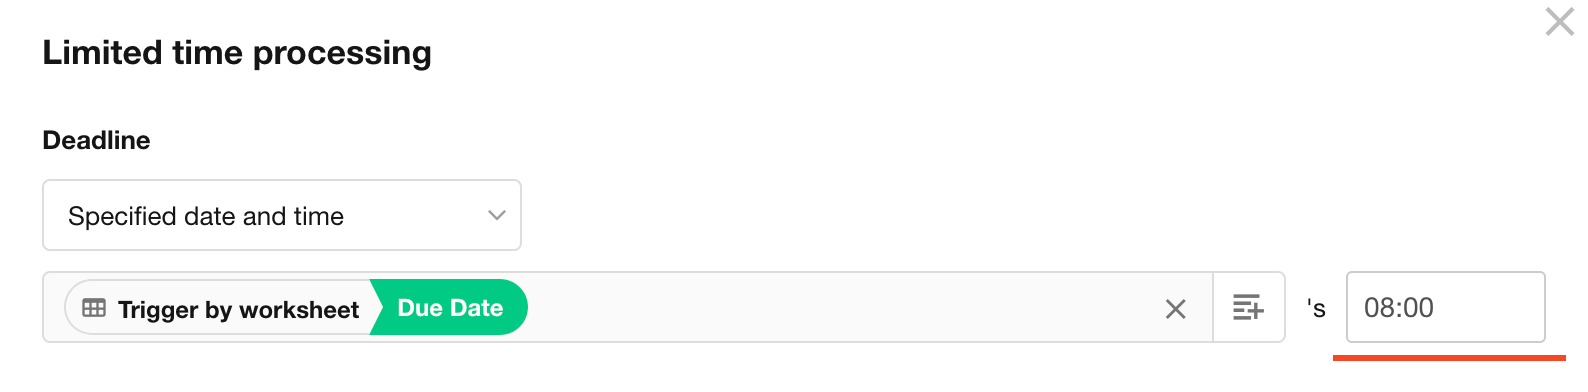
Based on a Date Field
The deadline can be based on a date field in the worksheet, optionally with a fixed time.
In the example below, the deadline is based on a date field in the worksheet.
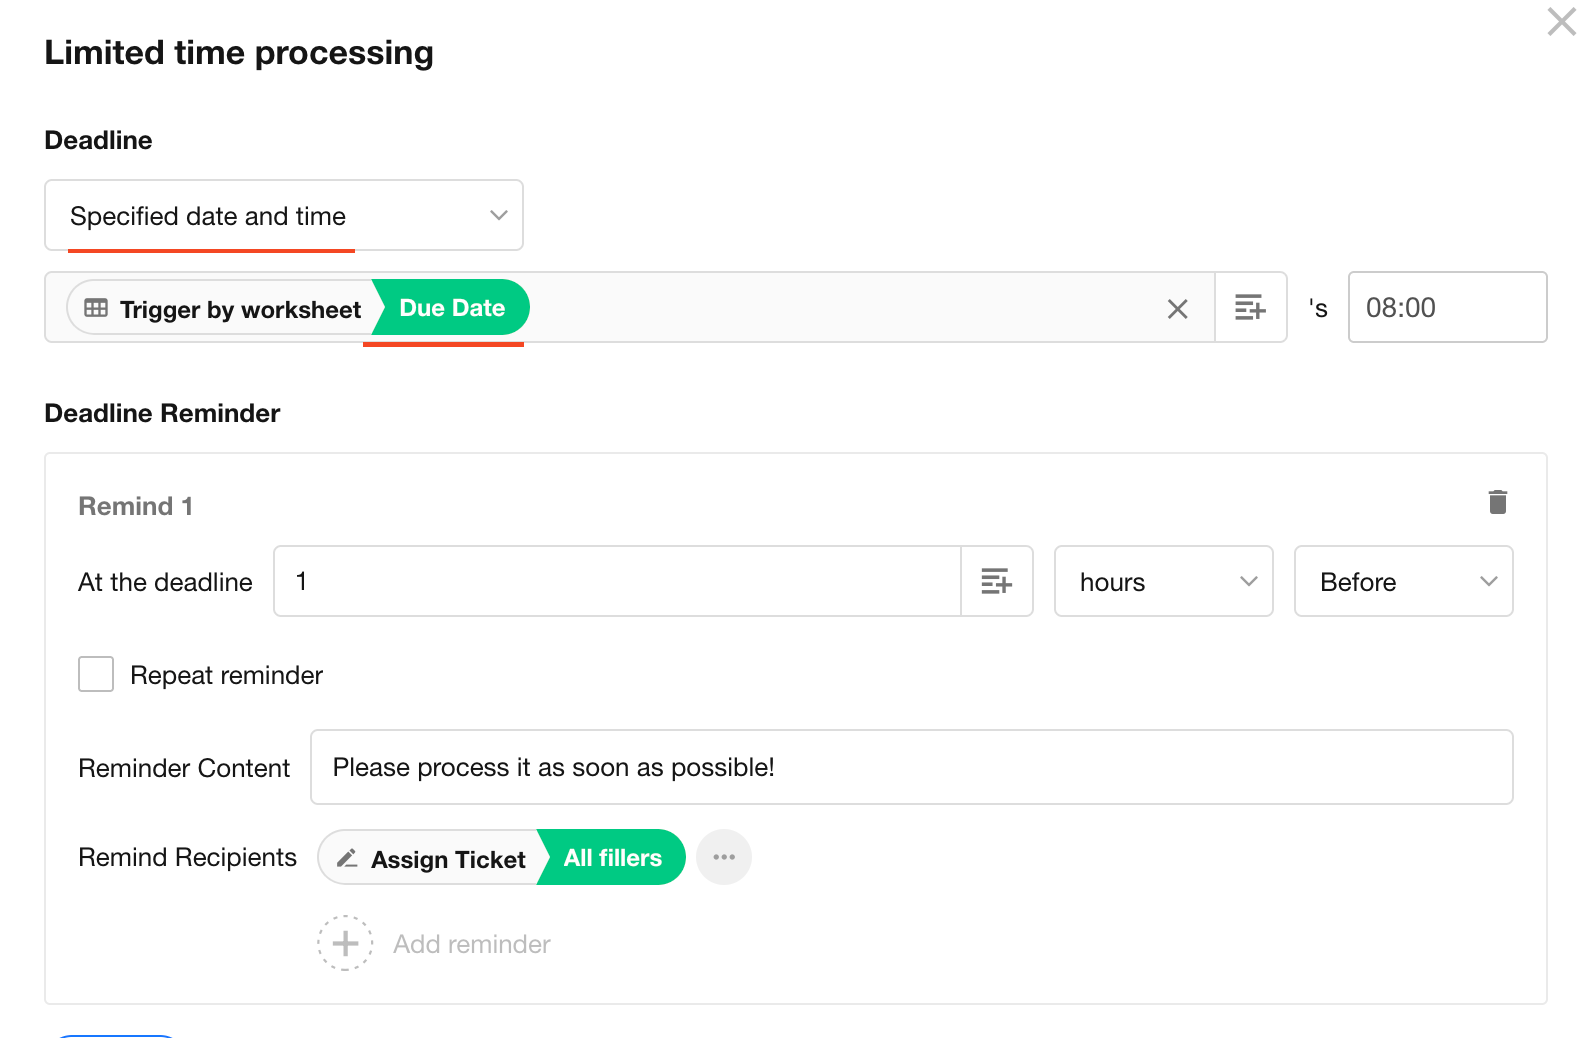
If a date field is selected, you must manually specify the time portion.
b. Set Reminder Method and Content
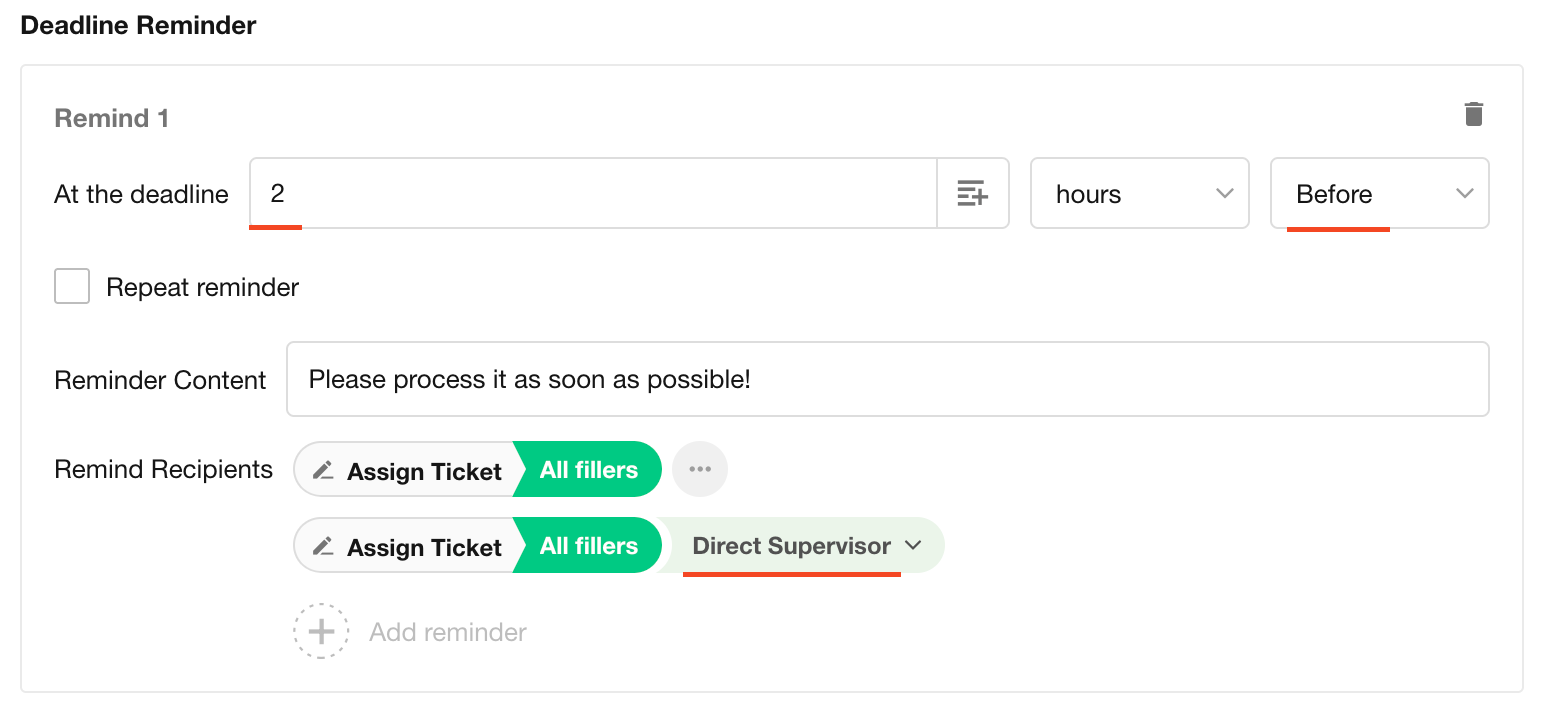
You can configure automatic reminders before or after the deadline to prompt the fill-in user to complete the task.
In addition to the fill-in user, you can also notify other users (such as the user's supervisor) to supervise the task.
For example, as shown below, a reminder will be sent 2 hours before the deadline to both the fill-in user and their supervisor.
If Repeat Reminder is enabled, the system will send reminders repeatedly at the specified interval after the first reminder (even after the deadline).
A maximum of 10 reminders can be sent.
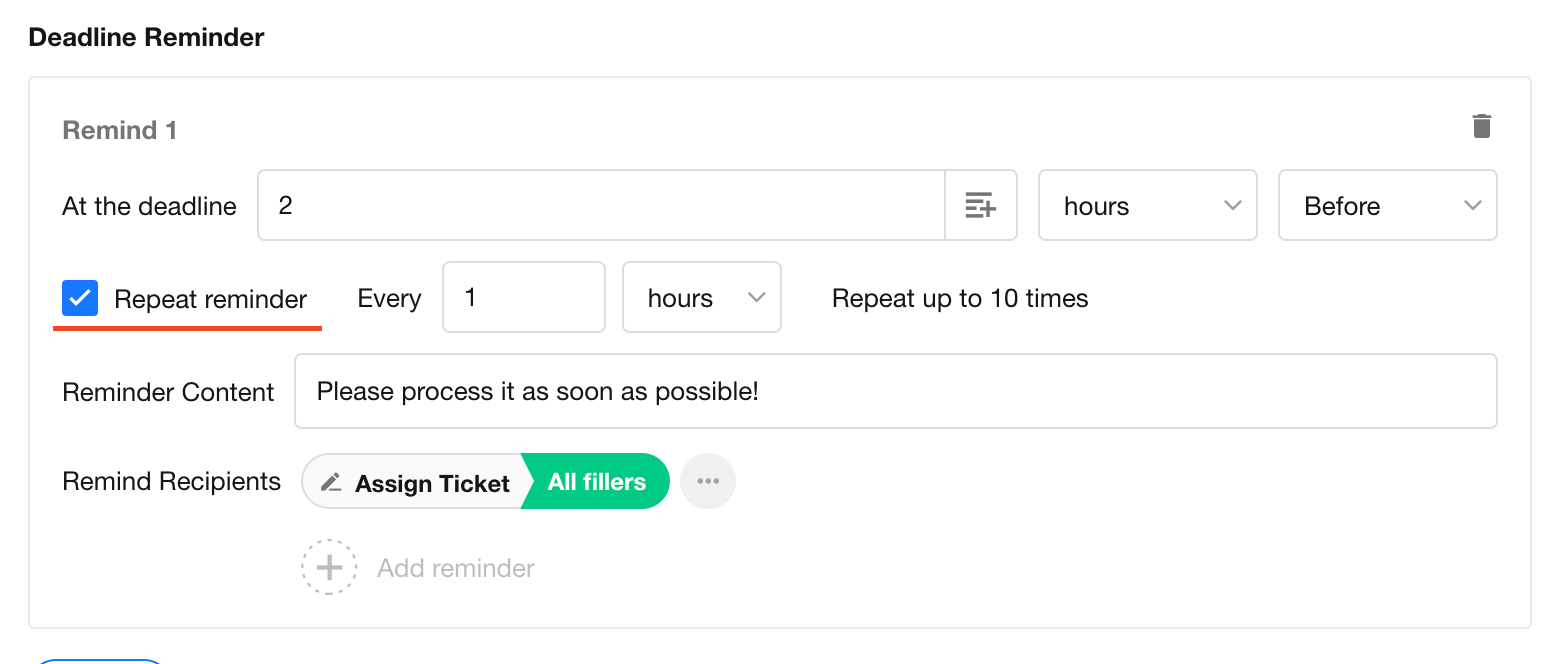
If you want reminders both before and after the deadline, you can configure multiple reminder rules.
In the example below, reminders are sent 2 hours before the deadline and 1 hour after the deadline.

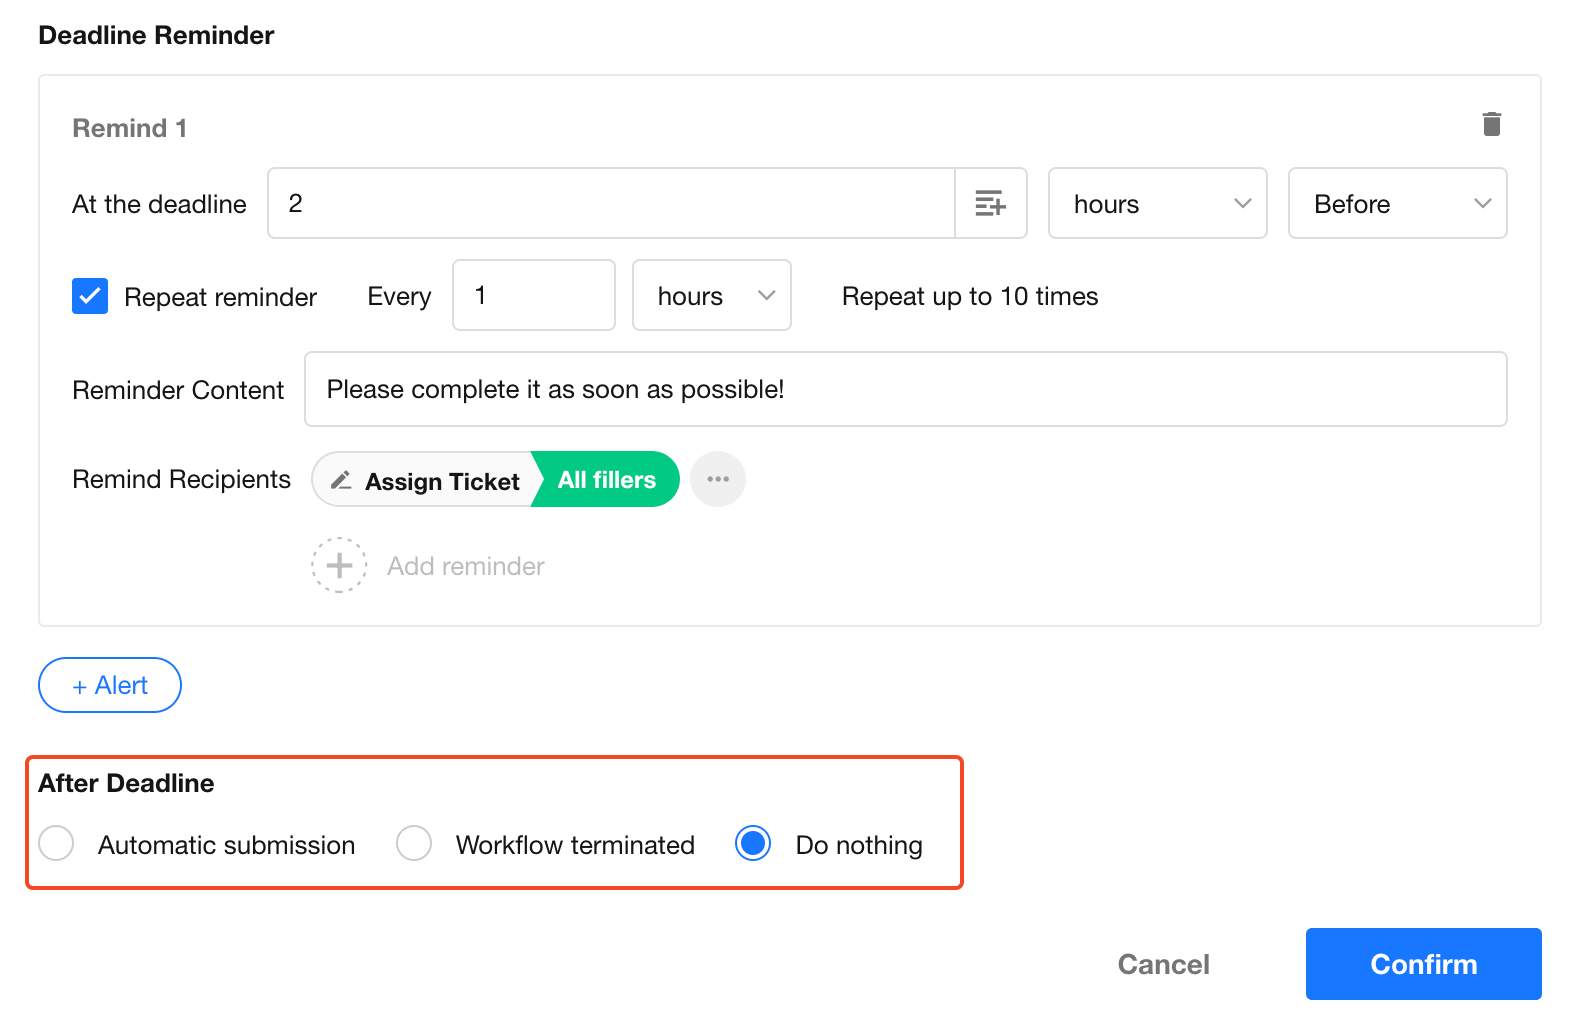
c. Overdue Handling
If the fill-in task is still incomplete after the deadline, you can define how the system handles the situation.
Three options are available:
- Automatically submit
- Terminate the workflow
- Do nothing and continue waiting
12. Handling When the Fill-in User Is Empty
This works the same way as when the approver is empty in an approval node.
Learn more
13. Enable Email Notification
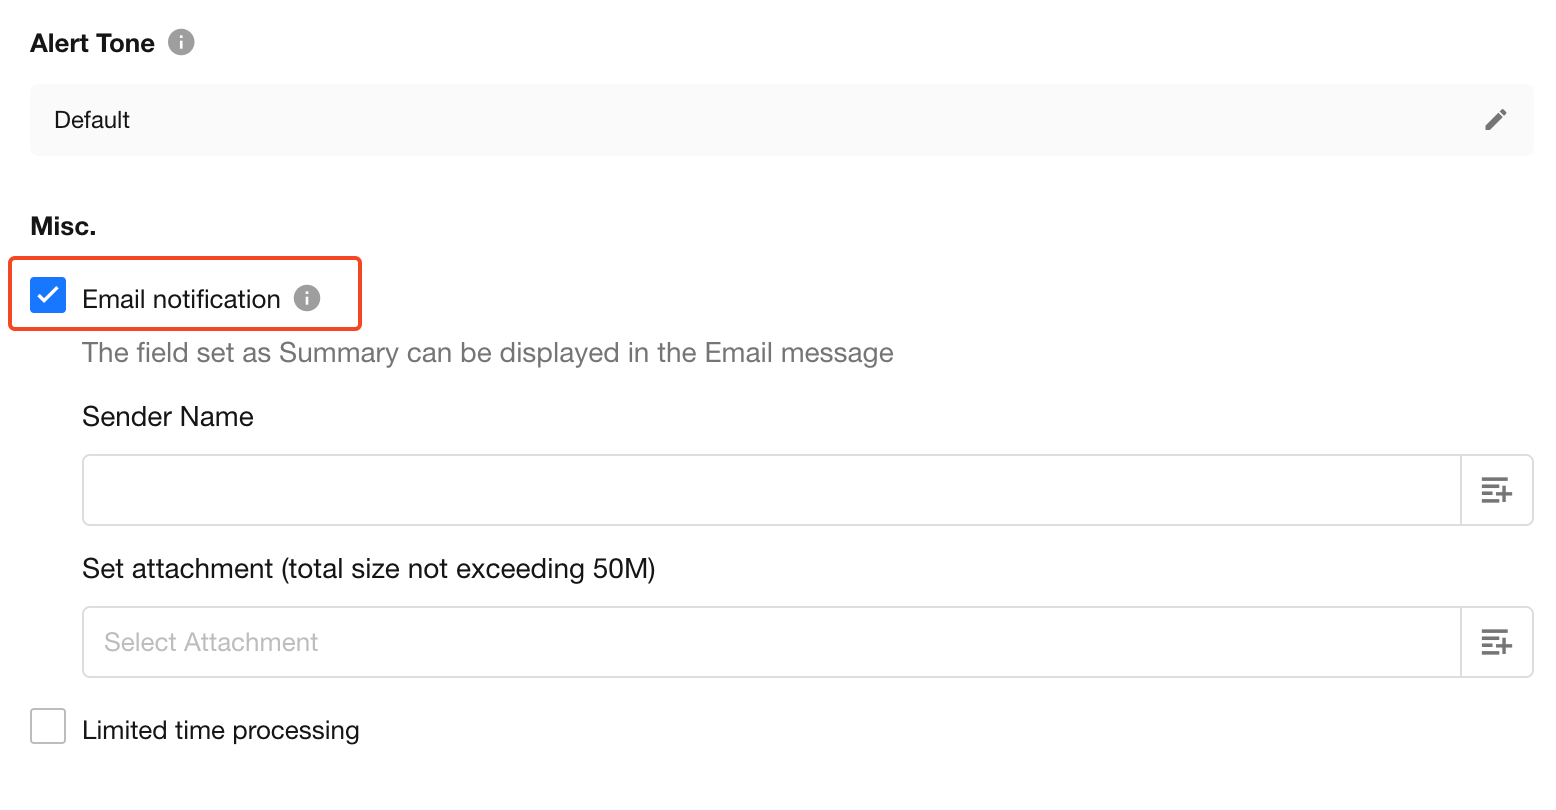
When enabled, the fill-in notification will also be sent to the fill-in user via email.
The user can click the link in the email to log in and complete the task.
Email notifications cost 0.002 credits per message, automatically deducted from the account credits.
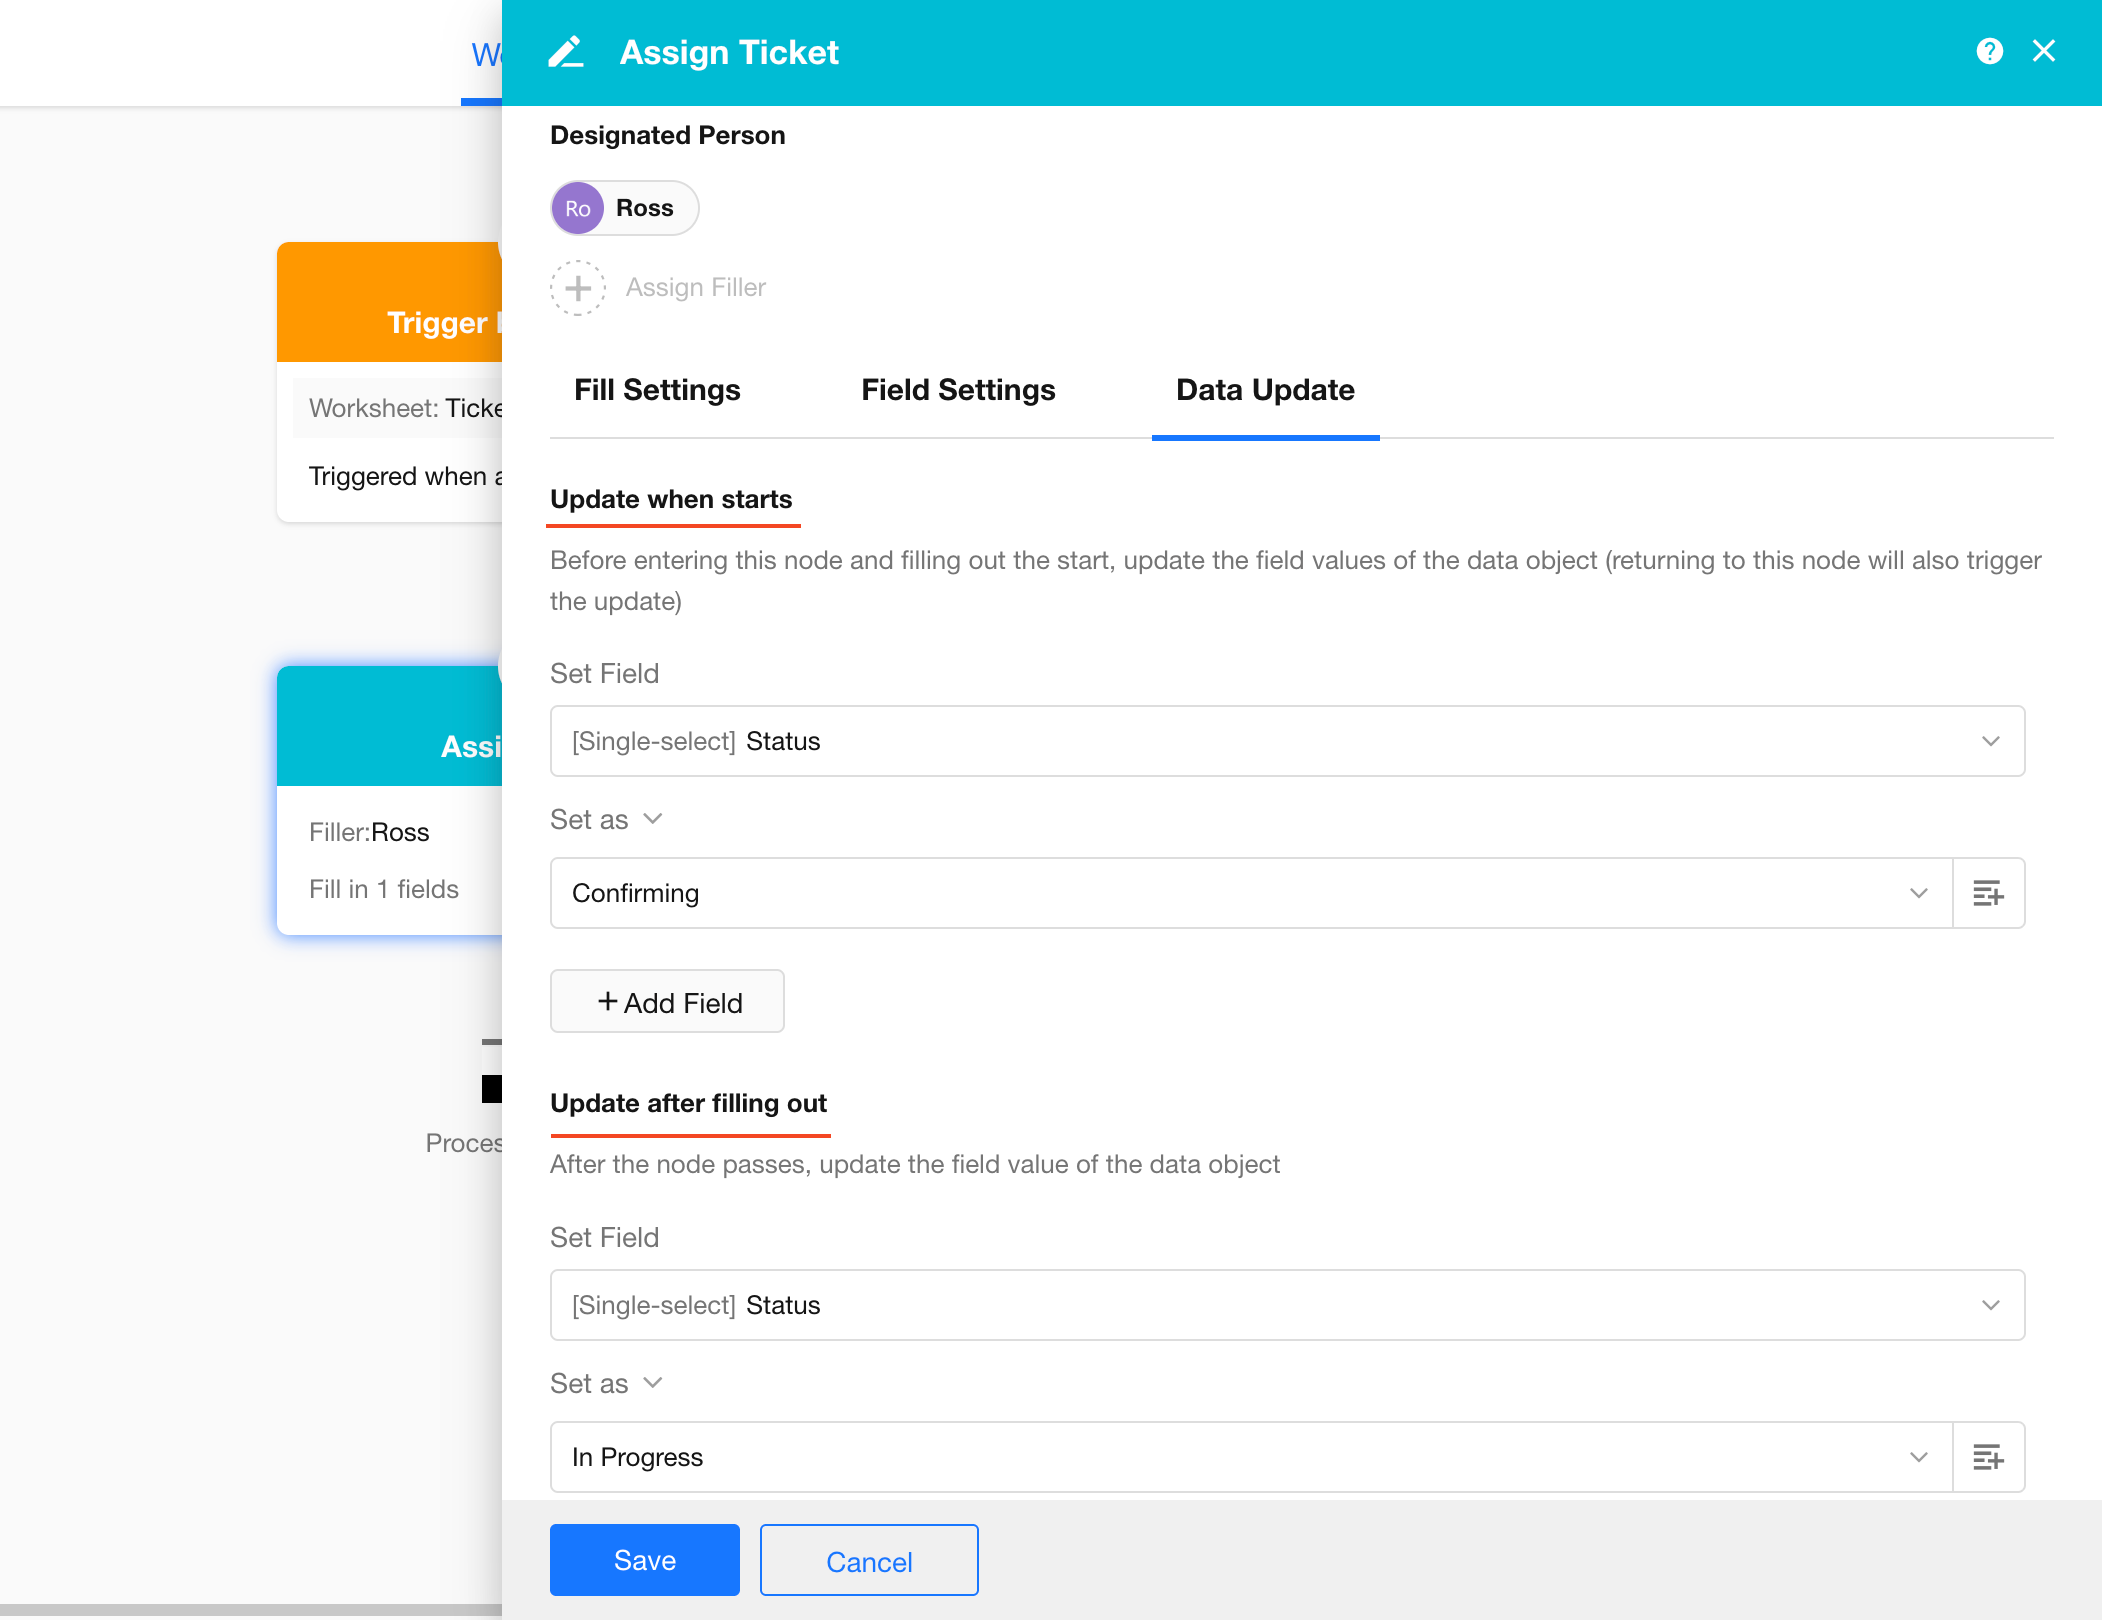
14. Data Update
You can automatically update field values in the record when the workflow enters the Fill-in node and when the fill-in user completes the task and leaves the node.
-
Update When Node Starts
When entering the Fill-in node, automatically change the ticket record status to “Confirming”.
-
Update After Submission
After the form is completed, automatically change the ticket record status to “In Pprogress”.
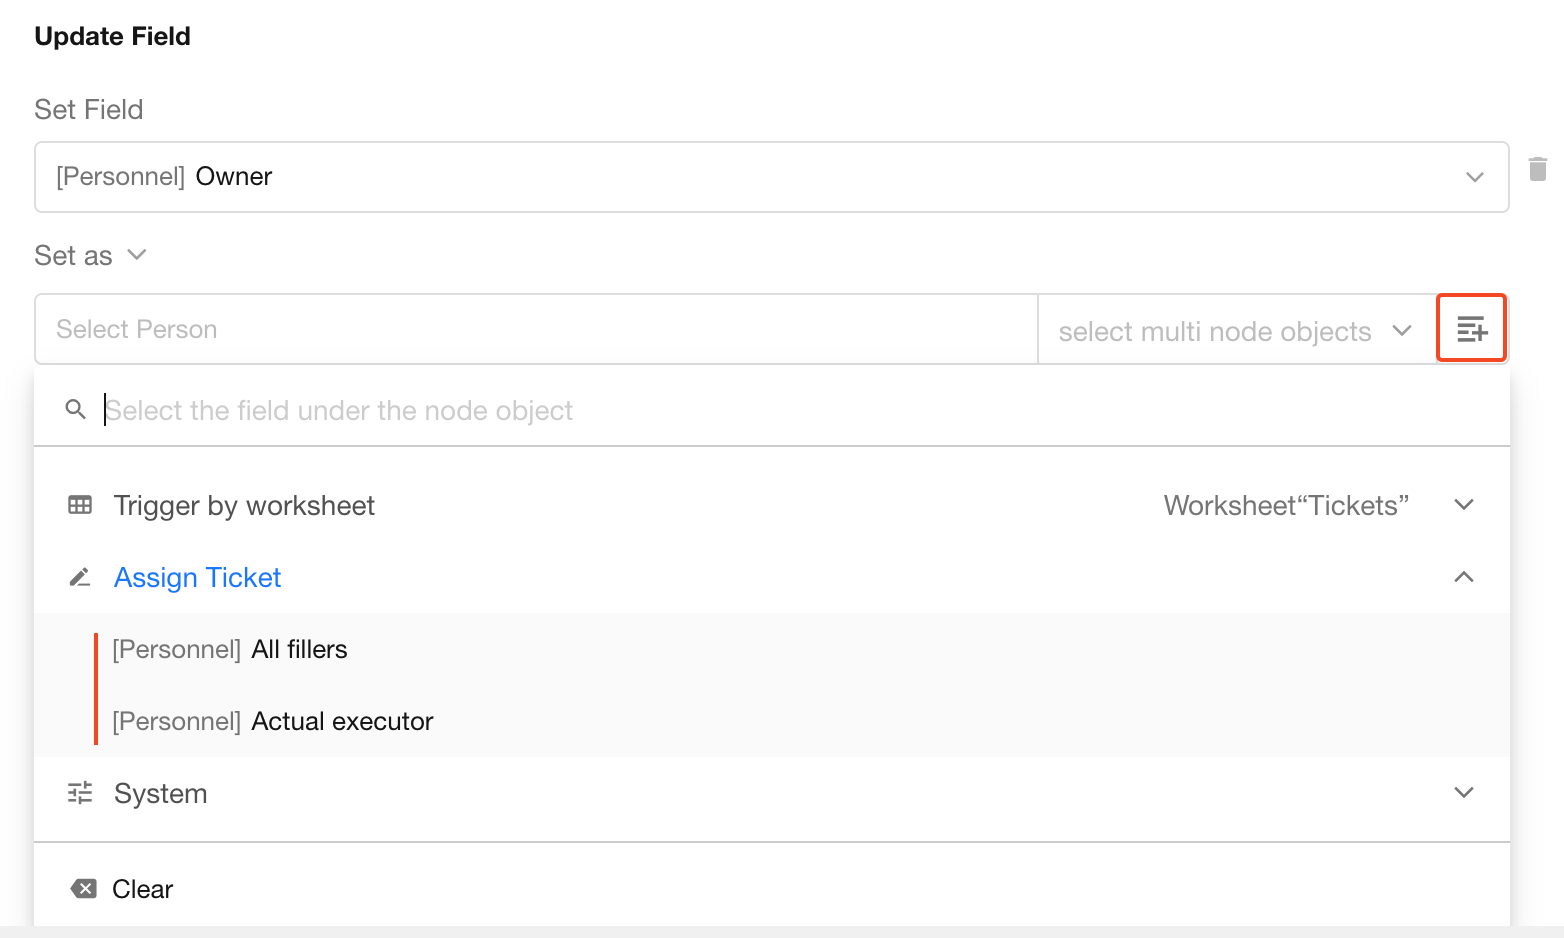
15. Difference Between Assigned Fill-in User and Actual Executor
In subsequent nodes of the workflow, you may reference the fill-in user, and you will be asked to choose between the assigned fill-in user or the actual executor.
-
In most cases, the assigned fill-in user and the actual executor are the same person. However, if the task is reassigned, the person who takes over becomes the actual executor.
-
If the fill-in user is defined by a position and multiple users belong to that position, the assigned fill-in users will include all of them, while the actual executor will be the first person who performs the operation.
Was this document helpful?